
Cursor Projects Tutorial: Create, Plan and Delegate Your First Project
Cursor Projects turns a chat into a standing body of work with its own coordinator agent. This 15-step walkthrough starts at the empty start screen — open a folder, connect GitHub, plan before it builds, keep the diffs — and ends with a running app and a project that watches your pull requests.
TL;DR — what Cursor Projects is
- A Project is one larger body of work — a feature, a migration, a whole app — that you drive by chatting with a coordinator agent. The coordinator plans and delegates; it does not write the code itself, its subagents do, as many in parallel as the job needs.
- Projects live in the Projects section of the Agents Window sidebar and run on Cloud Agents, so closing your laptop does not stop the work. They are not available on Enterprise plans or with Privacy Mode (Legacy).
- Before a Project is useful you still need a real project: Open project on the start screen, a folder on disk, then Connect GitHub so the Workspace picker lists repositories, then pick the model the coordinator uses.
- The payoff is subscriptions: tell the coordinator to watch a Slack channel, follow your pull requests, or run on a schedule. Once it has at least one, a Listening pill appears above the chat input listing every event the project reacts to.
How to Create My First Project in Cursor AI (2026)
Video walkthrough:The Code City5:04
Cursor Docs — Projects
Product facts:cursor.comDocs
Steps 1-11 are stills from The Code City's screen recording; steps 12-15 are stills from Emma's Productivity Lab Agents Window walkthrough. What a Project, coordinator agent, subscription and shared context actually do is taken from the official Cursor docs and the Cursor Projects announcement.
Frames are credited screenshots from the source videos, each deep-linked to its timestamp. This guide's text is original — not a transcript.
Cursor Projects, step by step
1 · Create the project folder
- 1
Start from Open project, not New chat
Open Cursor and you get three buttons on the start screen: Open project, Clone repo and Connect via SSH, sitting above a Recent projects list with each folder's path. A project in Cursor is still a folder on disk — agents, plans and cloud work all hang off it. Click Open project even when you have nothing yet.
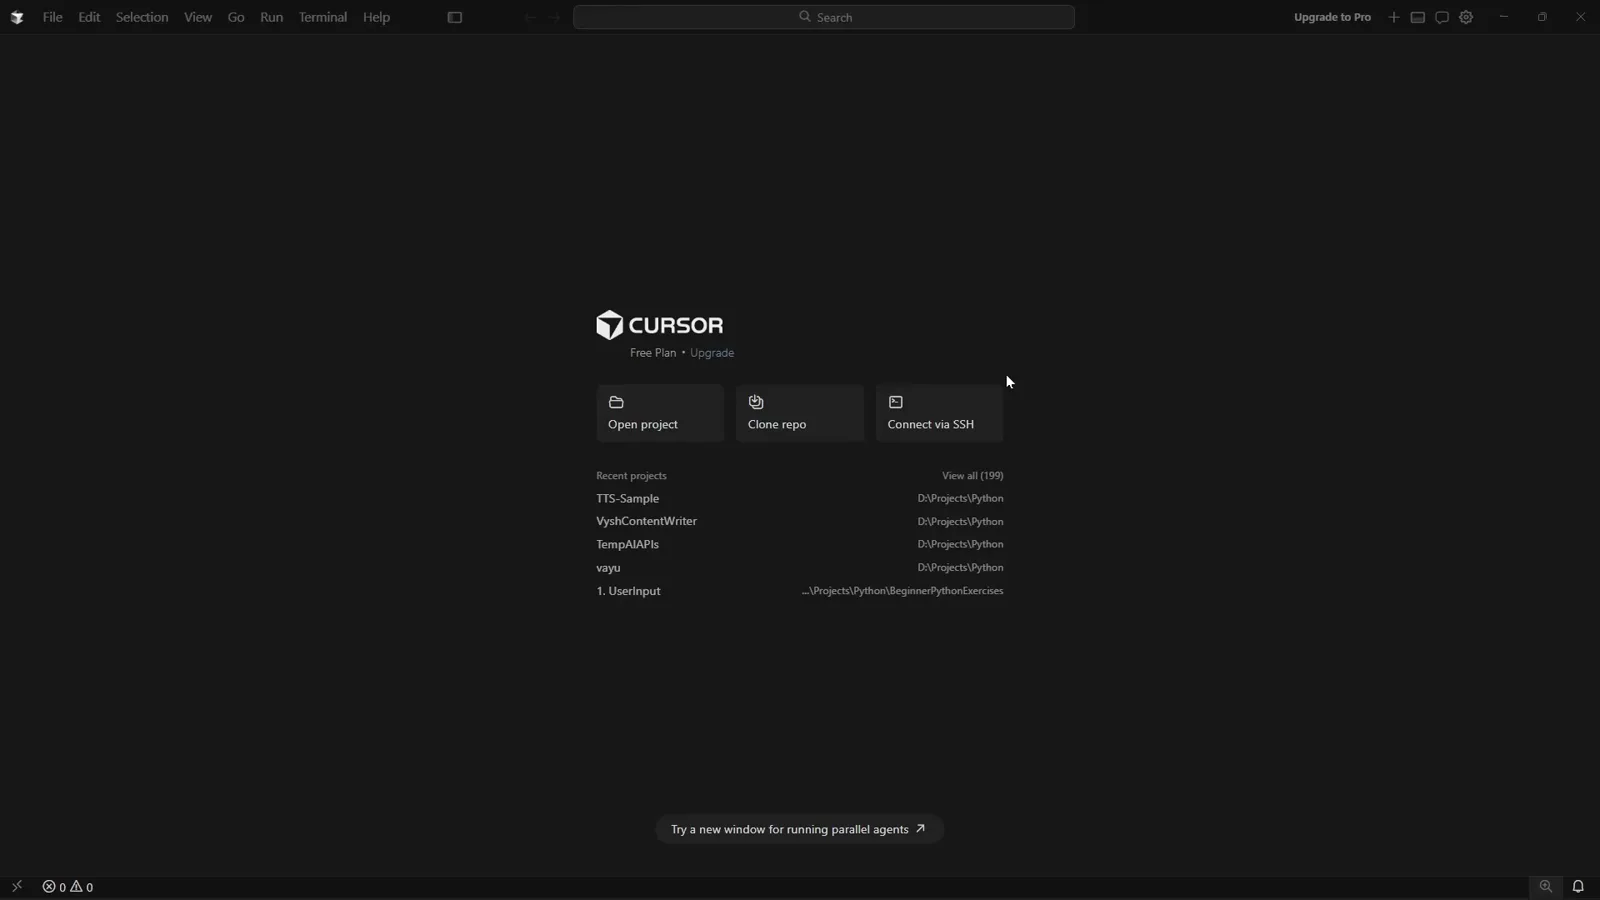
The Cursor start screen: Open project, Clone repo, Connect via SSH, plus your Recent projects.Watch at 0:06 - 2
Make an empty folder and select it
The Windows Open Folder dialog appears over the start screen. Use New folder in its toolbar, name the directory (the recording uses MyWebApp), then click Select Folder. Do not pre-create files or install dependencies — an empty folder is the correct starting point, because the agent writes the first file.
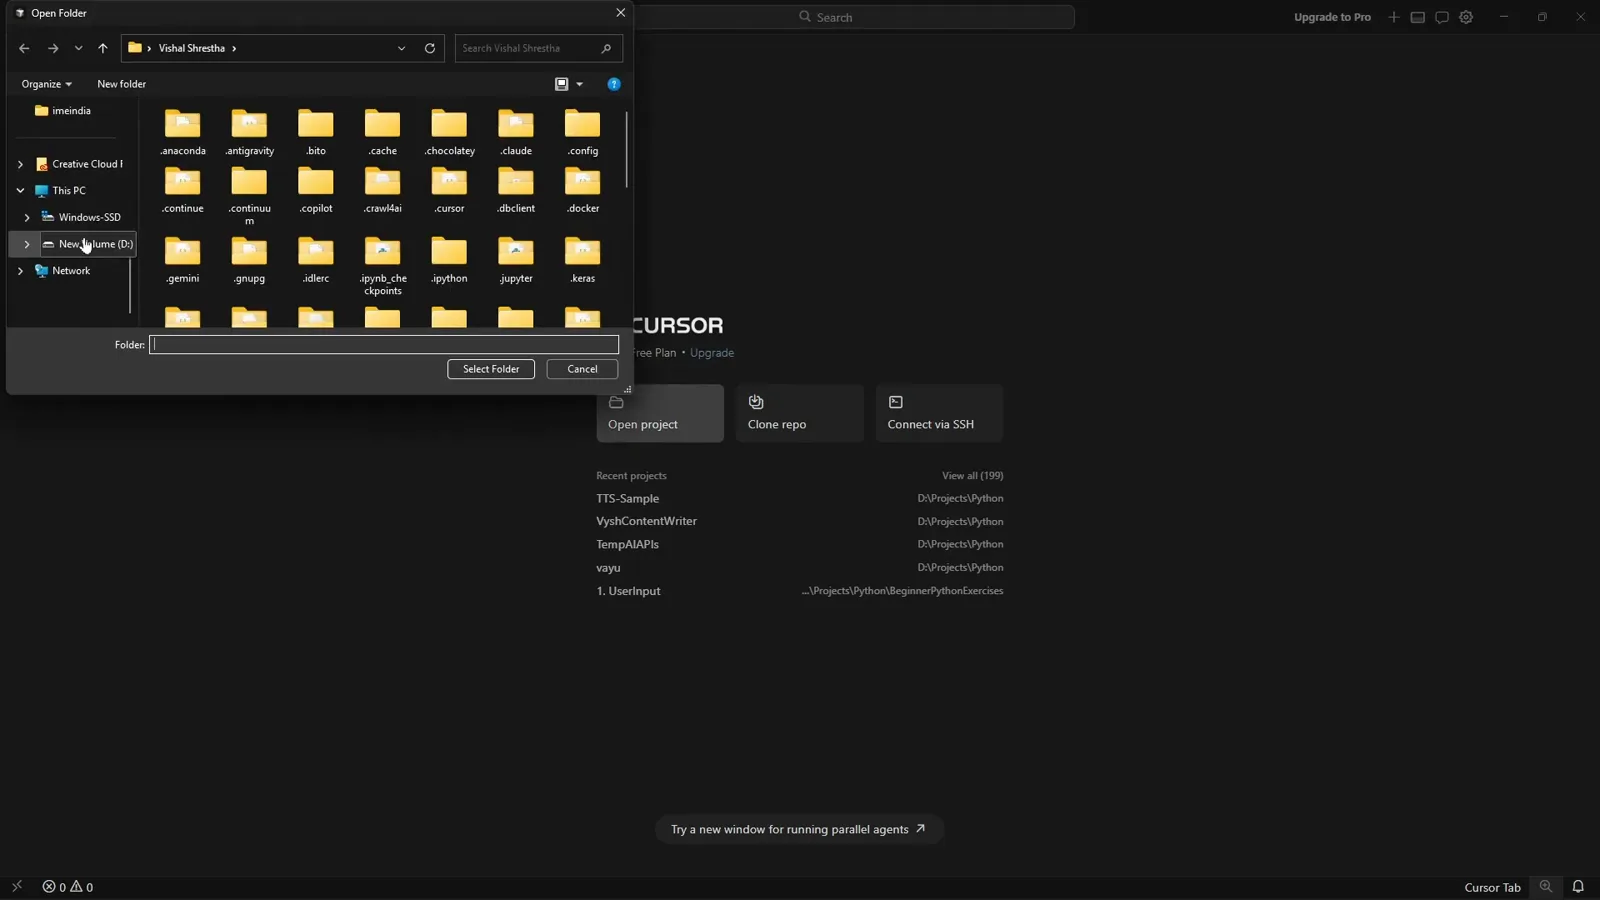
Creating the project folder straight from Cursor's Open Folder dialog.Watch at 0:18 - 3
Learn the agent shortcuts on the empty editor
With nothing open, Cursor prints its own cheat sheet in the middle of the editor: New Agent Ctrl+Shift+L, Show Terminal Ctrl+J, Search Files Ctrl+P, Open Browser Ctrl+Shift+B, Maximize Chat Ctrl+Alt+E and Add Folder Ctrl+Alt+A. The New Agent panel is docked on the right with the placeholder "Plan, Build, / for commands, @ for context" and a mode switch.
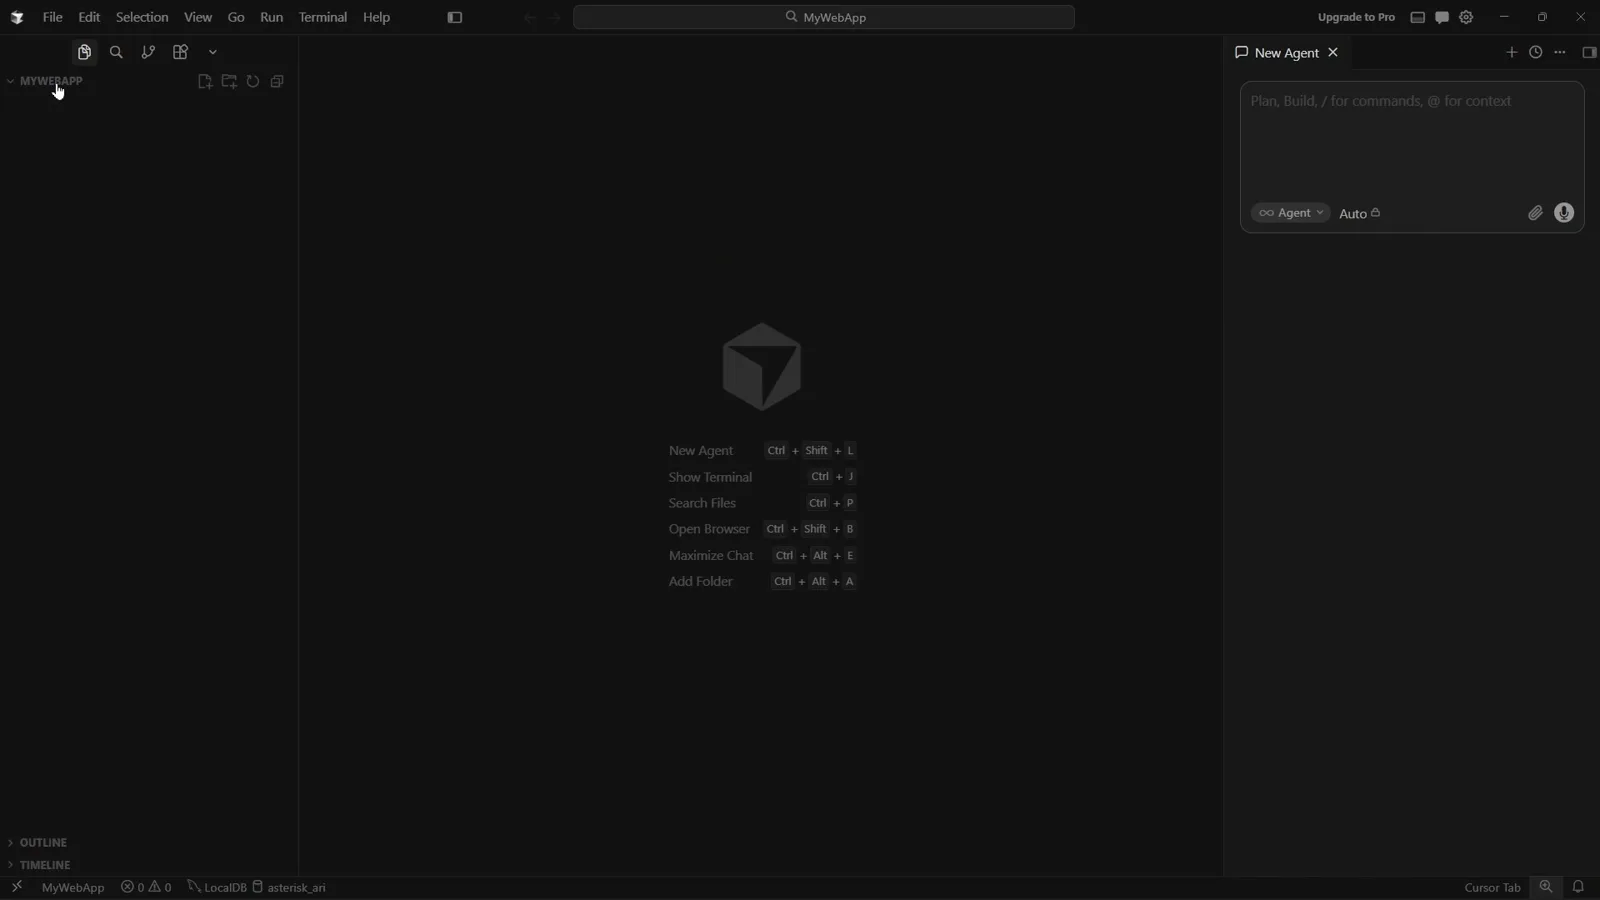
Empty workspace with the New Agent panel and Cursor's built-in shortcut list.Watch at 0:42 - 4
Brief the agent in one plain sentence
Type the job, not the implementation: "Create a ToDo web app with reminders." Cursor shows a Try Plan Mode Shift+Tab hint under the box while you type. Keep the first pass in Ask mode if you want answers before edits — vague prompts make the agent guess your stack, and that is where beginner projects go wrong.
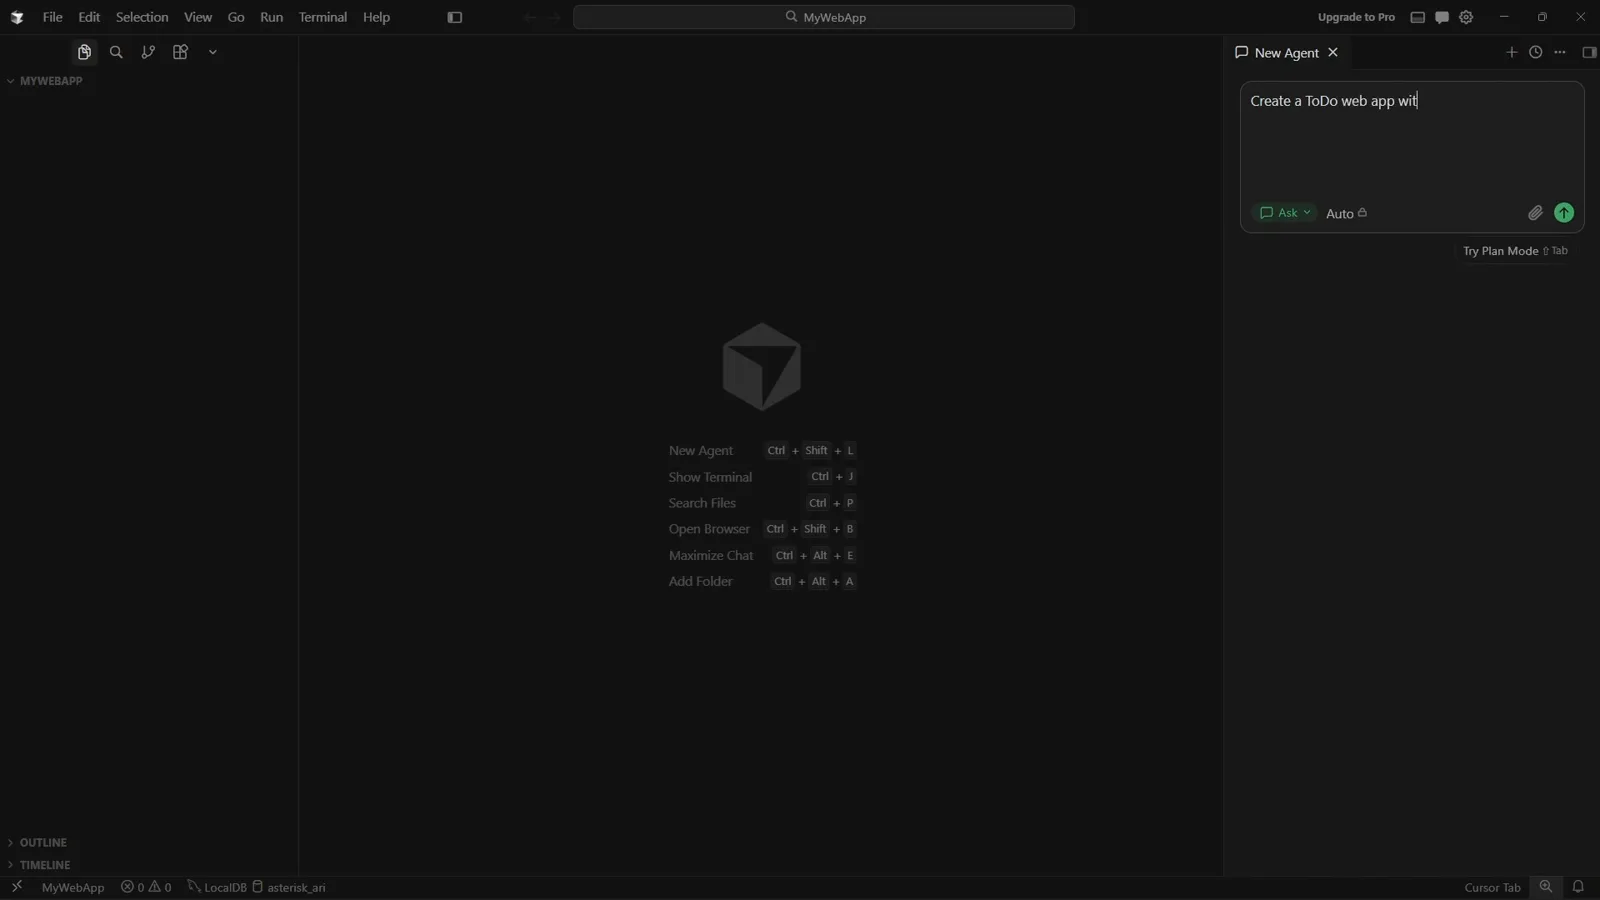
The first prompt typed into New Agent, still in Ask mode.Watch at 1:36
2 · Plan before it builds
- 5
Read the architecture before you approve anything
The agent replies with a data model (`type Todo` with id, title, notes, dueAt, remindAt, completed, createdAt), storage in localStorage under a versioned key like todos:v1, and a client-only reminder flow: scheduleReminder, a due-in-future check, setTimeout until remindAt, then the Notification API. It also states its own limits — setTimeout dies when the tab closes, background tabs throttle timers, and each todo needs reminded: true to stop duplicate pings.
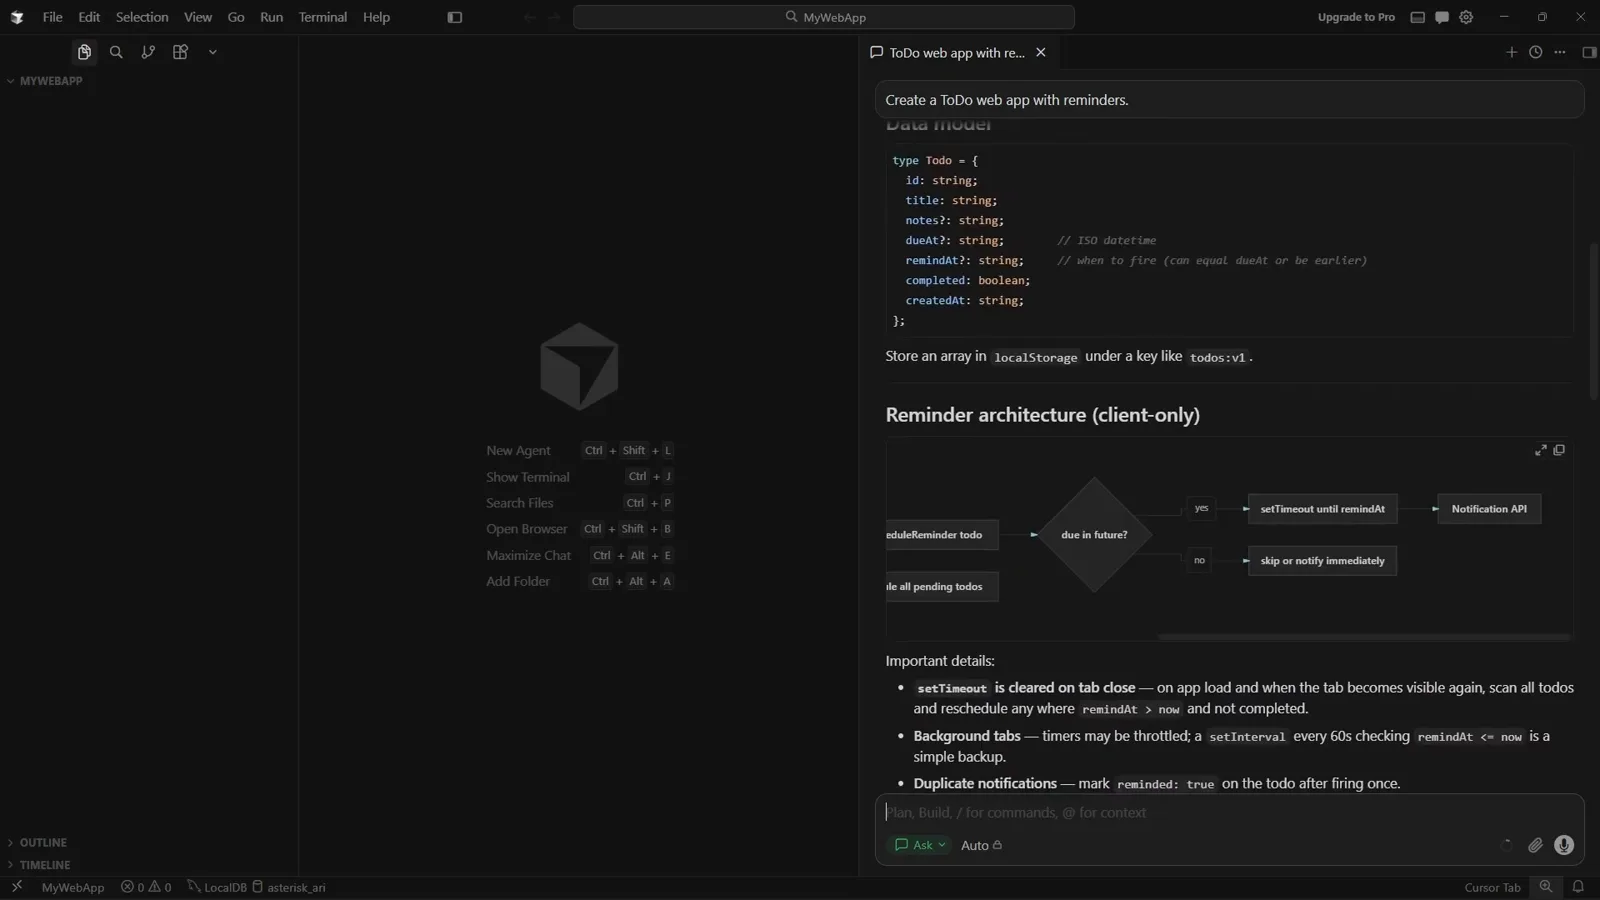
The proposed data model and reminder flowchart, with the caveats spelled out.Watch at 2:06 - 6
Switch to Plan mode and ask for a plan
Hit Shift+Tab (or use the mode dropdown) to move the panel from Ask to Plan, then send "Provide plan for this". The agent reports what it did — Thought for 1s, Checking the workspace then drafting a plan for the quick-demo frontend, Explored 1 search — and stops with a Questions card: "Which frontend setup do you want for the quick demo?" with A Single index.html (no build step), B Vite + React + TypeScript, C Other.
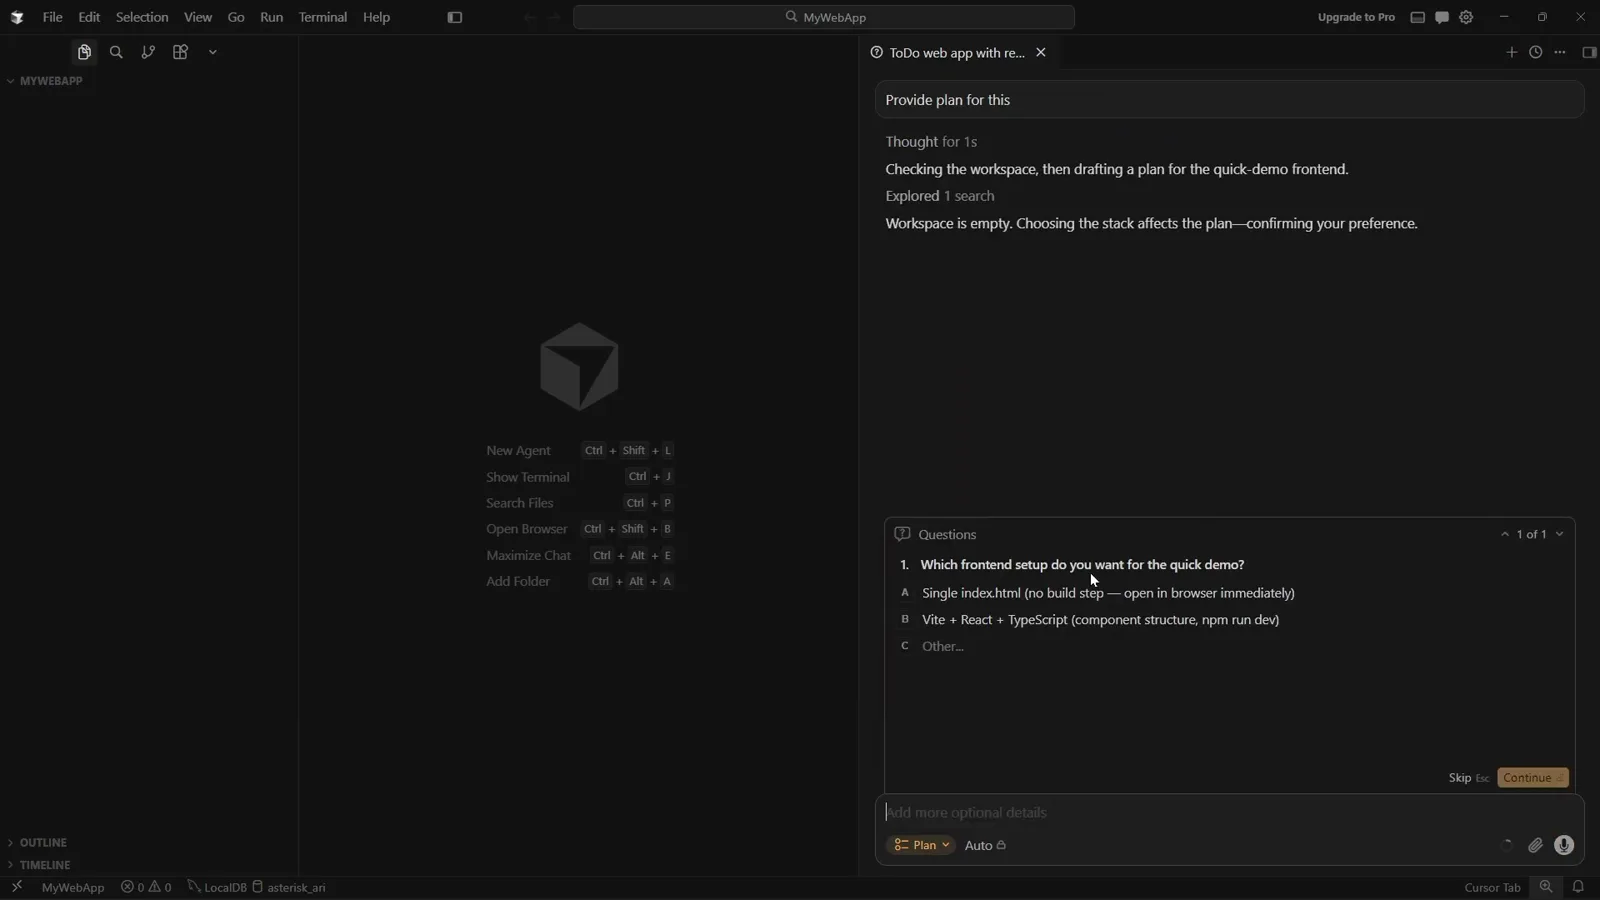
Plan mode running a workspace search and returning a multiple-choice question.Watch at 2:54 - 7
Answer the scope question and narrow the job
Pick option A and press Continue. Your answer is echoed into the thread as a labelled Answer block, and the agent immediately starts Creating a plan for the single-file quick demo. Shrinking scope is the whole trick: the narrower the question you answer, the faster and more accurate the plan that comes back.
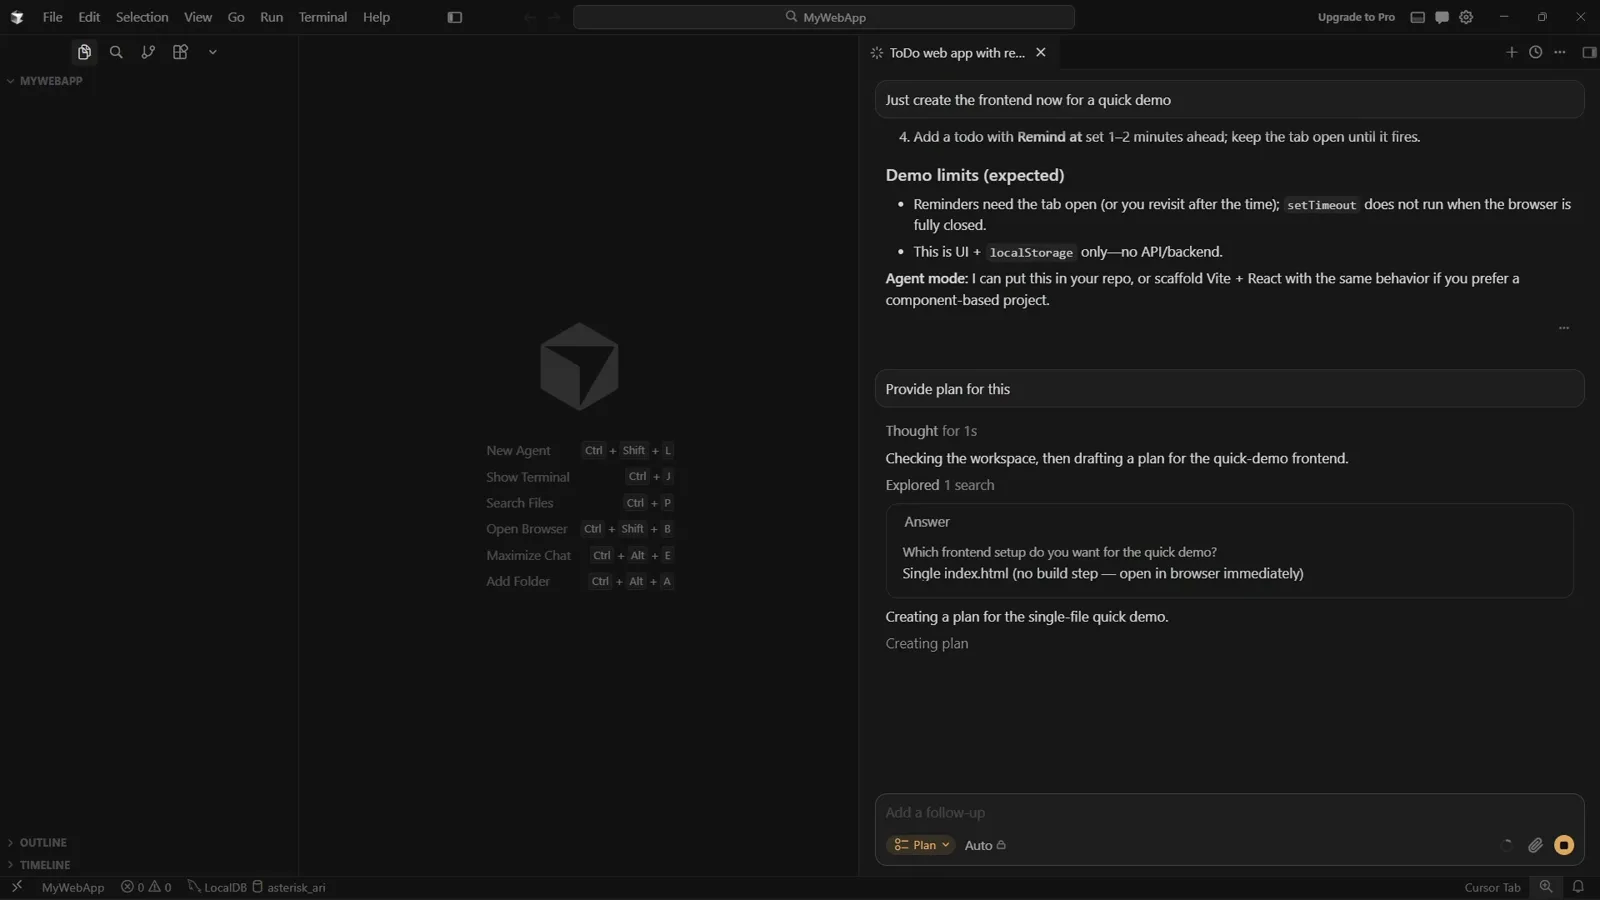
The chosen answer echoed back, with Plan mode still selected in the composer.Watch at 3:06 - 8
Review the plan file and its to-do list
The plan is not a wall of chat — it is a real file, `todo_demo_frontend_8c948b00.plan.md`, opened in the editor with a Known demo limitations section, an Out of scope list (backend, sync, auth, email/SMS reminders, Service Worker / Web Push, snooze and categories, npm, React, tests) and a 6 To-dos checklist. The chat mirrors it as a plan card with View Plan and a Build Ctrl+Enter button. Switch the mode back to Agent and send "proceed with the plan".
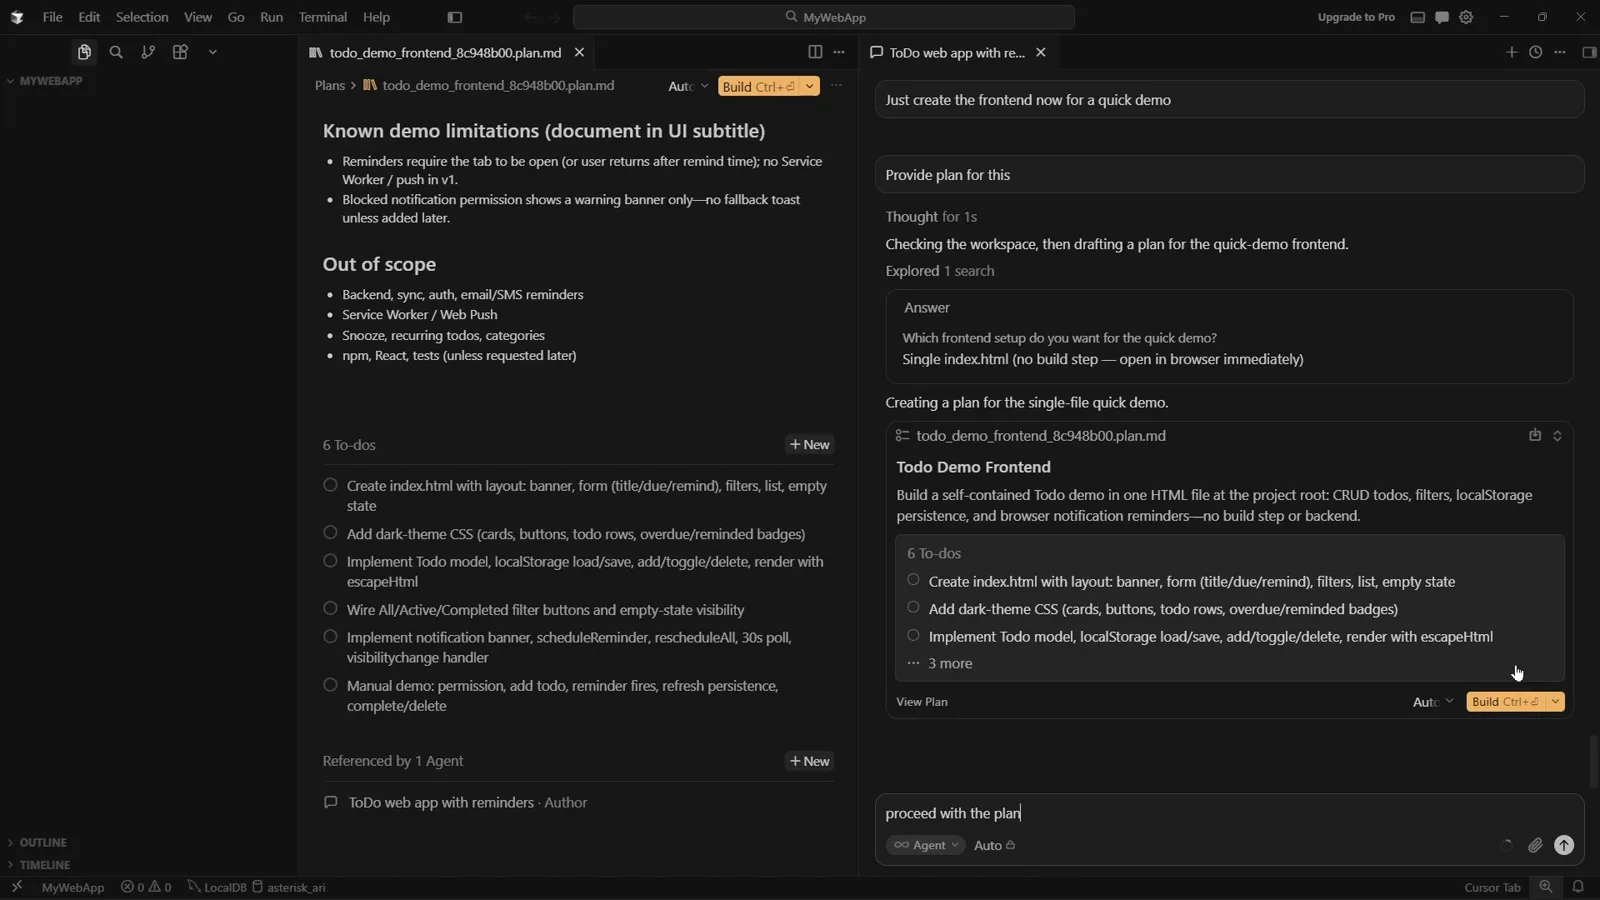
The generated .plan.md with its out-of-scope list and six tasks.Watch at 3:30
3 · Build, review and keep the files
- 9
Watch the to-dos tick off as it builds
The agent works the checklist top to bottom: the plan card shows Build Todo Reminders — Quick Demo Frontend Plan with Manual demo: permission, add todo, reminder fires, refresh persistence, complete/delete at 6/6, and the file diff appears inline as index.html +362. It then verifies its own output by running a Node script ("Verify index.html contains required elements", Node.js v22.22.0) and tells you it is Waiting for 1 command to finish, offering Run in background.
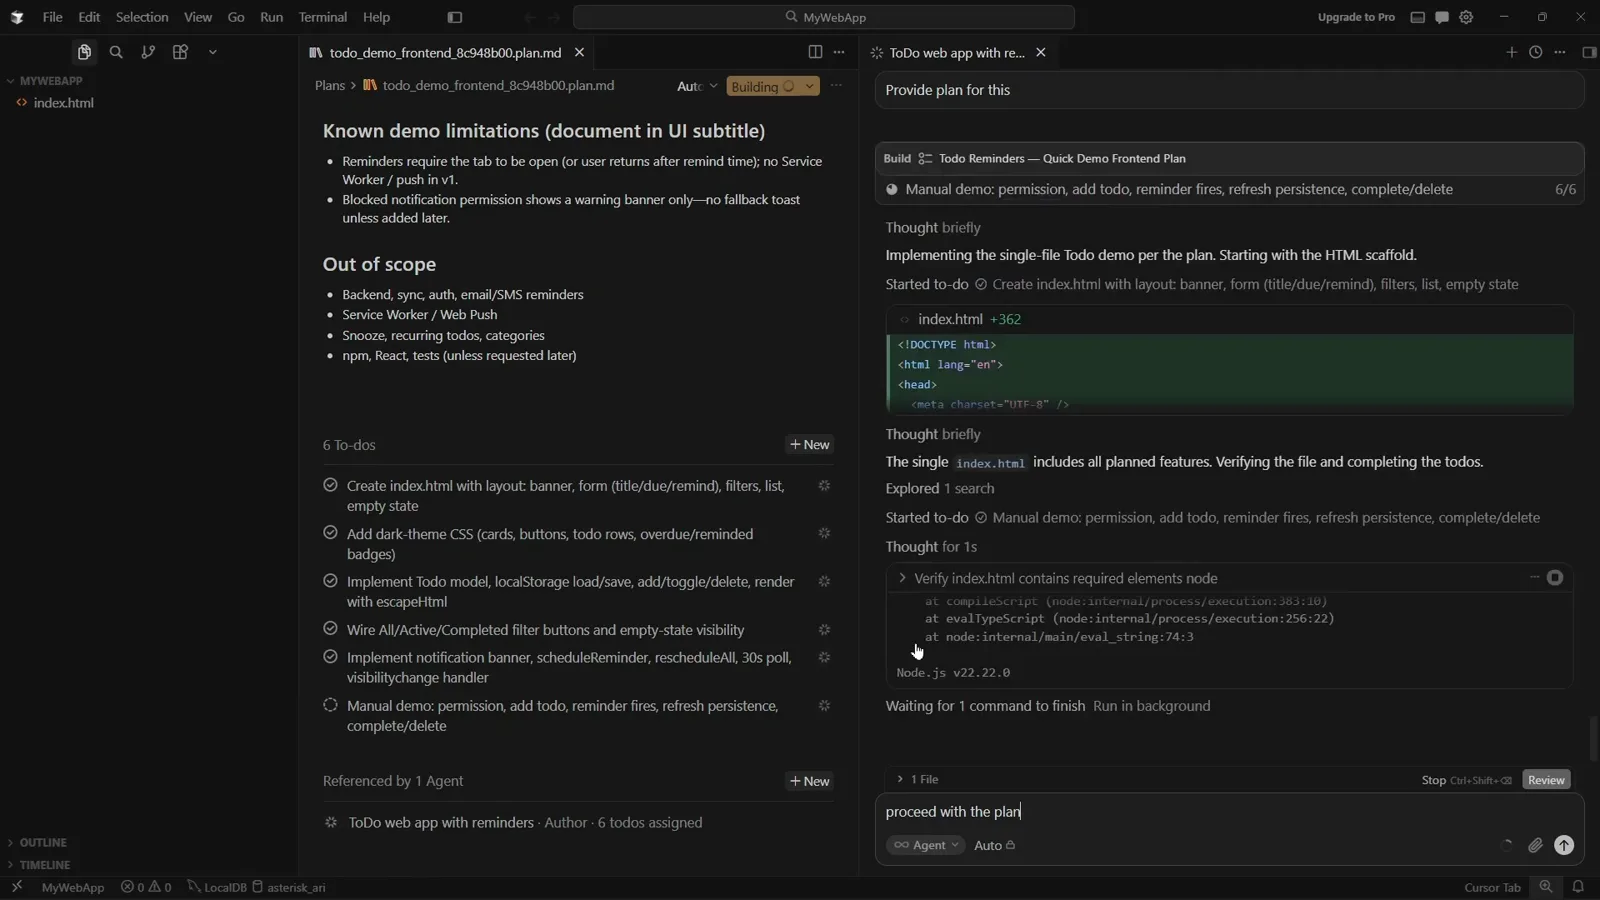
Completed to-dos, the inline +362 diff and the agent's own verification command.Watch at 3:48 - 10
Keep or undo every generated file
Open the file Cursor wrote and the whole buffer is tinted green as an addition, with Undo File and Keep File (Ctrl+Backspace) in the top-right of the editor. Read it before you keep it: the form labels (What to do?, Due (optional), Remind at (optional)), the Add todo submit button, the All / Active / Done filter buttons and the empty state are all visible in the markup, and they are exactly what you asked for.
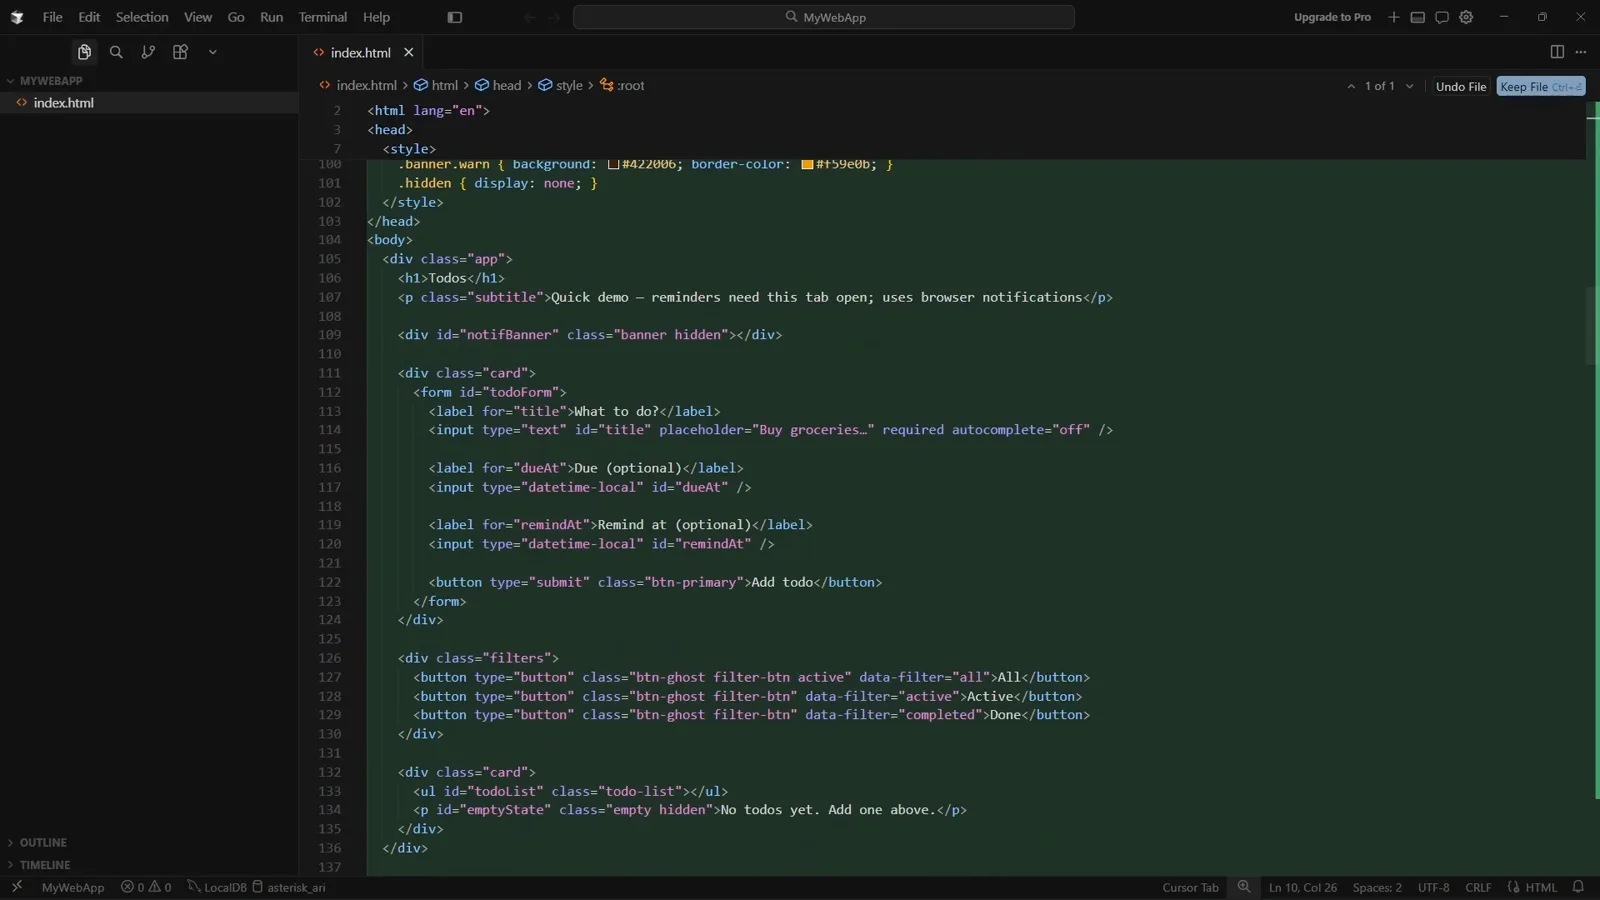
Generated index.html with the Keep File and Undo File actions in the editor header.Watch at 4:06 - 11
Run the result without leaving Cursor
Ctrl+Shift+B opens the app in a browser tab inside Cursor — here file:///D:/MyWebApp/index.html, titled Todo Reminders — Demo. Type buy eggs, set a due time, press Add todo, and the All / Active / Done filters work against the empty state message "No todos yet. Add one above." That is the loop: brief, plan, build, keep, run.
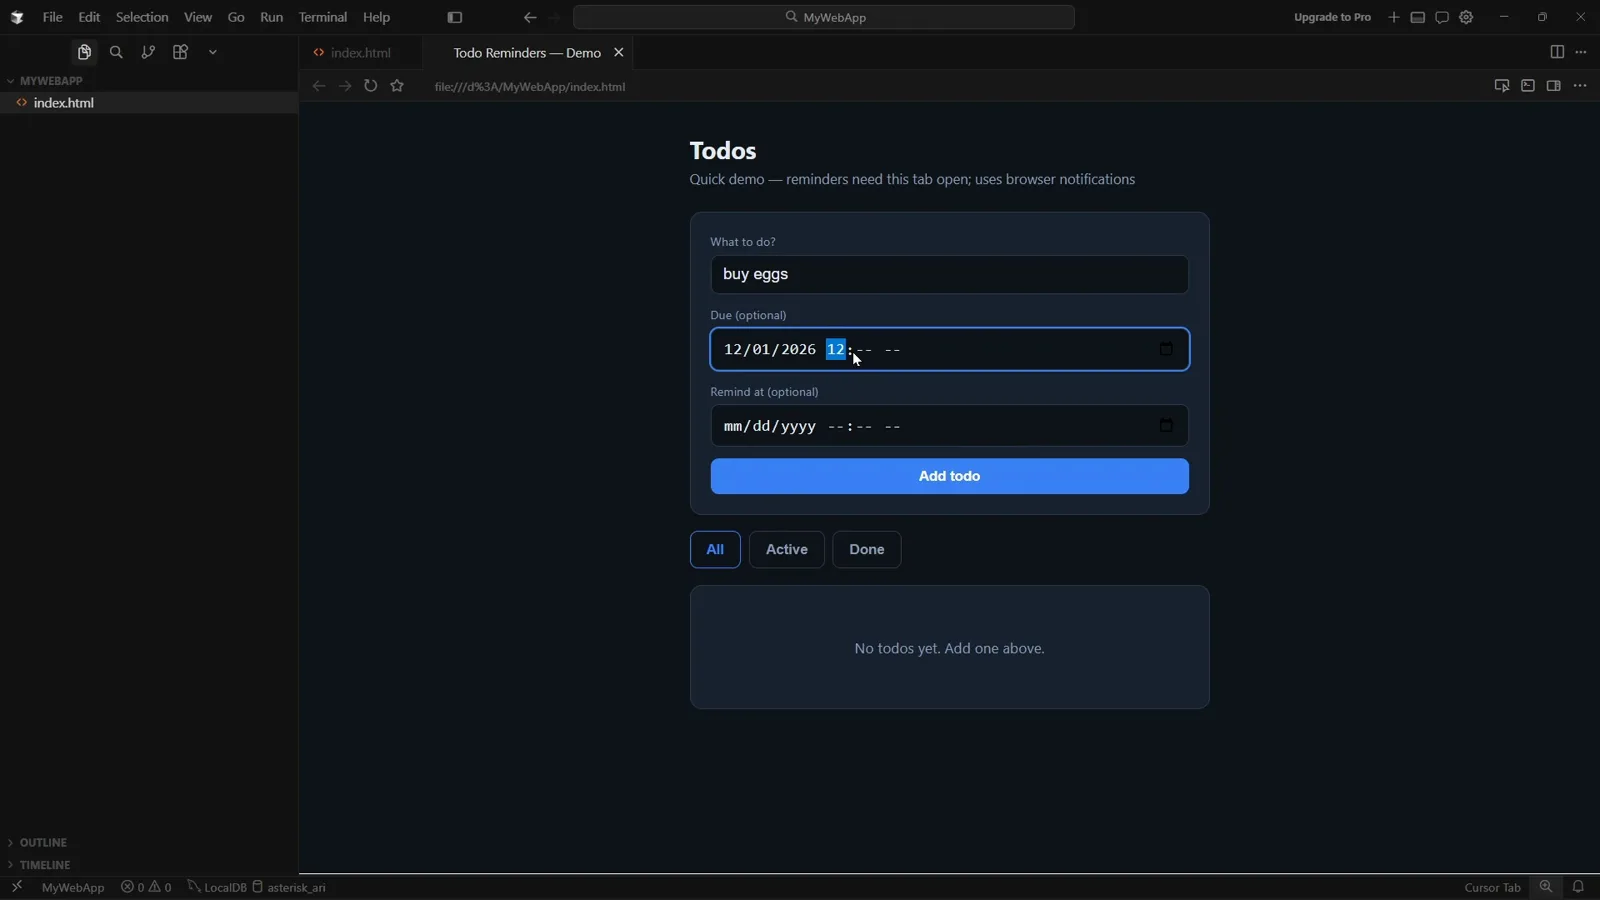
The finished to-do app running in Cursor's built-in browser preview.Watch at 4:30
4 · Move the work into a Project
- 12
Open the Agents Window and connect GitHub
Projects live in the Agents Window, whose left nav is New Chat, Search, Automations and Customize above a Repositories section. Bottom-left you get a Getting Started checklist with a Connect GitHub button — until you press it the workspace chip only offers This PC, and the empty Repositories list reads No Repo. The composer itself shows Start from scratch, a model picker and the hint "Use /multitask to run subagents to parallelize your requests instead of queuing them".
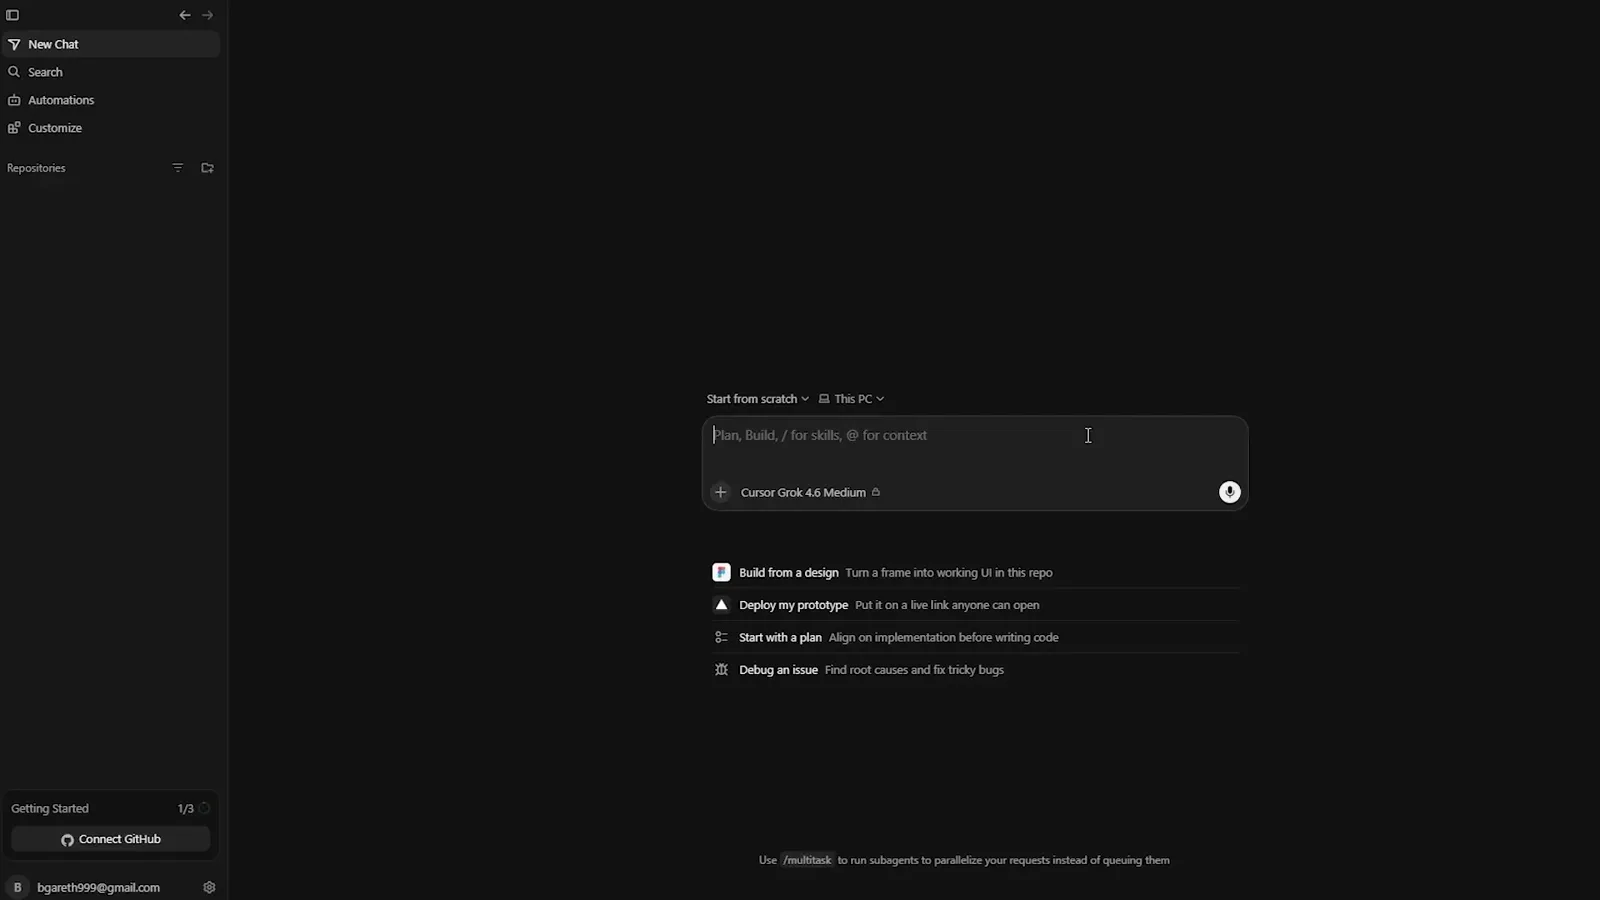
The Agents Window before any repository is connected, with starter prompts and the model picker.Watch at 5:00 - 13
Let the coordinator interview you first
Type "i want to build an app" and the agent answers "You want to build an app — I'll confirm the type and a project name first so we can set it up in the right folder", searches its own tool definitions, then walks a four-question card: main purpose, project folder name (default: my-app) and "Any preferences for setup?" with A Use sensible defaults (git, standard layout, common stack), B TypeScript, C Python, D React, E Skip git for now, F Other. Skip or Continue — the answers become the project's brief.
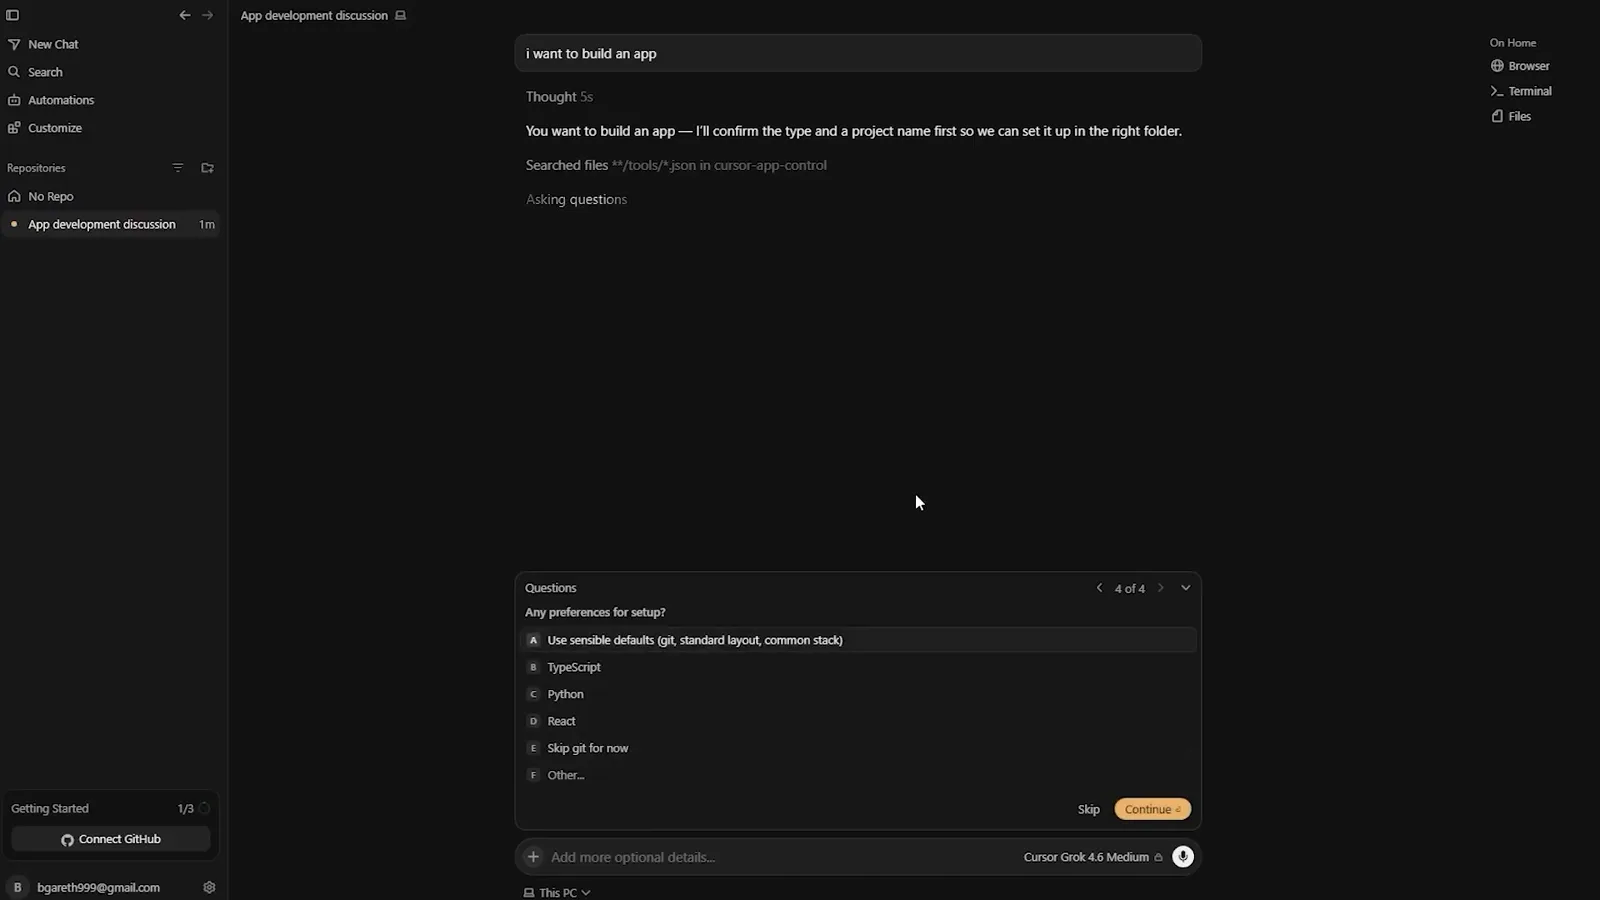
The setup-preferences question card the agent asks before it touches your workspace.Watch at 6:45 - 14
Check the workspace the agent created
Your answers come back as a summary block at the top of the thread, followed by "Web portfolio it is — I'll create my-app with git and a standard layout, then move into that folder before scaffolding" and "Workspace is c:\Users\DELL\my-app. Next I'll scaffold a Vite portfolio landing page with git already initialized." The right rail now tracks the workspace: On my-app, Changes +459, Browser, Terminal and Files. This is the moment a folder becomes a project with history.
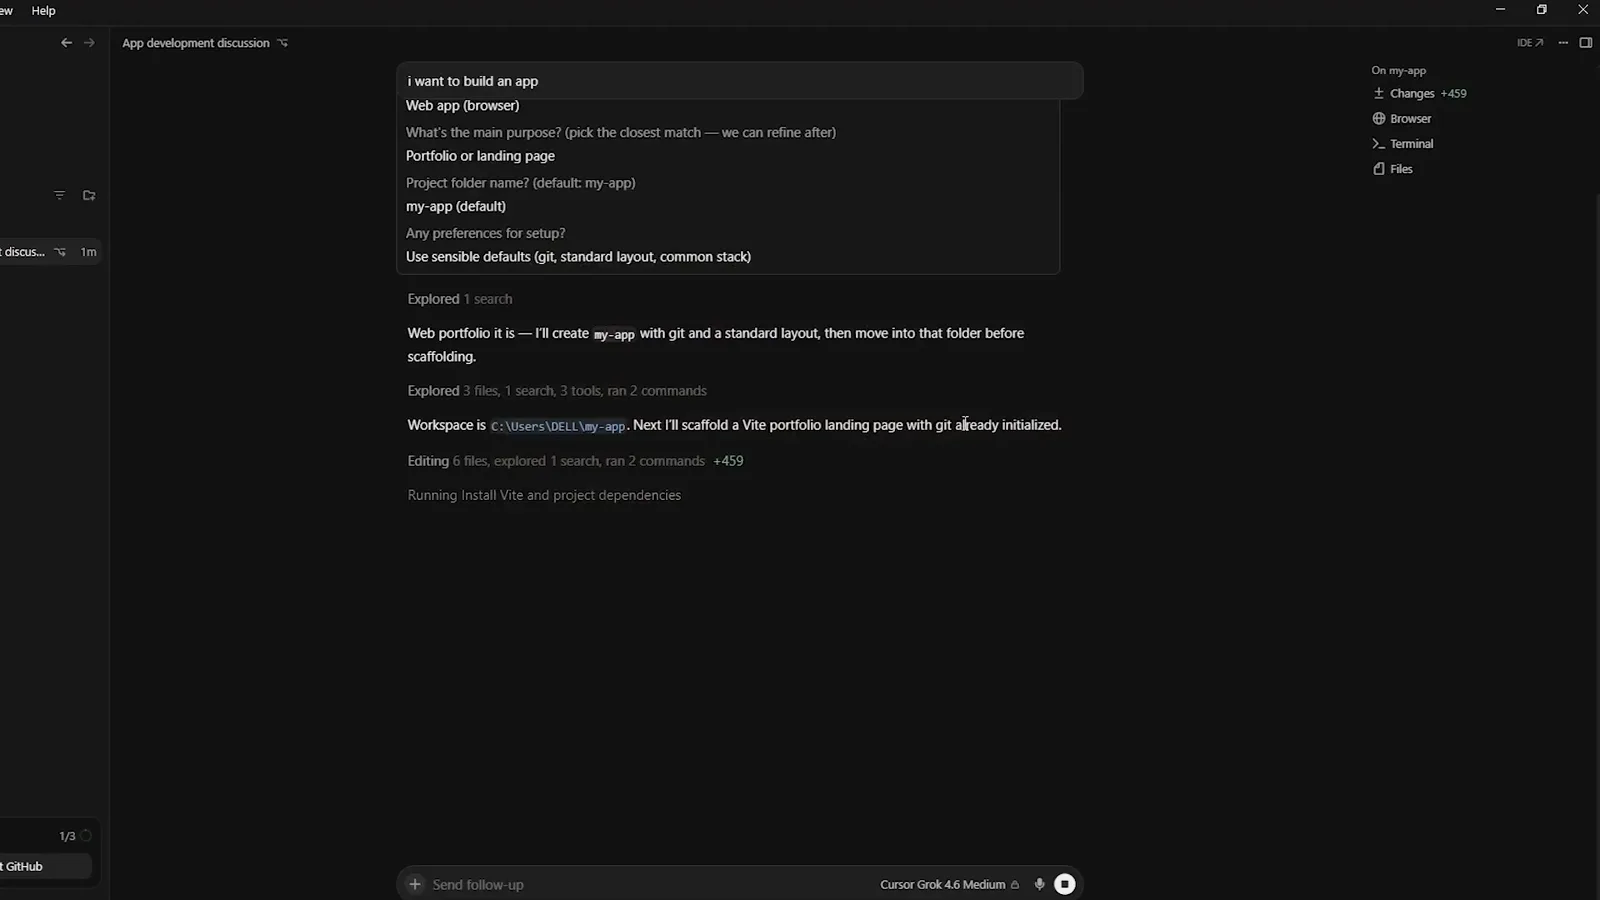
The confirmed brief and the workspace path the agent scaffolded into.Watch at 9:20 - 15
Commit the branch, then give the Project recurring work
The thread lists every edit — package.json +14, .gitignore +4, index.html +140, main.js +4, styles.css +282, README.md +15 — plus "Ran Install Vite and project dependencies" and "Ran Start Vite development server", with the branch (master) and a Worktree dropdown in the footer and Changes +1623 one click from Create Branch & Commit. From there, hand the Project the work that outlives one chat: ask the coordinator to watch a Slack channel, follow your pull requests, or run on a schedule, and a Listening pill appears above the input listing every event it reacts to.
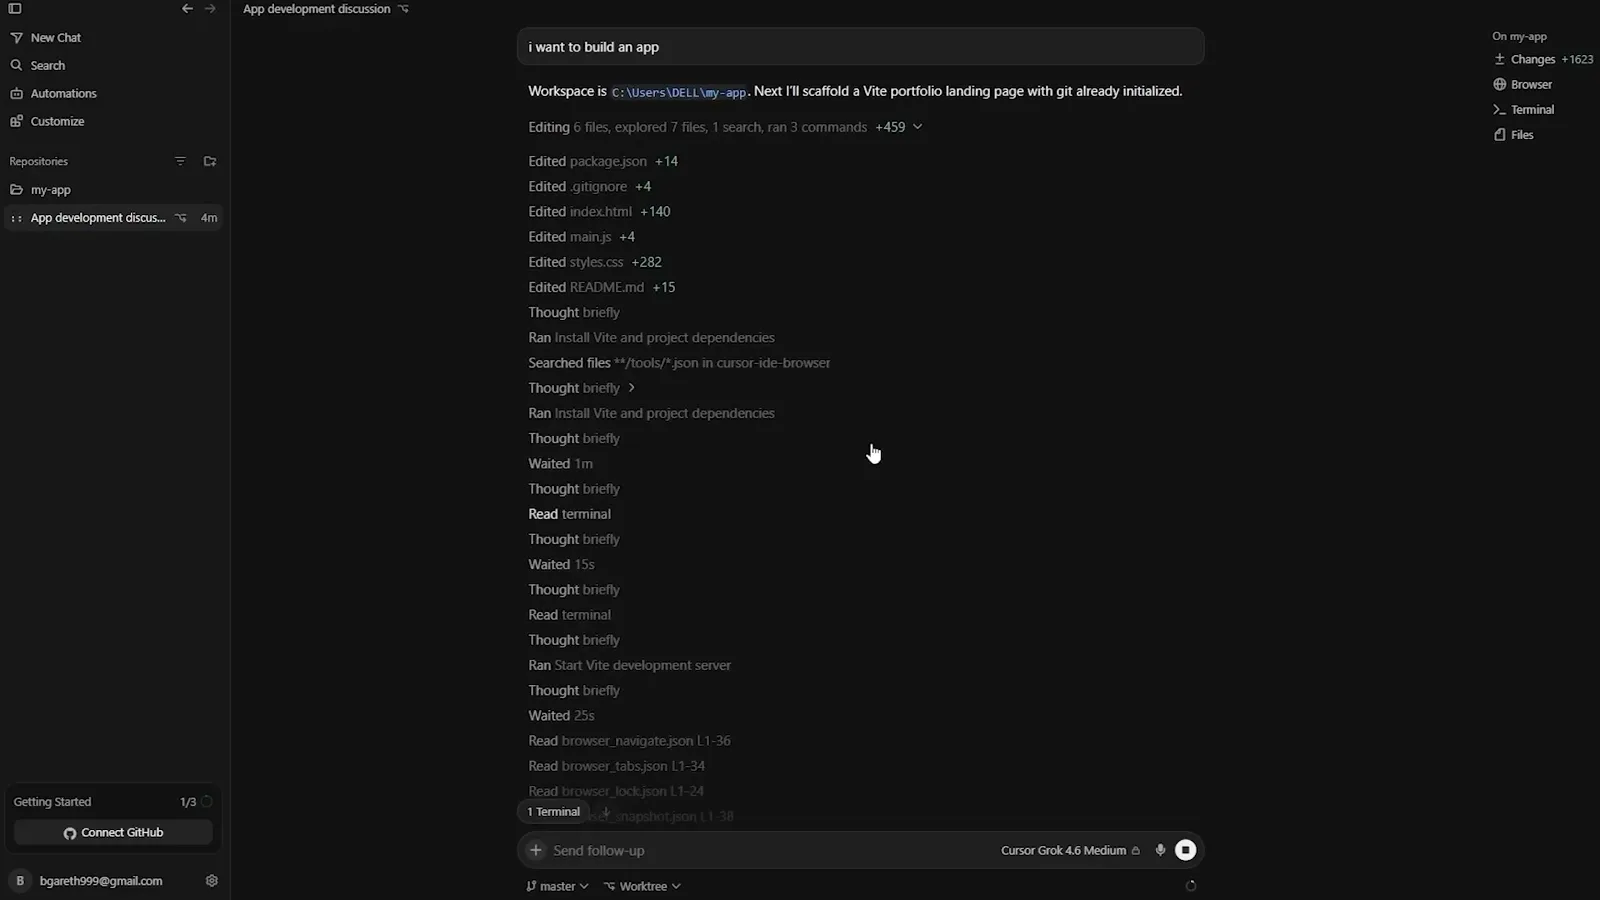
Every file the agent changed, ready to branch and commit from the Agents Window.Watch at 11:20