
Cline Tutorial for Beginners: Install, First Task, Plan/Act, Rules & MCP
A step-by-step Cline tutorial with 15 verified screenshots: install the VS Code extension, ship a real app on a free model, then master Plan and Act modes, rules and MCP servers.
TL;DR
- Cline is a free, open-source AI coding agent inside VS Code — install it from the Extensions Marketplace, sign in with Google or GitHub, and start without an API key.
- The Absolutely Free tier runs on hosted models like DeepSeek V4 Flash (1M context) and GLM-5.3-Flash; this walkthrough ships a working BMI calculator app in 15 steps.
- Plan mode strategizes with a reasoning model, Act mode codes with a fast model — the demo's entire Plan-mode analysis cost $0.0145.
- Level up with your own Gemini key, Global and Workspace rules, and MCP servers like GitHub and Context7 — the three pillars of an ideal Cline setup.
I Found 2 Ways to Use Cline for FREE (Best Free AI Coding Agent)
Walkthrough video:HMA WebCode5:26
Ideal Setup for Cline
Facts source:Cline3:47
Walkthrough frames come from the HMA WebCode free-setup demo; the Plan/Act settings, rules and MCP marketplace frames come from the official Cline channel shorts, which are also the fact source for mode behavior, rule scoping and the three-pillar setup.
Screenshots belong to their respective channels and are used with attribution and deep links; every step description is our own writing.
The 15-step Cline walkthrough
Install Cline and unlock the free tier
- 1
Install the Cline extension in VS Code
Open the Extensions view in VS Code, search for Cline, and click Install on the autonomous coding agent listing published by Cline Bot. When it finishes, the Cline robot icon appears in the Activity Bar — click it to open the agent panel beside your editor.
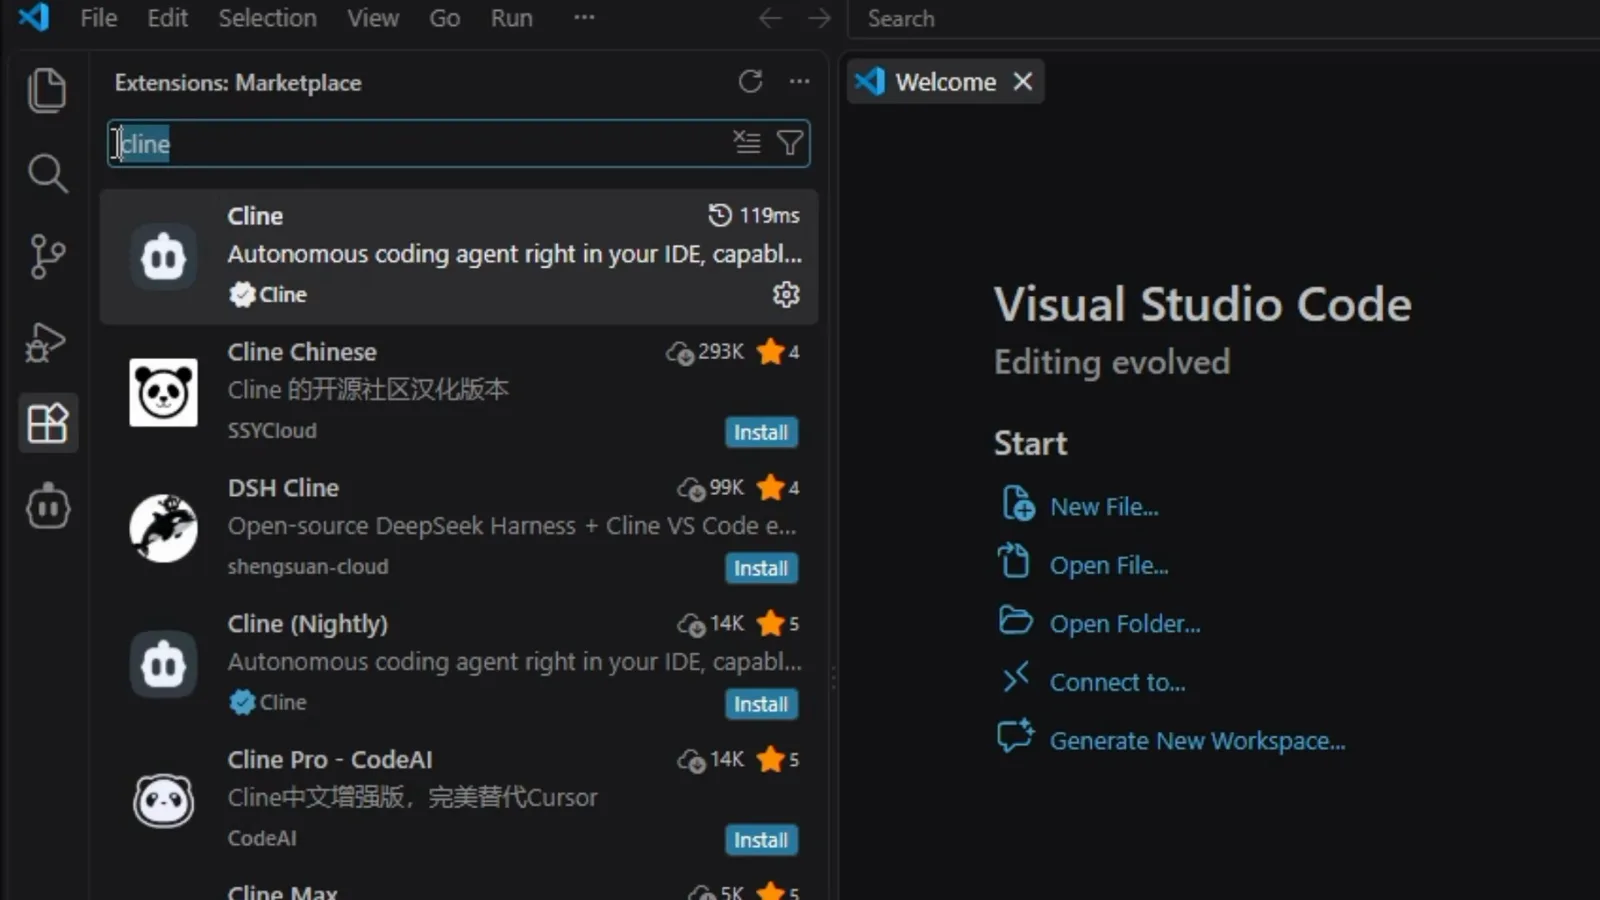
The Cline listing in the VS Code Extensions Marketplace, ready to install.Watch at 0:24 - 2
Pick how you want to use Cline
The first time you open the panel, Cline asks how you want to use it and offers four paths: Absolutely Free (hosted free models), ClinePlans (a paid subscription for open-weight models), Frontier Model (pay per use through Cline's billing) and Bring my own API key. Beginners should start with Absolutely Free — no API key or credit card needed.
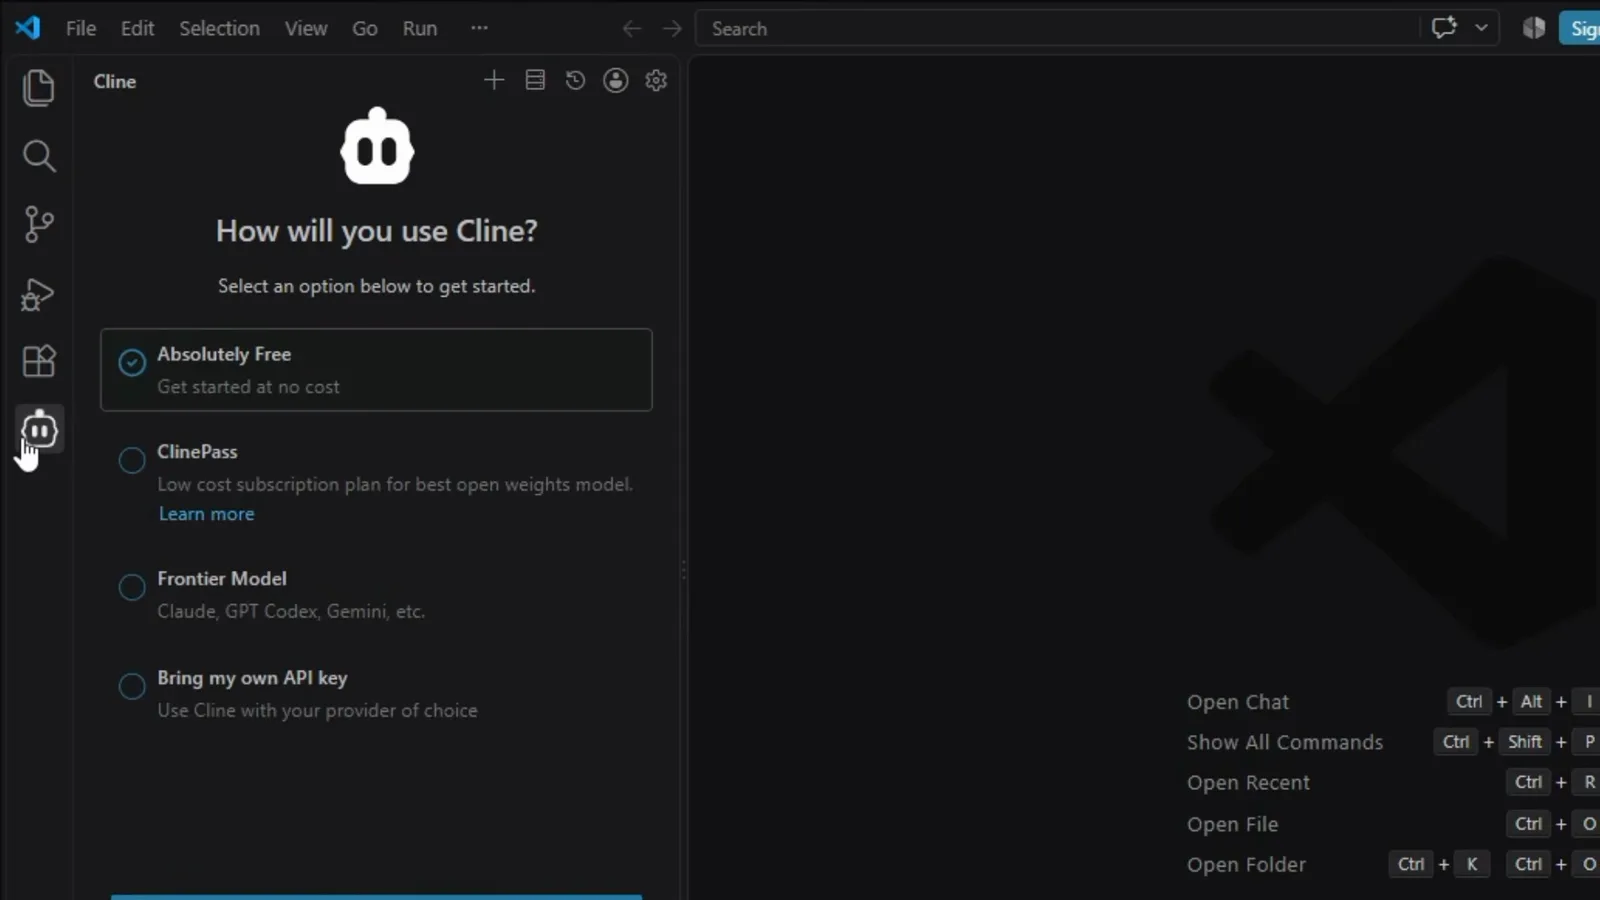
Cline's first-run screen with the four setup options.Watch at 0:34 - 3
Sign in and land on the free tier
Select Absolutely Free, click Log in to Cline and sign in with your Google or GitHub account — it takes about ten seconds and asks for no payment method. You land on the provider screen with Cline Usage-Billing selected, which is what powers the free models.
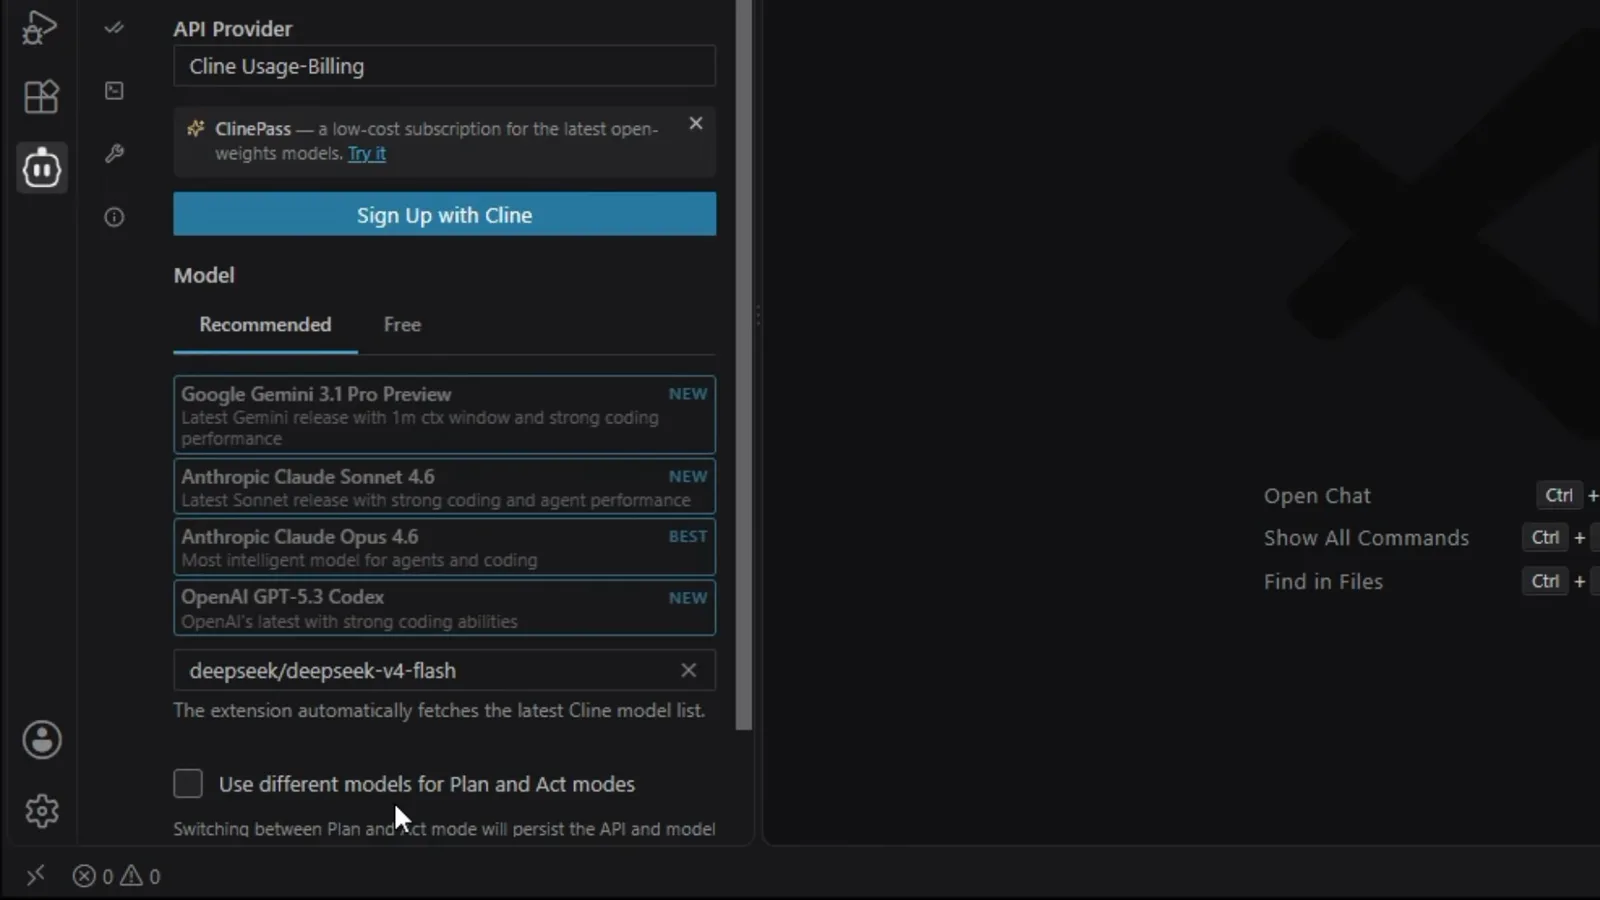
After signing in, Cline shows the Usage-Billing provider with its model tabs.Watch at 1:46 - 4
Choose a free model and a reasoning effort
Open the model selector and switch to the Free tab: DeepSeek V4 Flash (1M token context), GLM-5.3-Flash, LongCat 2.0 and Laguna S 2.1 are all tagged FREE. Pick DeepSeek V4 Flash for fast multi-file work and leave Reasoning Effort on Medium — Low is faster, High thinks deeper but burns more tokens.
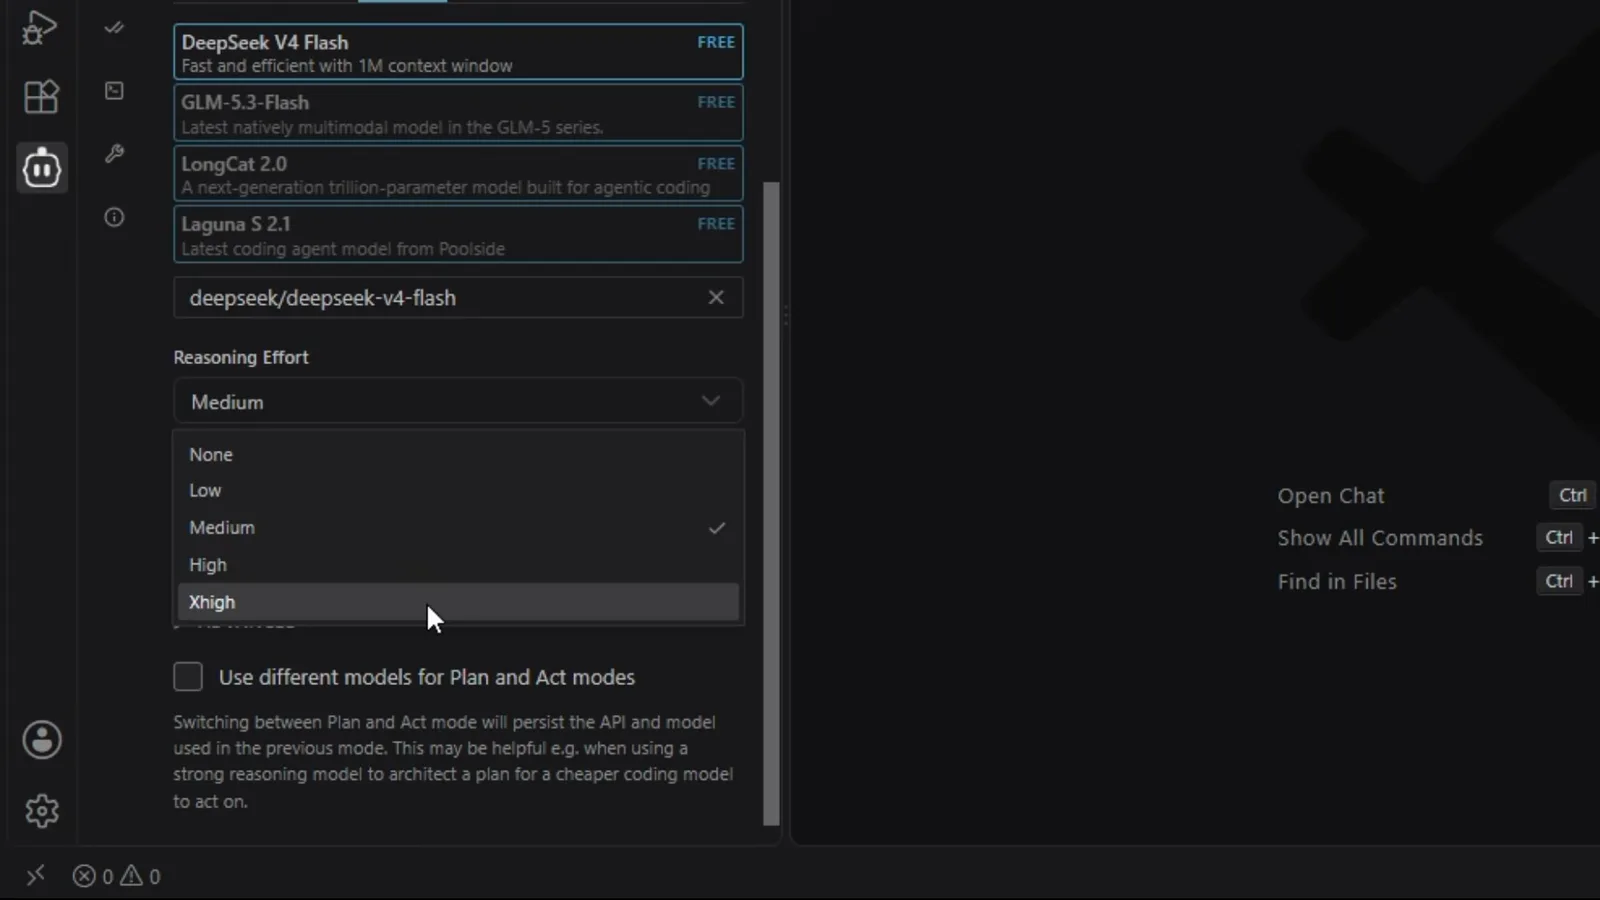
The deepseek/deepseek-v4-flash model ID selected with Reasoning Effort on Medium.Watch at 2:12
Run your first task end to end
- 5
Open an empty task box
Create or open a project folder in VS Code, then click the Cline icon. The panel greets you with a simple question — that input is where every task starts. The Auto-approve row and the Plan/Act toggle sit at the bottom of the panel.
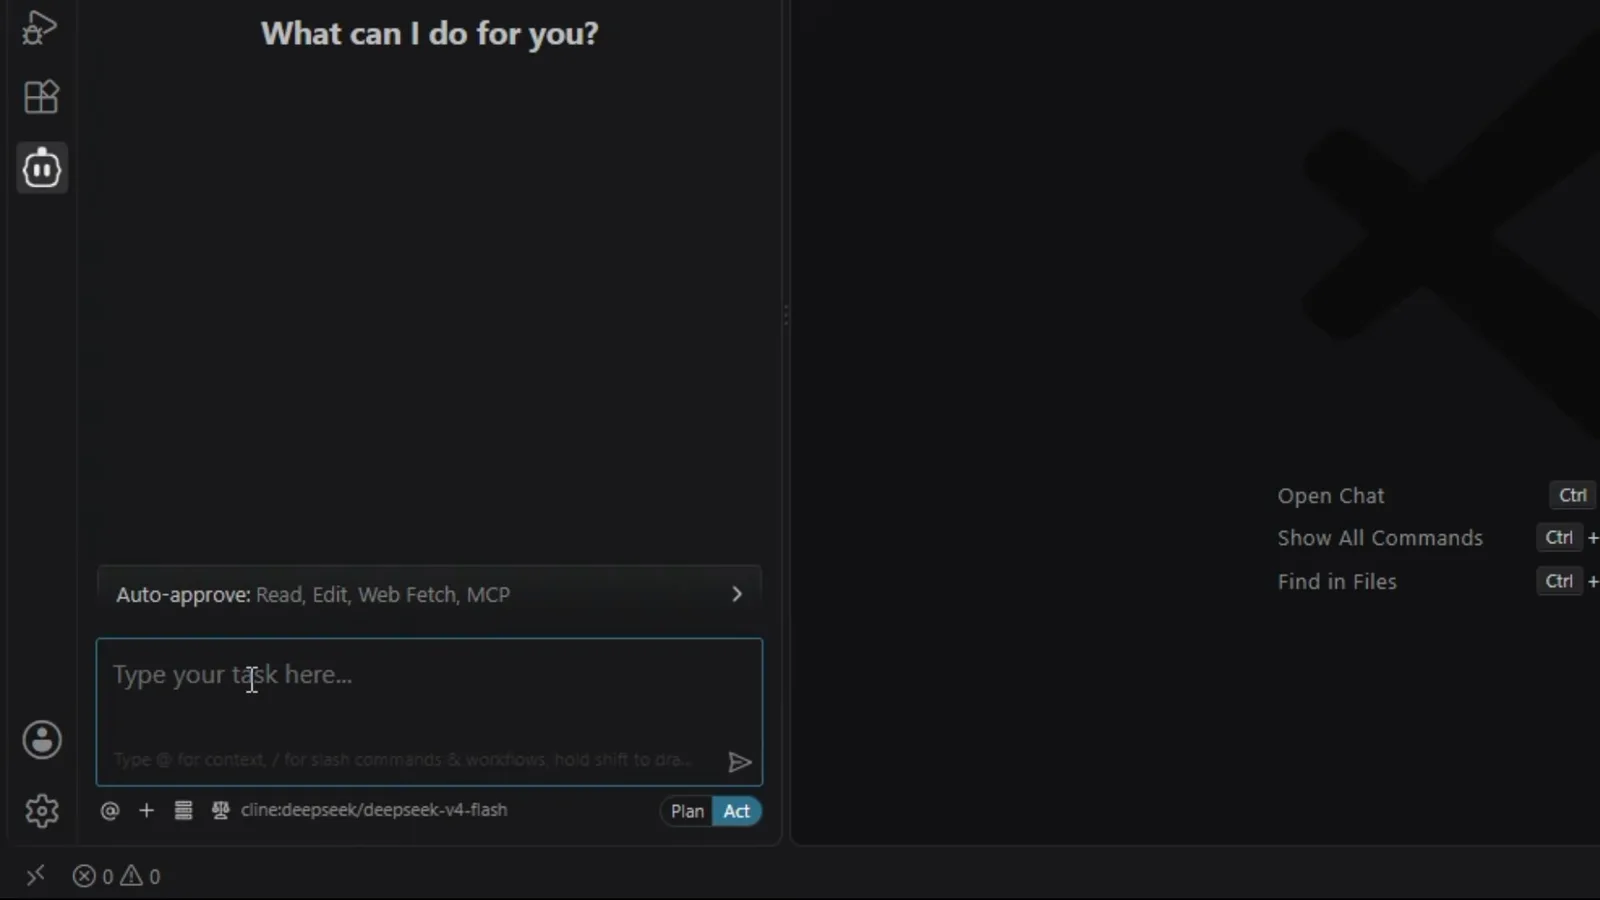
Cline's task panel ready for the first prompt, with Plan/Act in the corner.Watch at 2:36 - 6
Send your first task
Type a concrete goal into the task box, for example: build a modern BMI calculator web app using HTML, CSS and JavaScript where the user enters height in centimeters and weight in kilograms and the app shows the BMI with a category label. Specific inputs, outputs and design notes get much better results than one-liners.
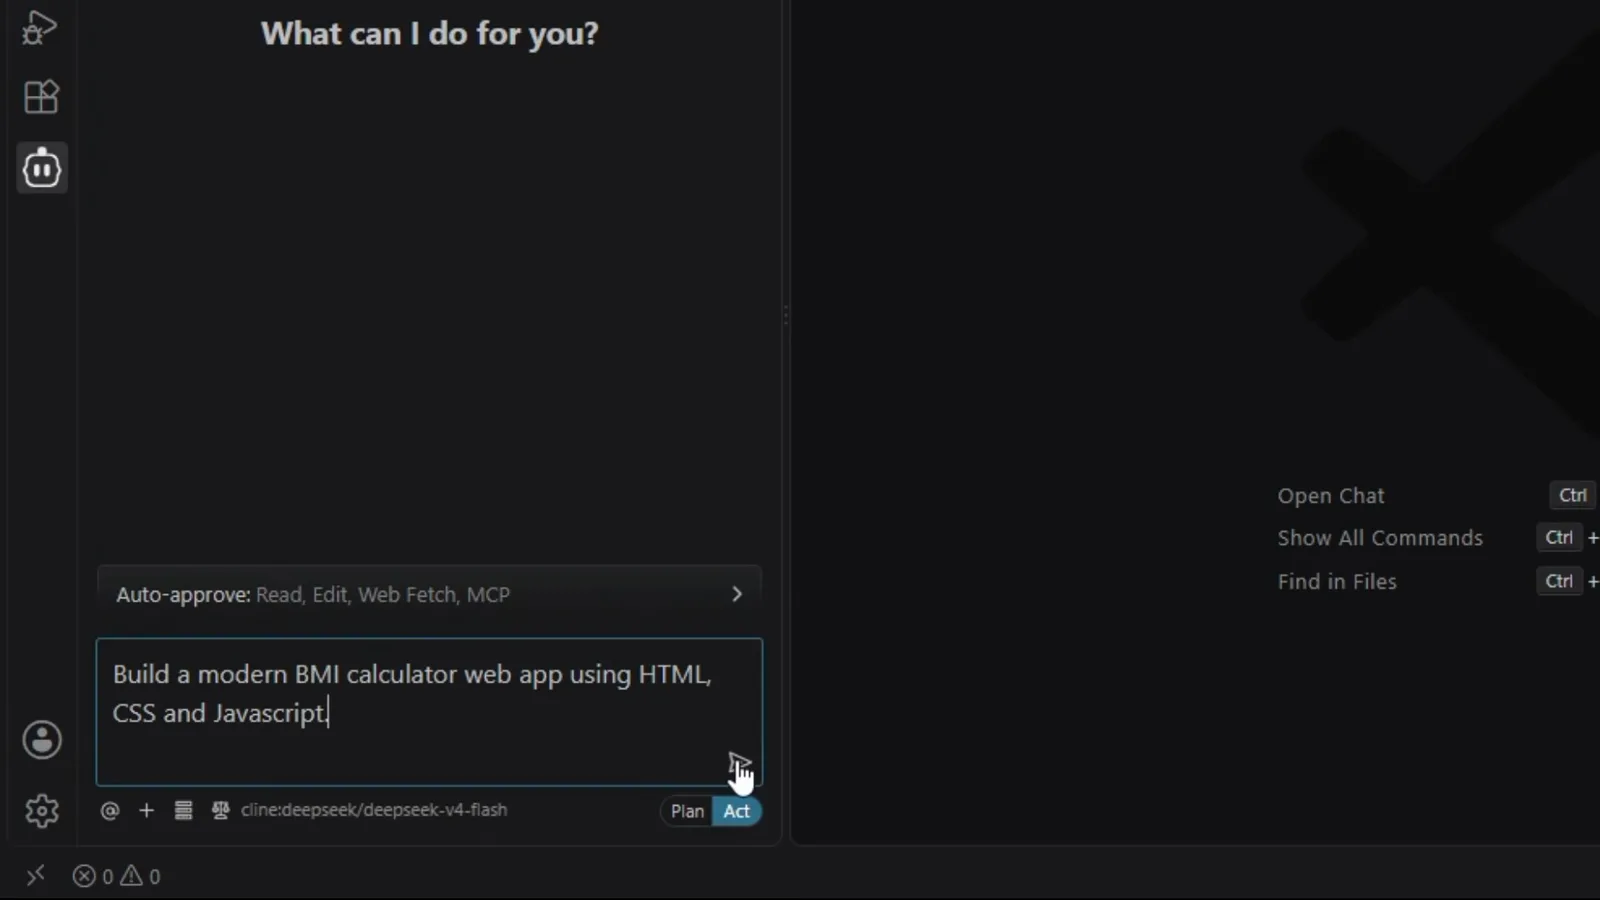
The BMI calculator prompt typed into Cline's task box.Watch at 2:58 - 7
Approve each action — or auto-approve
Cline works step by step: it wants to run a command, create a file or edit another one, and shows a diff of every change before applying it. Approve a single action, or switch on Auto-approve for Read, Edit and Commands to let it work through the checklist on its own — checkpoints make every step reversible either way.
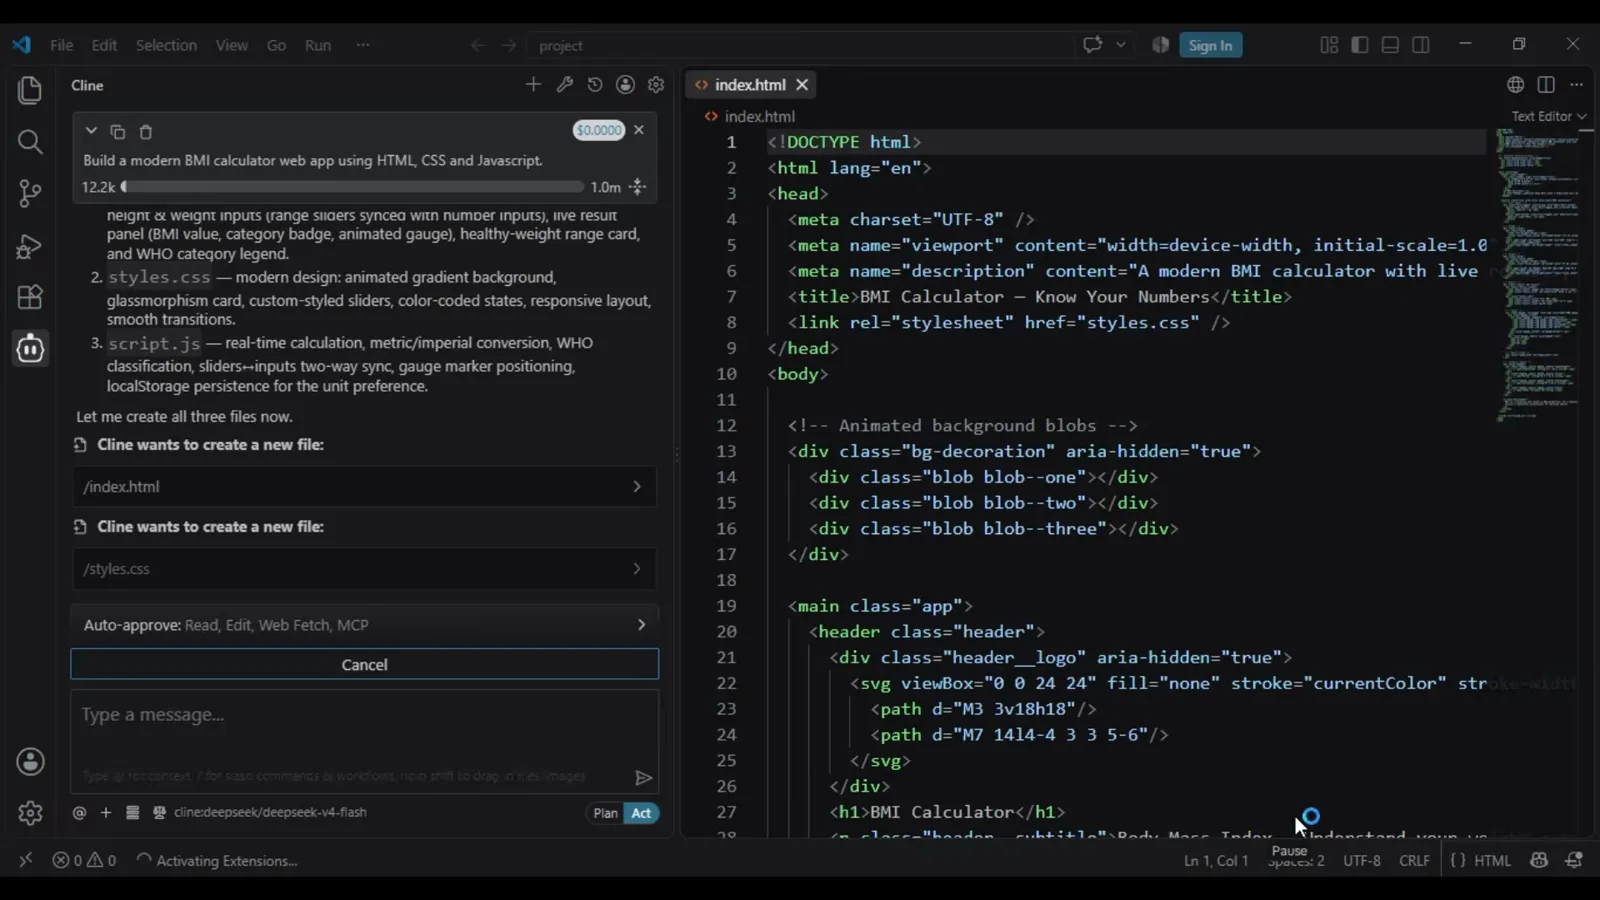
Cline requesting approval to create index.html, with the CSS diff shown.Watch at 3:06 - 8
Open the finished app
Within a few minutes the task completes with a summary and a BMI Calculation Checkpoint entry. Open the generated index.html with Live Server or any static server and test it: 175 centimeters and 70 kilograms return a BMI of 22.9 — Normal. A complete, working app without writing a line yourself.
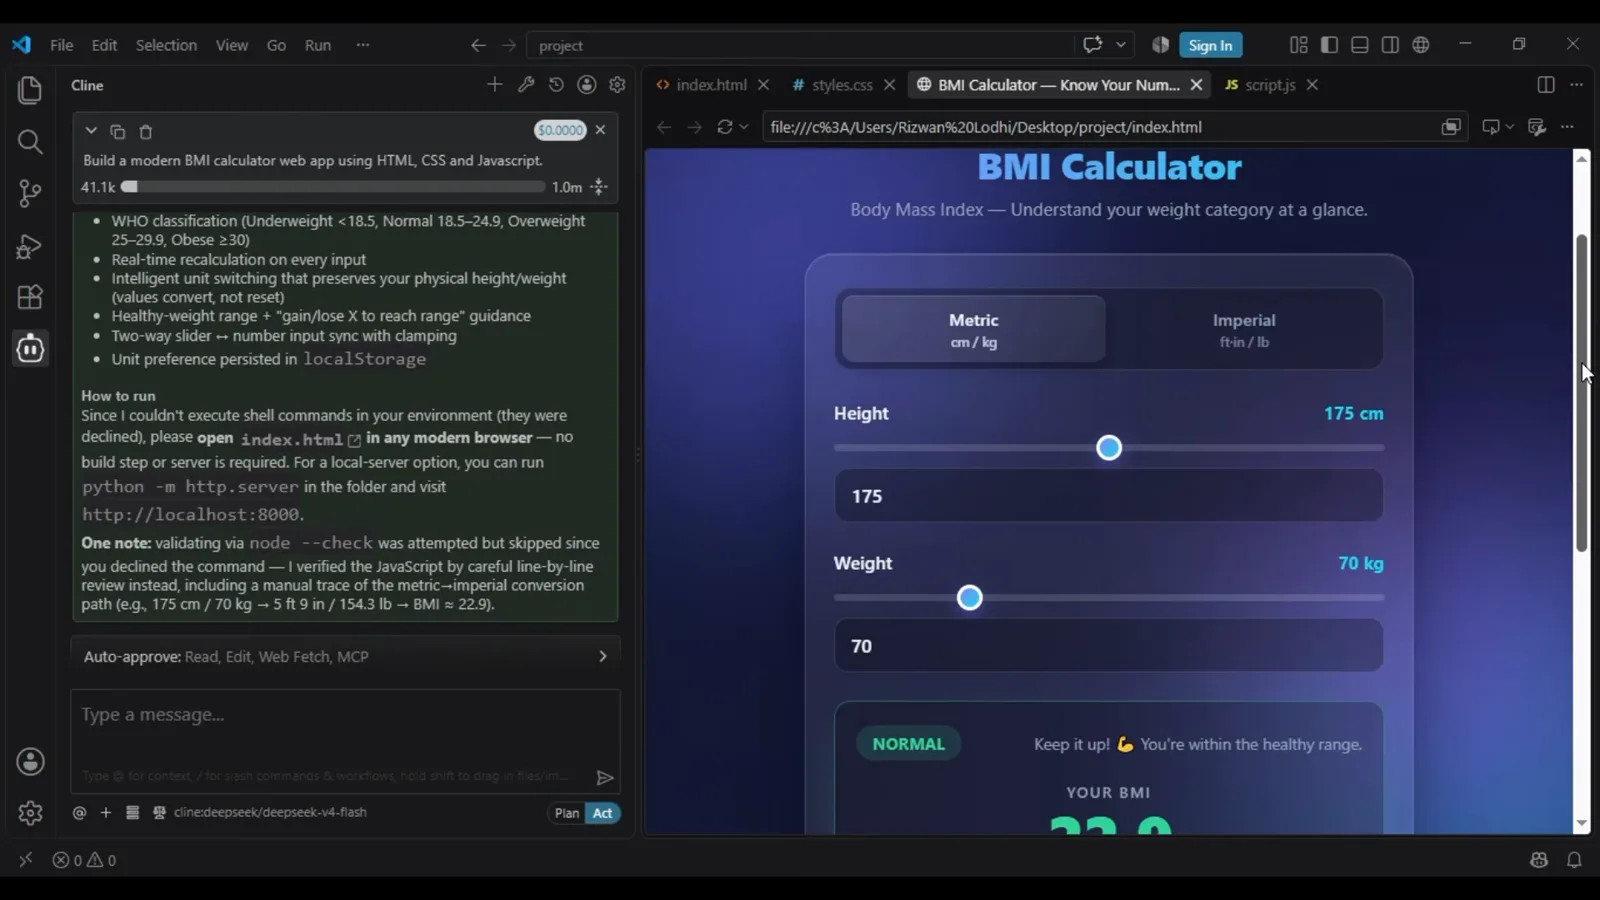
The finished BMI calculator in the browser beside Cline's summary in VS Code.Watch at 3:17
Plan and Act modes without wasted tokens
- 9
Meet Plan mode and Act mode
The toggle at the bottom of the panel switches between Plan and Act. In Plan mode Cline only investigates: it reads files, asks questions and proposes an implementation plan. The settings dialog has tabs with the same names, so you can assign a different model to each mode — a strong reasoner for Plan, a fast coder for Act.
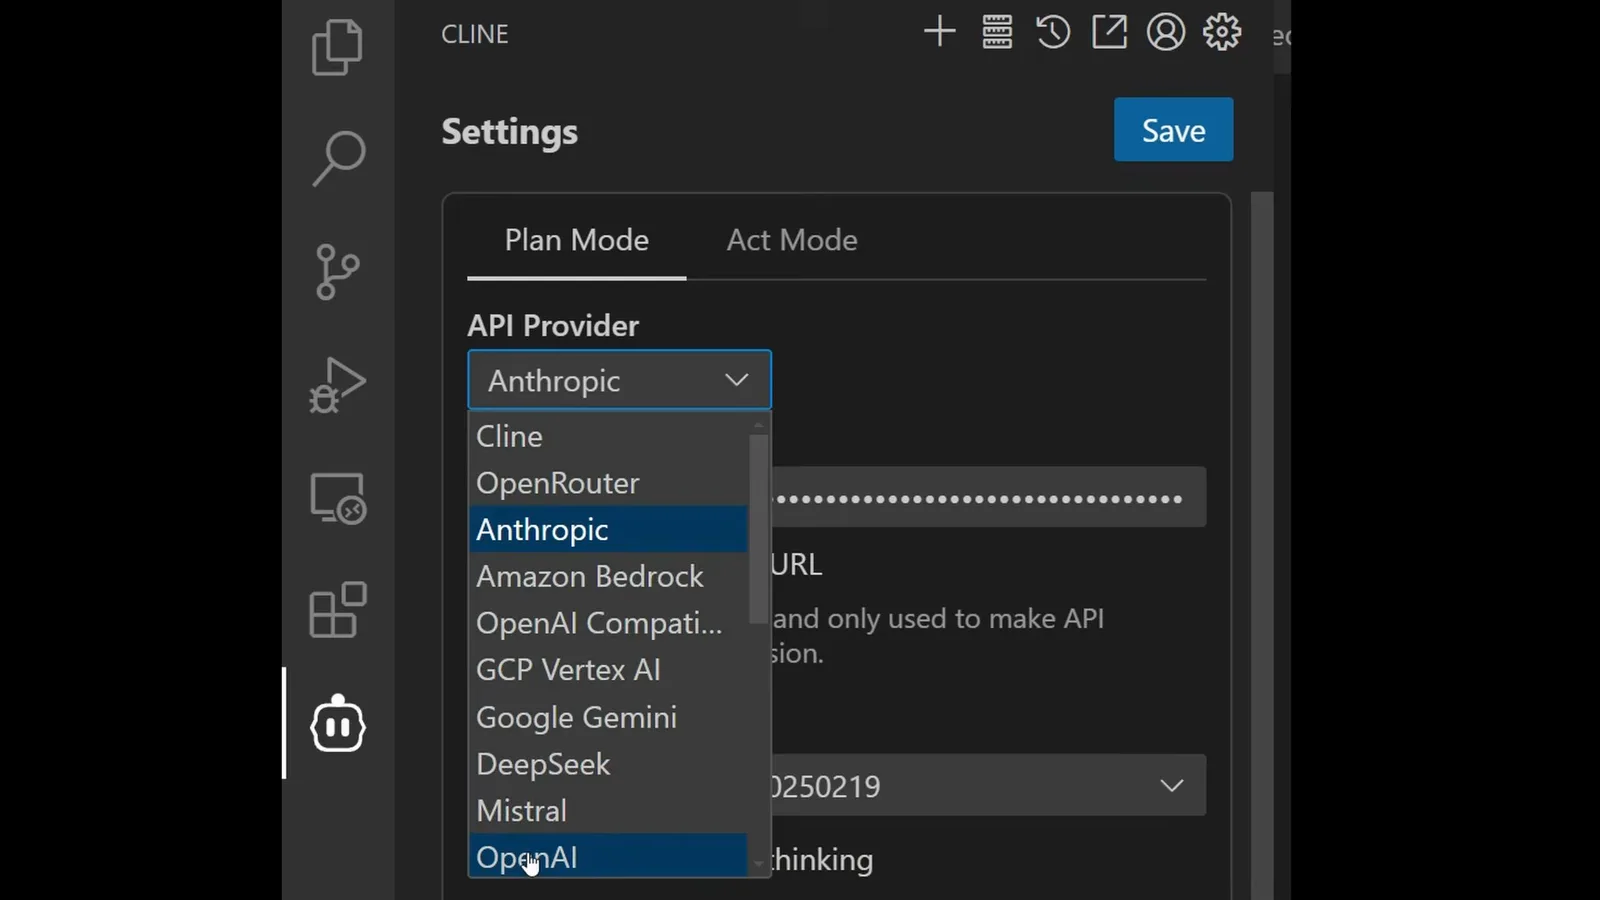
Cline settings with the Plan Mode and Act Mode tabs for per-mode models.Watch at 0:48 - 10
Let Plan mode think before it codes
Reasoning models shine in Plan mode because mapping out a task is analysis, not typing. Since nothing is written yet, a full investigation is cheap — the demo's DRY-violation analysis cost just $0.0145. Answer Cline's questions while it plans; every correction here saves rewrites later.
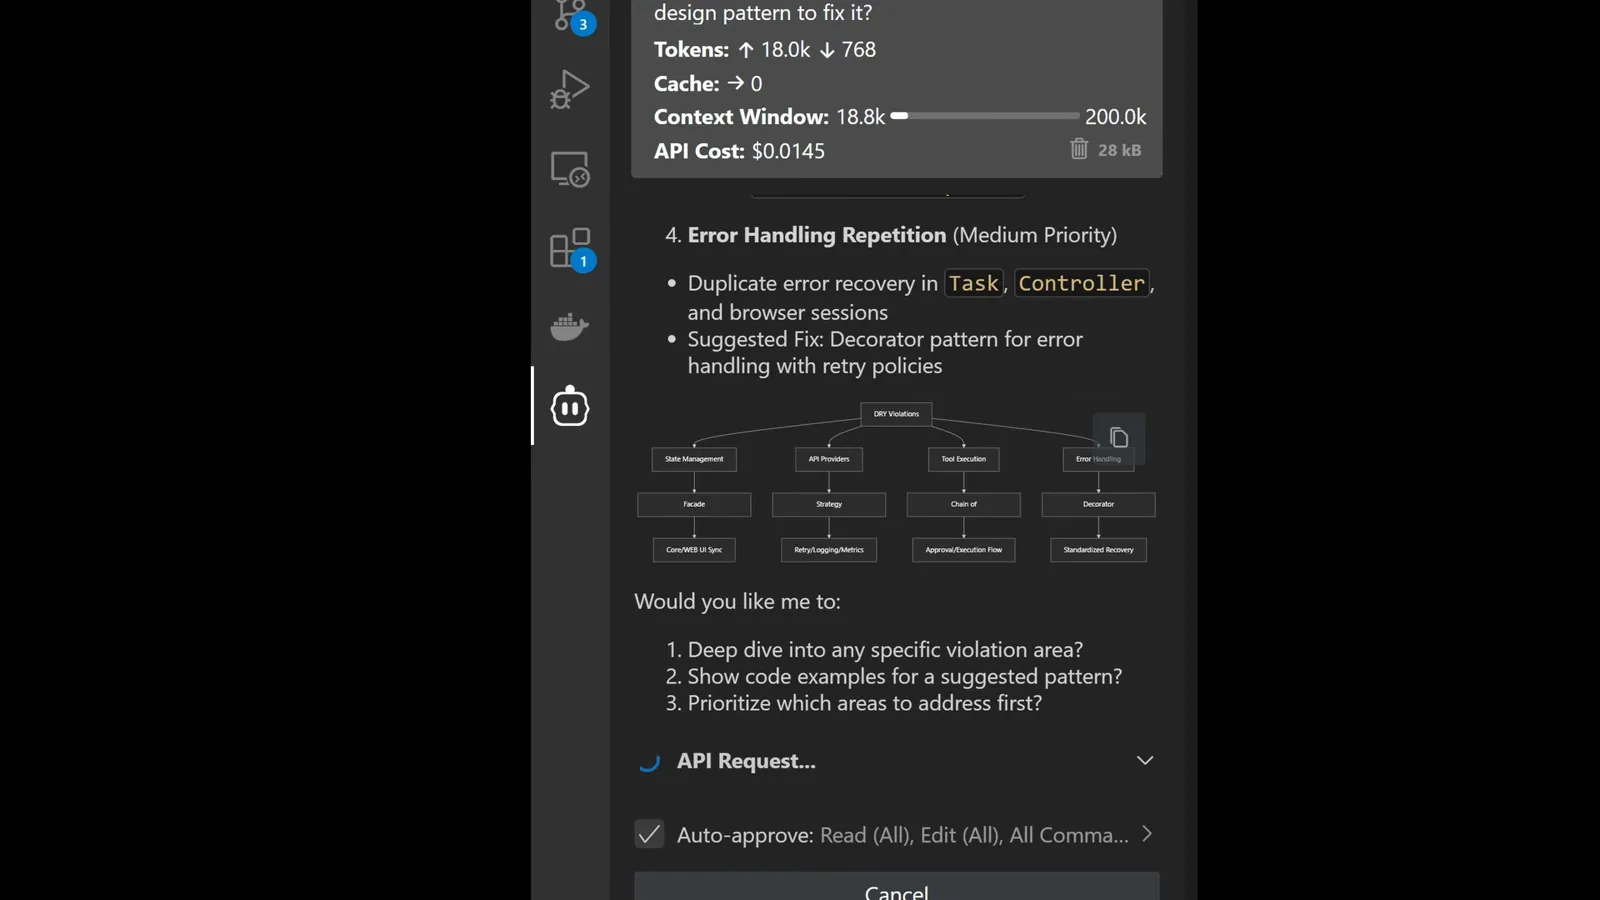
A Plan mode task card with the analysis, token counts and $0.0145 API cost.Watch at 1:10 - 11
Flip to Act mode to write the code
Once the plan matches what you want, toggle to Act — the plan is locked in and Cline starts editing files. Coding models are cheaper and faster at this part, which is exactly why splitting the modes saves tokens. On the task resume screen Cline shows the shortcut: Win+Shift+A toggles between the modes.
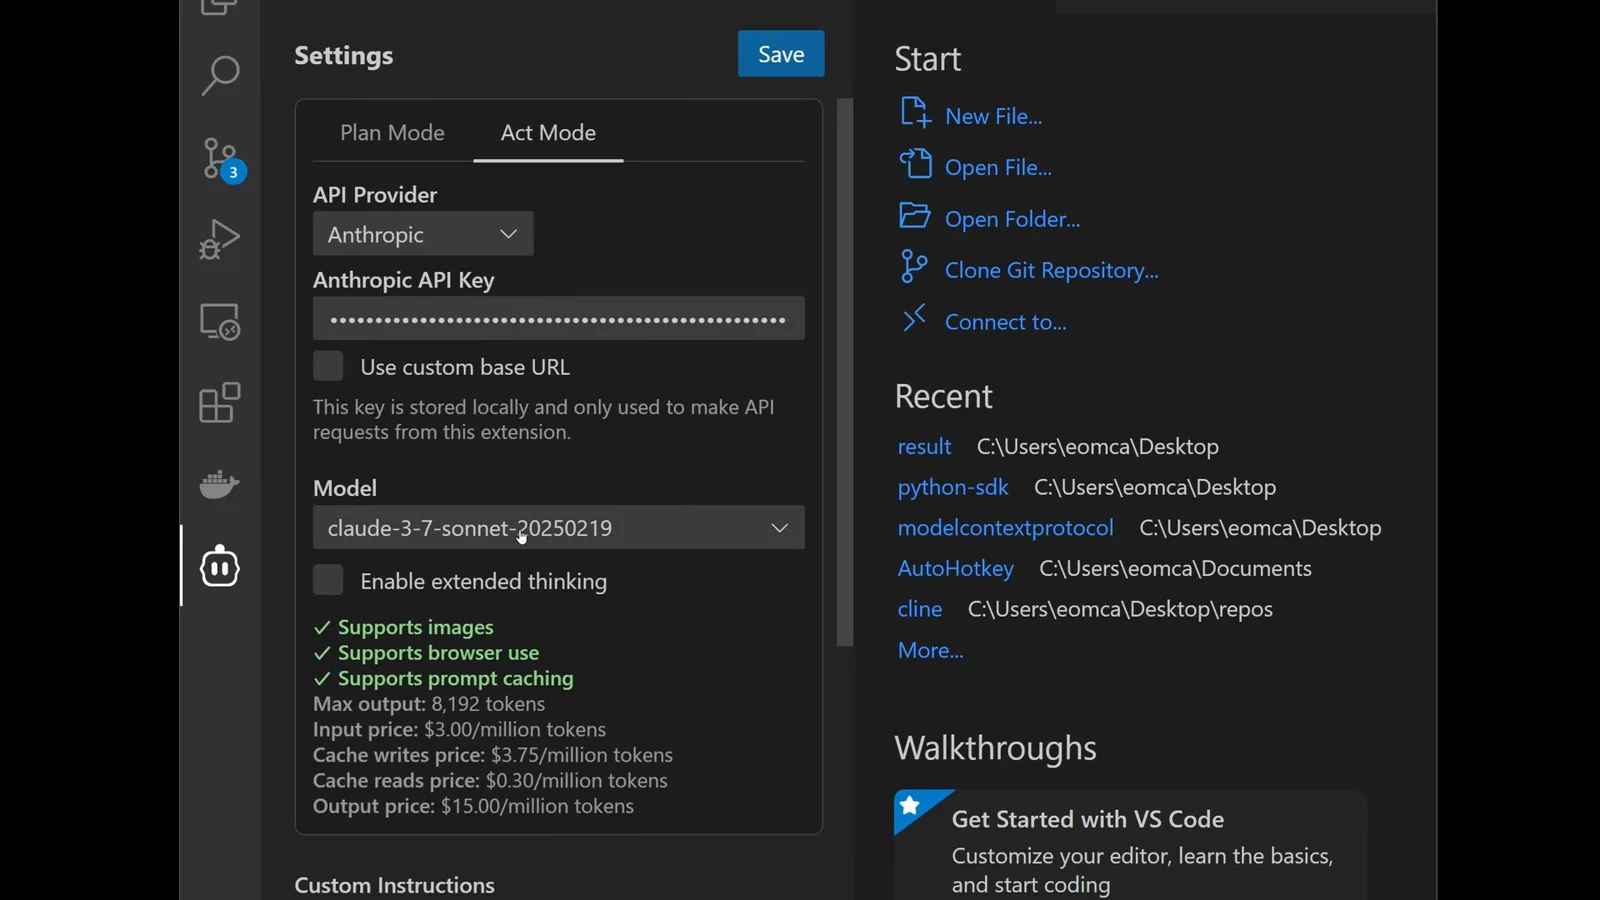
Settings with the Act Mode tab selected and a coding model for execution.Watch at 1:28
Your own key, rules and the MCP marketplace
- 12
Or bring your own free key
Prefer your own quota instead of Cline's shared free pool? Pick Bring my own API key, choose Google Gemini, then click Get API key in Google AI Studio — the free tier only needs a Google account. Paste the key into Cline's API key field, pick a Gemini model and save, and you are running on your own quota.
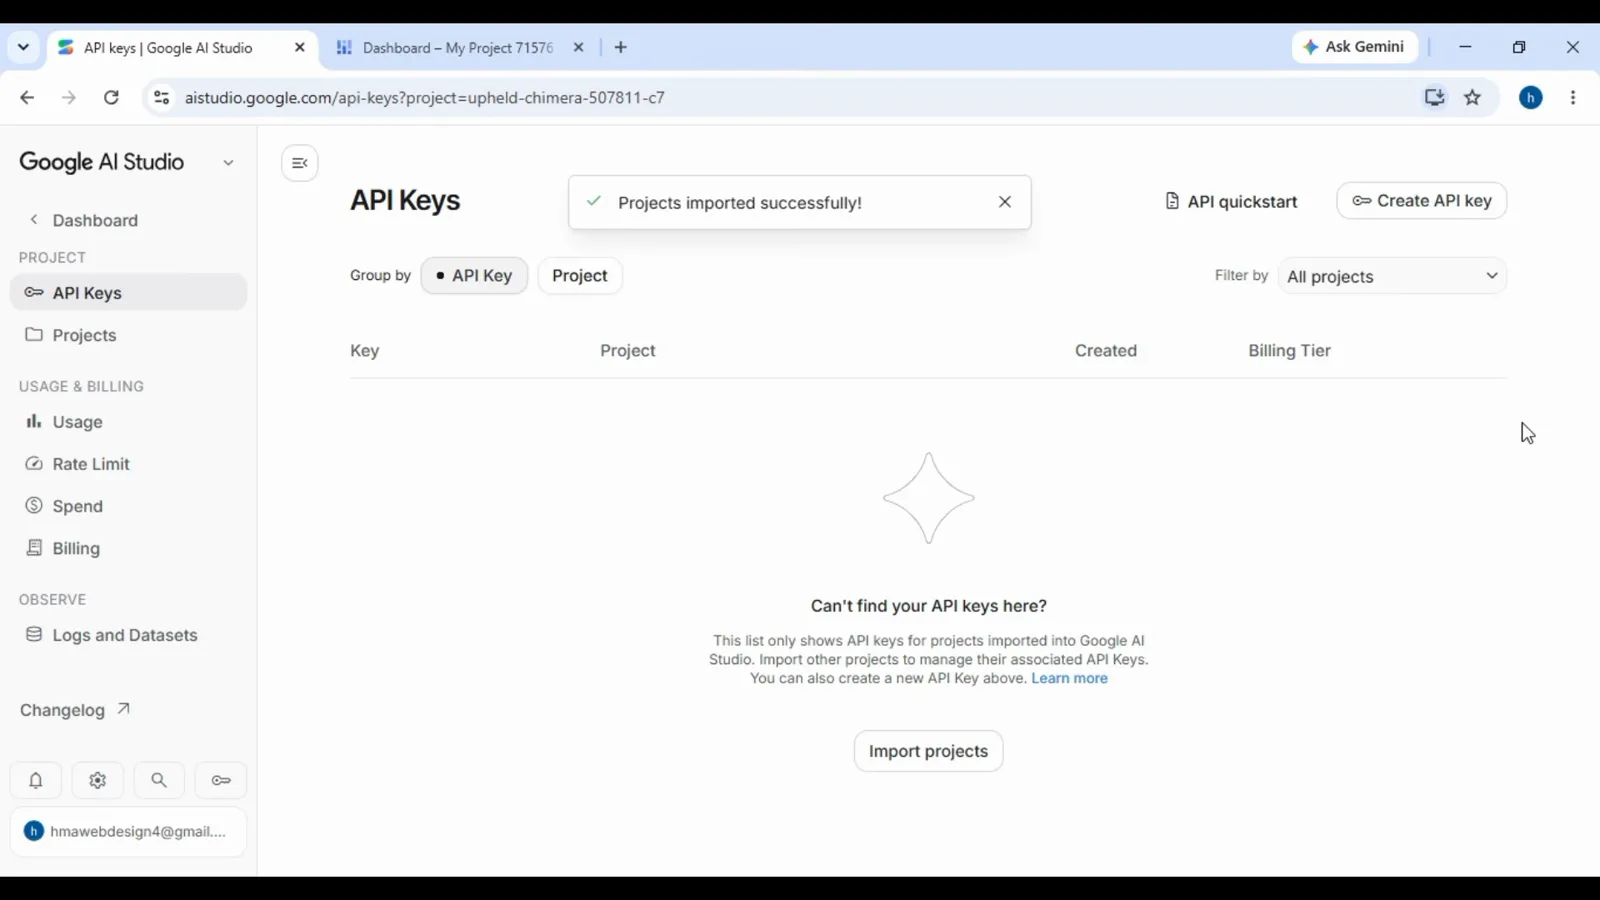
The Create API key dialog in Google AI Studio that produces the free Gemini key.Watch at 3:54 - 13
Teach Cline your standards with rules
Rules are persistent instructions Cline reads on every task. Open the Rules tab in the panel settings: Global Rules apply to every project on your machine, while Workspace Rules live in the current repository as .clinerules files you can commit and share. Use them for coding principles, security practices, documentation guidelines and style.
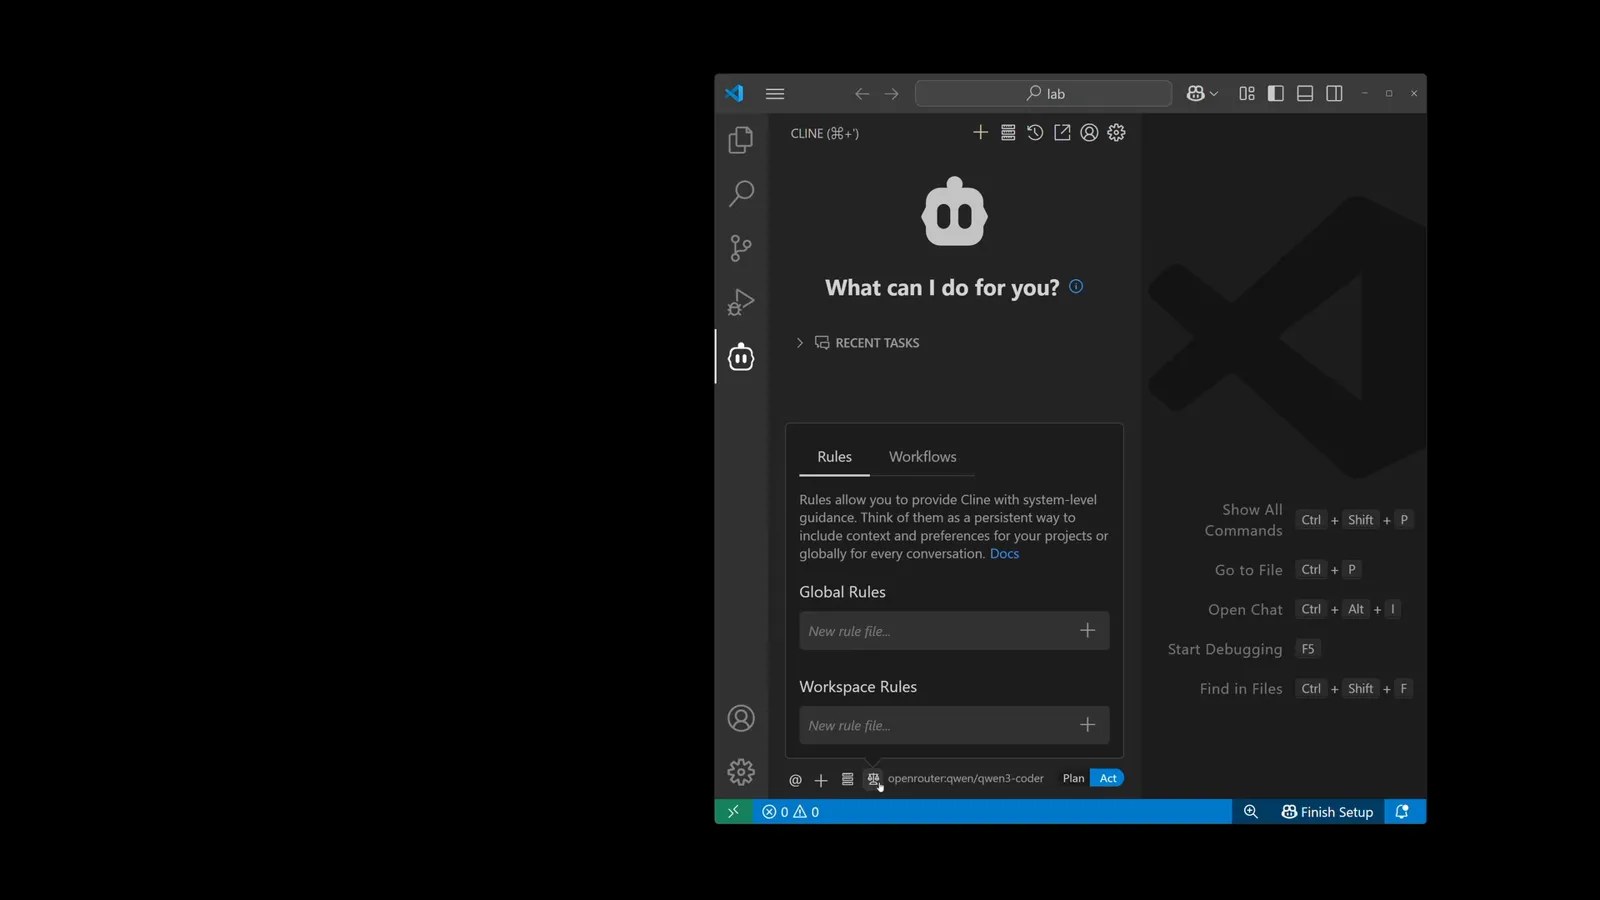
The Rules tab in Cline settings with Global Rules and Workspace Rules sections.Watch at 1:06 - 14
Write rules a model can actually follow
Vague rules backfire — optimize code where possible gives Cline room to ignore you. Write measurable triggers instead: optimize code when unit tests take longer than 100 milliseconds, use SOLID principles when you use classes, add inline comments when the code is making assumptions. Treat rules as a living document and prune conflicts.
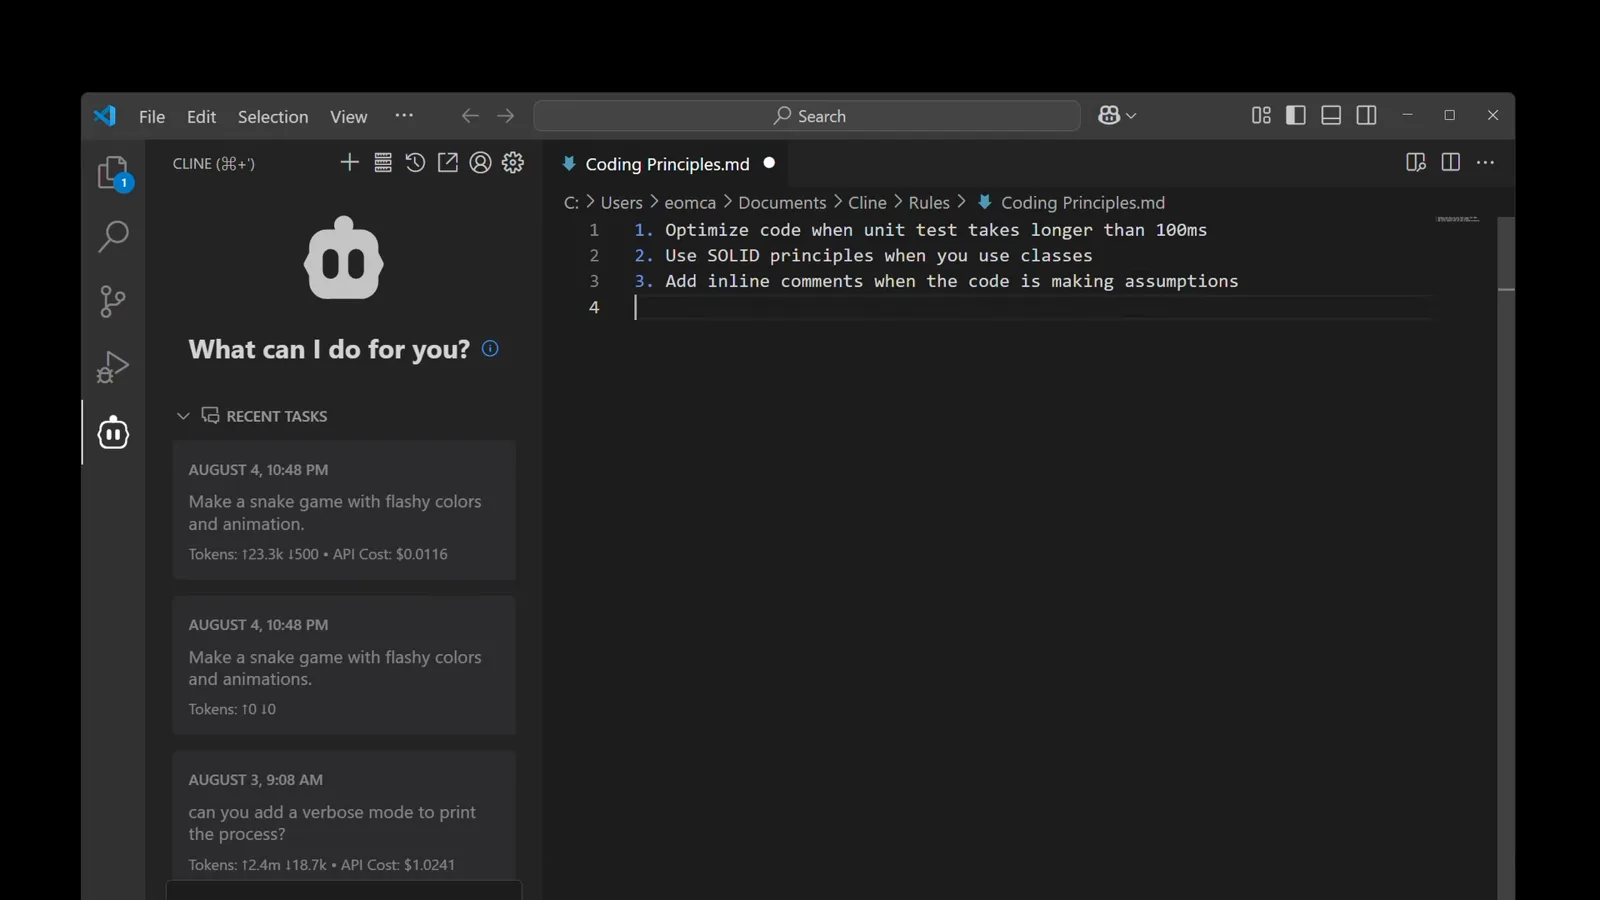
A rule file with three concrete, measurable rules Cline applies on every task.Watch at 1:45 - 15
Extend Cline with MCP servers
The MCP Marketplace icon in the panel opens one-click servers that plug new abilities into Cline: GitHub for repository operations, Context7 for up-to-date library documentation, Perplexity and Sequential Thinking for research and planning. Install a server, approve its tools, and Cline can call it mid-task — the third pillar of the ideal setup.
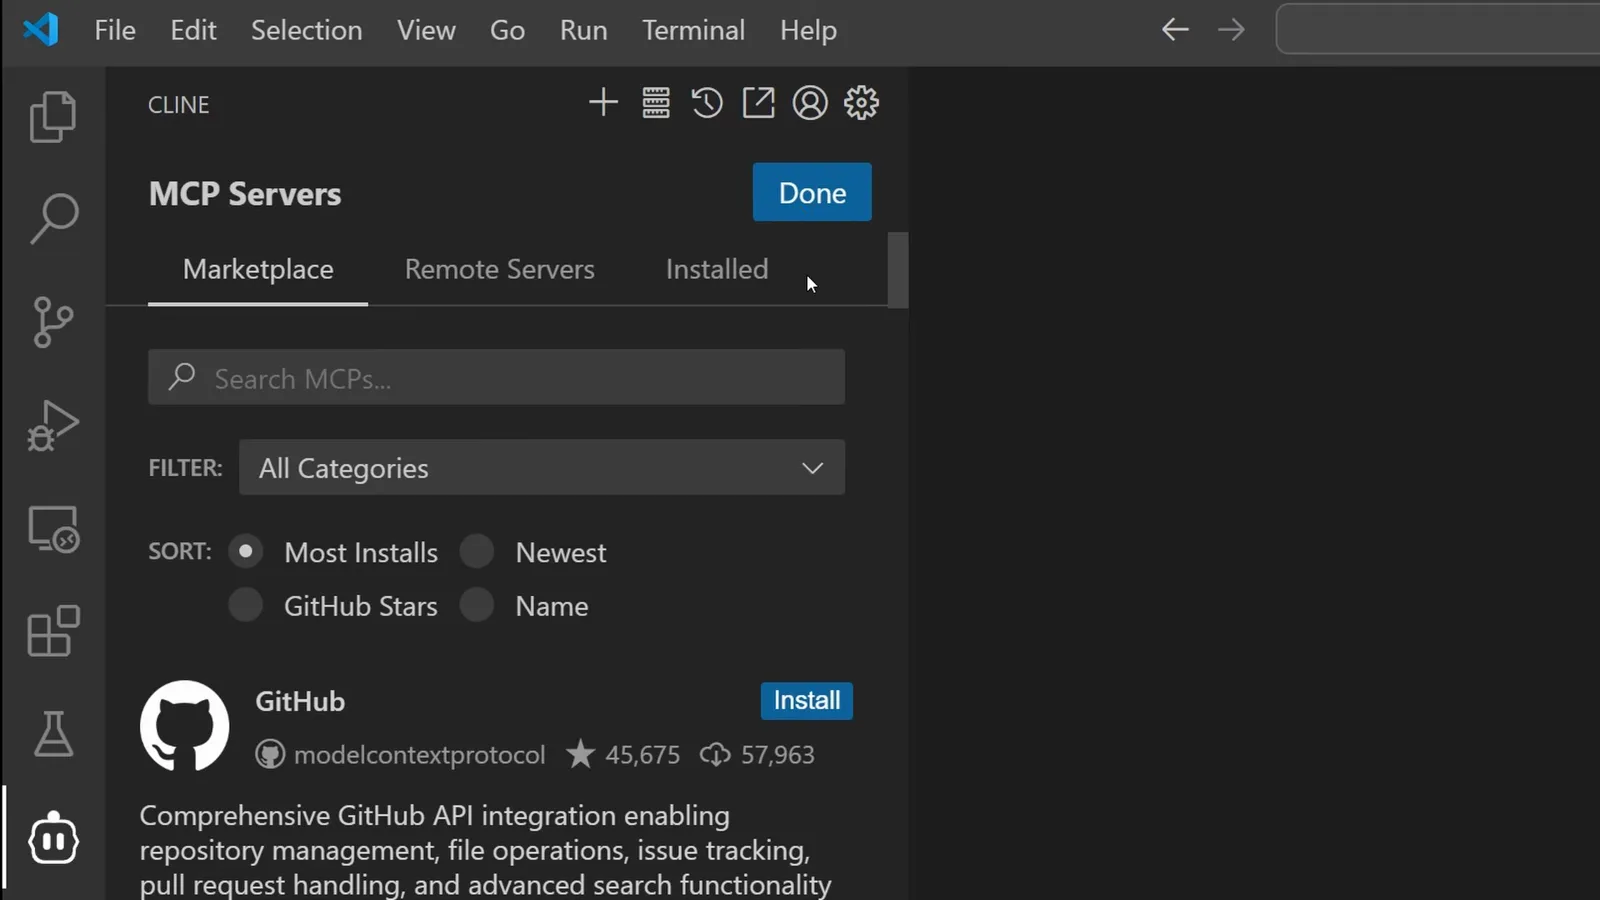
Cline's MCP Servers marketplace with the GitHub server card and Install button.Watch at 2:44