
Kilo Code Tutorial: Setup, Free Credits and Roo Migration
The AI coding agent that inherited the Roo Code community: install it in VS Code, claim $20 in bonus credits, connect DeepSeek with your own key, and migrate before your Roo setup goes dark.
TL;DR
- Roo Code announced its shutdown on April 21, 2026 and its VS Code extension went offline on May 15 — Kilo Code, Roo's own fork, is the official migration path for its 3 million installs.
- The extension is open source and free with your own API key (BYOK); new accounts get $20 in bonus credits on their first top-up, plus a 14-day enterprise trial with no credit card.
- DeepSeek connects directly: Settings → Providers → add your DeepSeek API key against https://api.deepseek.com and pick deepseek-flash or deepseek-v4-pro.
- Migrating is semi-automatic: rename Roo's config files, let the migration wizard convert them, write a minimal kilo.jsonc — and re-authenticate every API key, because keys do not transfer.
Just Signed Up? Your first 14 minutes with Kilo Code
Walkthrough video:Kilo (official)14:02
How to Migrate from Roo to Kilo
Migration video:Kilo (official)2:07
The onboarding walkthrough was recorded in June 2025 on the extension UI that predates the OpenCode-based rewrite (GA April 2, 2026) — menus have moved, but the flow is unchanged. The migration video shows the current UI.
Screenshots are frames from Kilo's official YouTube videos, used with attribution and linked back at each step. This guide's text is our own.
Kilo Code setup and migration, step by step
1 · Meet Kilo Code (and why Roo users are moving)
- 1
Know the backstory: Roo Code is shutting down
On April 21, 2026 the Roo Code team announced it was shutting the extension down to go all-in on Roomote; the VS Code extension went offline on May 15 and the GitHub repo became a read-only archive. Kilo Code — a fork of Roo — published the official farewell and became the landing spot for Roo's roughly 3 million installs.
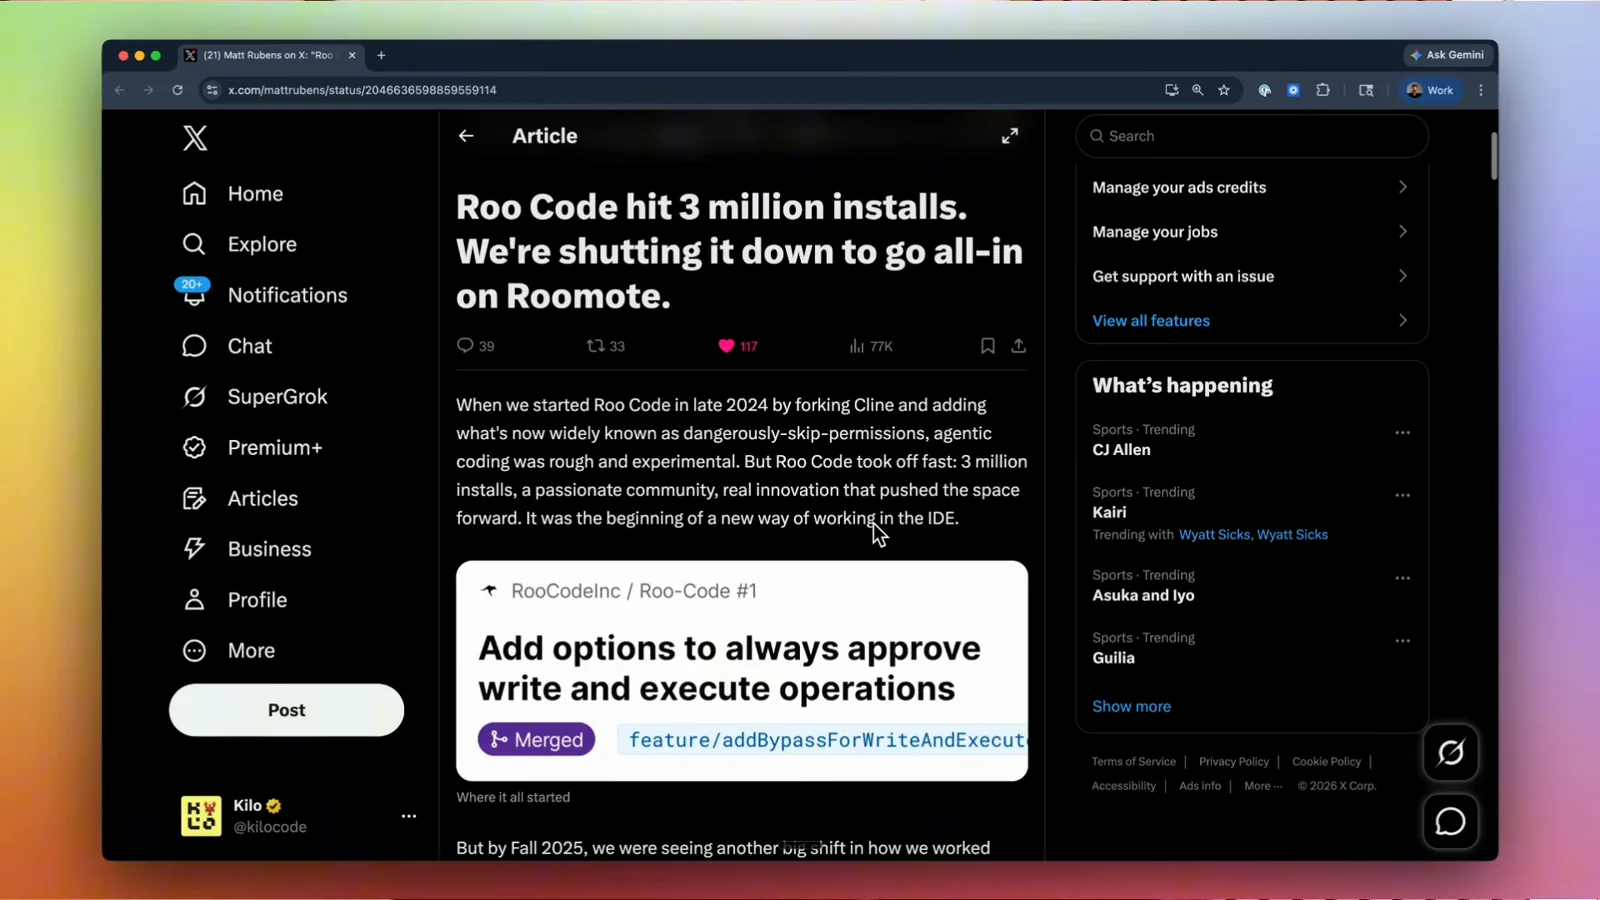
The shutdown announcement, with a Kilo maintainer already answering in the commentsWatch at 0:04 - 2
Meet the five interaction modes
Kilo Code ships five modes: Code writes and implements, Architect plans before touching code, Ask explains, Debug hunts down errors, and Orchestrator splits a huge task into subtasks. You can also define custom modes of your own — Roo's custom modes map onto these during migration.
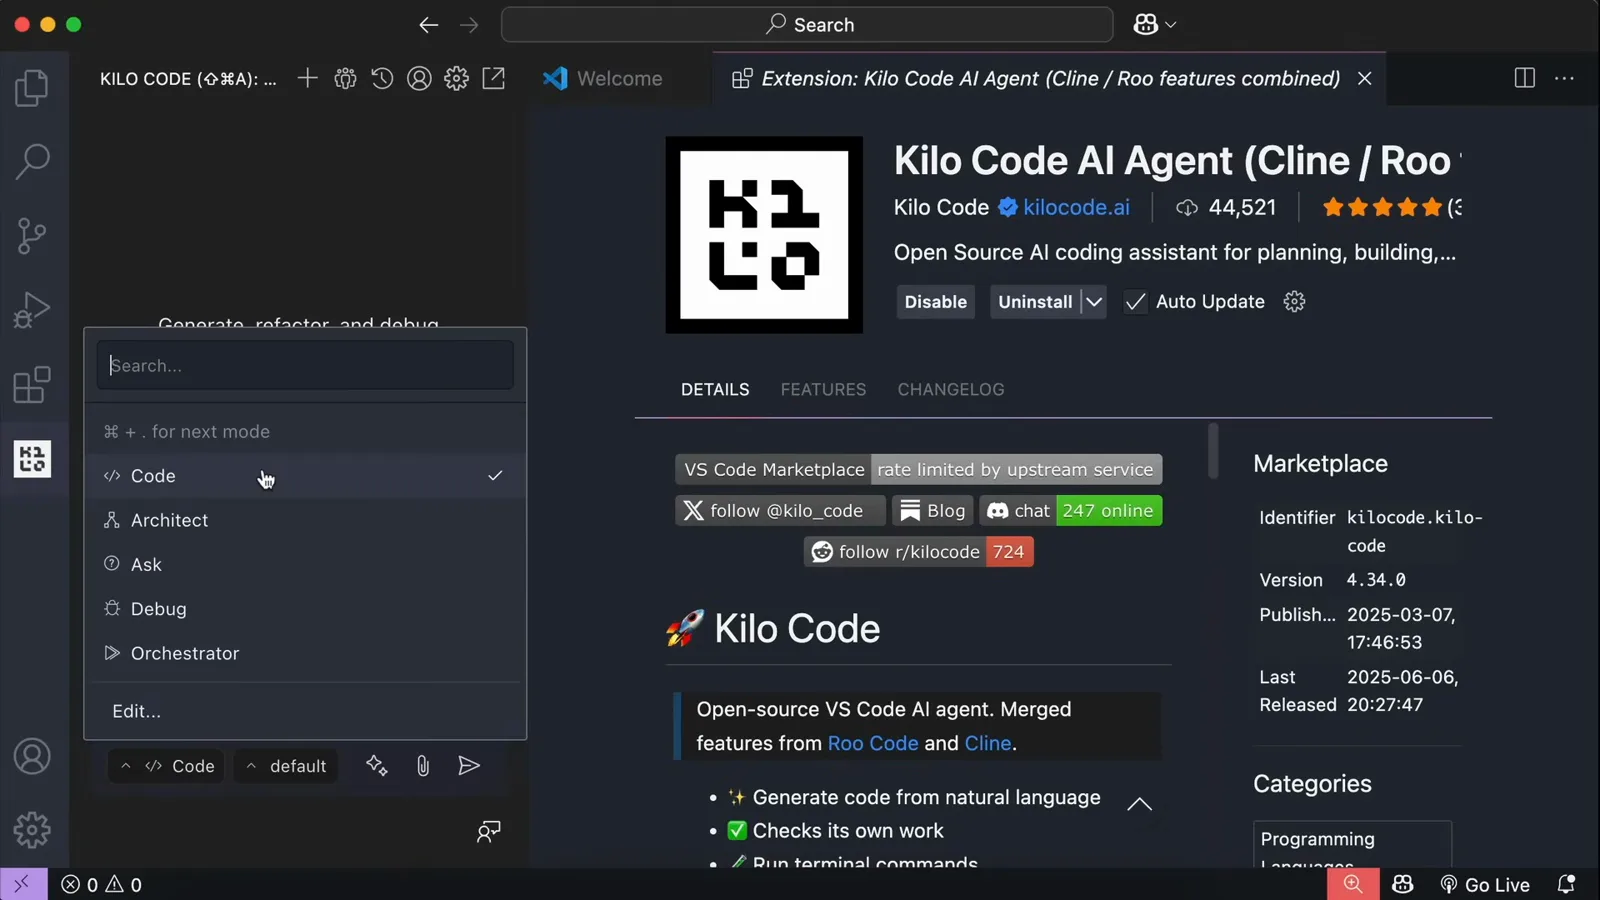
The mode picker sits right above the prompt box in the Kilo Code panelWatch at 0:22 - 3
See what one prompt produces
In the official onboarding walkthrough, a single detailed prompt — app purpose, data shape, sort and search behaviour, UI design — produced a working Note Organizer as a single HTML file, which Kilo then opened in the browser. The whole generation cost about 3 cents of API credit.
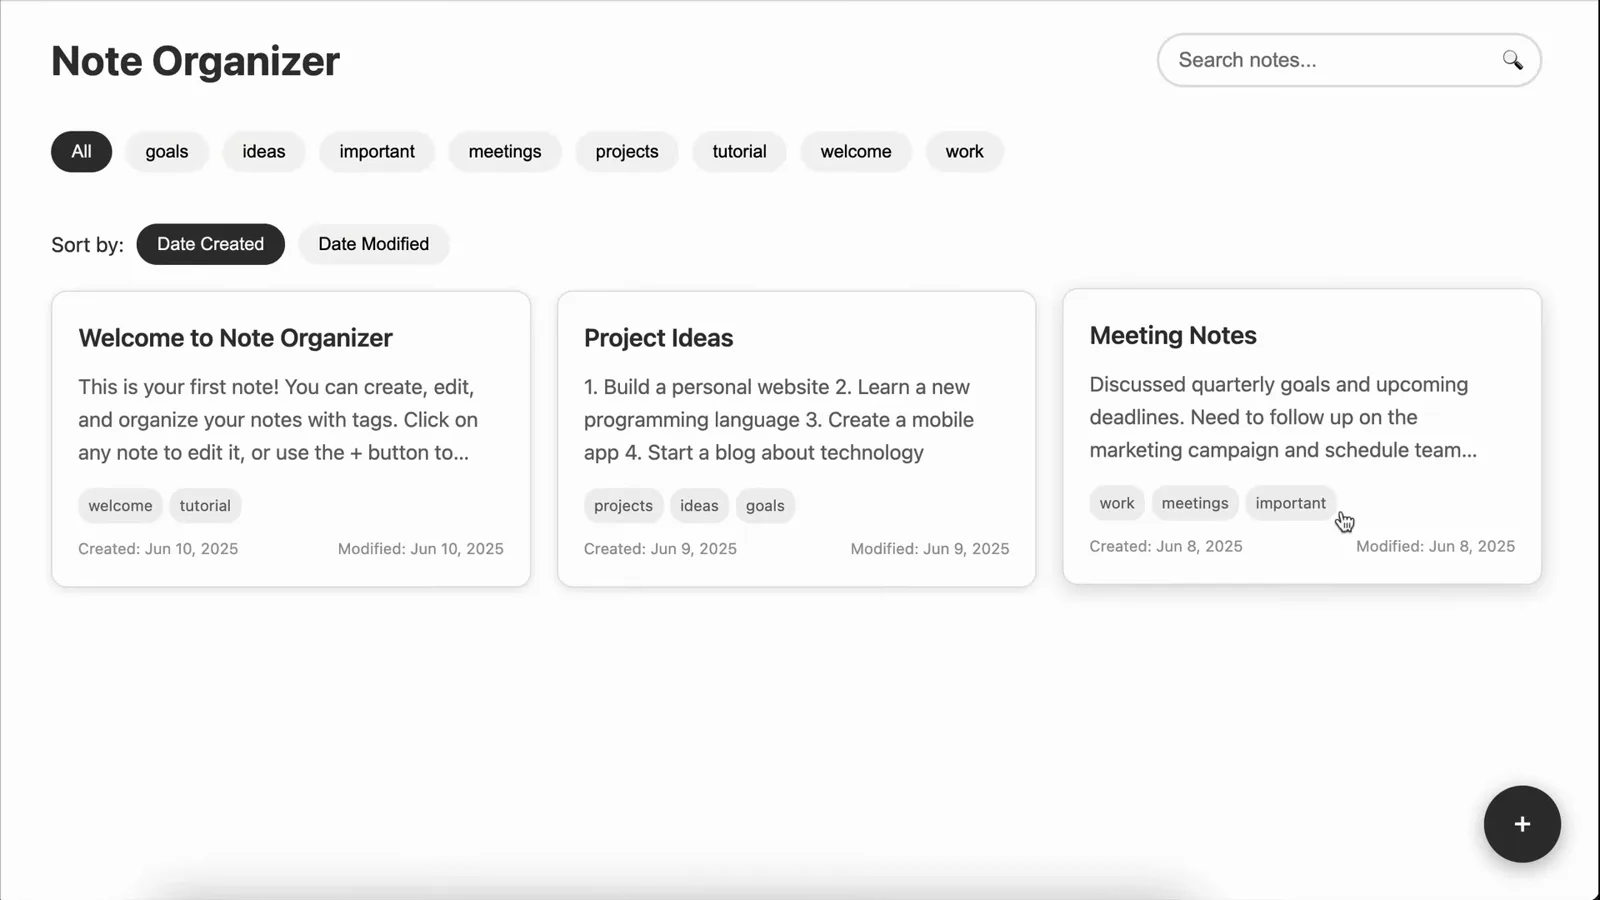
The finished Note Organizer: cards, tags, search and sorting, built from one promptWatch at 5:06 - 4
Let Architect mode ask the questions
When you don't know what to specify, Architect mode interviews you: for a chess game it asked about rule depth, single- versus two-player, and AI strength, offering clickable answer options. The finished plan — including an architecture diagram — is written to a markdown file before Code mode builds it.
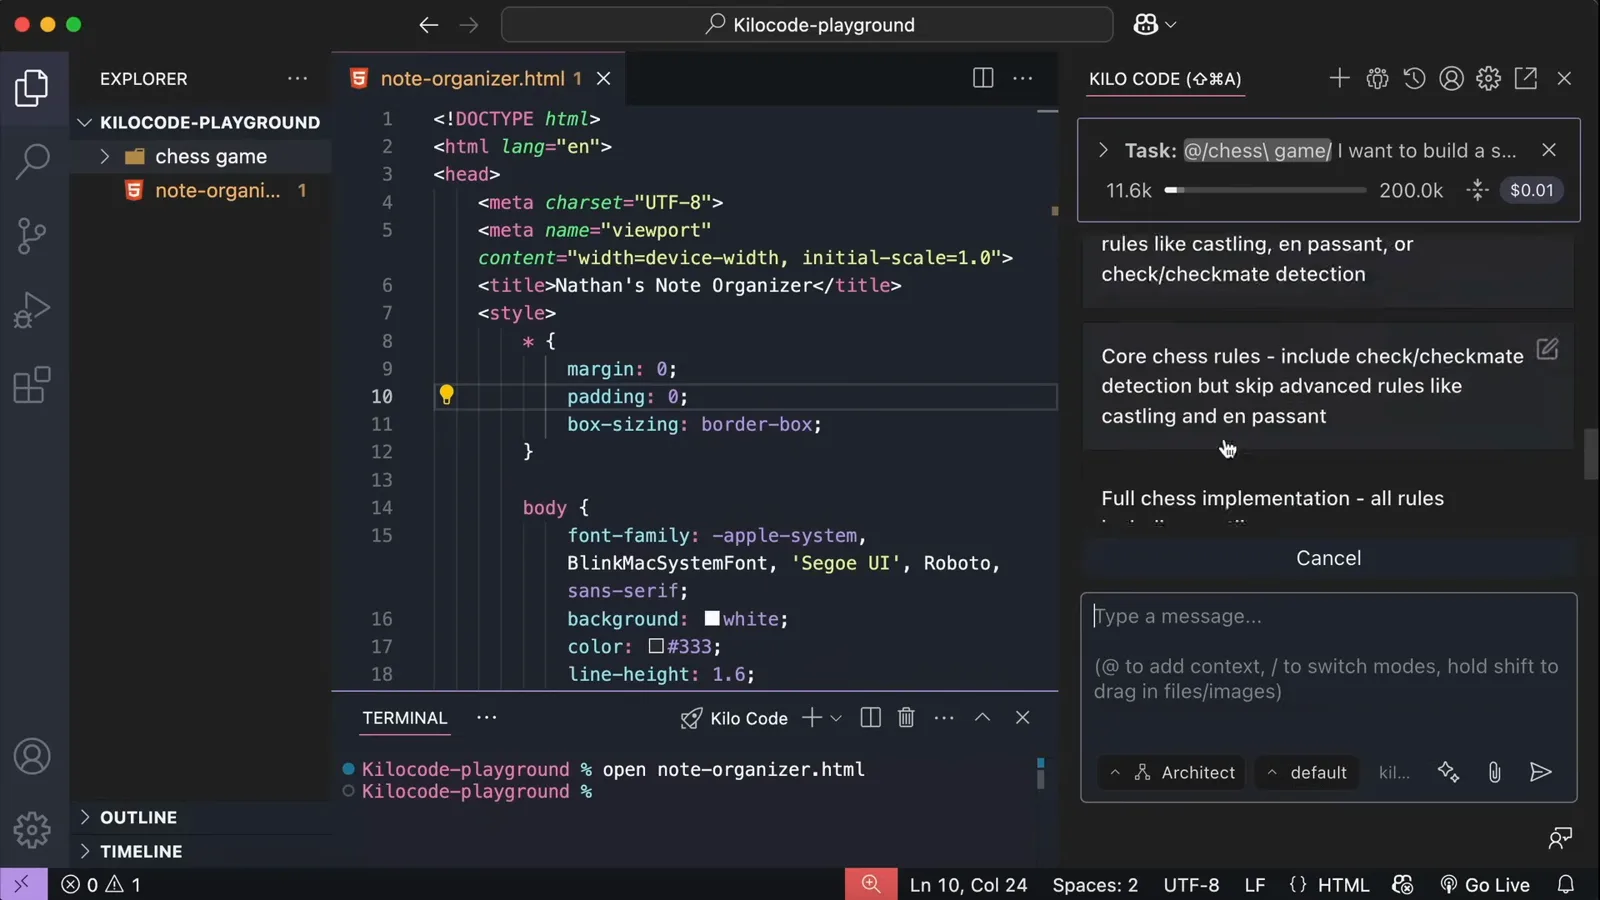
Architect mode turns vague ideas into concrete, answerable choicesWatch at 8:12
2 · Install the extension and claim $20 credits
- 5
Install the Kilo Code extension
In VS Code, search the marketplace for "Kilo Code" or run the CLI command shown here: code --install-extension kilocode.Kilo-Code. The extension is open source and ships for VS Code, JetBrains and a standalone CLI.
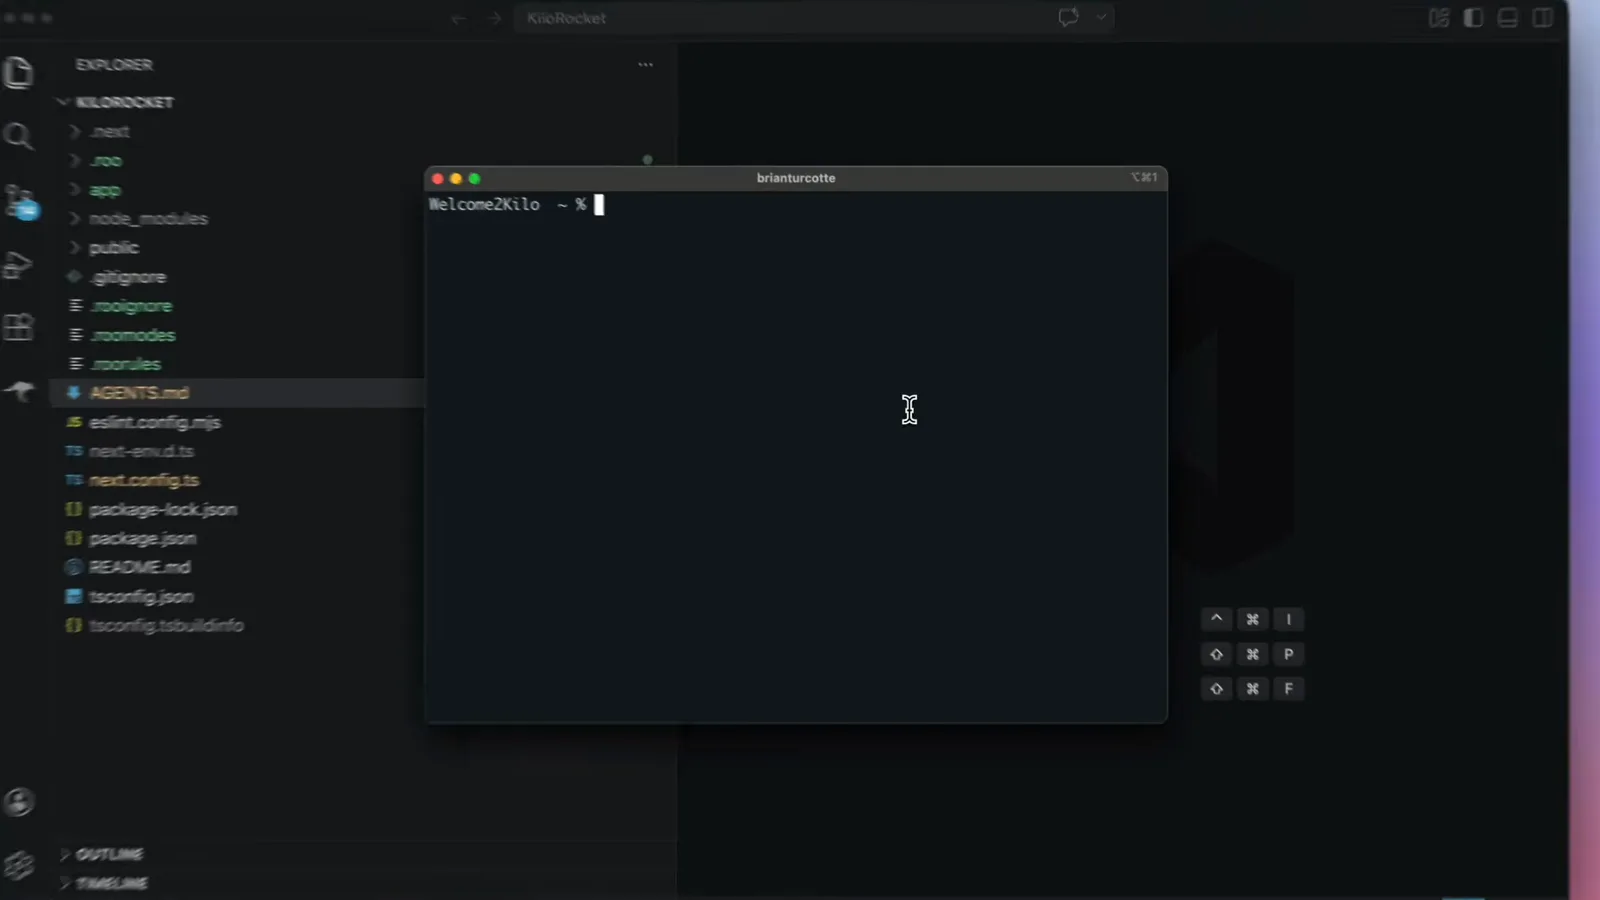
The one-line terminal install from the official migration videoWatch at 0:10 - 6
Claim your sign-up credits
Right after signing up you get a hosted Kilo Code API profile preloaded with free credits — the onboarding recording below shows a "$20 for free" notice, and kilo.ai/pricing still lists $20 in bonus credits on your first top-up plus a 14-day enterprise trial with no credit card. BYOK stays free forever.
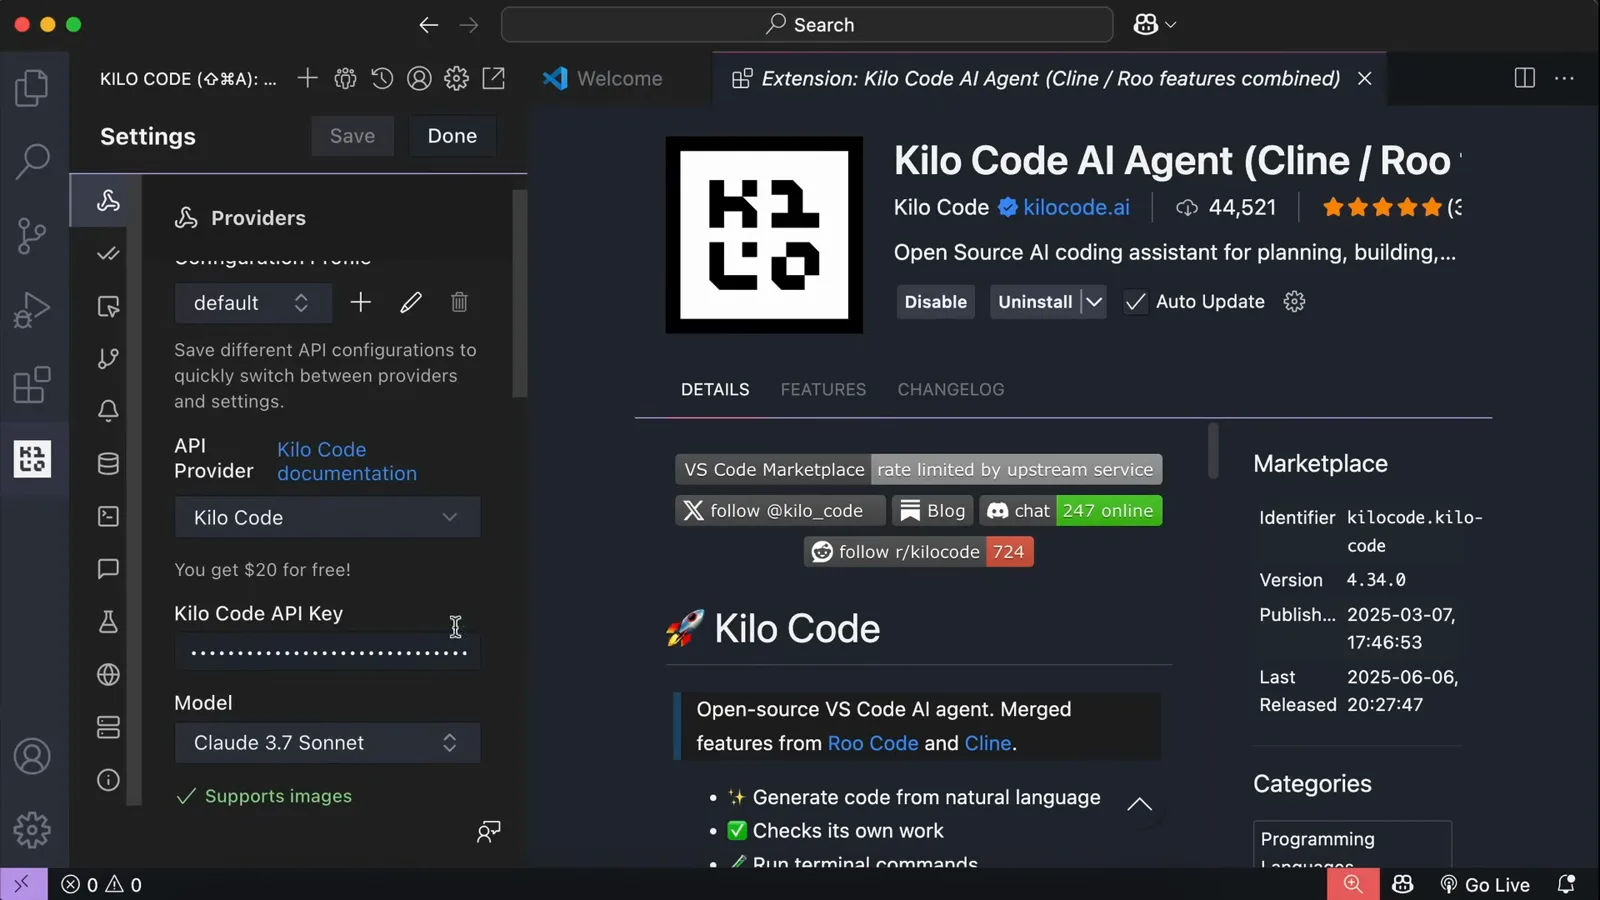
Settings → Providers: the default Kilo Code profile with its $20 sign-up creditWatch at 1:18
3 · Connect DeepSeek with your own key
- 7
Add a provider profile for your own key
Open Settings → Providers and click + to create a New Configuration Profile. Give it a name — "DeepSeek" or "OpenRouter" — and you'll have a second profile you can switch to from the main panel without touching the built-in one.
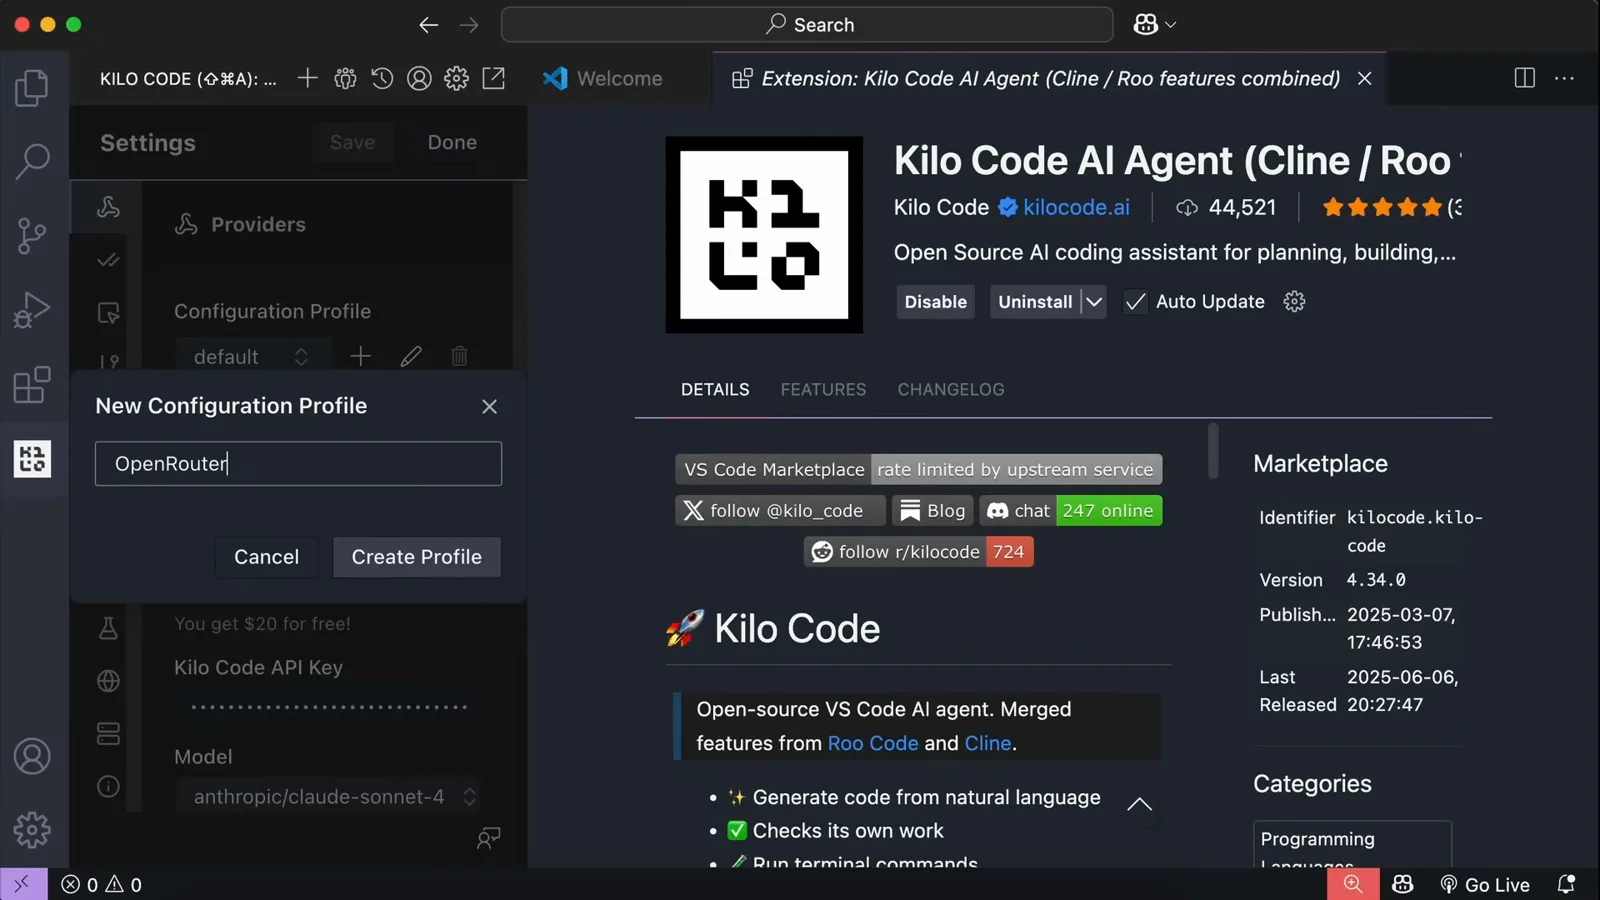
Creating a second configuration profile named OpenRouterWatch at 1:46 - 8
Paste your API key and pick a model
Choose the provider type, paste its API key and select a model. For DeepSeek direct, follow kilo.ai/docs/ai-providers/deepseek: set the base URL to https://api.deepseek.com and pick deepseek-flash for everyday coding or deepseek-v4-pro for heavy reasoning. Keys are stored securely in VS Code's SecretStorage.
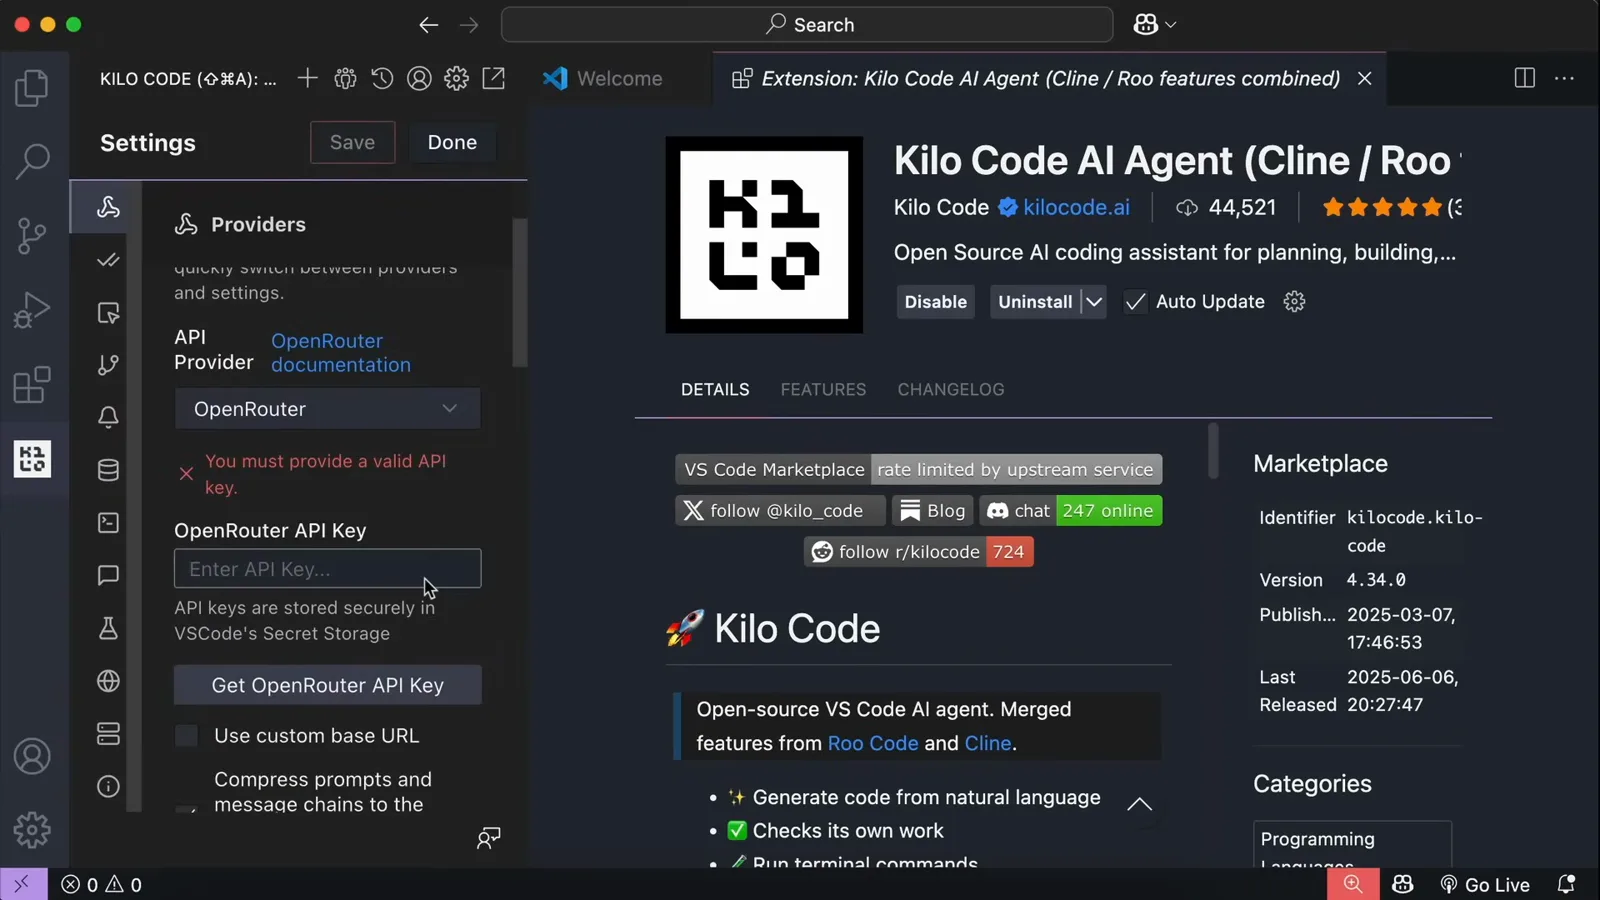
Provider type, API key and model — the same three fields DeepSeek's official Kilo guide fills inWatch at 1:52
4 · Migrate from Roo Code
- 9
Rename Roo's workspace files (per repo)
The migration wizard does not read Roo-prefixed files, so port them first with the commands from Kilo's migration guide: .roorules → AGENTS.md, .roo/rules/* → .kilo/rules/, .roomodes → .kilocodemodes, .roo/mcp.json → .kilocode/mcp.json, .rooignore → .kilocodeignore. Back up Roo's globalStorage folder before you start.
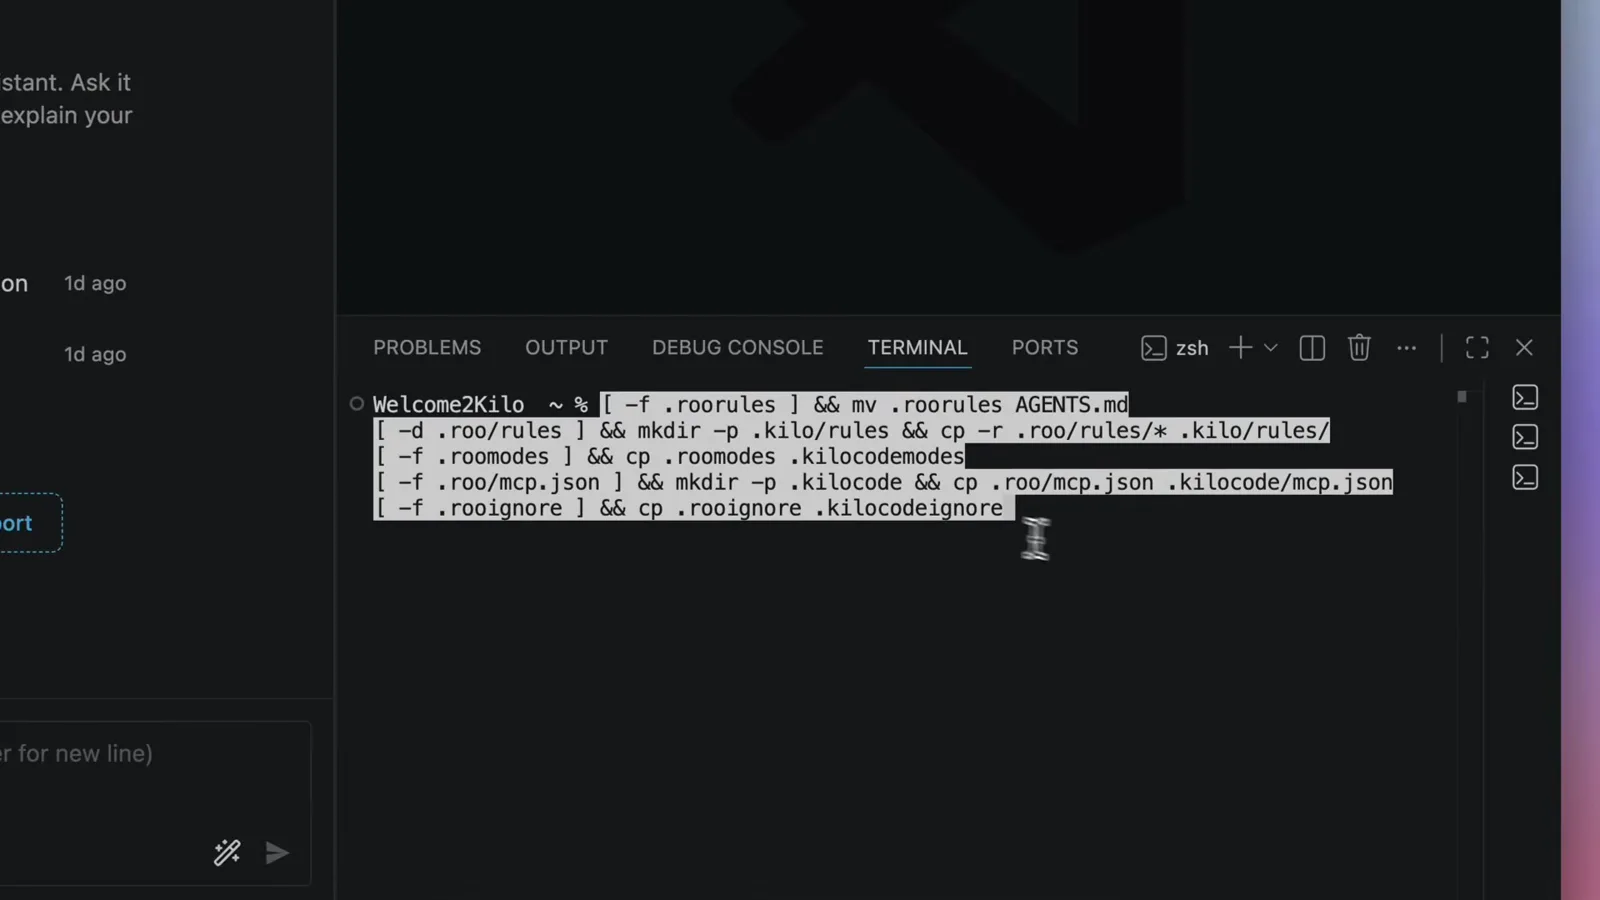
The official porting script: five copy and rename commands per repositoryWatch at 0:34 - 10
Write a minimal kilo.jsonc
kilo.jsonc replaces Roo's tool groups with explicit permissions — everything is allow, ask or deny, with optional path patterns. Copy the minimal example from the migration guide, set your model, and list your rules files under instructions.
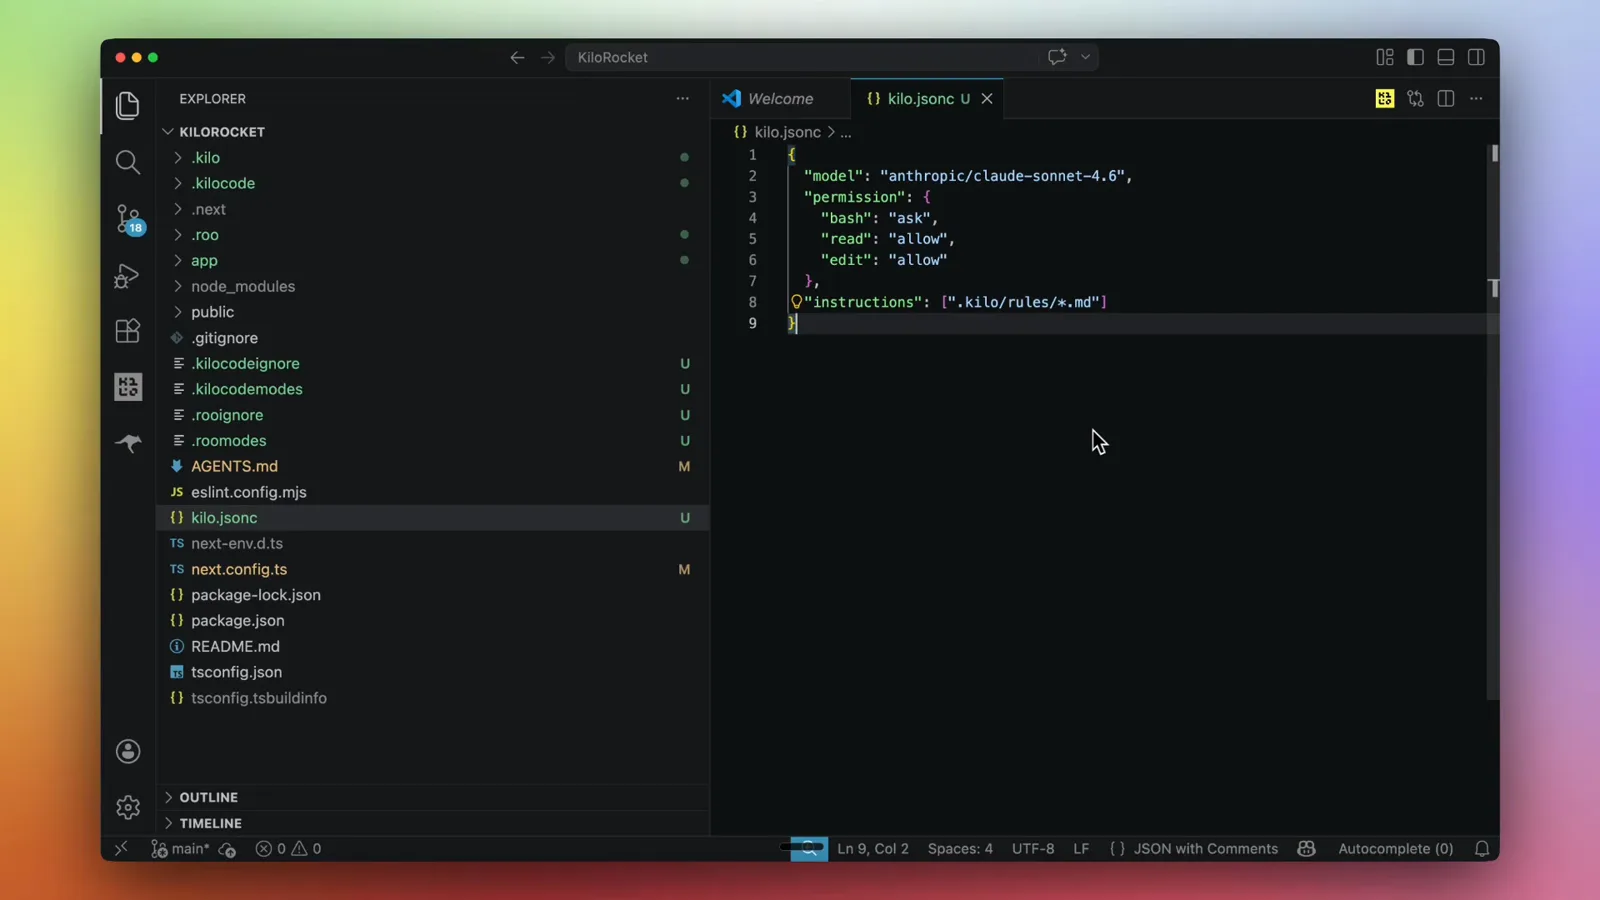
kilo.jsonc: model choice plus read, edit and bash permissions per actionWatch at 1:10 - 11
Validate with kilo config check
Run kilo config check in the terminal to confirm the migrated config parses and every referenced file exists. On first launch, the extension's migration wizard also converts legacy files automatically — .kilocodemodes become proper agent markdown files, and .kilo/rules are preserved as a fallback.
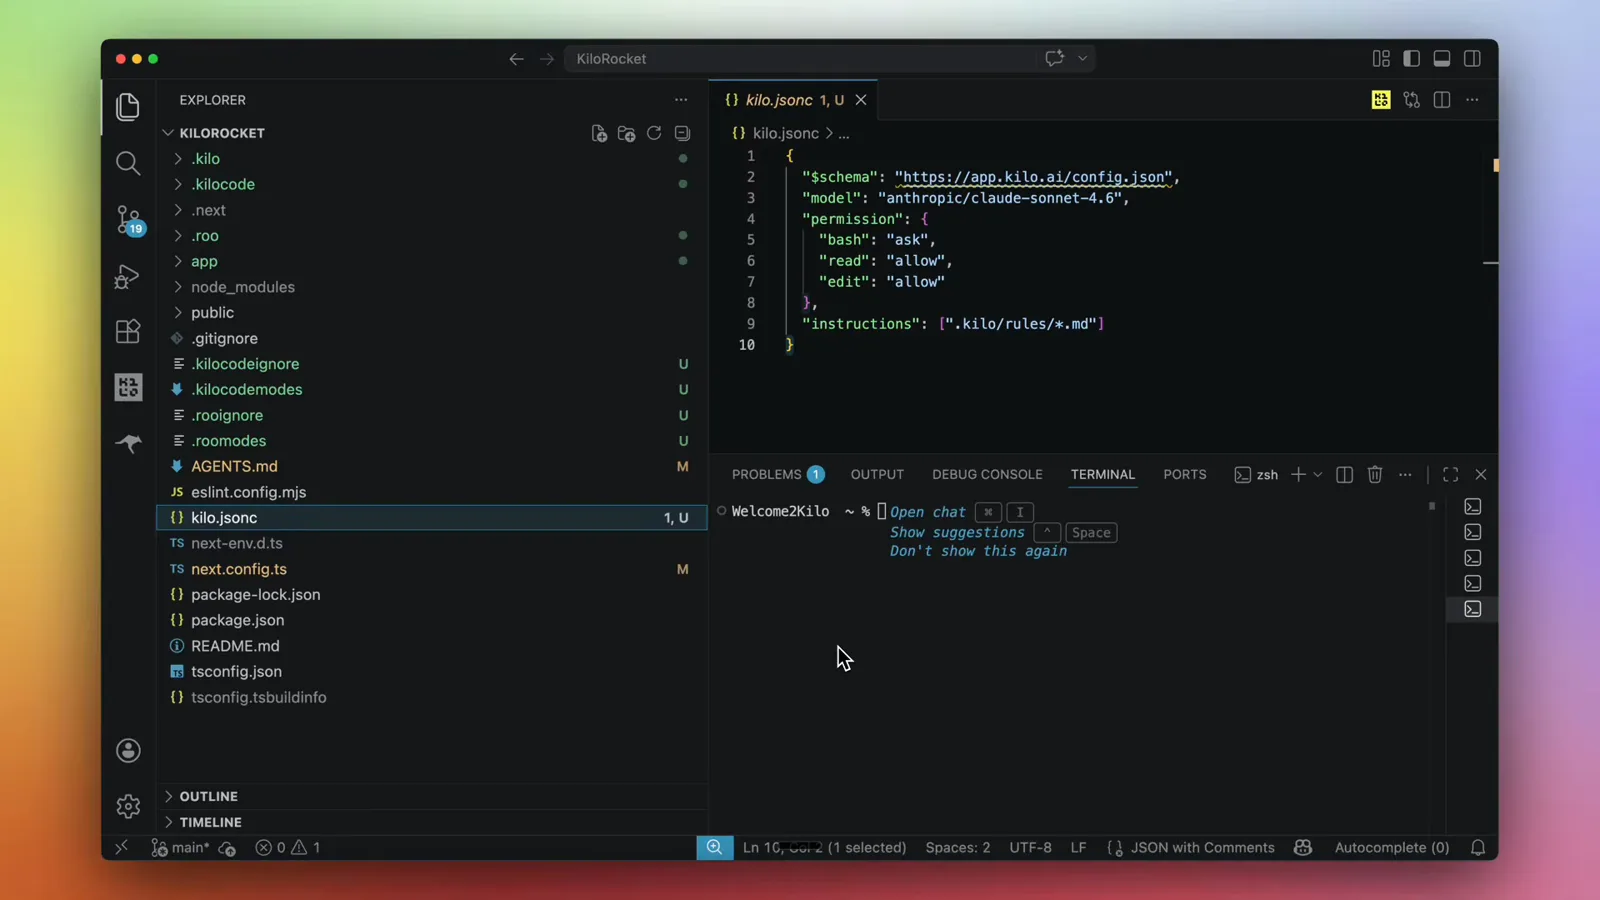
One command confirms the migrated configuration is validWatch at 1:15 - 12
Verify, then disable Roo (don't uninstall)
Open a repo, pick the Code agent, and ask it to list the custom agents and rules it loaded — the answer should name your migrated agents, rules, model and permissions. When everything checks out, disable Roo in the extensions panel and keep it for about a week as a fallback before removing it.
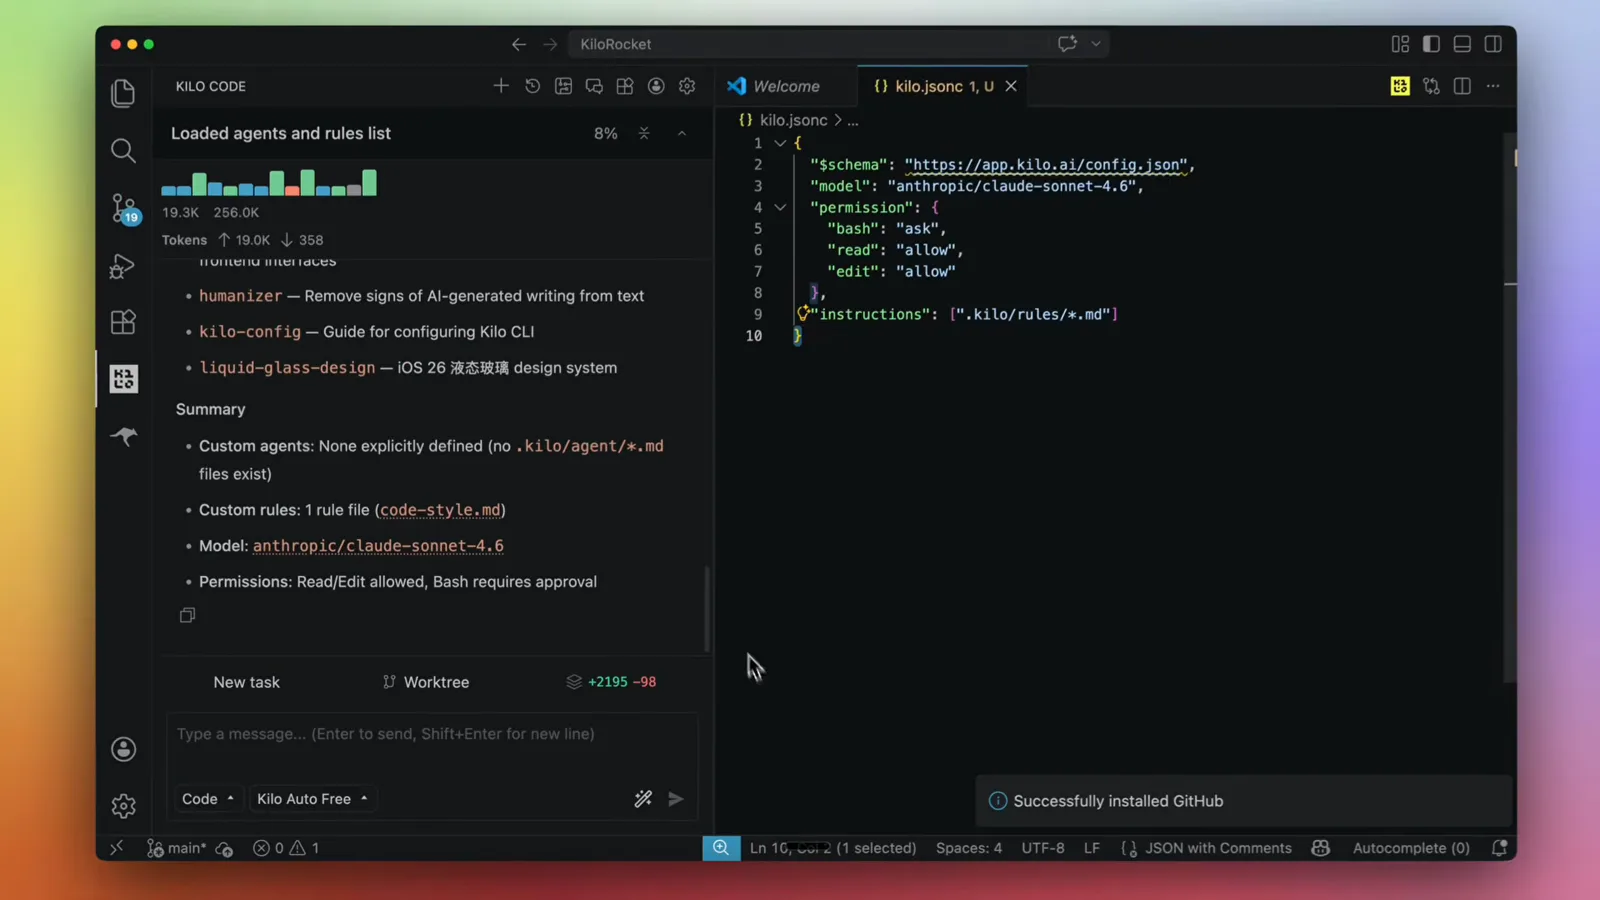
The verification answer lists every agent, rule, model and permission Kilo loadedWatch at 1:36
Kilo Code vs Roo Code at a glance
| Dimension | Kilo Code | Roo Code |
|---|---|---|
| Status | Active — the official migration path for Roo users | Shutdown announced April 21, 2026; extension offline since May 15, 2026 |
| Lineage | Fork of Roo Code (which itself forked Cline), continued by an independent company | Fork of Cline; the original team moved on to Roomote |
| Current extension | Rebuilt on the OpenCode server — GA April 2, 2026 — plus JetBrains, CLI and cloud companions | Legacy v5.x line frozen at the shutdown; GitHub repo archived read-only |
| Migration path | Rename-and-wizard flow, kilo.jsonc permissions, provider re-authentication required | None — workspace files stay in .roo paths; billing questions go to billing@roocode.com |