
一句话总结:Cursor Projects 是什么
- 一个 Project 对应一件较大的活——一个功能、一次迁移、一整个应用——你通过跟协调 Agent(coordinator agent)对话来推进它。协调 Agent 只做规划和分派,不亲自写代码,写代码的是它并行拉起来的多个子 Agent。
- Project 位于 Agents 窗口左侧边栏的 Projects 分区,跑在 Cloud Agents 上,所以合上笔记本活也不会停。企业版套餐和 Privacy Mode(Legacy)用不了这个功能。
- 想建 Project,前提是你得先有一个真正的项目:在启动页点 Open project,落到磁盘上的一个文件夹,再 Connect GitHub 让 Workspace 下拉框能列出仓库,最后选协调 Agent 用的模型。
- 真正的价值在订阅(subscription):让协调 Agent 盯住某个 Slack 频道、跟紧你的 Pull Request,或者按定时任务跑。只要建了至少一条,输入框上方就会出现 Listening 标签,列出项目正在监听的所有事件。
How to Create My First Project in Cursor AI (2026)
视频演示:The Code City5:04
Cursor Docs — Projects
产品事实:cursor.comDocs
第 1-11 步的截图来自 The Code City 的录屏;第 12-15 步来自 Emma's Productivity Lab 演示 Cursor Agents 窗口的录屏。Project、协调 Agent、订阅和共享上下文的具体行为,全部对照 Cursor 官方文档与 Cursor Projects 发布公告。
截图均已标注来源视频,每一步都能跳到对应的视频时间点。本文文字为原创撰写,不是字幕搬运。
Cursor Projects 分步操作
1 · 先把项目文件夹建起来
- 1
从 Open project 进入,别直接开新对话
打开 Cursor,启动页给的是三个按钮:Open project、Clone repo、Connect via SSH,下面还有一列带路径的 Recent projects。在 Cursor 里,一个项目本质上仍是磁盘上的一个文件夹,Agent、计划、云端任务全都挂在它上面。哪怕你手上什么都没有,也先点 Open project。
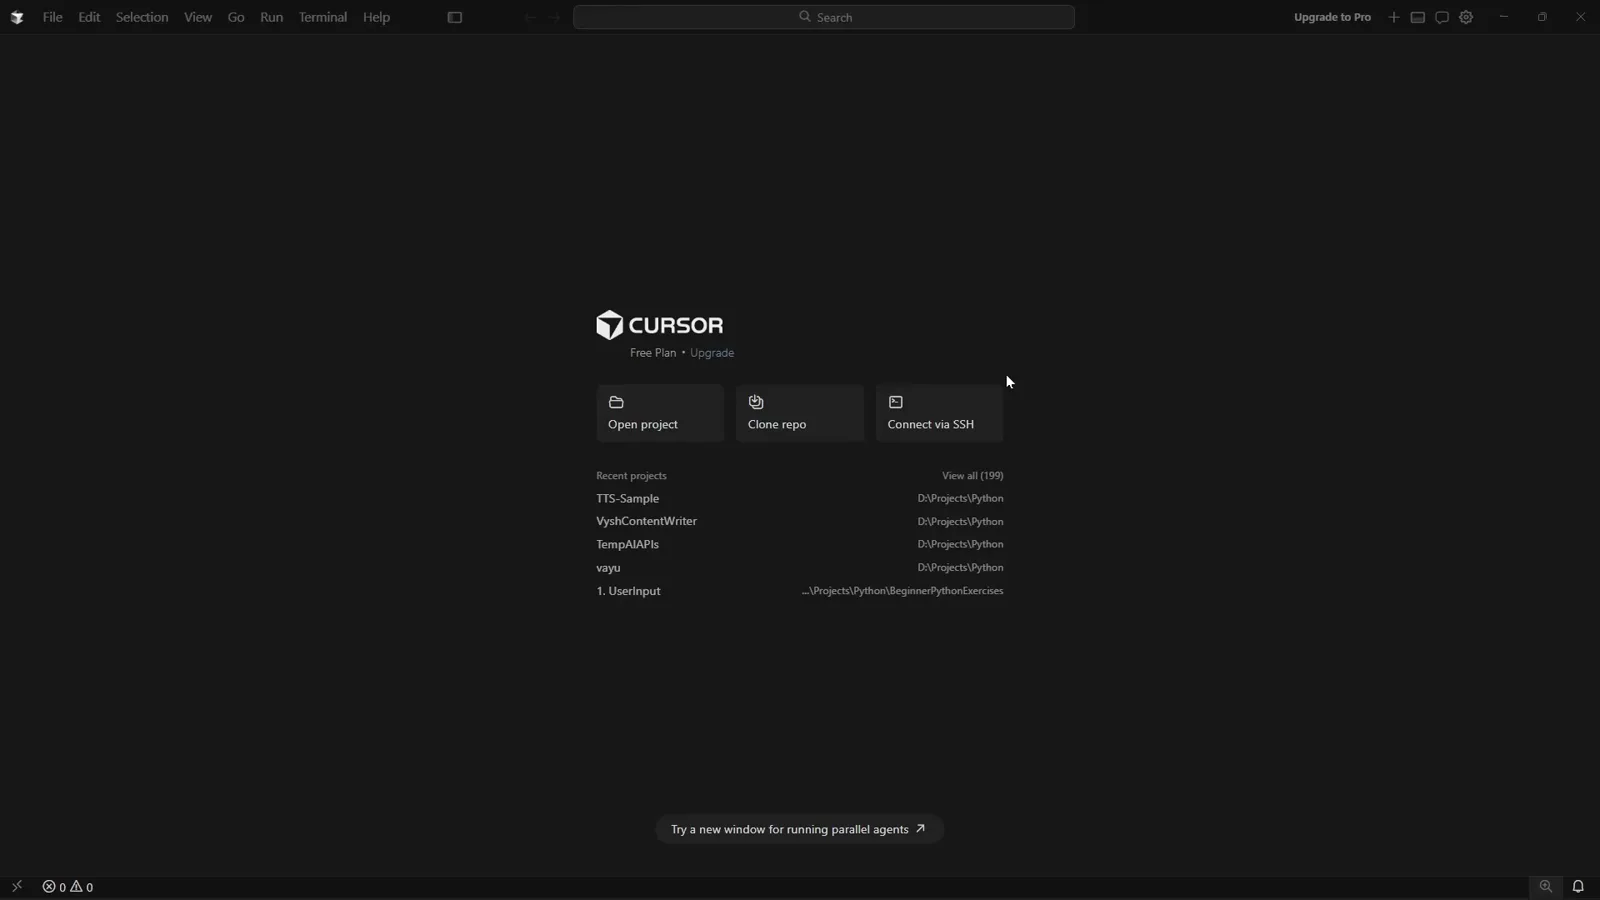
Cursor 启动页:Open project、Clone repo、Connect via SSH,以及最近项目列表。看 0:06 处的演示 - 2
新建一个空文件夹并选中它
启动页上会浮出 Windows 的 Open Folder 对话框。点工具栏里的 New folder,给目录起个名字(视频里用的是 MyWebApp),再点 Select Folder。不要提前建文件,也不要装依赖——空文件夹才是正确的起点,因为第一个文件应该由 Agent 来写。
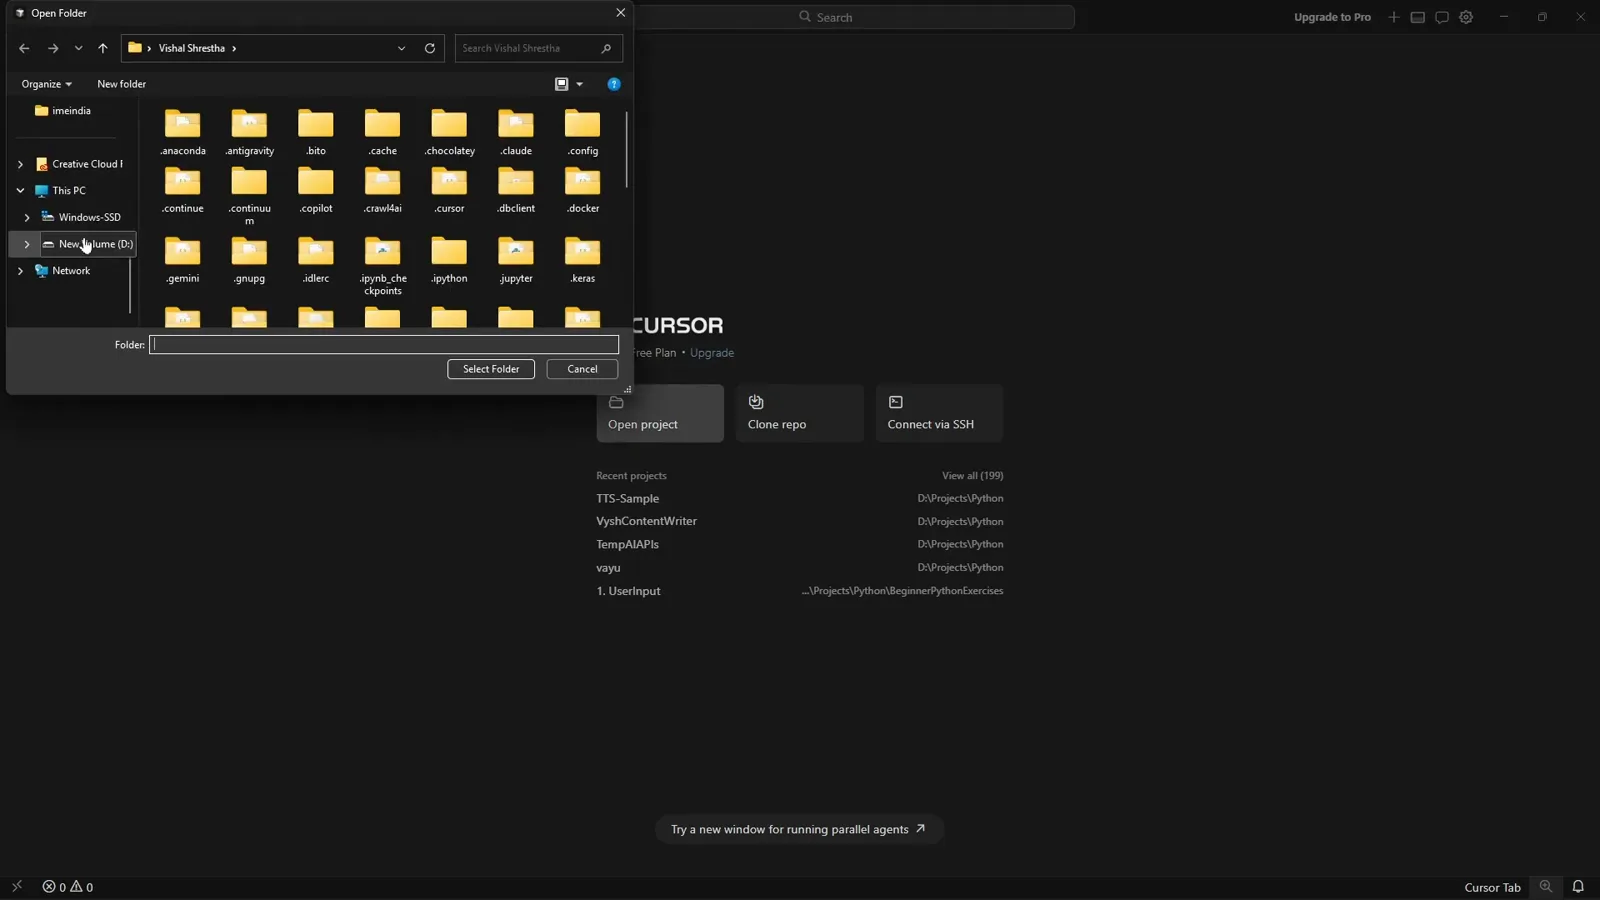
直接在 Cursor 的 Open Folder 对话框里建出项目文件夹。看 0:18 处的演示 - 3
顺手记住空白编辑器上的快捷键
什么都没打开时,Cursor 会在编辑器正中间印一份快捷键清单:New Agent 是 Ctrl+Shift+L,Show Terminal 是 Ctrl+J,Search Files 是 Ctrl+P,Open Browser 是 Ctrl+Shift+B,Maximize Chat 是 Ctrl+Alt+E,Add Folder 是 Ctrl+Alt+A。右侧停靠着 New Agent 面板,输入框提示语是「Plan, Build, / for commands, @ for context」,下面还有一个模式切换按钮。
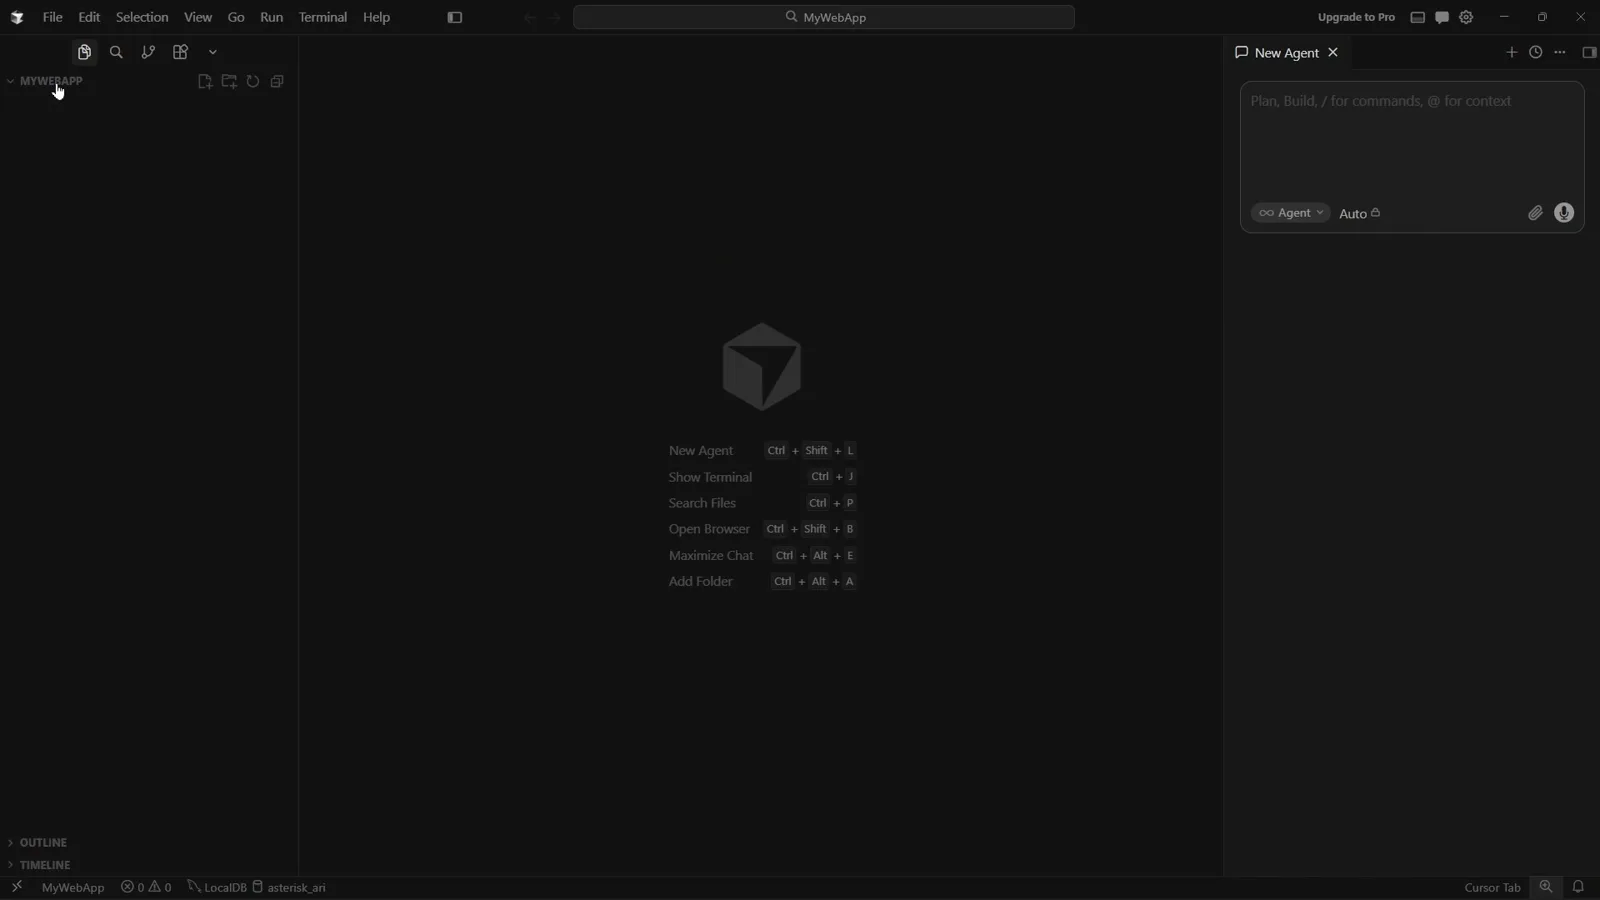
空白工作区,右侧是 New Agent 面板,中间是 Cursor 自带的快捷键提示。看 0:42 处的演示 - 4
用一句大白话把需求说清楚
输入要做的东西,而不是怎么做:"Create a ToDo web app with reminders."(做一个带提醒的待办网页应用)。你打字时,输入框下方会出现 Try Plan Mode Shift+Tab 的提示。第一轮可以先留在 Ask 模式,只要回答、不要改文件——需求说得越含糊,Agent 就越会替你猜技术栈,新手项目往往就翻车在这里。
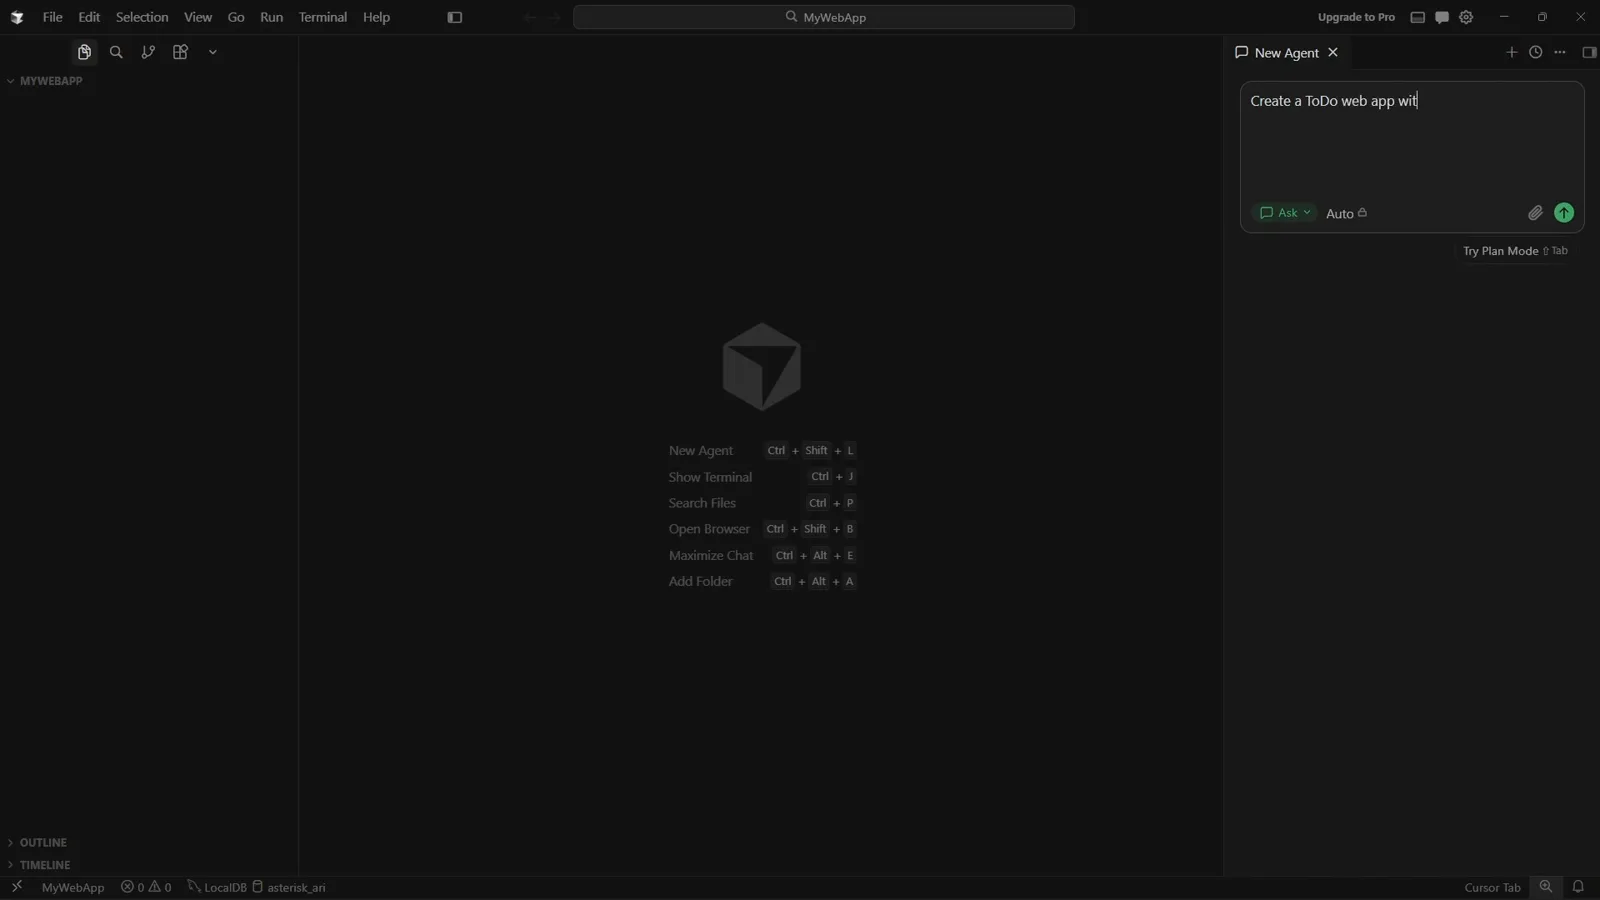
在 New Agent 里敲下第一句提示词,此时仍是 Ask 模式。看 1:36 处的演示
2 · 动手之前先出计划
- 5
先读它给出的架构,再决定点不点继续
Agent 会先回一份数据模型(`type Todo` 里有 id、title、notes、dueAt、remindAt、completed、createdAt),说明用 localStorage 存储、键名带版本号如 todos:v1,再画一张纯前端的提醒流程图:scheduleReminder → 判断是否在未来 → setTimeout 到 remindAt → 调用 Notification API。它还会主动交代限制:标签页一关 setTimeout 就没了,后台标签页的定时器会被节流,每条待办要写入 reminded: true 才不会重复弹提醒。
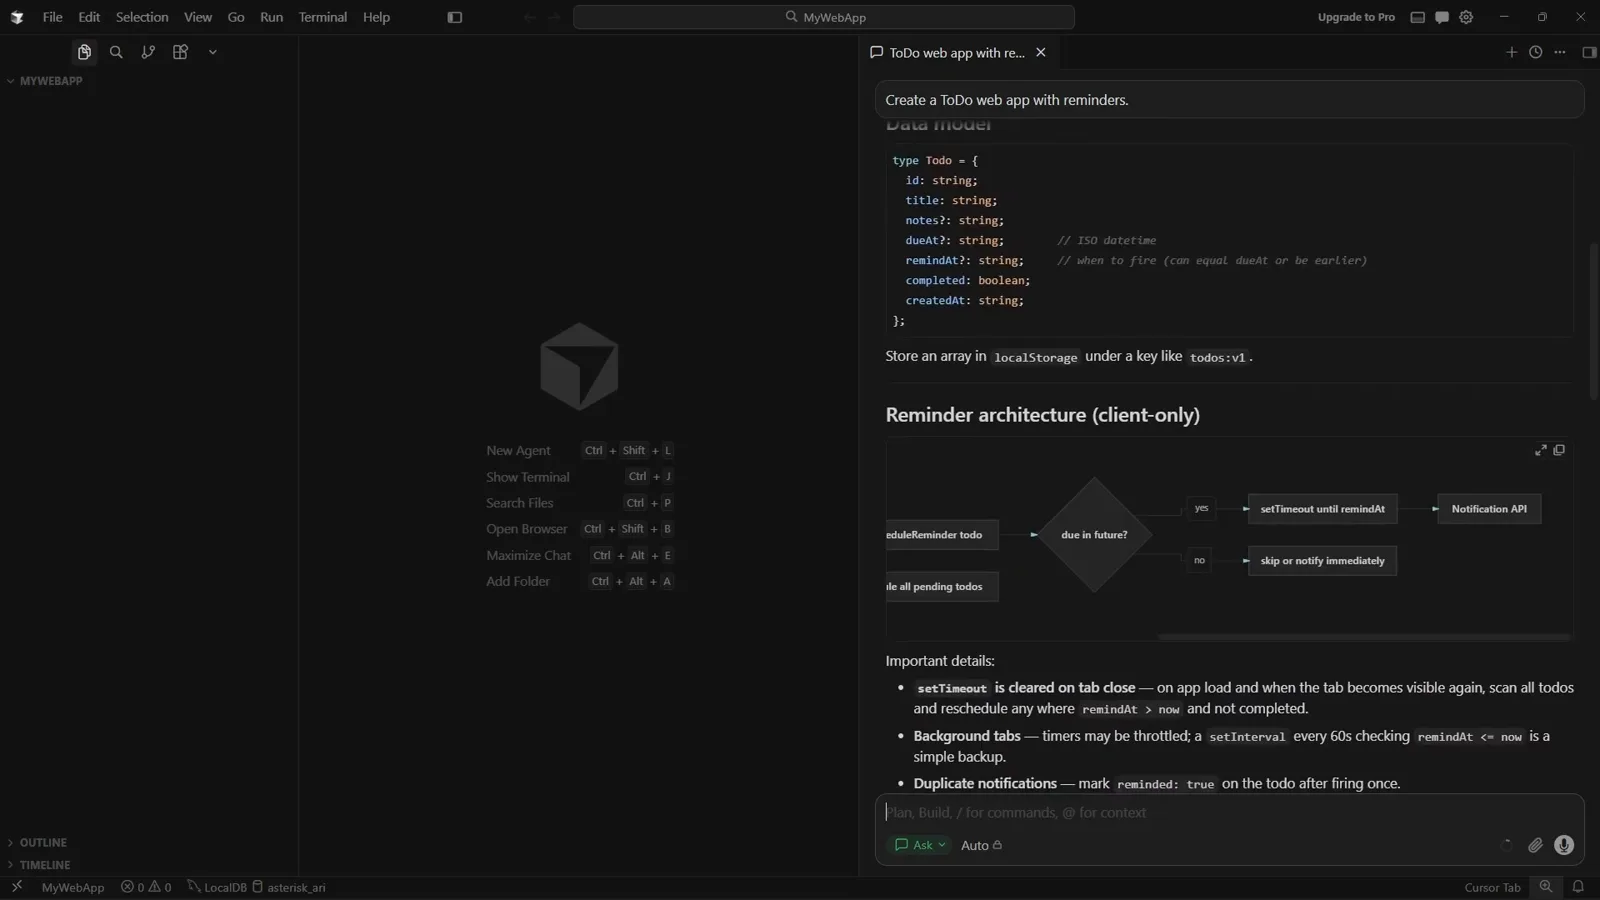
它给出的数据模型和提醒流程图,连坑都一并写明了。看 2:06 处的演示 - 6
切到 Plan 模式,让它先给方案
按 Shift+Tab(或用模式下拉框)把面板从 Ask 切到 Plan,然后发一句 "Provide plan for this"。Agent 会汇报自己做了什么——Thought for 1s、Checking the workspace then drafting a plan for the quick-demo frontend、Explored 1 search——随后停在一张 Questions 卡片上:"Which frontend setup do you want for the quick demo?",选项是 A Single index.html(免构建,直接打开)、B Vite + React + TypeScript、C Other。
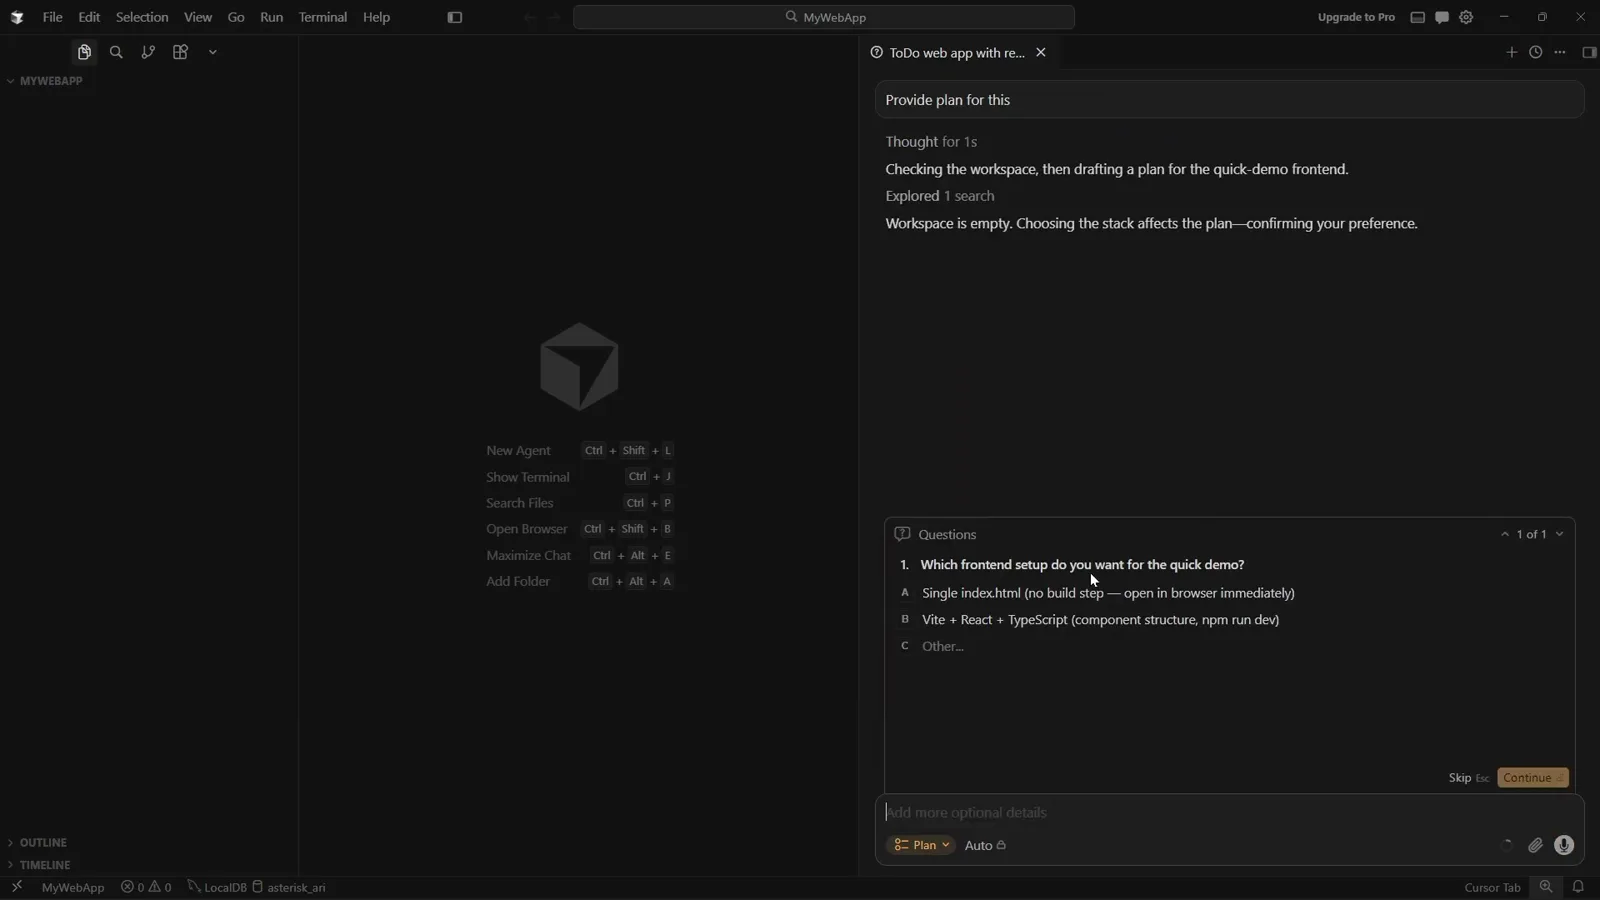
Plan 模式跑了一次工作区搜索,然后回了一道选择题。看 2:54 处的演示 - 7
回答范围问题,把任务收窄
选 A,按 Continue。你的回答会作为一个带 Answer 标签的块回到对话里,Agent 随即开始 Creating a plan for the single-file quick demo。收窄范围是关键技巧:你回答的问题越具体,回来的计划就越快也越准。
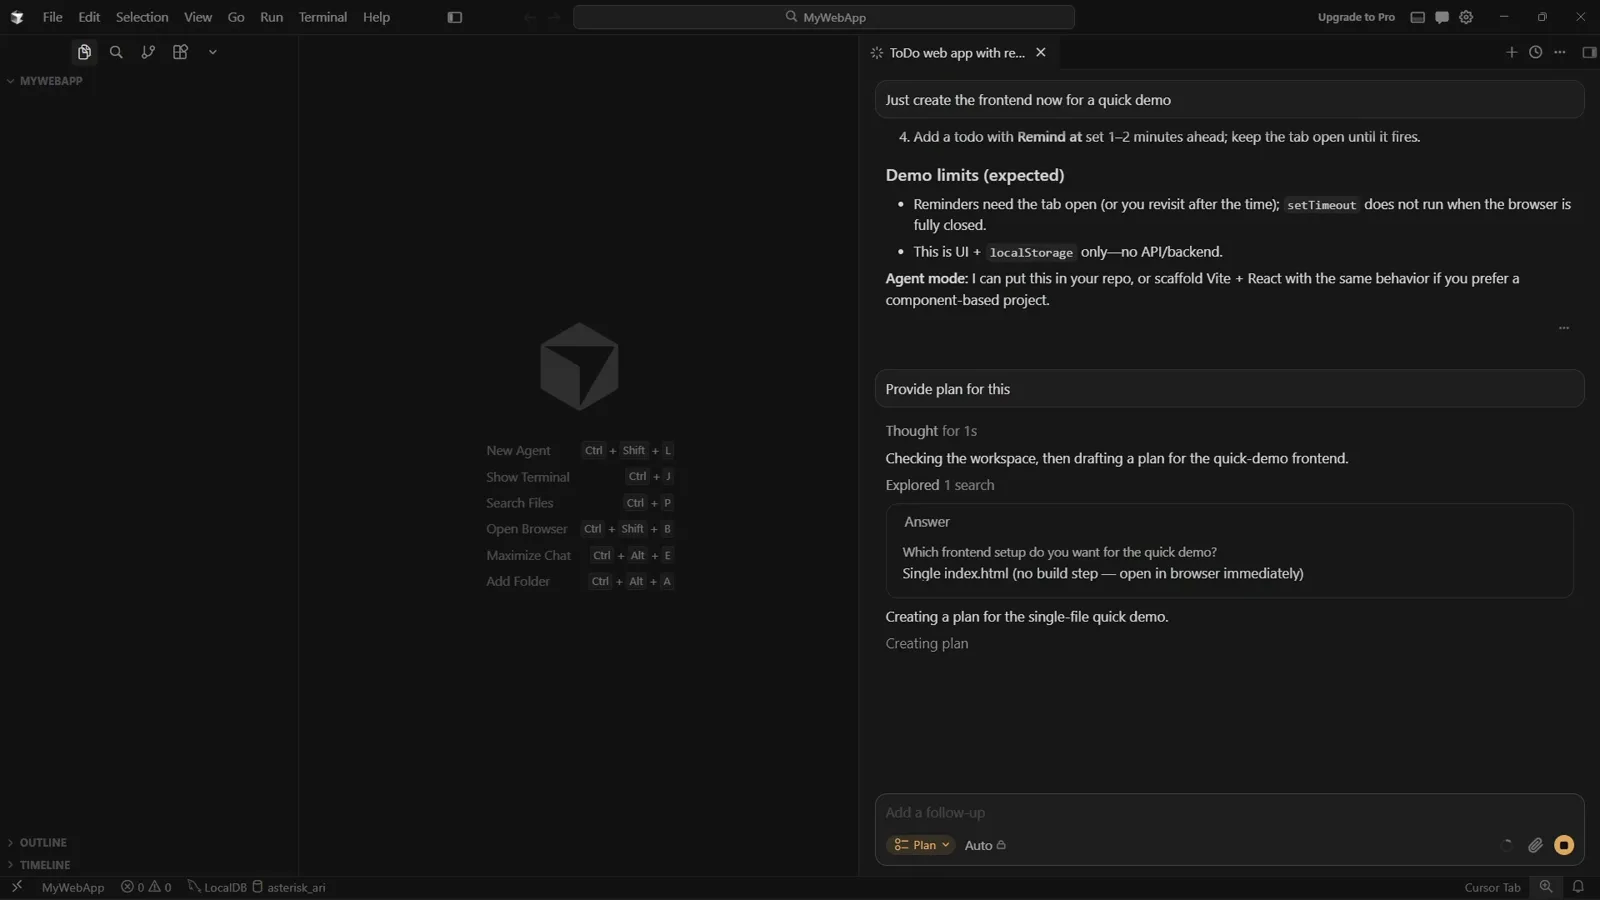
选中的答案被回显到对话里,输入框仍停留在 Plan 模式。看 3:06 处的演示 - 8
逐条检查计划文件和它列出的待办
计划不是一大段聊天,而是一个真实的文件 `todo_demo_frontend_8c948b00.plan.md`,会在编辑器里打开,里面有 Known demo limitations 小节、Out of scope 清单(后端、同步、鉴权、邮件/短信提醒、Service Worker / Web Push、稍后提醒与分类、npm、React、测试)以及 6 To-dos 待办列表。对话侧同步给出一张计划卡片,带 View Plan 和 Build Ctrl+Enter 按钮。把模式切回 Agent,再发 "proceed with the plan"。
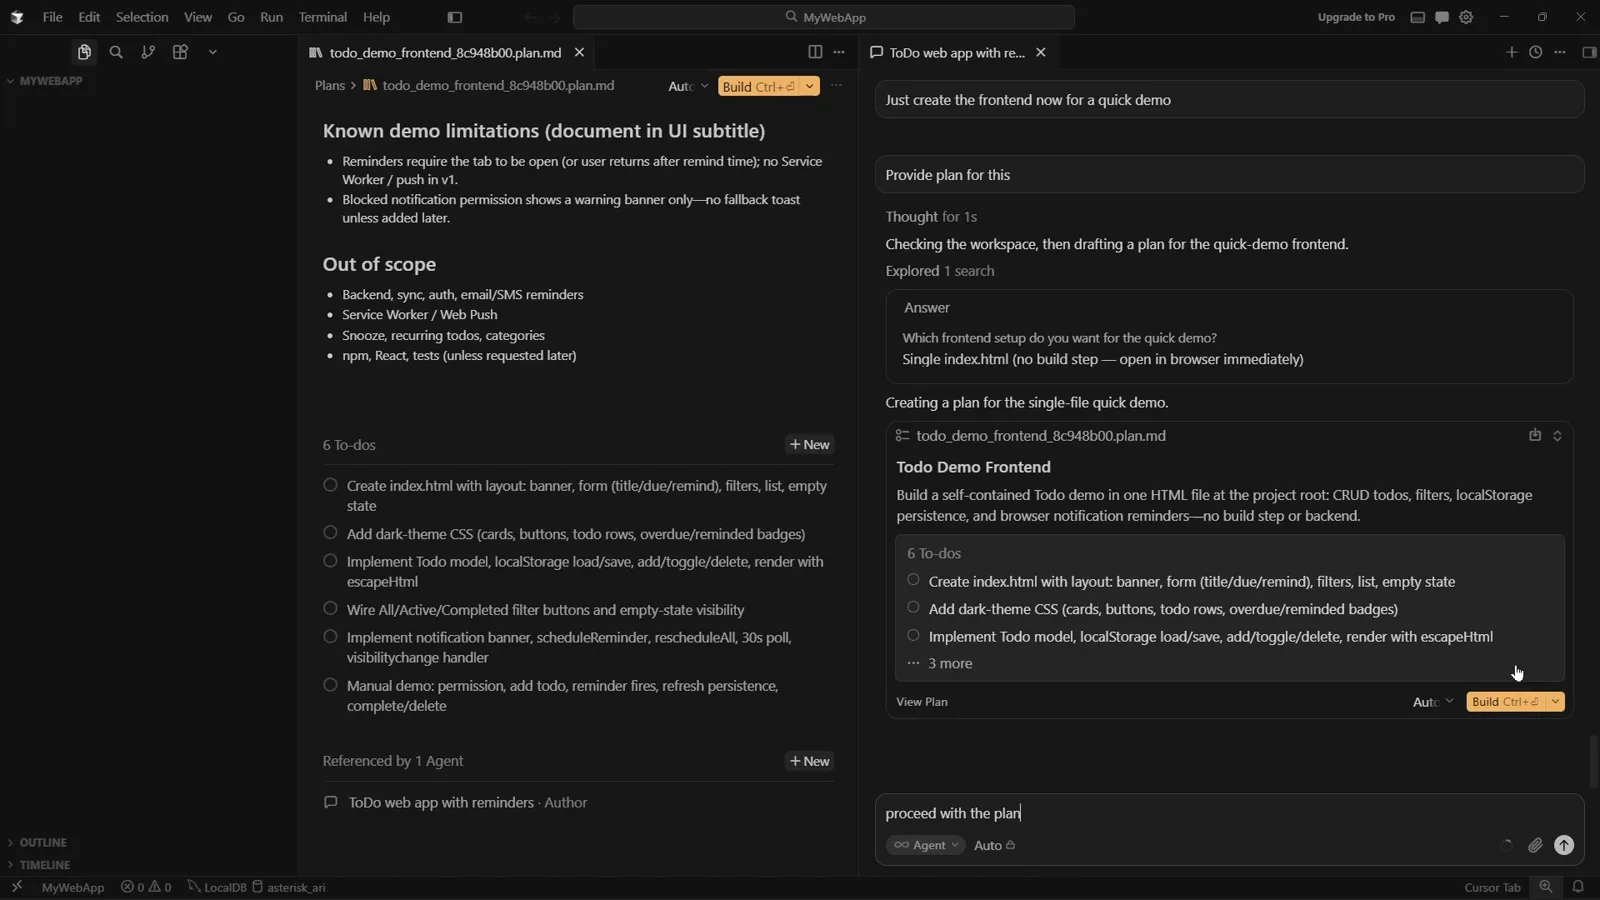
生成的 .plan.md 文件,含范围外清单和六项任务。看 3:30 处的演示
3 · 生成、检查、保留文件
- 9
看着待办一条条被勾掉
Agent 按清单从上往下做:计划卡片显示 Build Todo Reminders — Quick Demo Frontend Plan,进度条上 Manual demo: permission, add todo, reminder fires, refresh persistence, complete/delete 已到 6/6,文件差异以行内形式出现,index.html +362。接着它会自己验证产出——跑一个 Node 脚本("Verify index.html contains required elements",Node.js v22.22.0),并告诉你 Waiting for 1 command to finish,同时提供 Run in background。
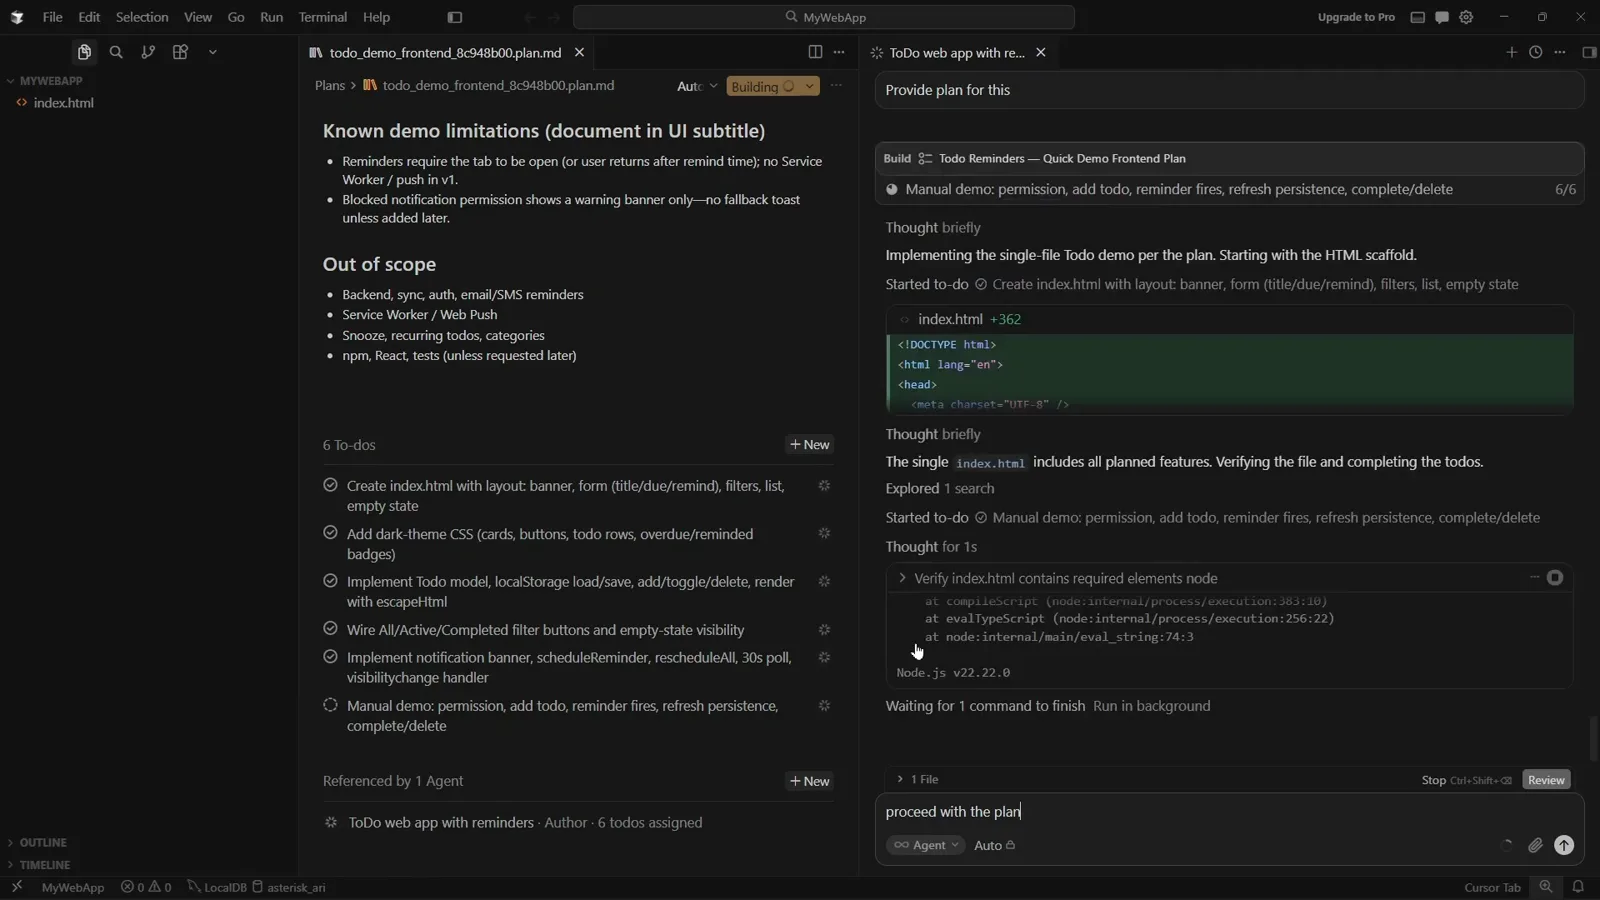
五项待办已勾选,行内 +362 差异,Agent 正在跑自己的验证命令。看 3:48 处的演示 - 10
每份生成的文件都要 Keep 或 Undo
打开 Cursor 写出来的文件,整个缓冲区会被标成绿色表示新增,编辑器右上角给出 Undo File 和 Keep File(Ctrl+Backspace)两个按钮。保留之前先读一遍:表单标签(What to do?、Due (optional)、Remind at (optional))、Add todo 提交按钮、All / Active / Done 筛选按钮和空状态提示都能在代码里看到,而且正是你要的那些东西。
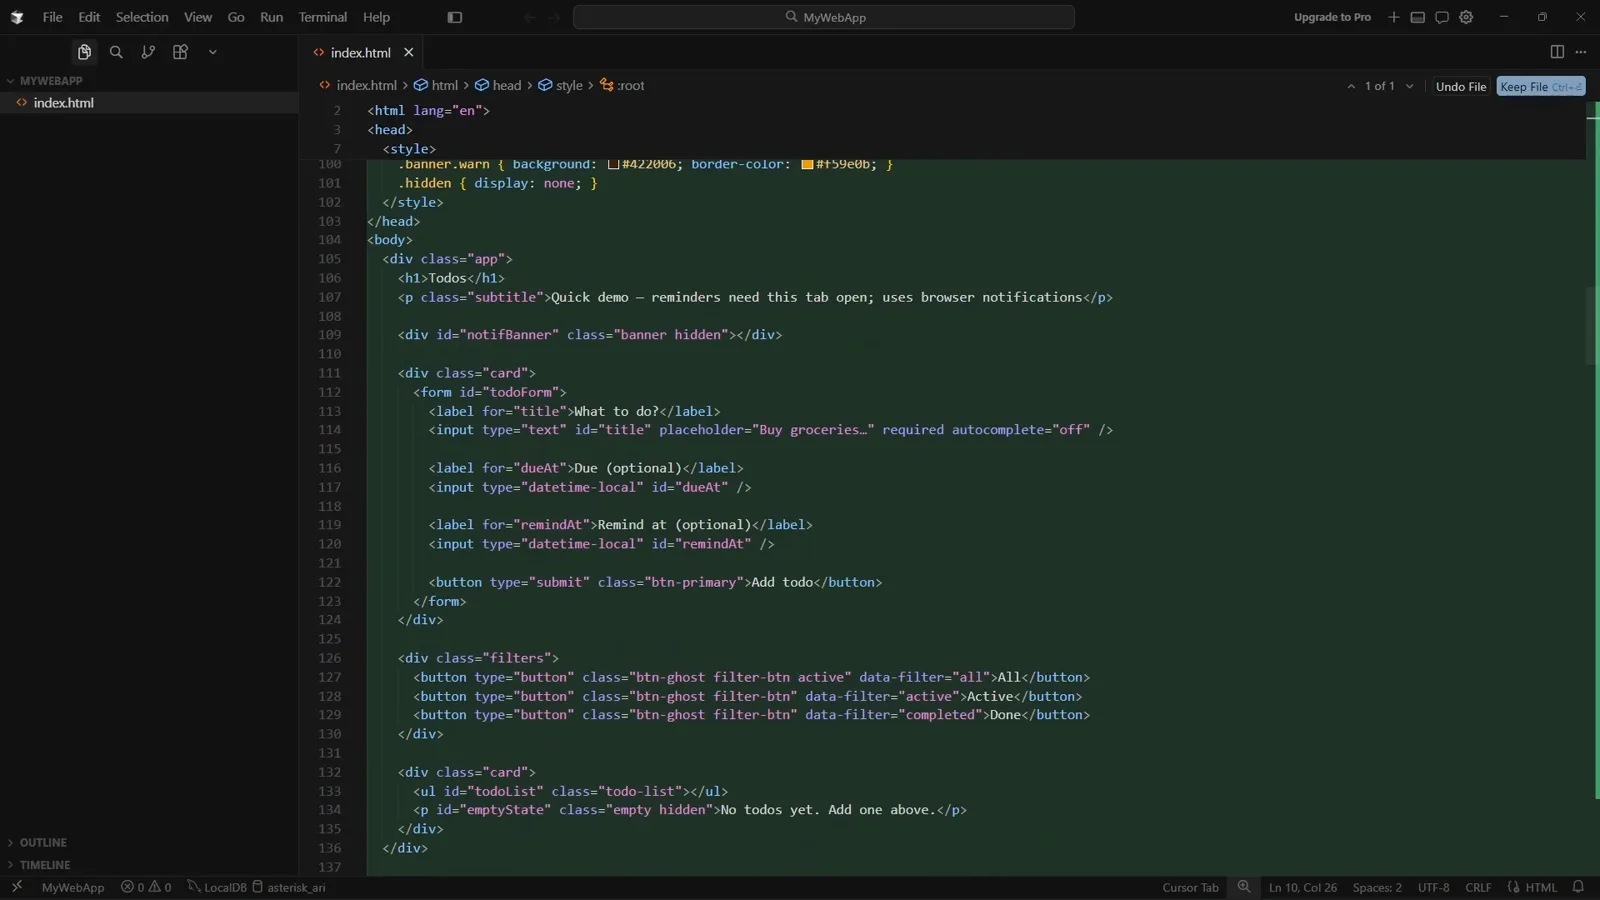
生成的 index.html,标签页右上角是 Keep File 与 Undo File。看 4:06 处的演示 - 11
不用离开 Cursor 就把结果跑起来
按 Ctrl+Shift+B,应用会在 Cursor 内部的一个浏览器标签页里打开——这里是 file:///D:/MyWebApp/index.html,标题 Todo Reminders — Demo。输入 buy eggs,设一个到期时间,点 Add todo,All / Active / Done 三个筛选就会在「No todos yet. Add one above.」的空状态上生效。整个循环就是:说清需求、出计划、生成、保留、跑起来。
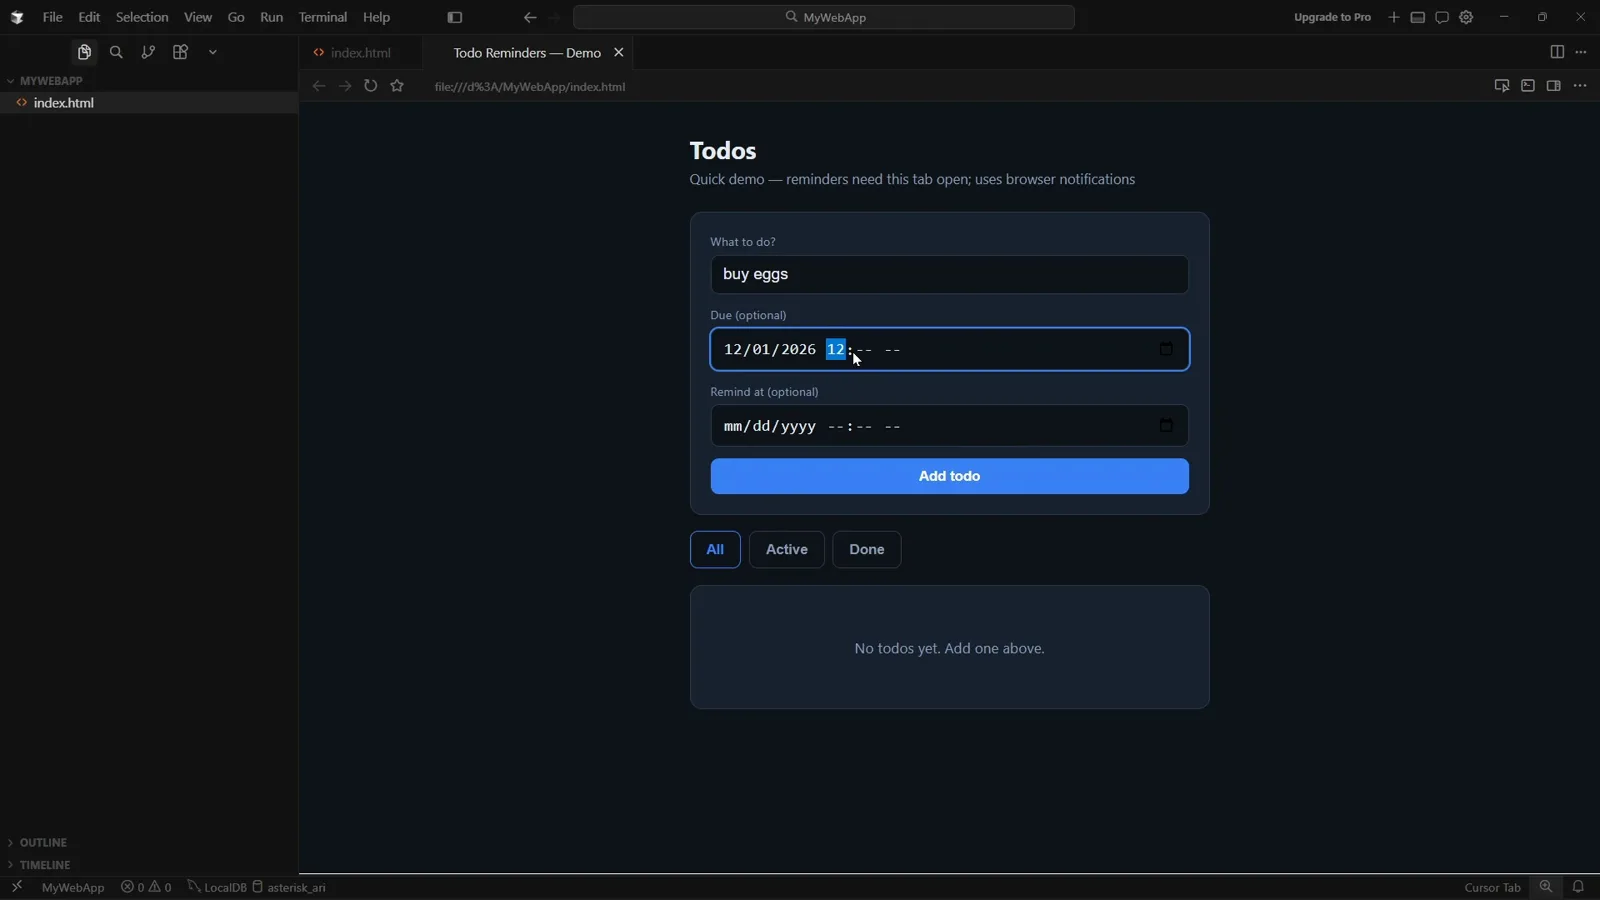
做好的待办应用跑在 Cursor 内置浏览器预览里。看 4:30 处的演示
4 · 把工作搬进 Project
- 12
打开 Agents 窗口,把 GitHub 连上
Project 住在 Agents 窗口里,左侧边栏依次是 New Chat、Search、Automations、Customize,再往下是 Repositories 分区。左下角有一份 Getting Started 清单和一个 Connect GitHub 按钮——在点它之前,工作区下拉框只给你 This PC,Repositories 列表里只写着 No Repo。输入区本身显示 Start from scratch、一个模型选择器和一行提示:"Use /multitask to run subagents to parallelize your requests instead of queuing them"。
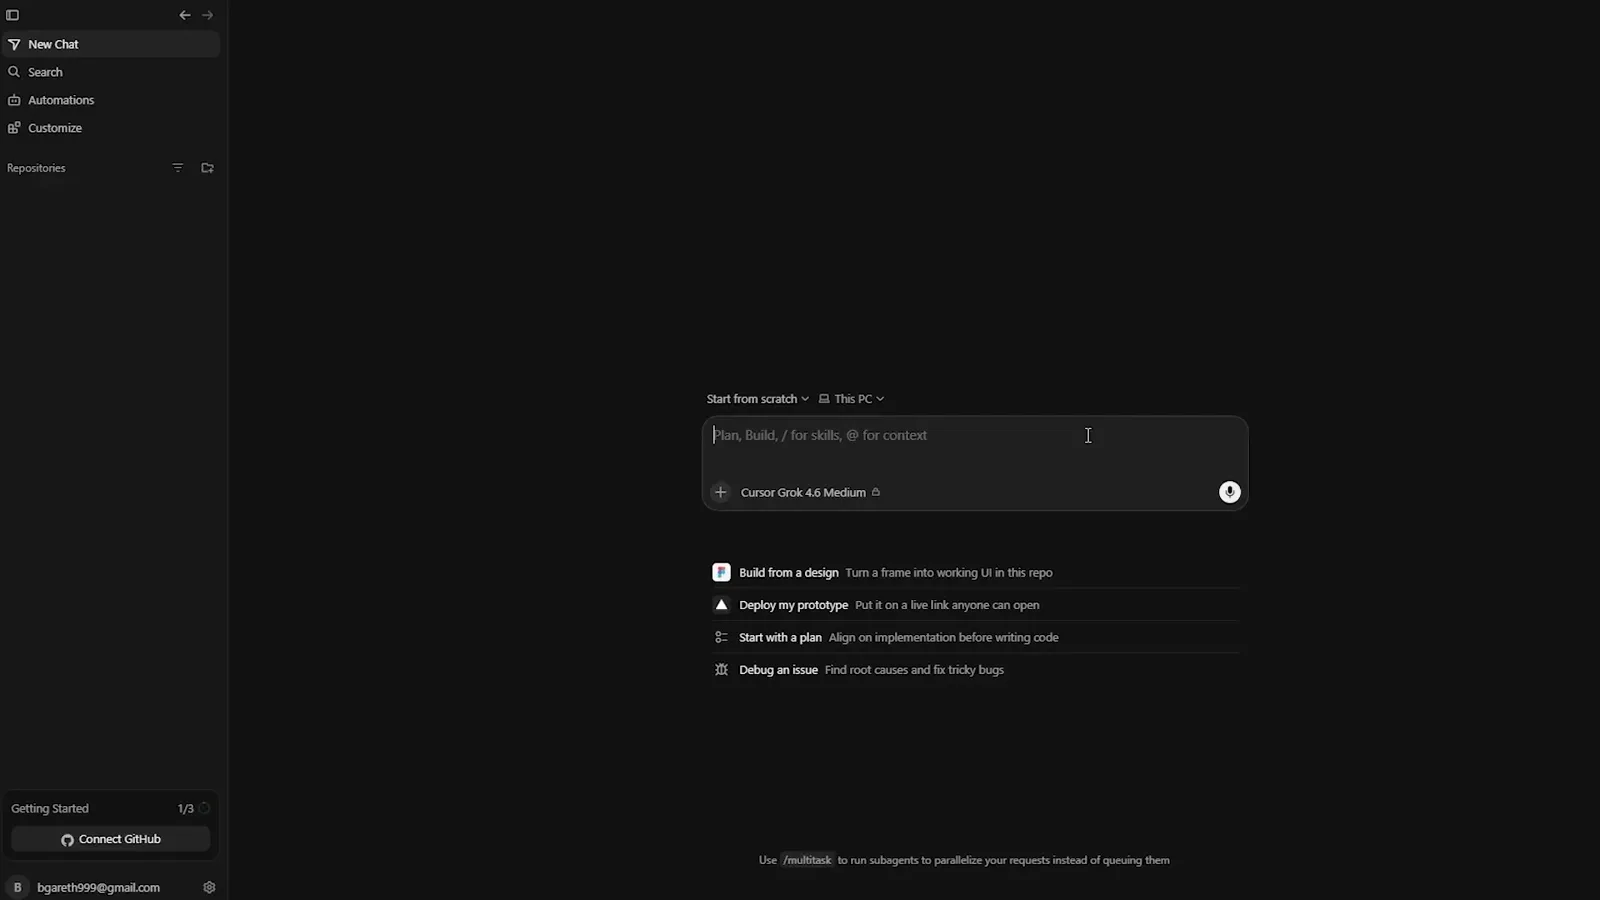
还没连接任何仓库时的 Agents 窗口,含起始提示词和模型选择器。看 5:00 处的演示 - 13
让协调 Agent 先把情况问清楚
输入 "i want to build an app",Agent 会回一句 "You want to build an app — I'll confirm the type and a project name first so we can set it up in the right folder",然后查一遍自己的工具定义,再开始走一张四问卡片:主要用途、项目文件夹名(默认 my-app)、以及 "Any preferences for setup?",选项有 A Use sensible defaults (git, standard layout, common stack)、B TypeScript、C Python、D React、E Skip git for now、F Other。用 Skip 或 Continue 都行——这些回答就成了项目的任务书。
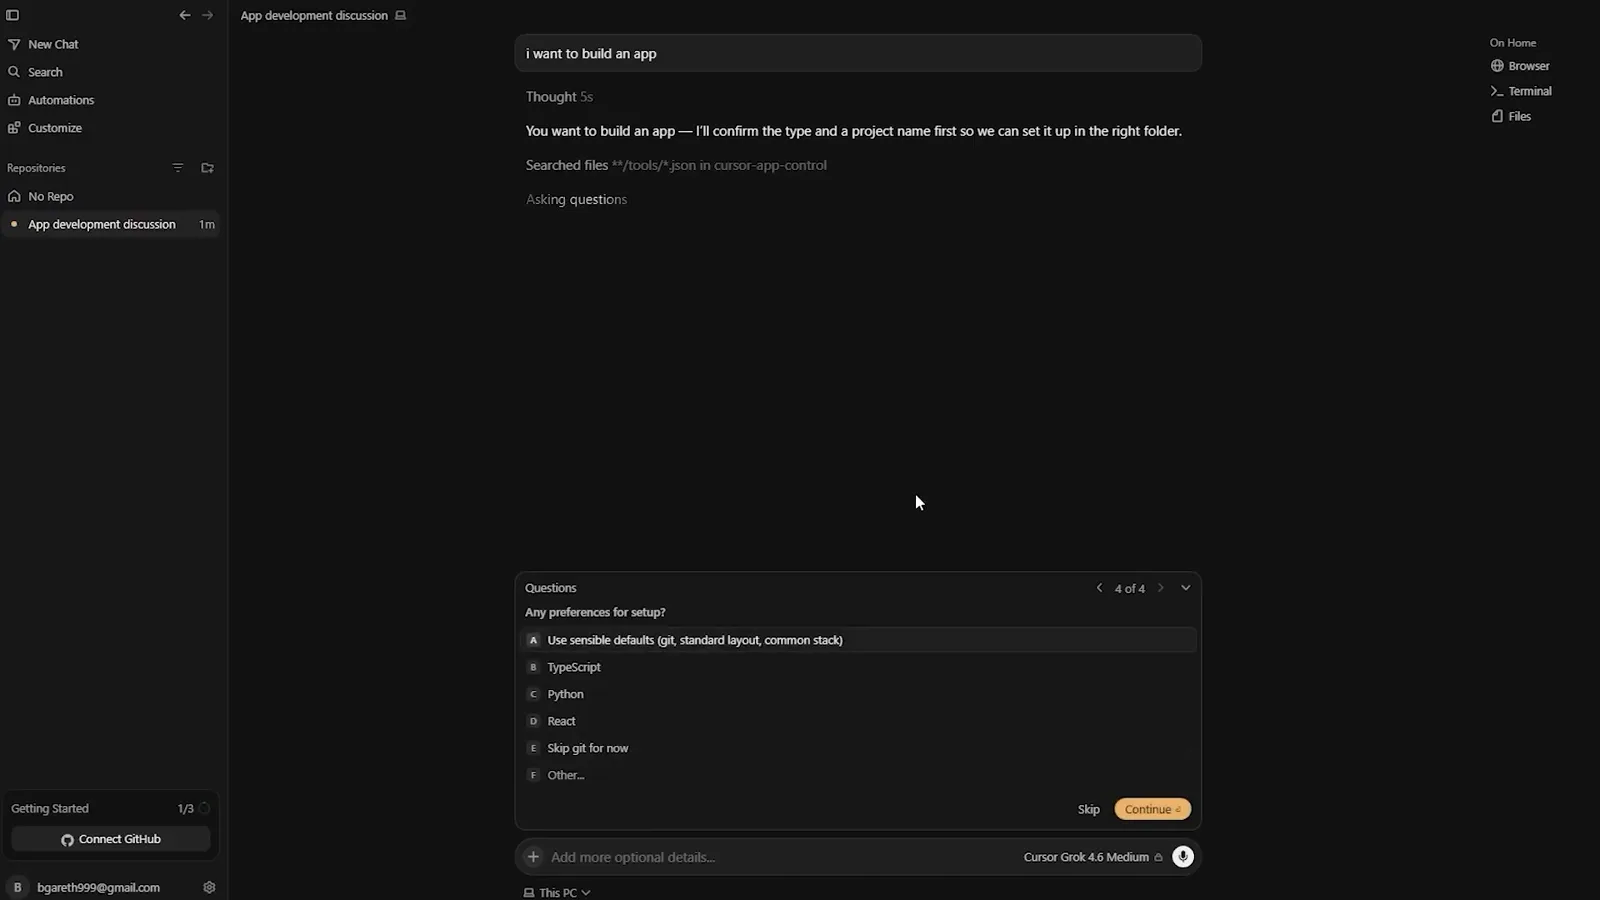
动手改工作区之前,Agent 抛出的配置偏好问题卡片。看 6:45 处的演示 - 14
确认它建出来的工作区到底在哪
你的回答会以一段摘要块回到对话顶部,紧接着是 "Web portfolio it is — I'll create my-app with git and a standard layout, then move into that folder before scaffolding" 和 "Workspace is c:\Users\DELL\my-app. Next I'll scaffold a Vite portfolio landing page with git already initialized."。右侧栏此时开始跟踪这个工作区:On my-app、Changes +459、Browser、Terminal、Files。就是这一步,一个普通文件夹变成了有历史的项目。
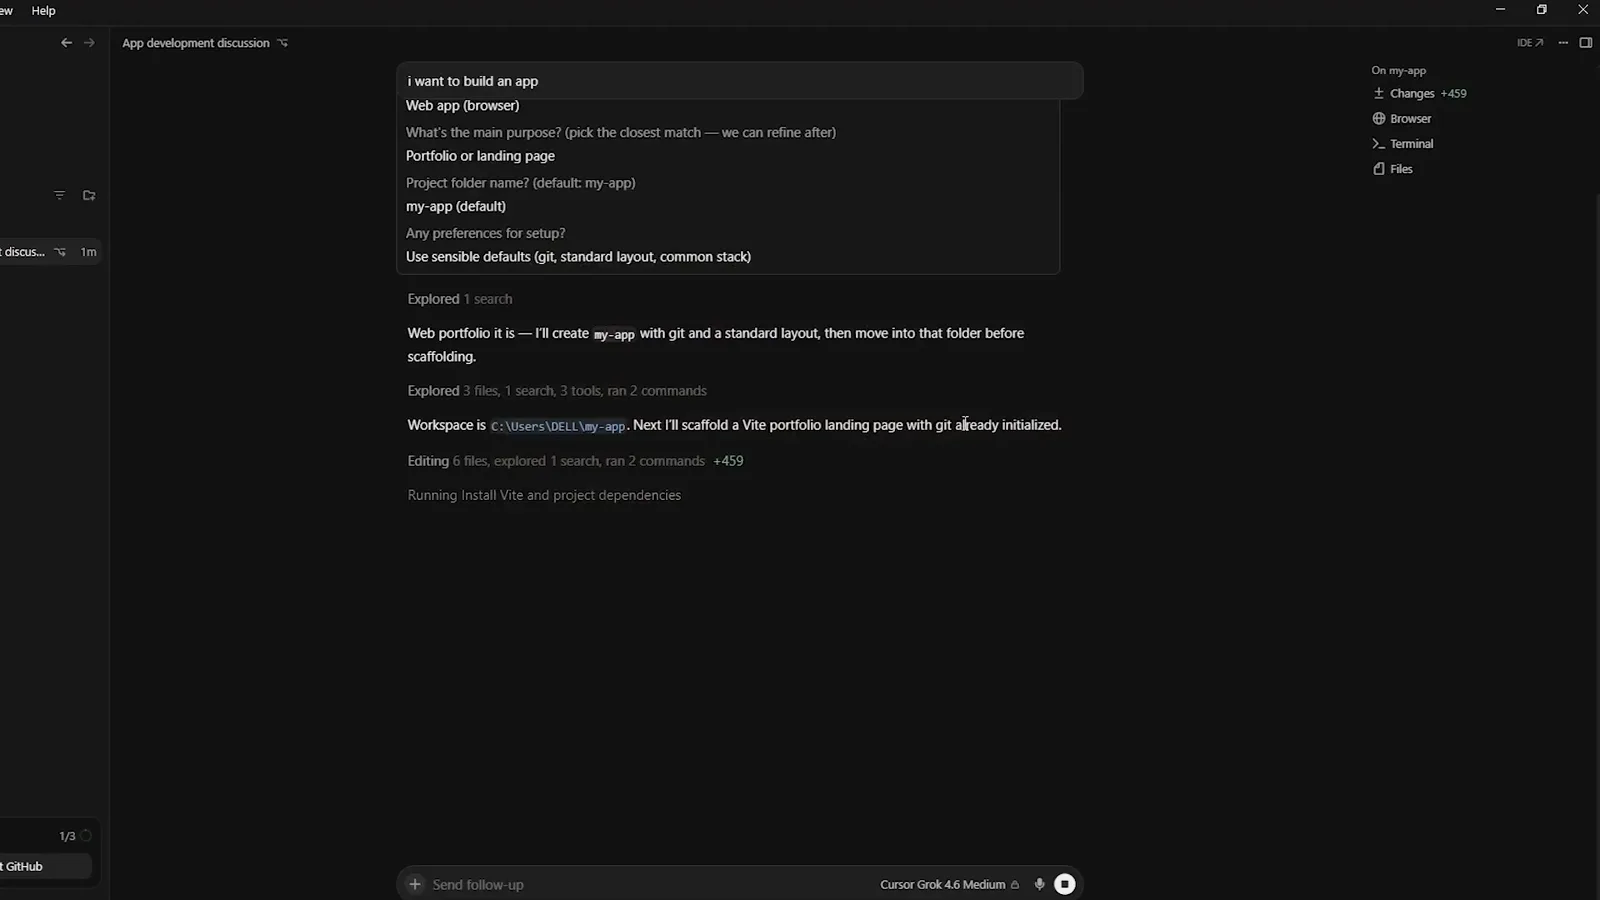
确认后的需求摘要,以及 Agent 落地代码的工作区路径。看 9:20 处的演示 - 15
先提交分支,再把例行的活交给 Project
对话里逐条列出了每次改动——package.json +14、.gitignore +4、index.html +140、main.js +4、styles.css +282、README.md +15——外加 "Ran Install Vite and project dependencies" 和 "Ran Start Vite development server",底栏显示当前分支(master)和一个 Worktree 下拉框,Changes +1623 旁边一步就是 Create Branch & Commit。到这里就可以把超出单次对话的工作交给 Project:让协调 Agent 盯一个 Slack 频道、跟你的 Pull Request,或者按定时执行;只要有一条订阅生效,输入框上方就会出现 Listening 标签,列出它监听的全部事件。
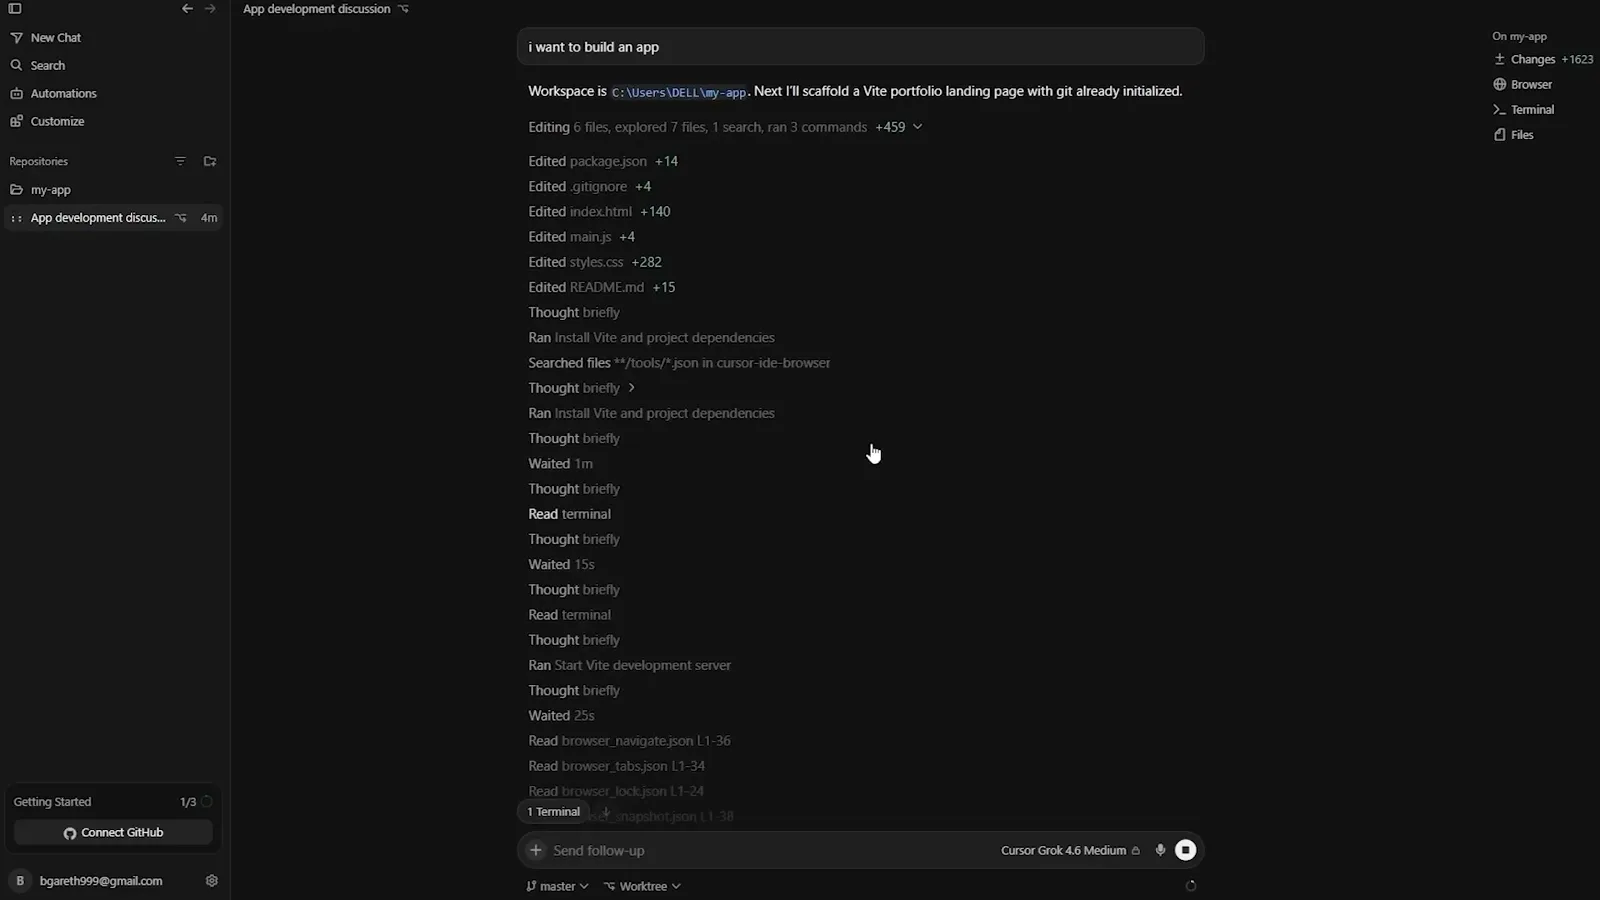
Agents 窗口汇总的每一处文件改动,随时可以建分支并提交。看 11:20 处的演示