
这篇 Windsurf AI 教程速览
- Windsurf 从 windsurf.com 下载安装,和普通编辑器没区别,首次启动有 Getting started 清单——VS Code 老用户可以直接迁移主题和插件。
- Ctrl+L 唤出 Cascade(AI 代理面板)。保持 Code 模式它才会直接写文件;Chat 模式只给建议、不动你的代码。
- 一句写清楚技术栈和板块的 prompt,就生成了完整的四文件作品集——index.html、styles.css、script.js 和 README,本地跑在 localhost:8000。
- 之后就是循环:小的追加 prompt → 审查红绿 diff → Accept all → 刷新浏览器。整个项目一共只用六条 prompt。
How I Built a Complete Website with Windsurf AI — Step-by-Step Tutorial
频道:Web Tech Knowledge7:24
文中截图均取自原视频,用于配合本页原创的分步讲解。每一步都带时间戳深链,可直接跳回视频对应位置。
视频版权归 Web Tech Knowledge 所有。Windsurf 术语(Cascade、Code/Chat 模式、Accept all)已对照 Tech With Tim 的《Windsurf Tutorial for Beginners (AI Code Editor)》与 corbin 的《How To Use Windsurf Editor For Beginners》核实。
从下载到成品网站,共 14 步
- 1
从官网下载 Windsurf
打开 windsurf.com,点 Download for Windows(macOS 和 Linux 版本就在旁边)。跑完安装包并登录。如果编辑器询问是否导入 VS Code 配置,直接同意——Windsurf 是 VS Code 的分支,主题和插件都能带过来。
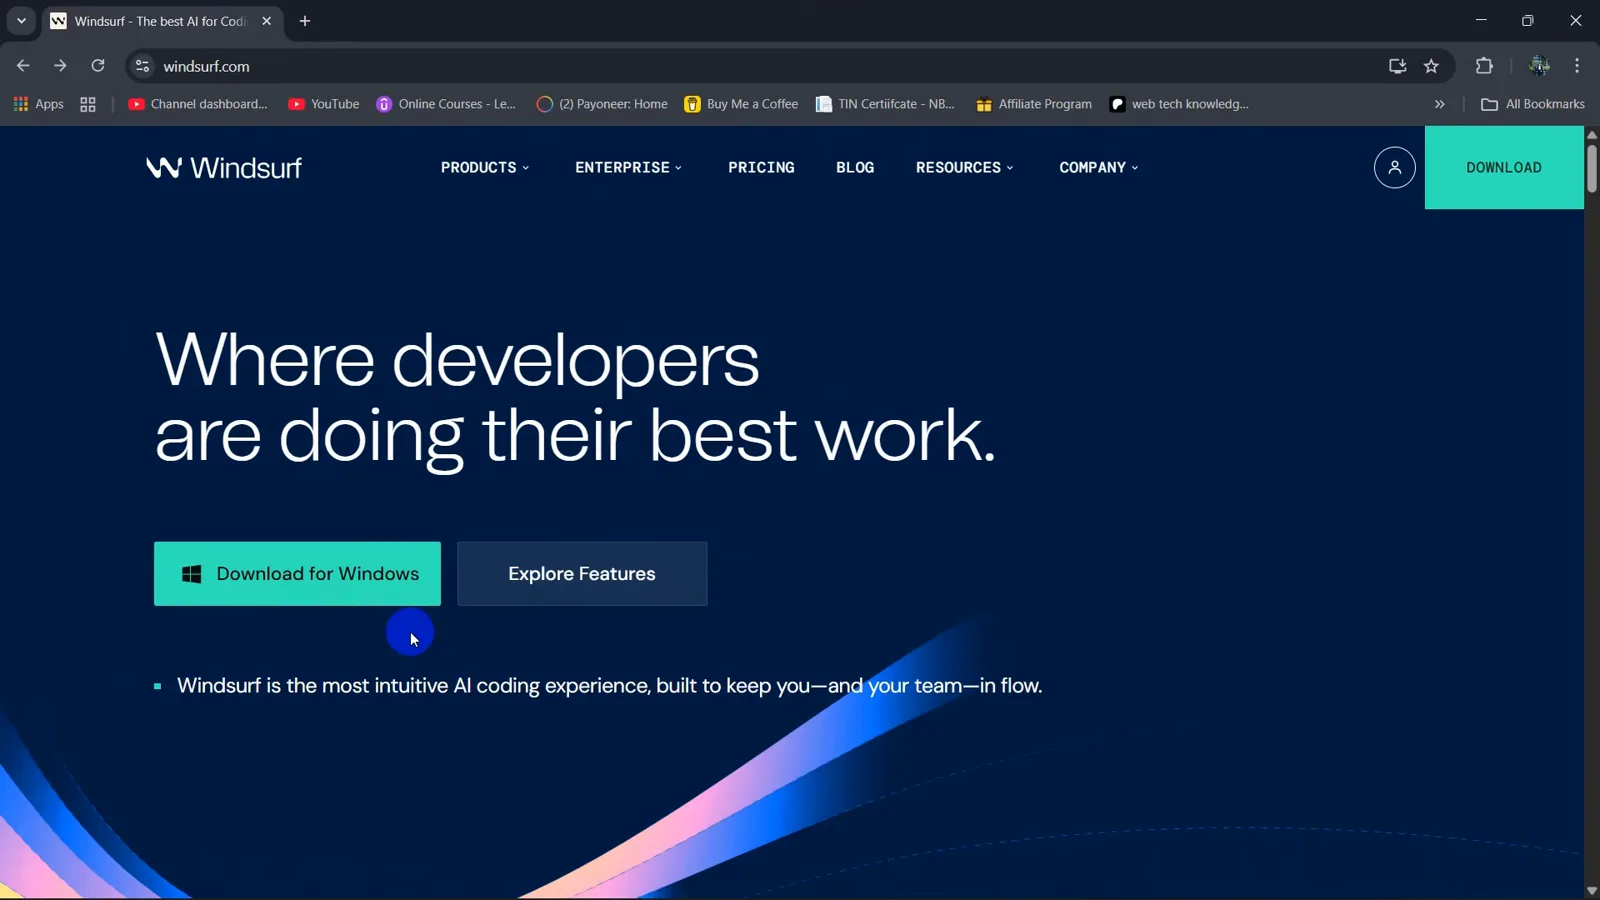
windsurf.com 官网首页,Download for Windows 按钮就在正中间。看视频 0:10 处 - 2
新建一个空项目文件夹
在欢迎页选 Code with Cascade,然后点 Open Folder。新建一个文件夹(视频里叫 My_cool_portfolio),点 Select Folder。空文件夹就够了,所有文件都会由 Cascade 来创建。
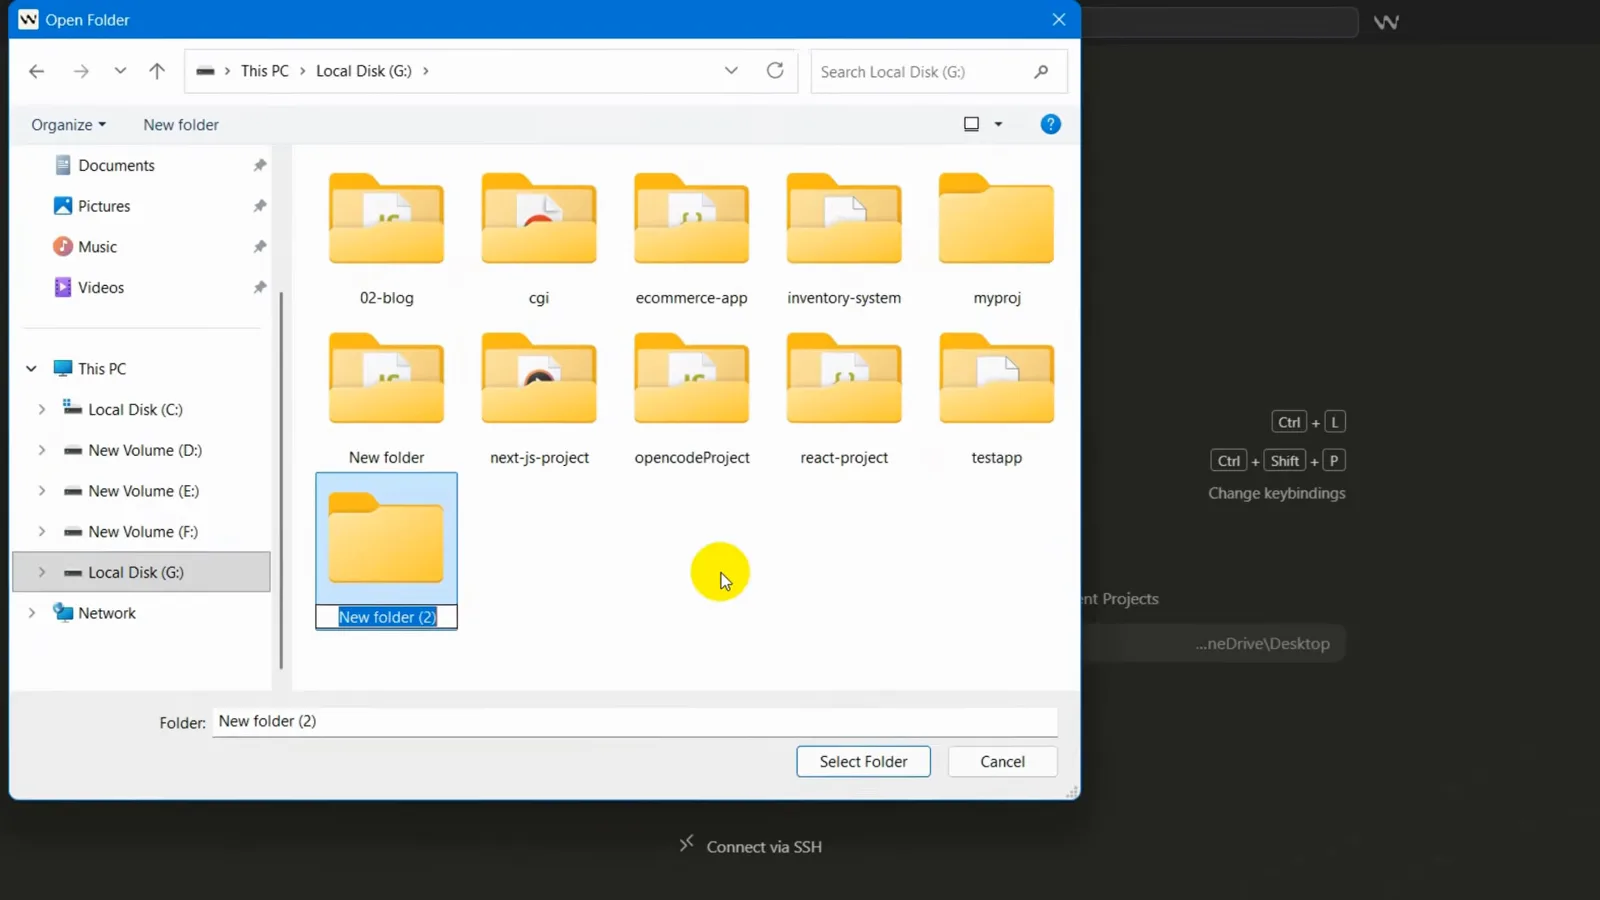
在 Open Folder 对话框里给新文件夹命名,然后点 Select Folder。看视频 0:33 处 - 3
一分钟认识编辑器布局
首次进入会看到 Getting started with Windsurf 清单。左侧 Explorer 侧边栏放项目文件,清单里标出了你唯一需要的两个快捷键:Ctrl+L 打开 Cascade,Ctrl+I 行内改代码。本教程用到这就够了。
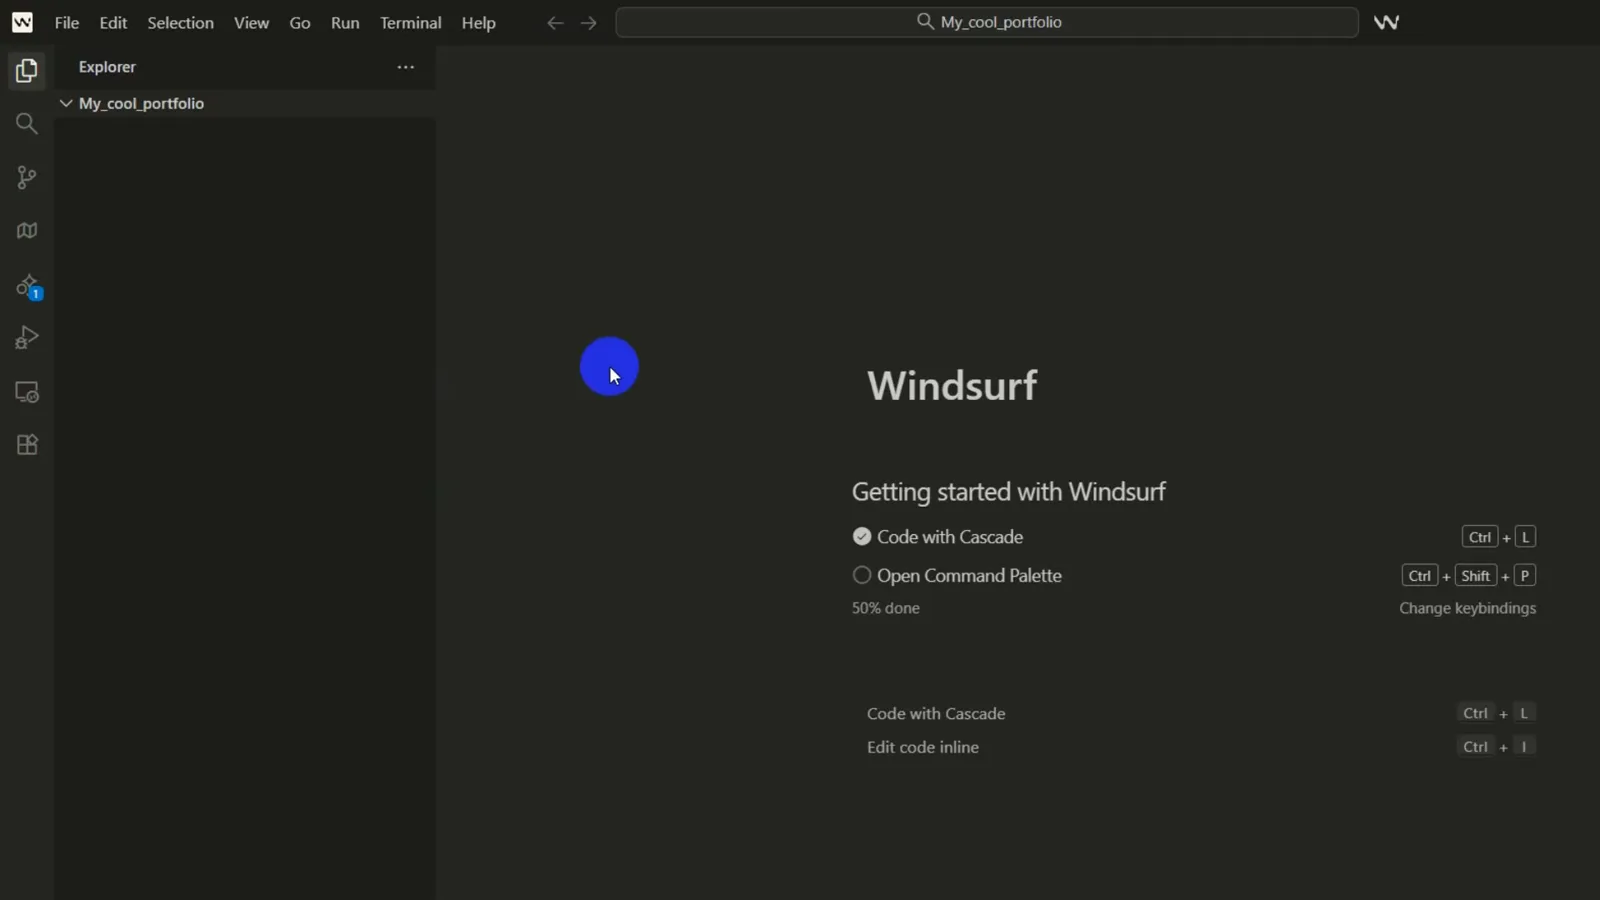
Getting started 清单,项目文件夹已经出现在左侧 Explorer 里。看视频 0:45 处 - 4
用 Ctrl+L 打开 Cascade 面板
按 Ctrl+L(macOS 用 Cmd+L),Cascade 会在右侧打开,有一个 Ask anything 输入框。确认输入框下方选的是 Code 模式——这样 Cascade 才会直接写文件;Chat 模式只给代码建议、不改项目。再从下拉框选个模型,本教程用的是 Claude Sonnet 4.5。
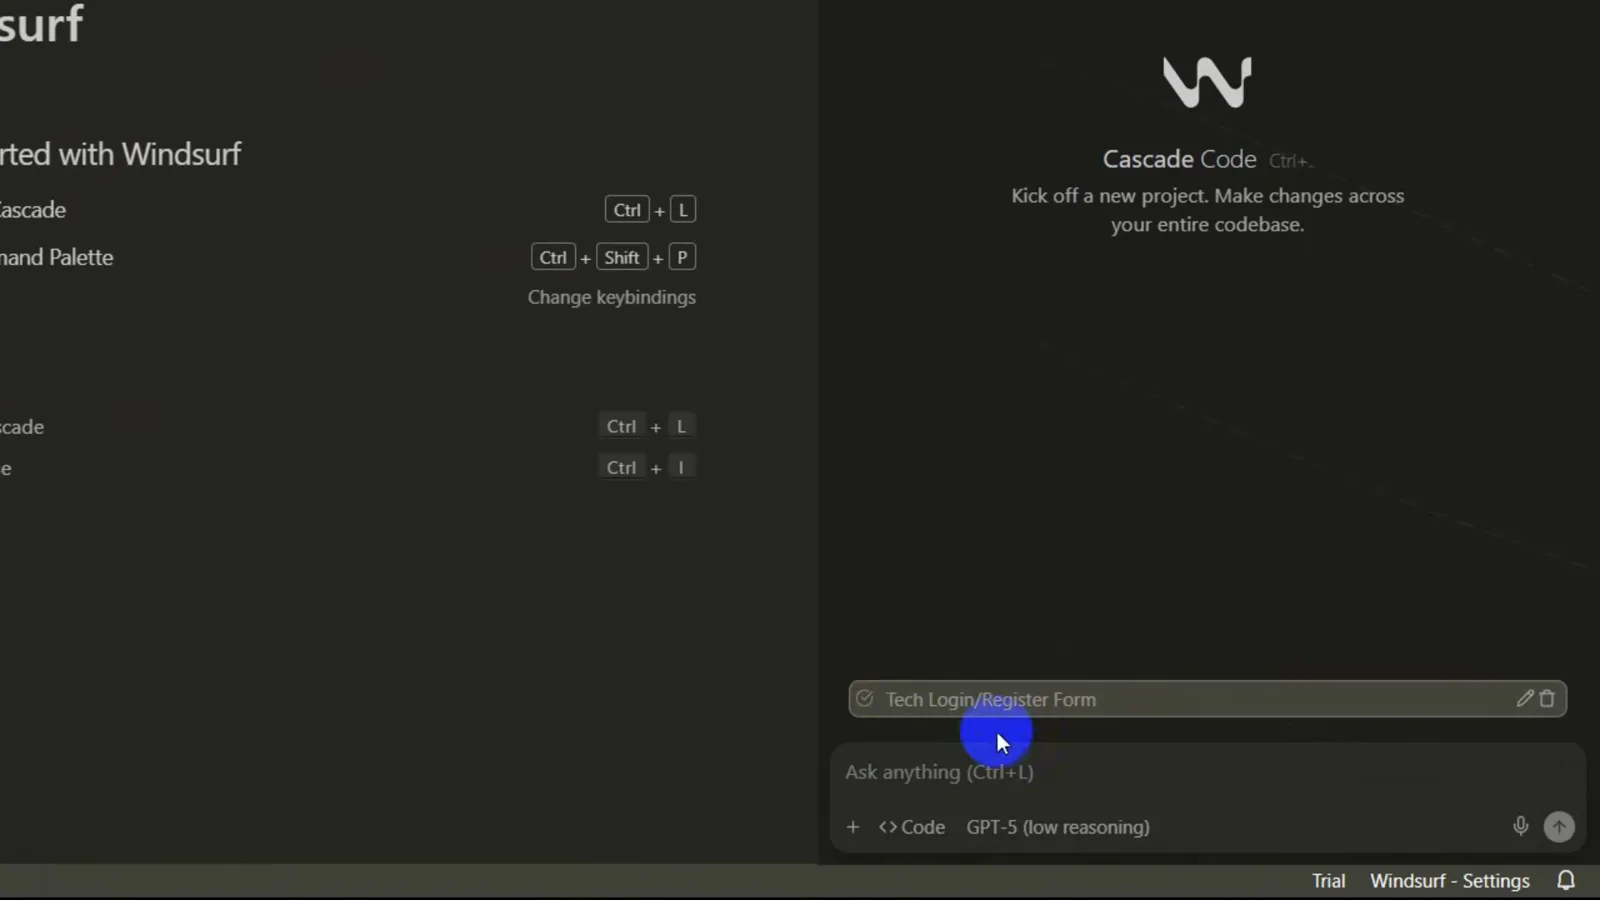
Cascade 的欢迎界面:Ask anything 输入框、Code 模式开关和模型选择器。看视频 1:03 处 - 5
发出第一条构建 prompt
输入:Create a responsive portfolio website using HTML, CSS, and JavaScript. Include a hero section, about, projects, and contact form. 写明技术栈、列出板块很关键——prompt 越具体,结果越好。点发送后,Cascade 会先把需求拆成 todo 清单,再动笔写代码。
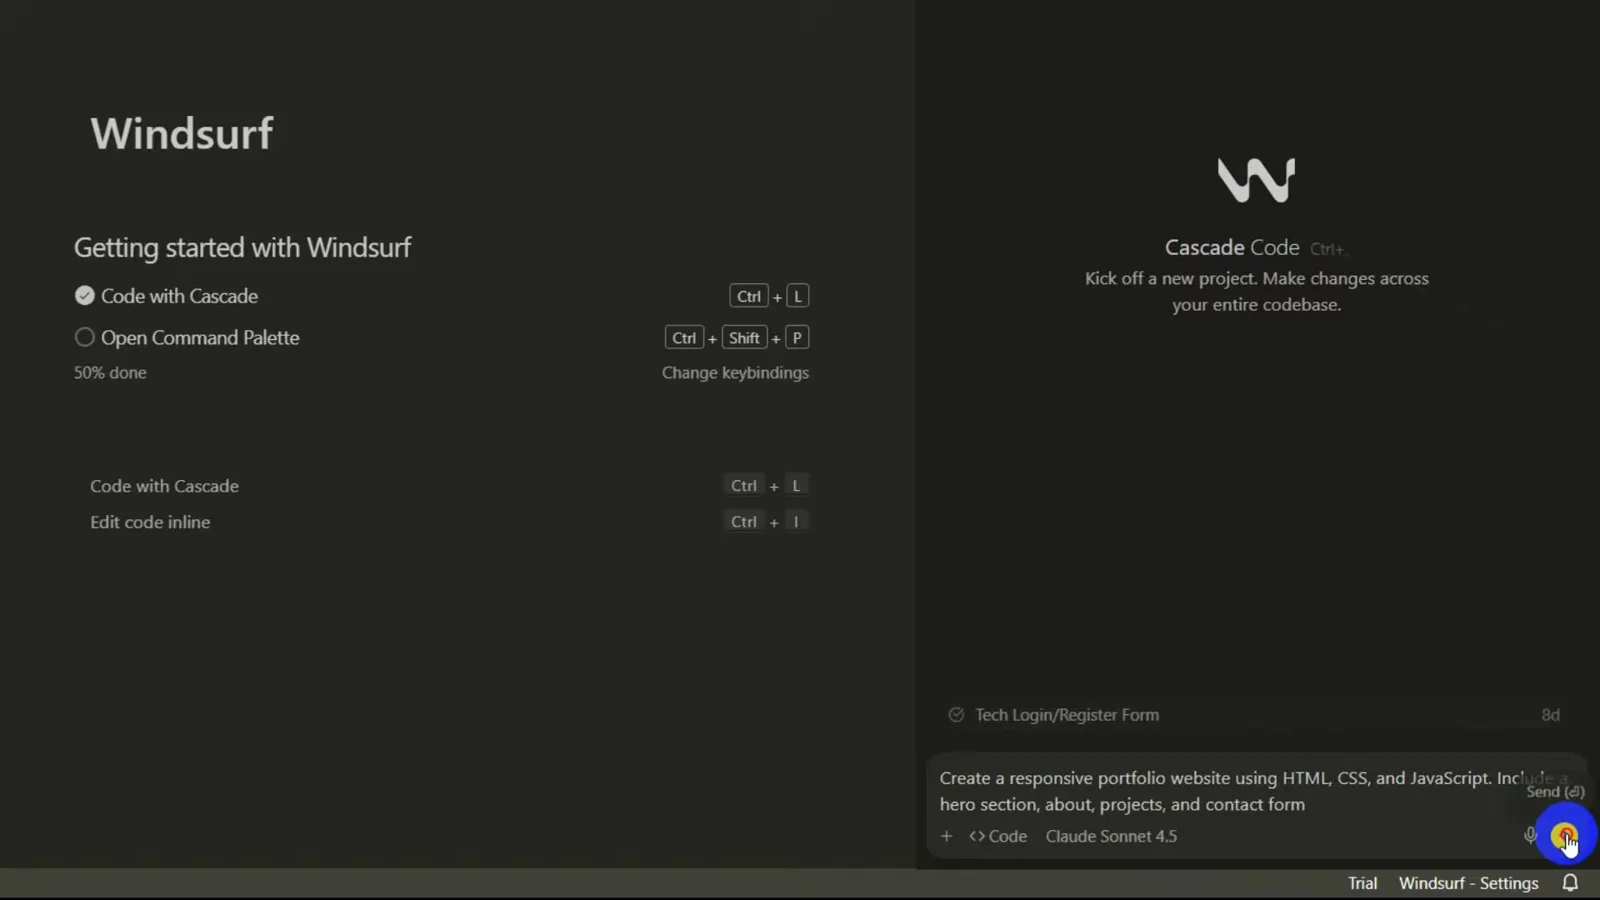
完整的作品集 prompt,Code 模式下选好 Claude Sonnet 4.5,准备发送。看视频 1:35 处 - 6
看 Cascade 生成文件
Cascade 按 todo 清单逐项推进:先写 index.html(231 行),接着 styles.css、script.js,最后生成一份 README 给项目做文档。每个新文件都会在面板里显示绿色行数计数,代码写完时统计是 3 files、+1132。
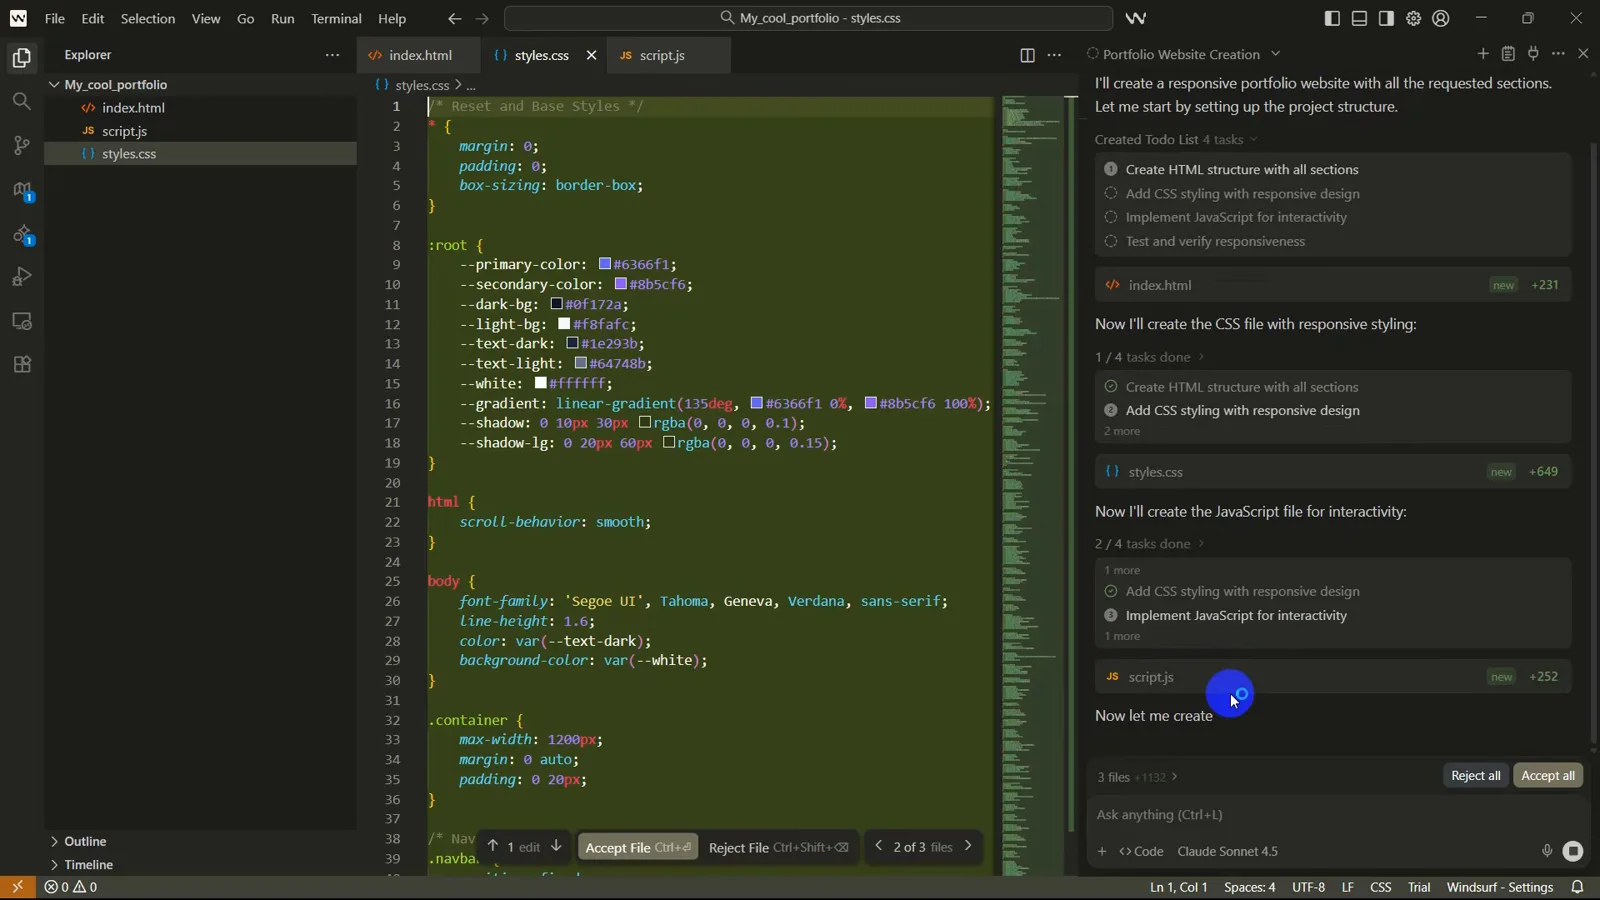
生成过程中的 Cascade todo 清单,index.html、styles.css、script.js 已就位。看视频 2:10 处 - 7
打开浏览器预览
完成报告里写着站点已跑在 http://localhost:8000——点预览链接,一个完整的单页作品集就出来了:吸顶导航、带头像圆框的 hero、about、projects 和联系表单。仔细看标题:页面把原始的 <span> 标签直接打印出来了。初稿带点小 bug 很正常,第 13 步会修掉它。
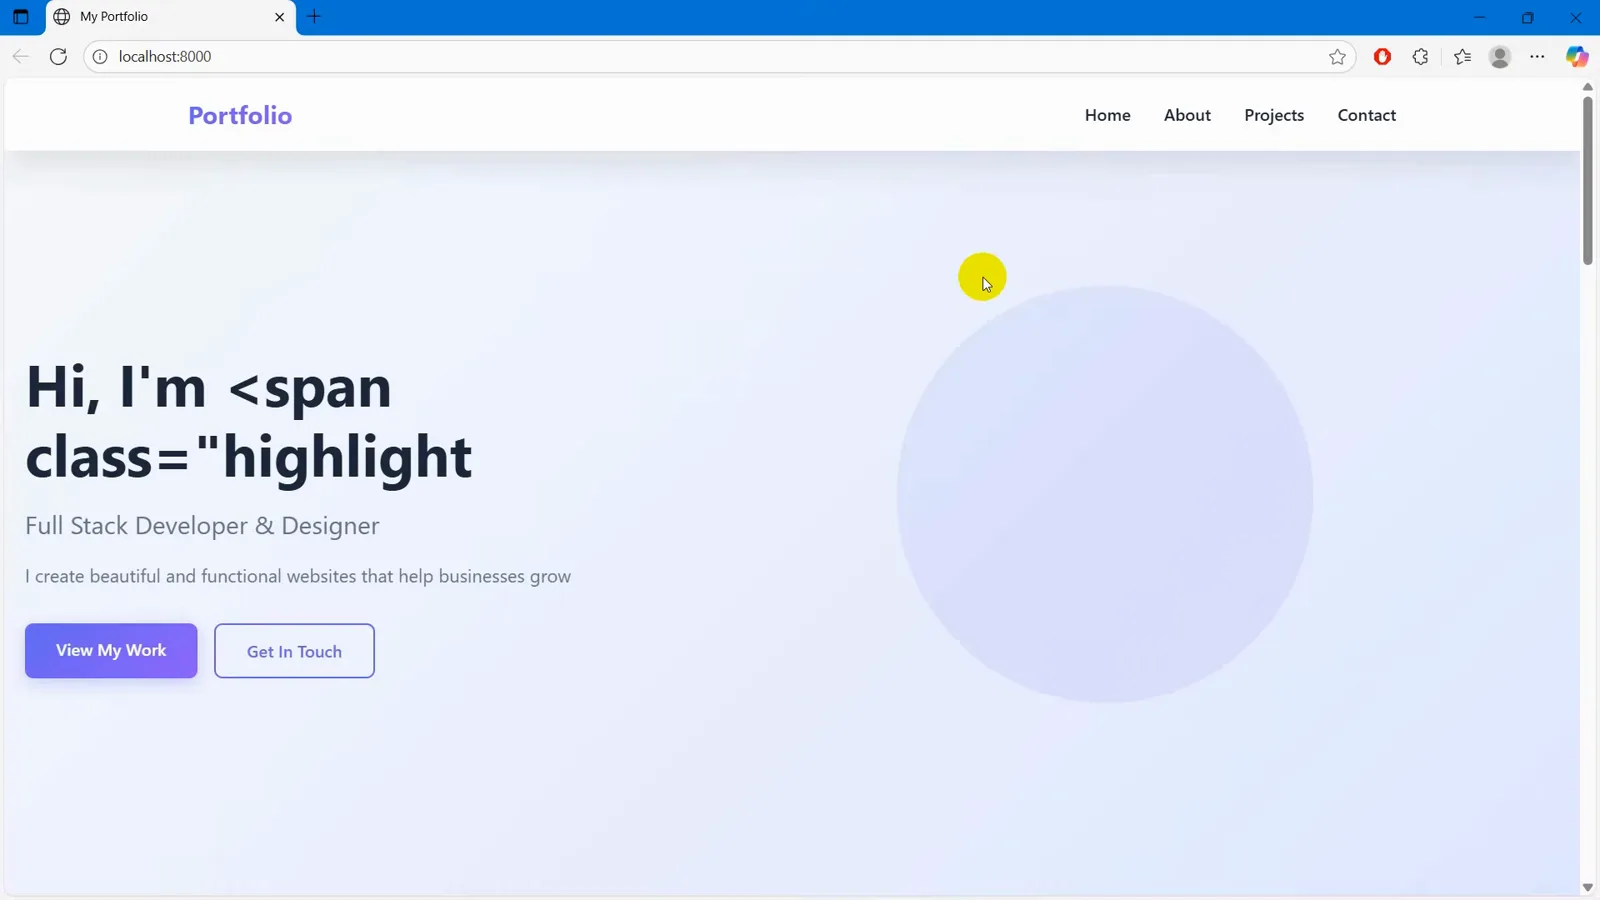
localhost:8000 上的生成结果——已经很完整,只差标题里那个裸 span 标签。看视频 2:35 处 - 8
追加 prompt:暗色主题和霓虹按钮
回到 Windsurf,先点 Accept all 保存生成的文件,然后发送:Make it dark mode and give the buttons a neon glow。这就是用 Cascade 的节奏——一次只提一个目标明确的小需求,验证通过再进行下一步。
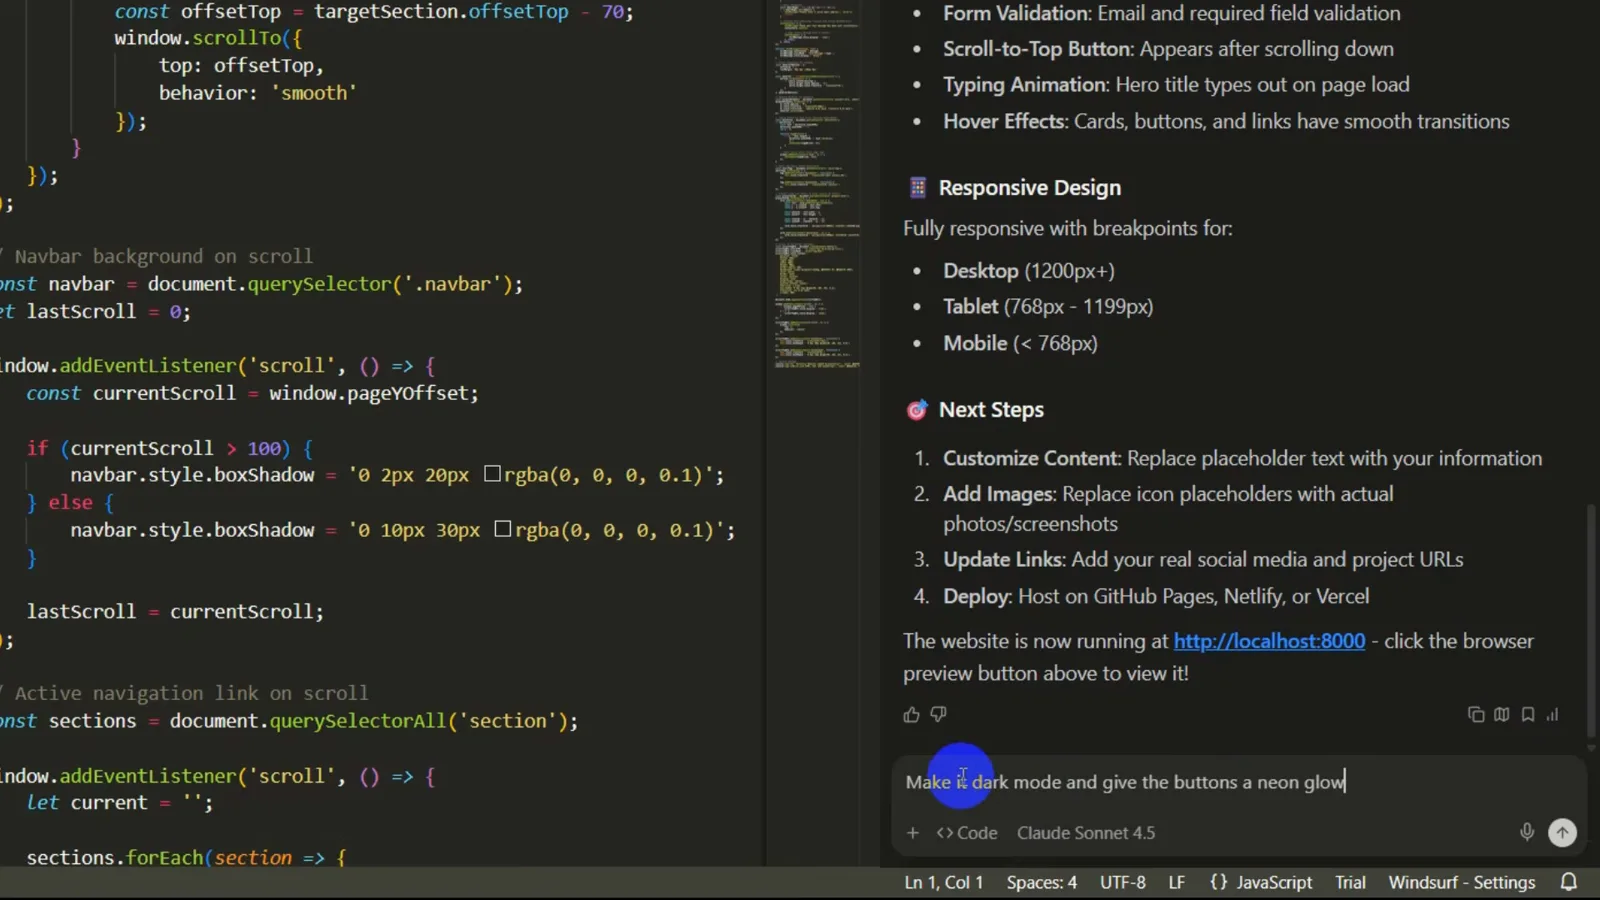
带 Next Steps 的完成报告,输入框里已经敲好暗色主题的追加 prompt。看视频 3:05 处 - 9
审查 diff,然后 Accept all
Cascade 重写 styles.css,把每处修改都列成 diff:红色是被删的 CSS,绿色是新增的。这里旧浅色配色被换成暗色 token,外加霓虹青和霓虹洋红的发光变量,一共十一条变更。逐条看完,点 Accept all(Alt+A)。
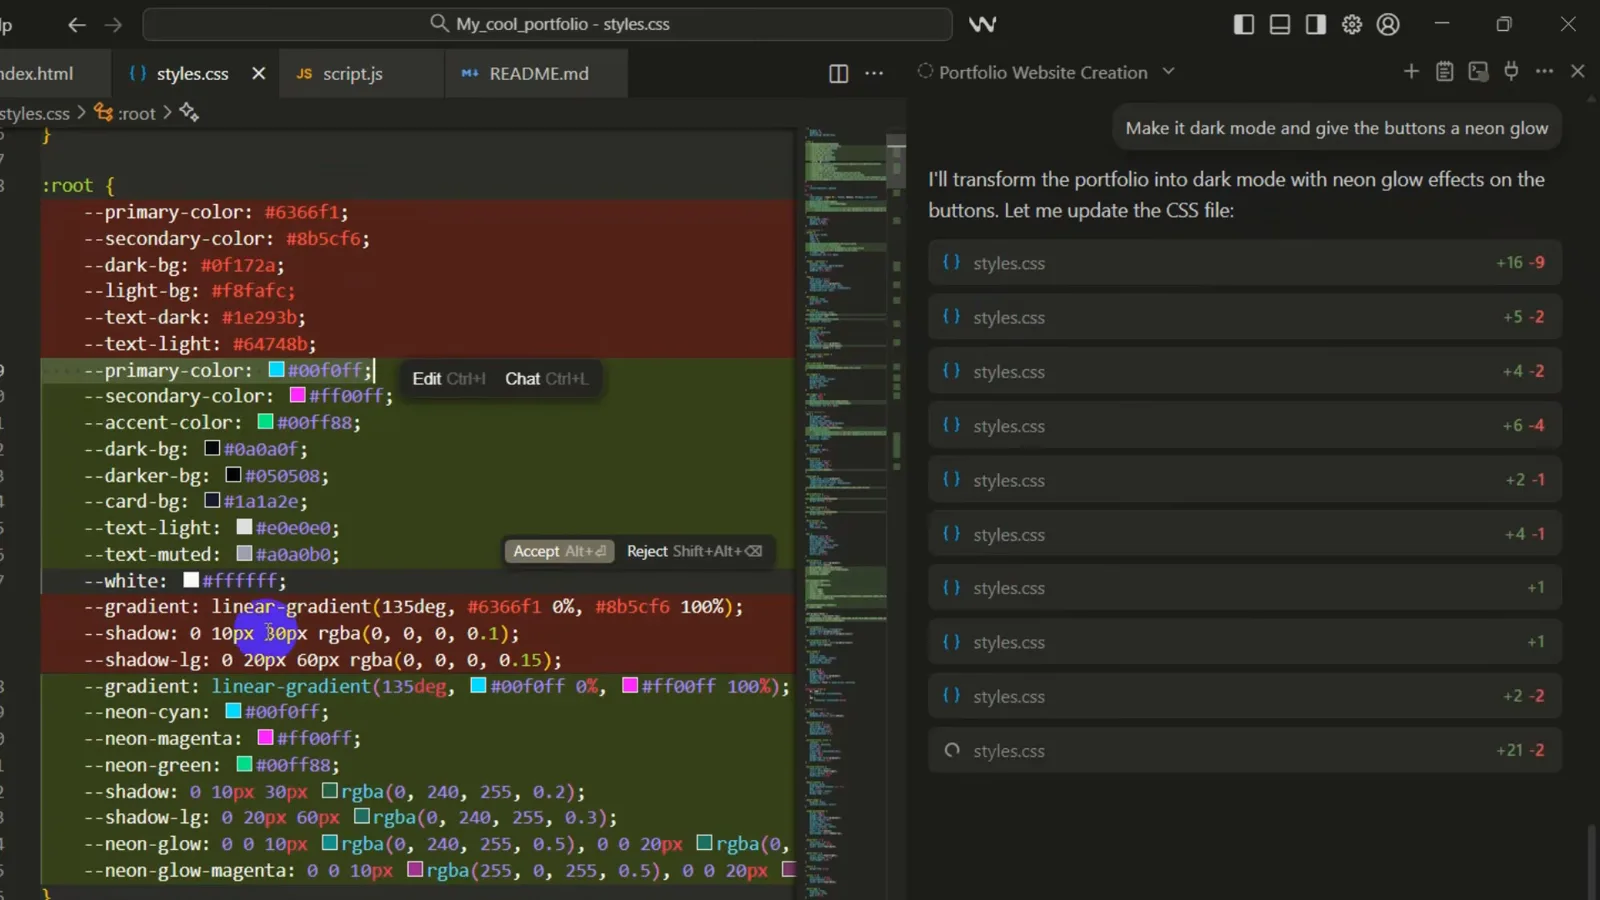
styles.css 的 diff:红色删掉的浅色变量,绿色新增的霓虹 token。看视频 3:32 处 - 10
刷新浏览器,验证效果
切回浏览器标签页刷新。同一个作品集变成了黑底发光风:View My Work 是青到洋红的渐变,Get In Touch 带霓虹描边,About Me 标题下有一条发光分隔线。每条 prompt 之后都验证一次,小意外才不会越攒越多。
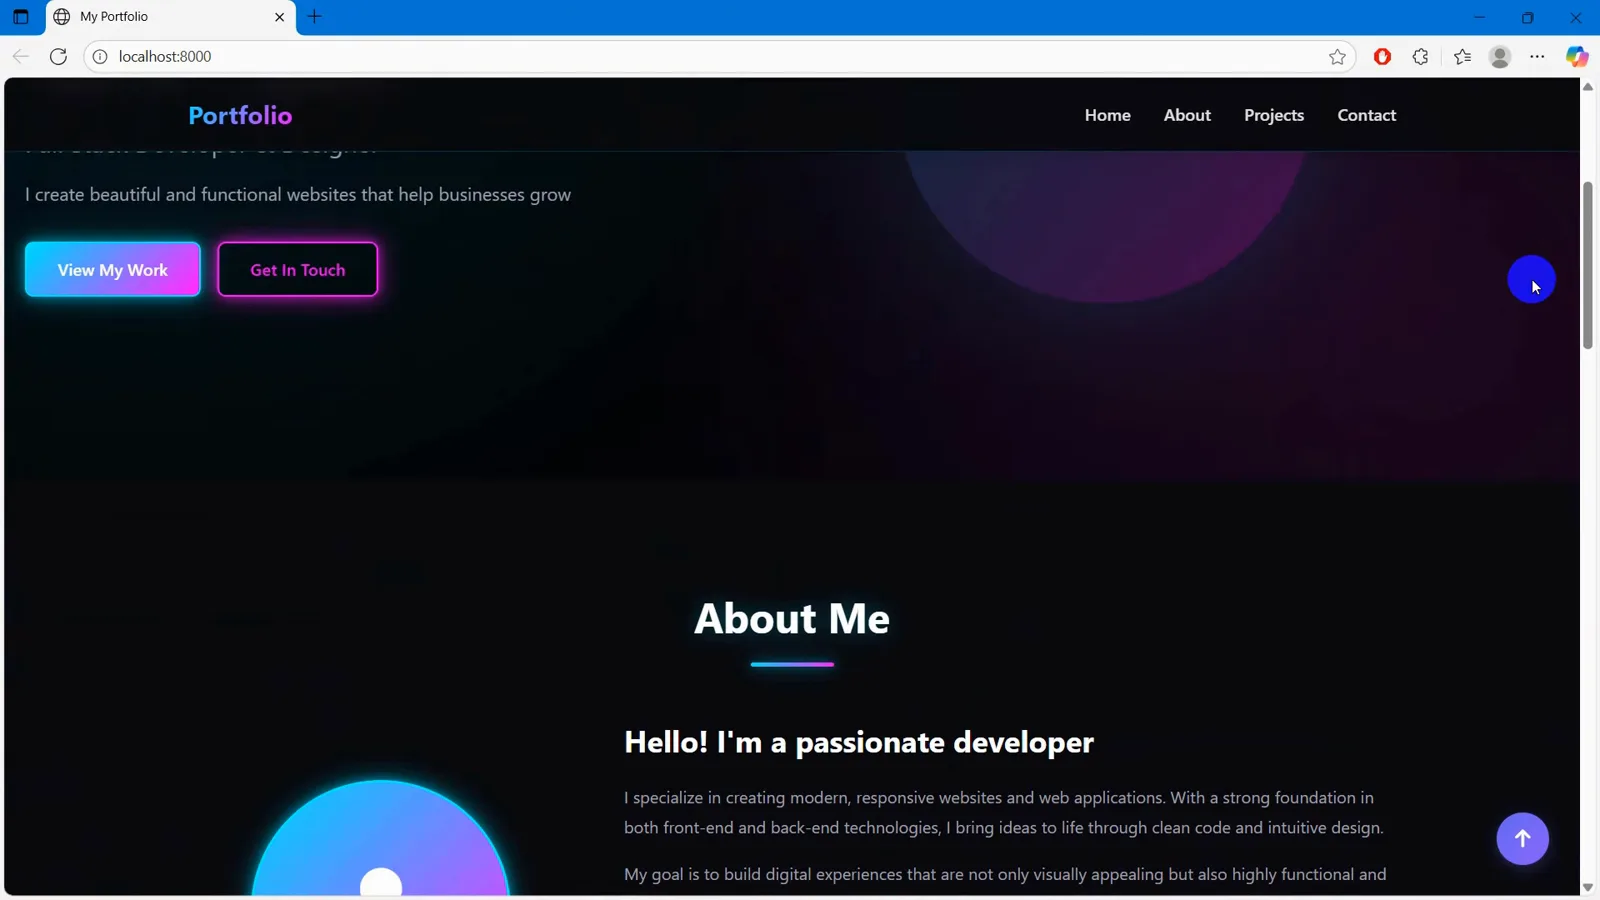
刷新后的暗色站点:霓虹按钮和 Portfolio 导航下的 About Me 区块。看视频 4:12 处 - 11
加滚动动画和淡入效果
发送:Add smooth scroll animation and fade effects。Cascade 会加 scroll-behavior: smooth 和 .fade-in 类,用 Intersection Observer 让区块进入视口时显现,再给 hero 圆框加轻微视差、技能标签做交错入场。Accept all、刷新、往下滚——区块会逐个淡入。
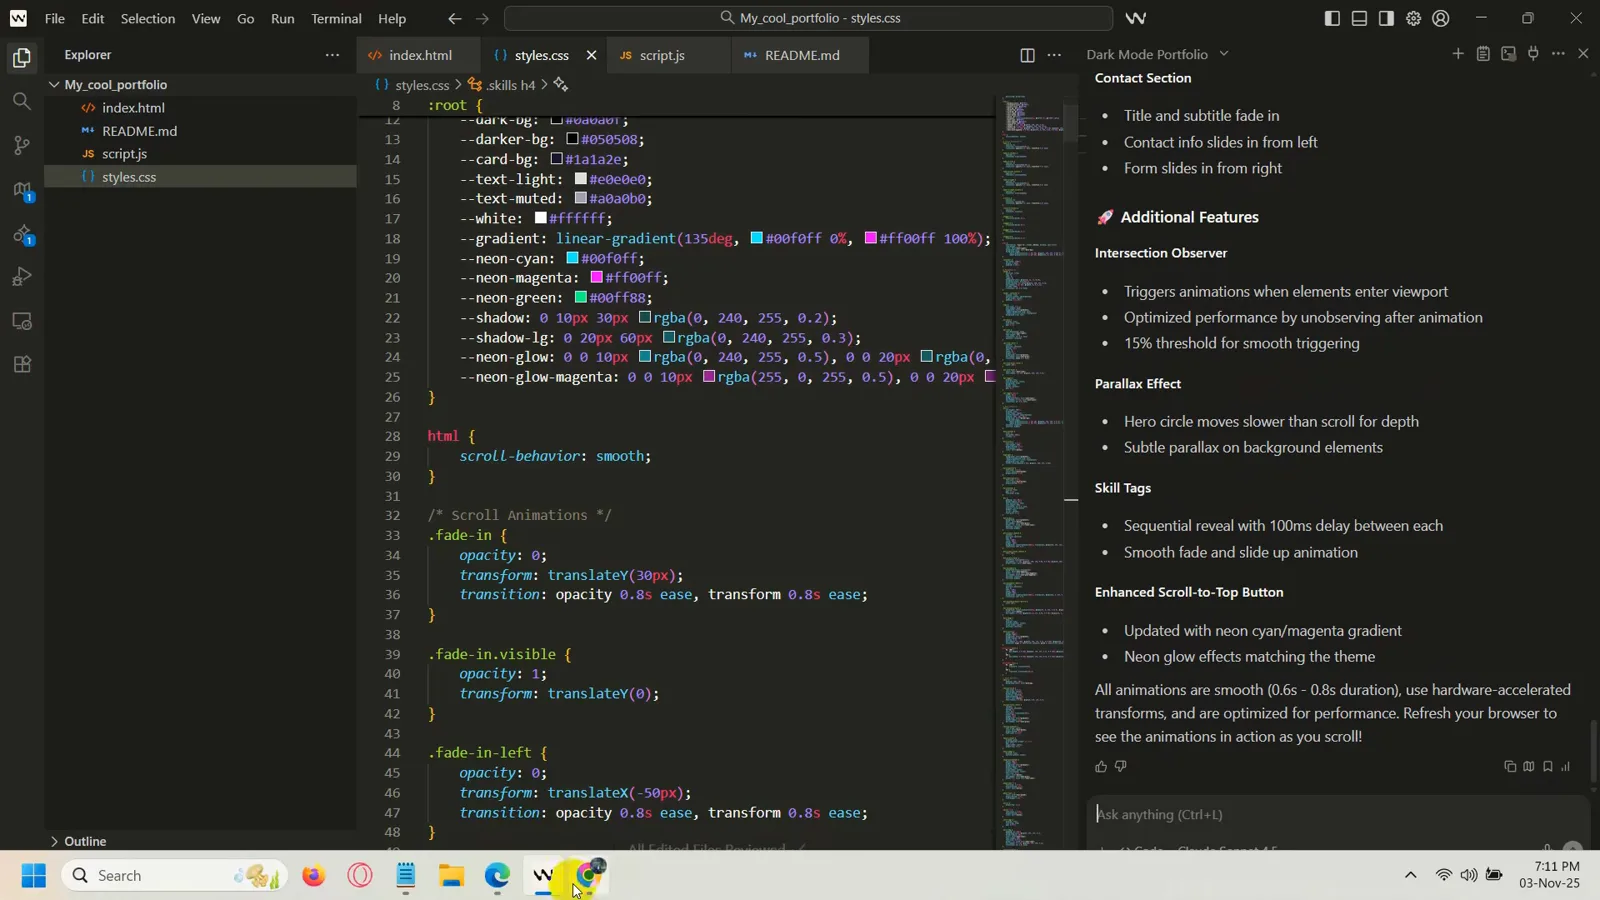
Scroll Animations 的 CSS,旁边是 Cascade 对观察器、视差和交错动画的总结。看视频 4:32 处 - 12
用示例图替换占位符
头像圆框和项目卡片还是图标占位,发送:Add some demo images。Cascade 会从 Unsplash 的 CDN 接入图片,填进 hero 圆框和三张项目卡片——URL 参数做了体积优化——卡片还加了悬停放大加发光的效果。Accept all、刷新,站点终于像成品了。
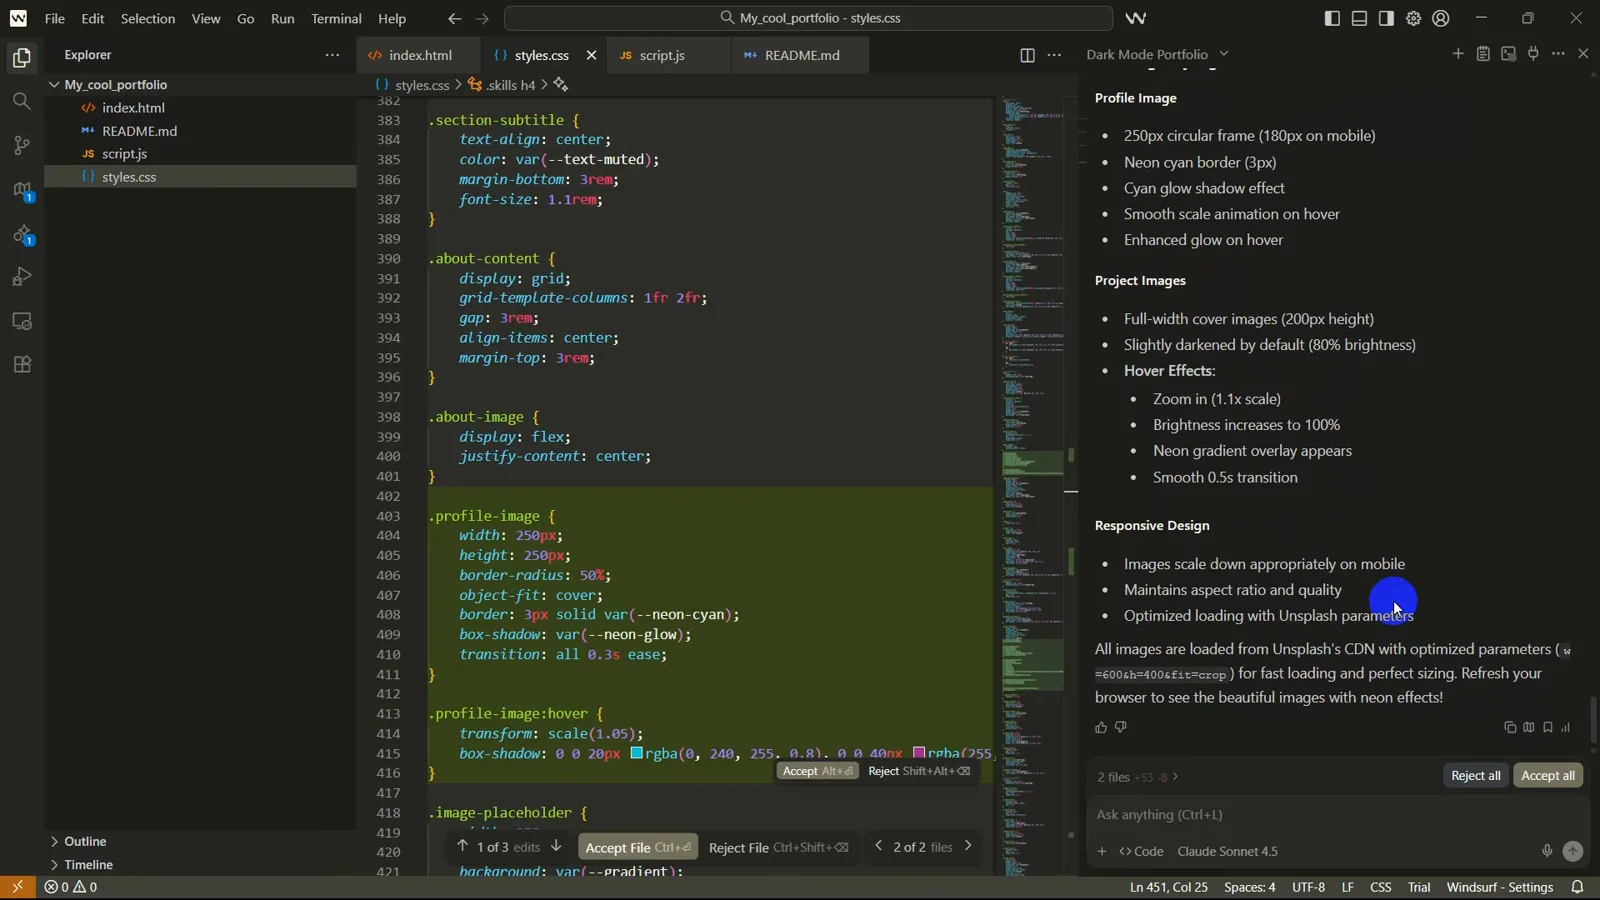
Cascade 图片轮总结:Unsplash 图片、霓虹圆框头像、悬停缩放。看视频 4:58 处 - 13
抓 bug,换上自己的图片
让 Cascade 把 hero 文案改成 Hi! I am Your AI Developer,并在圆框里放一个 AI logo。刷新后发现两个问题:标题里打印出了字面的 <span class="highlight"> 标记,生成的 logo 也不合心意。点输入框上方的加号图标,选 Upload image 传一张自己的图,然后 prompt:remove the span completely and add this image on the right circle。
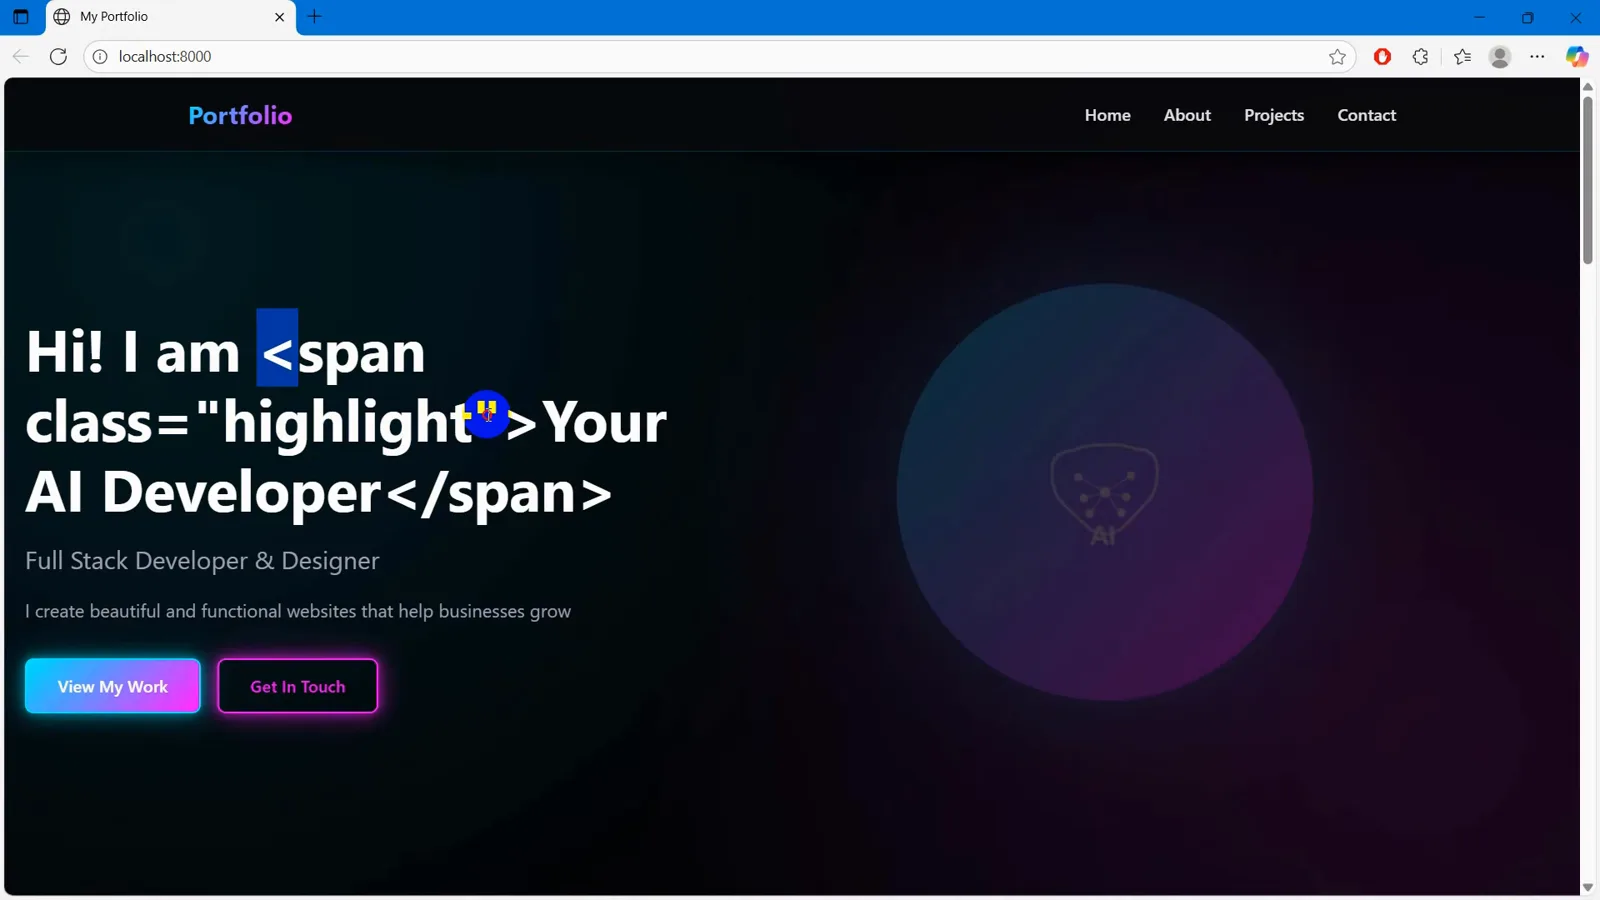
hero 还打印着裸 span 标签、旁边是占位 AI logo——以及 Upload image 修复入口。看视频 6:05 处 - 14
成品验收
最后刷新一次,作品集完工:干净的 Hi! I am Your AI Developer 标题、自己上传的图片在 hero 圆框里发光、霓虹按钮、滚动动画和图片项目卡片。一句起始 prompt 加五条简短追加——描述、接受、验证、重复,这就是 Windsurf 的全部工作流。
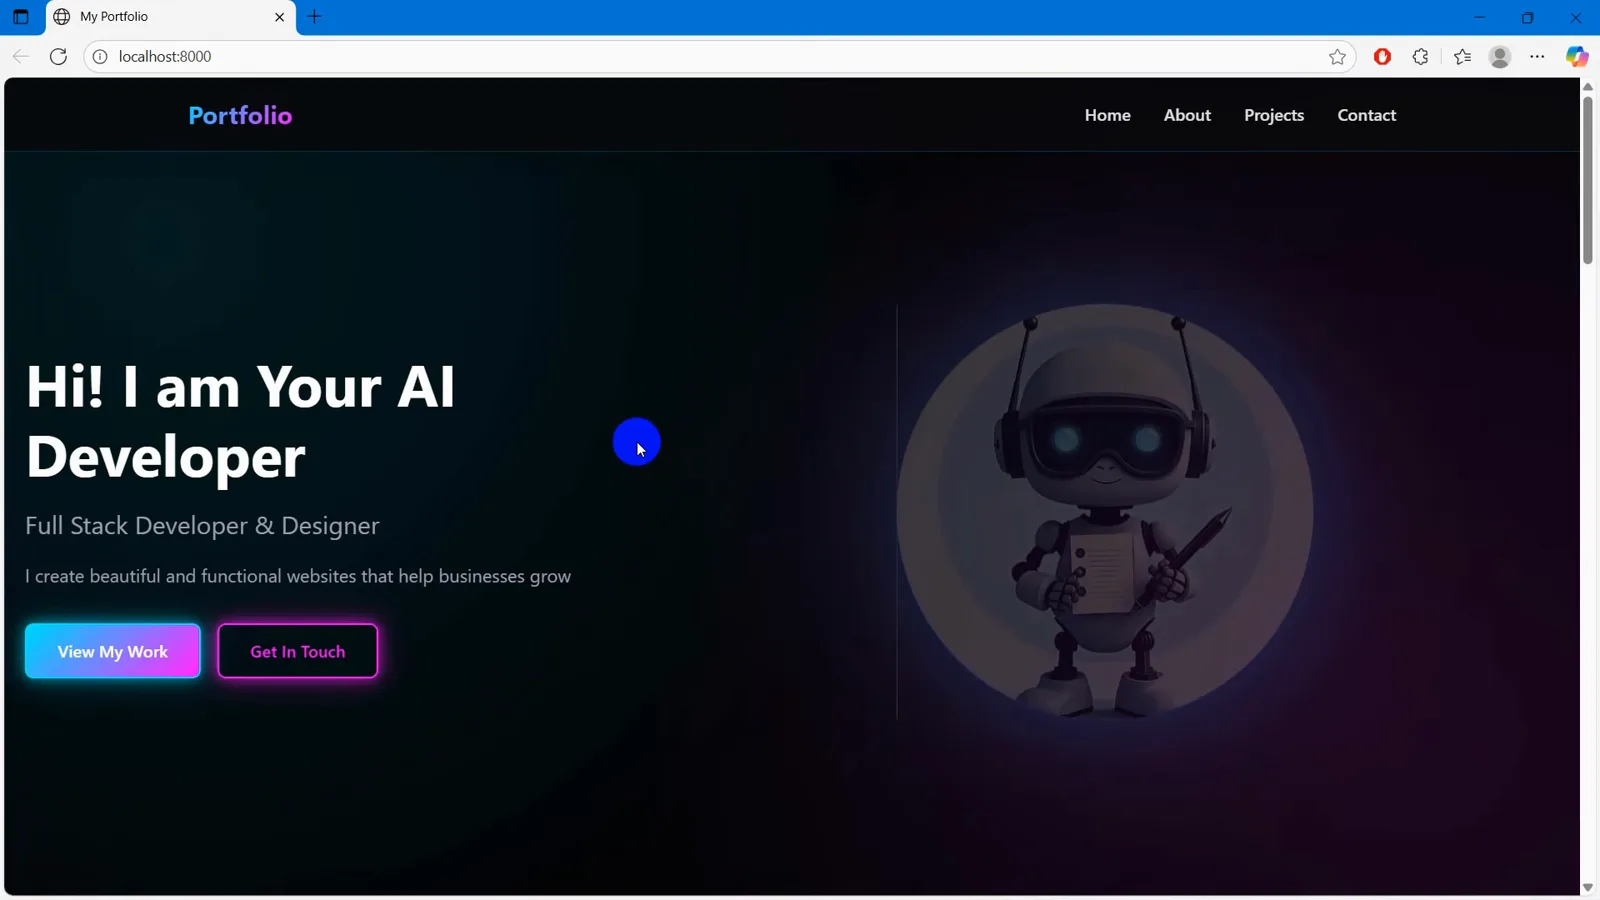
最终成品:干净标题、上传的机器人头像、霓虹按钮。看视频 7:12 处