
Codex CLI Tutorial: Install, Login and Your First Task
Everything a first session needs: install and sign in, make Codex explain an unfamiliar repo, ship a change in full-auto mode, and rebuild a screenshot as a working app — updated for the 0.157.0 release with GPT-6 Sol and Luna.
Codex CLI in quick view
- Install once with npm install -g @openai/codex, then sign in with your ChatGPT plan or an API key.
- The first prompt that always pays off: "explain this codebase to me and how do I run it?"
- --full-auto edits files and runs commands in a sandbox — the launch demo ships a whole dark theme in one prompt.
- 0.157.0 adds GPT-6 Sol and Luna to the catalog, Amazon Bedrock support and an f key that forks a session to another app.
OpenAI Codex CLI
Video:OpenAI6:19
Codex CLI in 12 mins
Video:lustoykov12:14
openai/codex releases
Changelog:GitHub changelog
Every screenshot on this page comes from OpenAI's official launch recording of Codex CLI — pure terminal and browser captures with no face-cam frames. Command, flag and workflow details are cross-checked against the second video; release facts come from the official changelog linked above.
Source videos by OpenAI ("OpenAI Codex CLI") and lustoykov ("Codex CLI in 12 mins") on YouTube, linked as timestamped deep links. The page text is original.
The walkthrough: 14 steps
Install Codex CLI and sign in
- 1
Install Codex CLI globally
Codex CLI ships through npm — run npm install -g @openai/codex in any terminal. Node.js is the only prerequisite (grab it from nodejs.org if needed), and macOS users can alternatively run brew install --cask codex. The CLI is open source on GitHub under Apache-2.0.
- 2
Start Codex and sign in
Run codex and the first launch walks you through sign-in: pick Sign in with ChatGPT to use an existing Plus, Pro, Business, Edu or Enterprise plan (a device-code option is offered too), or provide your own API key to pay per token. Your browser handles the login and the terminal confirms when you're in.
First task: make Codex explain a codebase
- 3
Launch Codex in a repo and ask the one question that matters
cd into any project and run codex again — this time a working session starts. The header shows the working directory, the active model and the approval mode before you type anything. In OpenAI's launch demo the target is openai-fm, and the question is the universal one: "explain this codebase to me and how do I run it?"
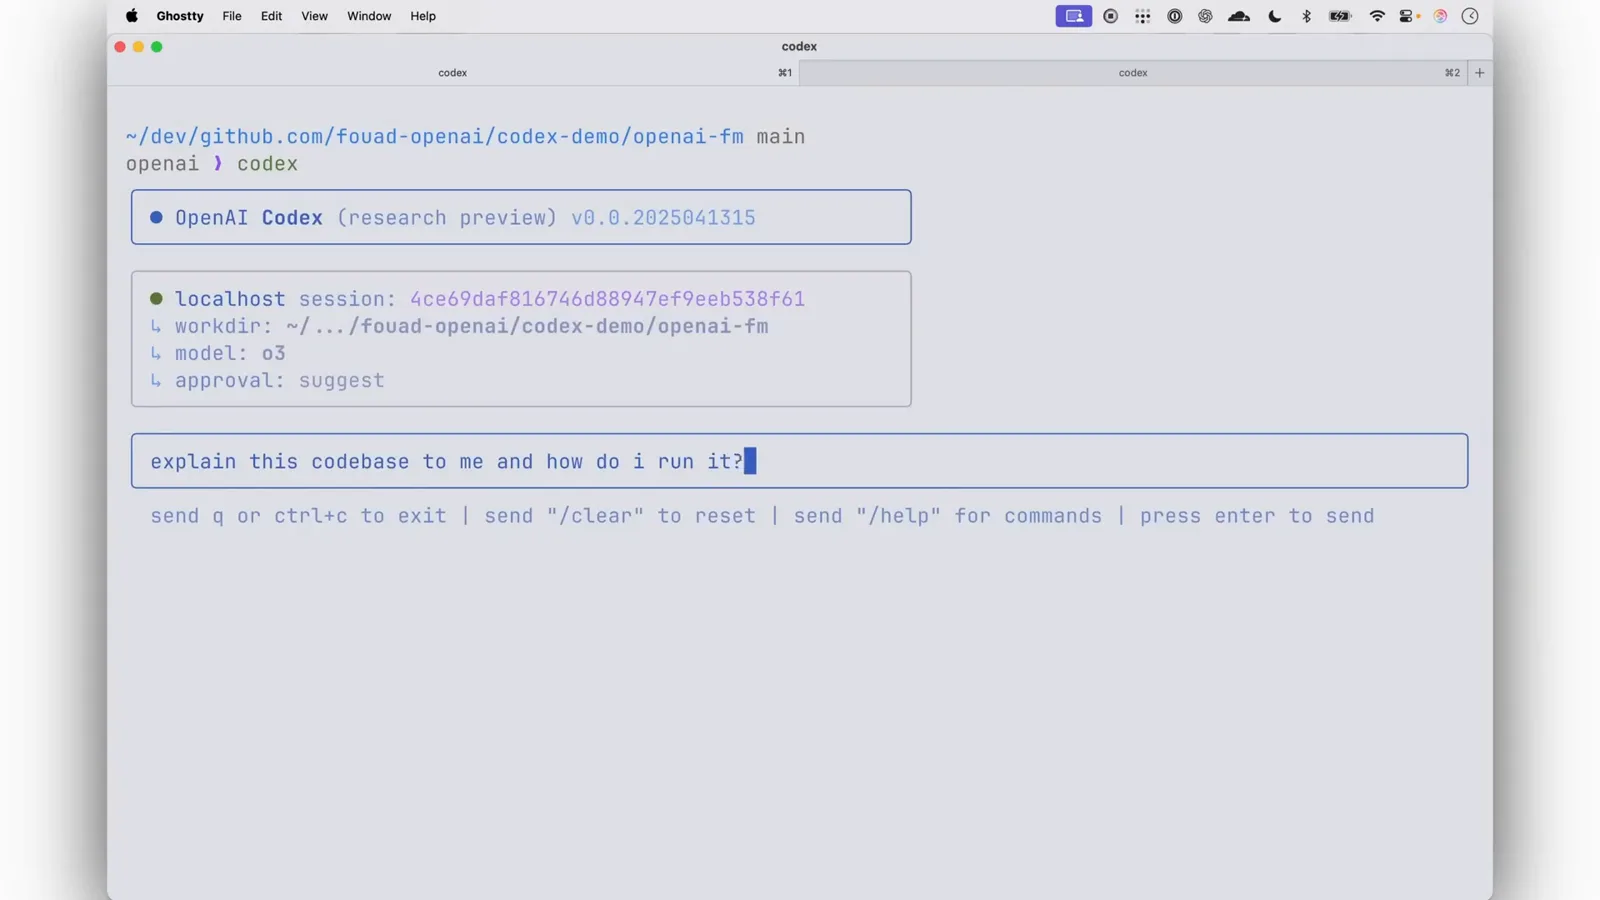
Session header first, question second — then Enter.Watch at 1:27 - 4
Read the High-level overview Codex writes back
Codex reads the files and answers in structure: which framework and styling stack the repo uses, where the state lives, how audio gets generated and which routes are optional. It is the fastest way to feel at home in an unfamiliar codebase.
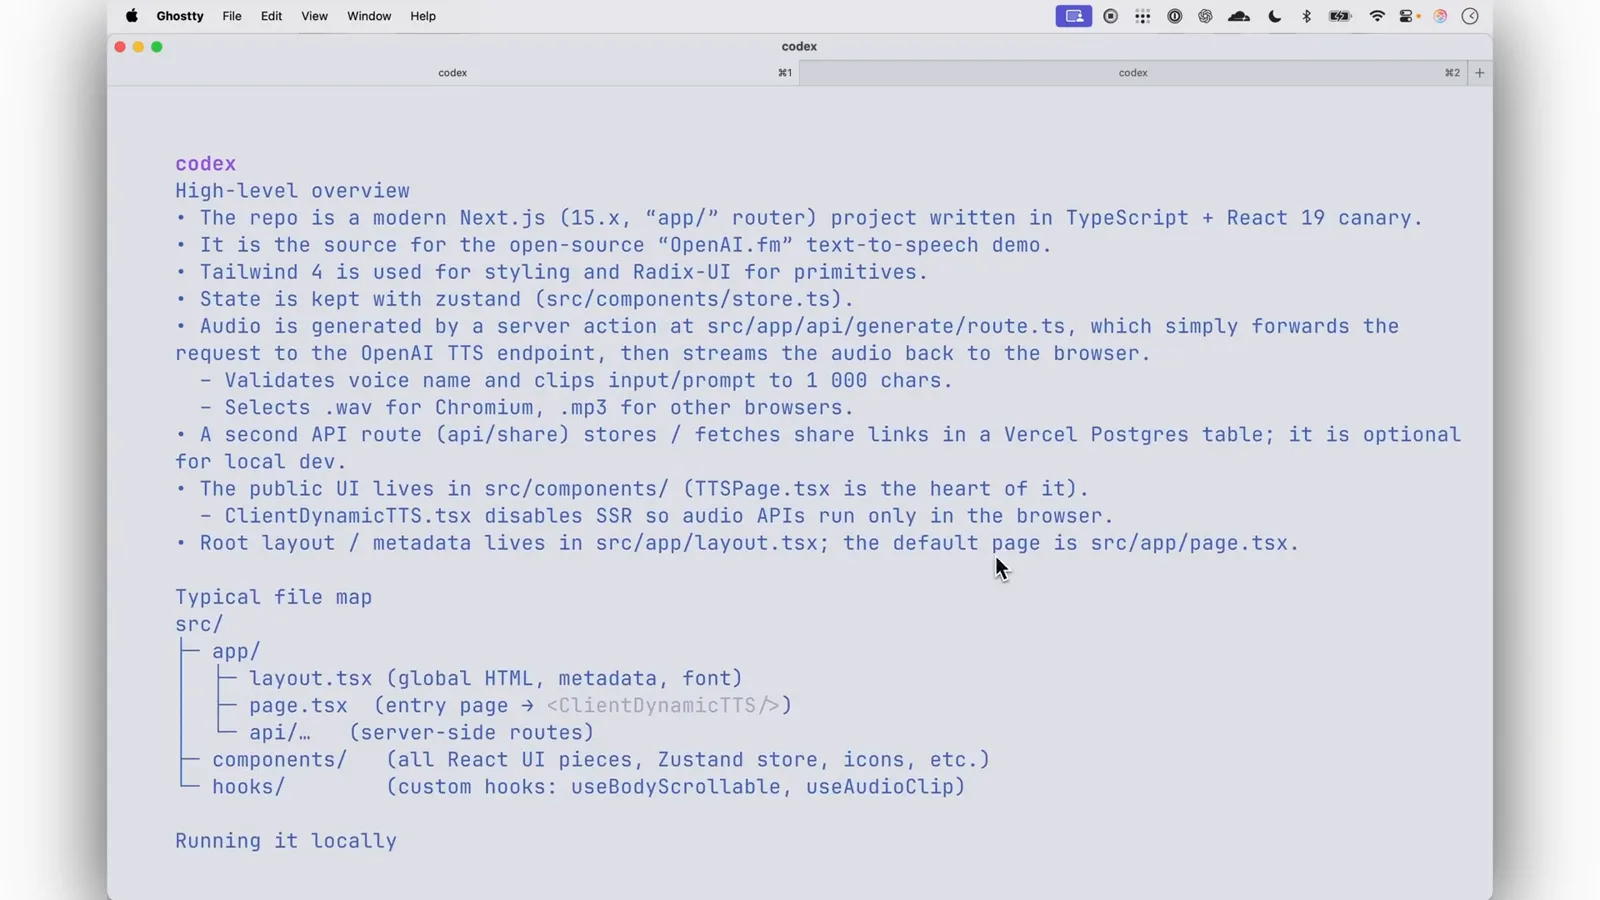
The overview names the stack: Next.js 15, React 19, Tailwind 4 and Zustand.Watch at 1:45 - 5
Study the Typical file map
The answer continues with a file map — layout.tsx for global HTML, page.tsx as the entry page, api/ for server-side routes — so your next prompts can reference real paths instead of vague descriptions.
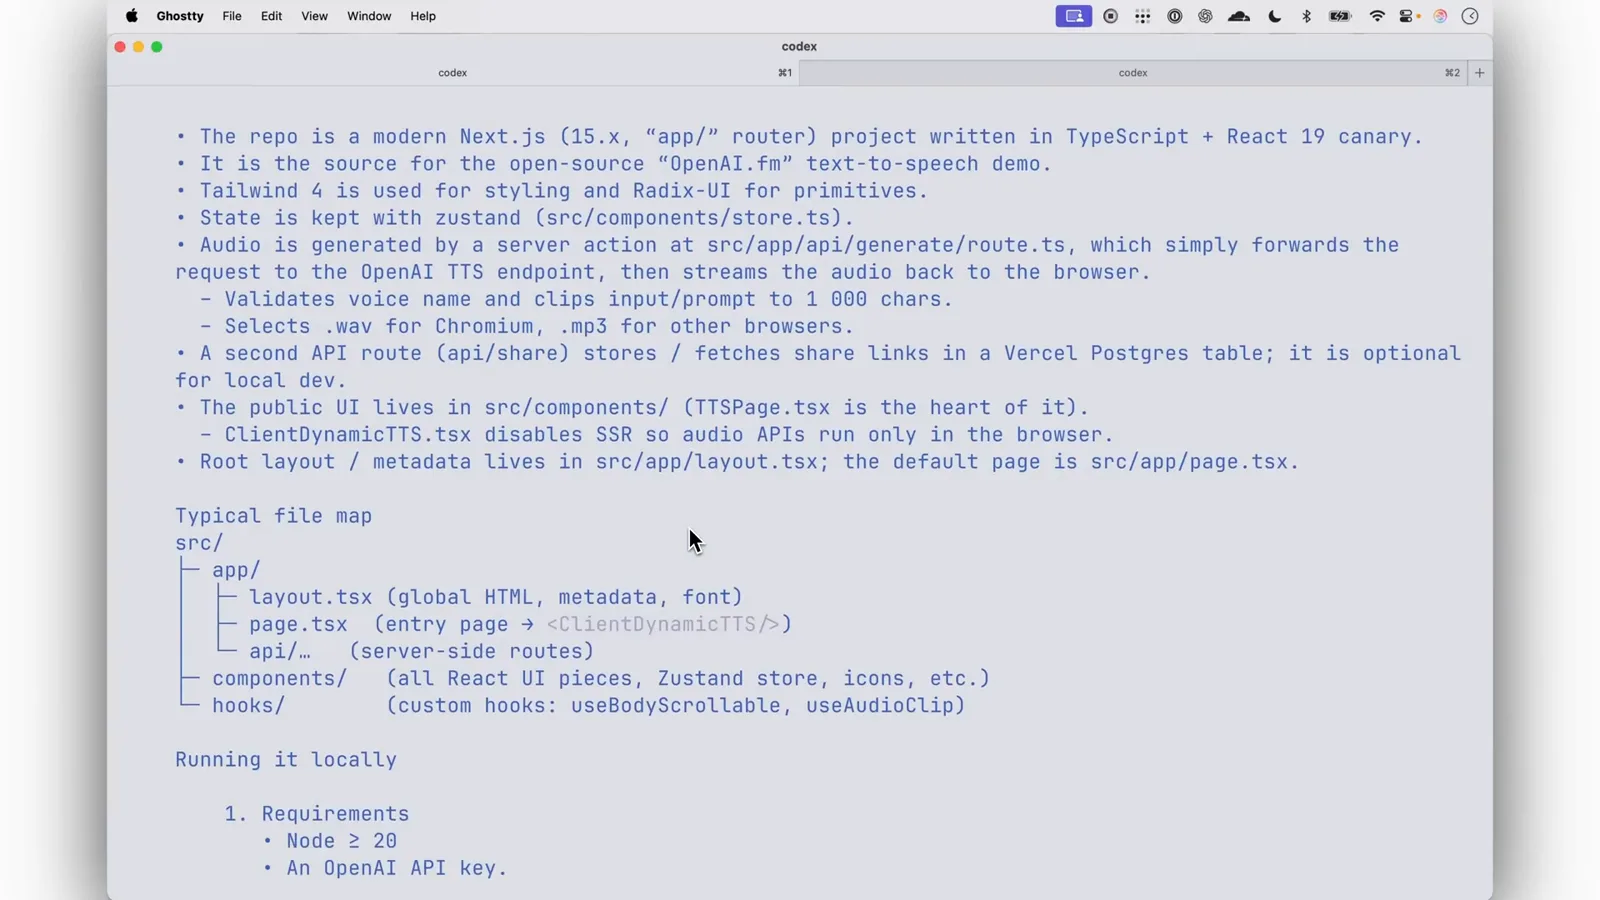
Every path in the map is context you can cite in the next prompt.Watch at 1:50 - 6
Follow the run instructions Codex wrote for you
The same answer ends with a ready-to-paste runbook: Node 20+ and an API key, git clone and npm install, an OPENAI_API_KEY line in .env.local, then npm run dev with next dev --turbopack and a visit to http://localhost:3000. Inside Codex you can also run shell commands yourself by prefixing them with !.
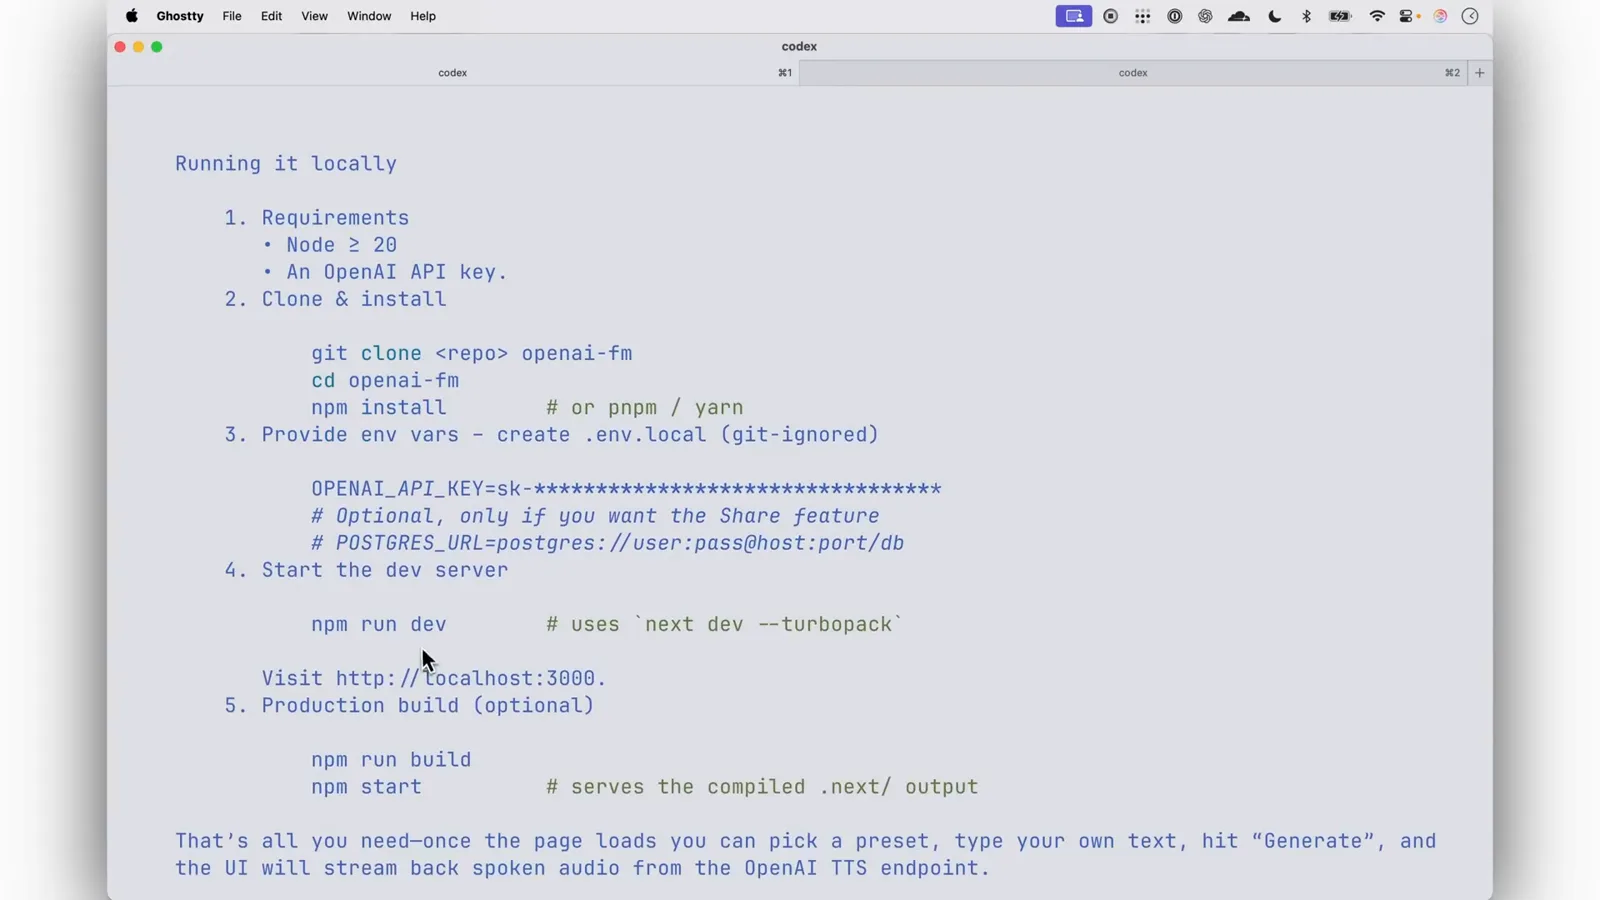
From clone to dev server without opening a doc.Watch at 1:55 - 7
Meet the target page in light mode
The demo's first edit is a theme change on the site you just ran. OpenAI.fm renders in light mode with voice cards, vibe presets and the orange Play button — knowing the current state this precisely is what makes the next prompt work.
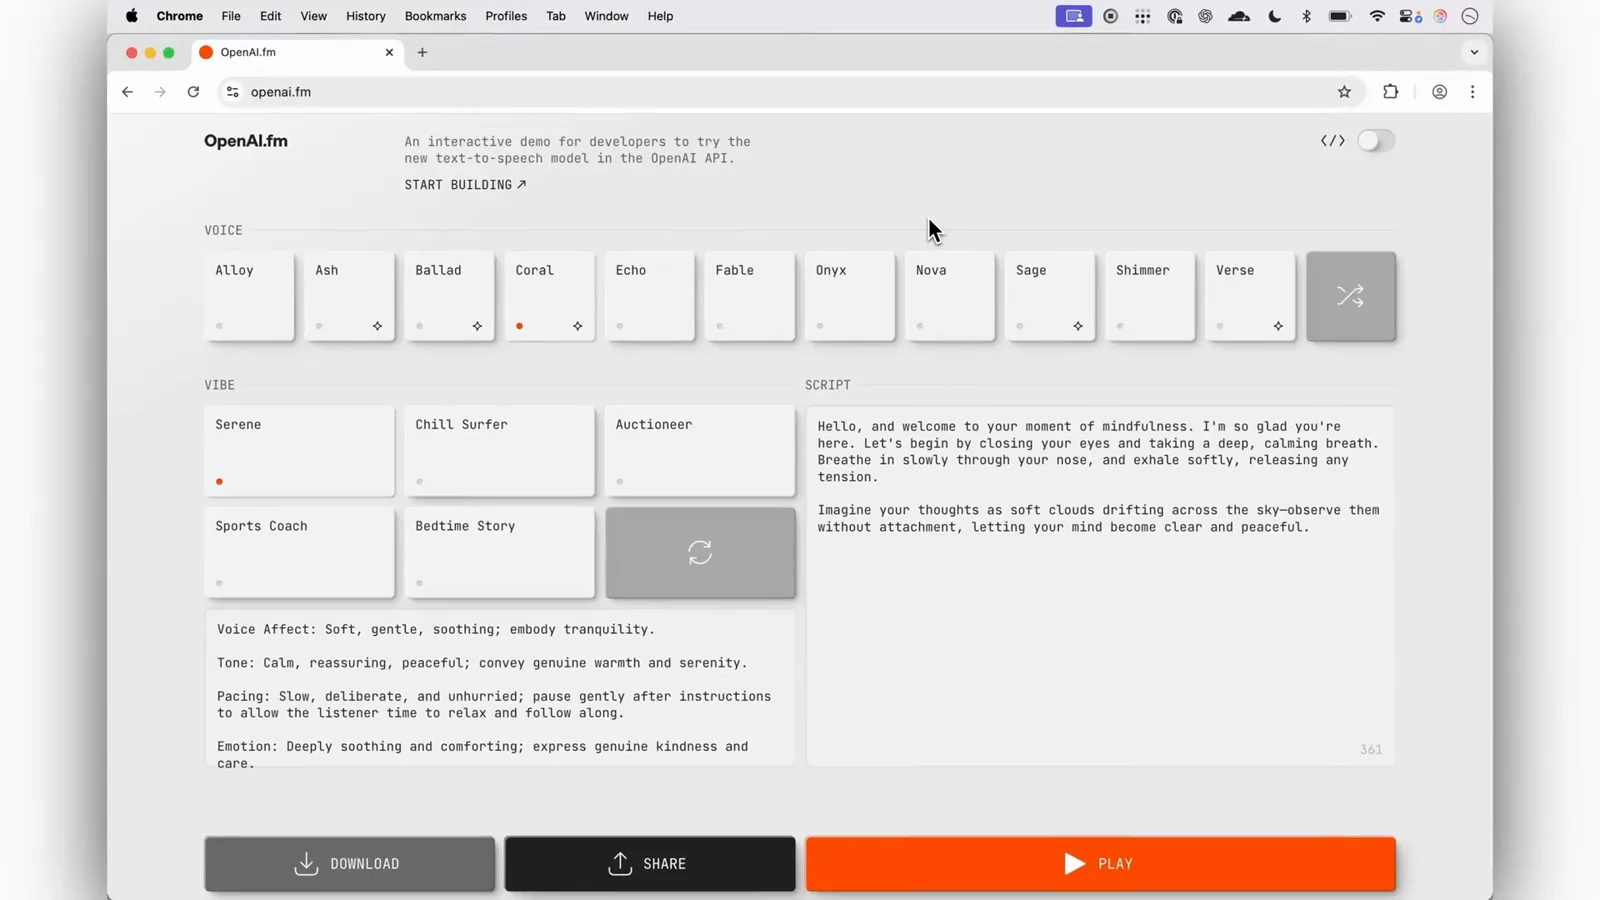
Light mode before: voice cards, vibe presets, orange Play.Watch at 1:15
First change: a dark theme in full-auto mode
- 8
Relaunch in full-auto with a precise prompt
Quit and start codex --full-auto, then describe the change: "Implement dark mode based on system settings — make sure every surface adapts automatically, like buttons and toggles." Full-auto lets Codex edit files and run commands without asking each time; OpenAI's demo describes it as network-disabled and sandboxed to the directory you started it in. Current builds expose the dials as --ask-for-approval (untrusted, on-request, never) and --sandbox (read-only, workspace-write, danger-full-access).
- 9
Check the result: every surface adapts
A refresh later the site is fully dark — background, cards and text follow the system setting, and the demo's prompt even renamed the Play button to Introduce Codex. Because full-auto stays sandboxed, a wrong edit can only touch your working copy.
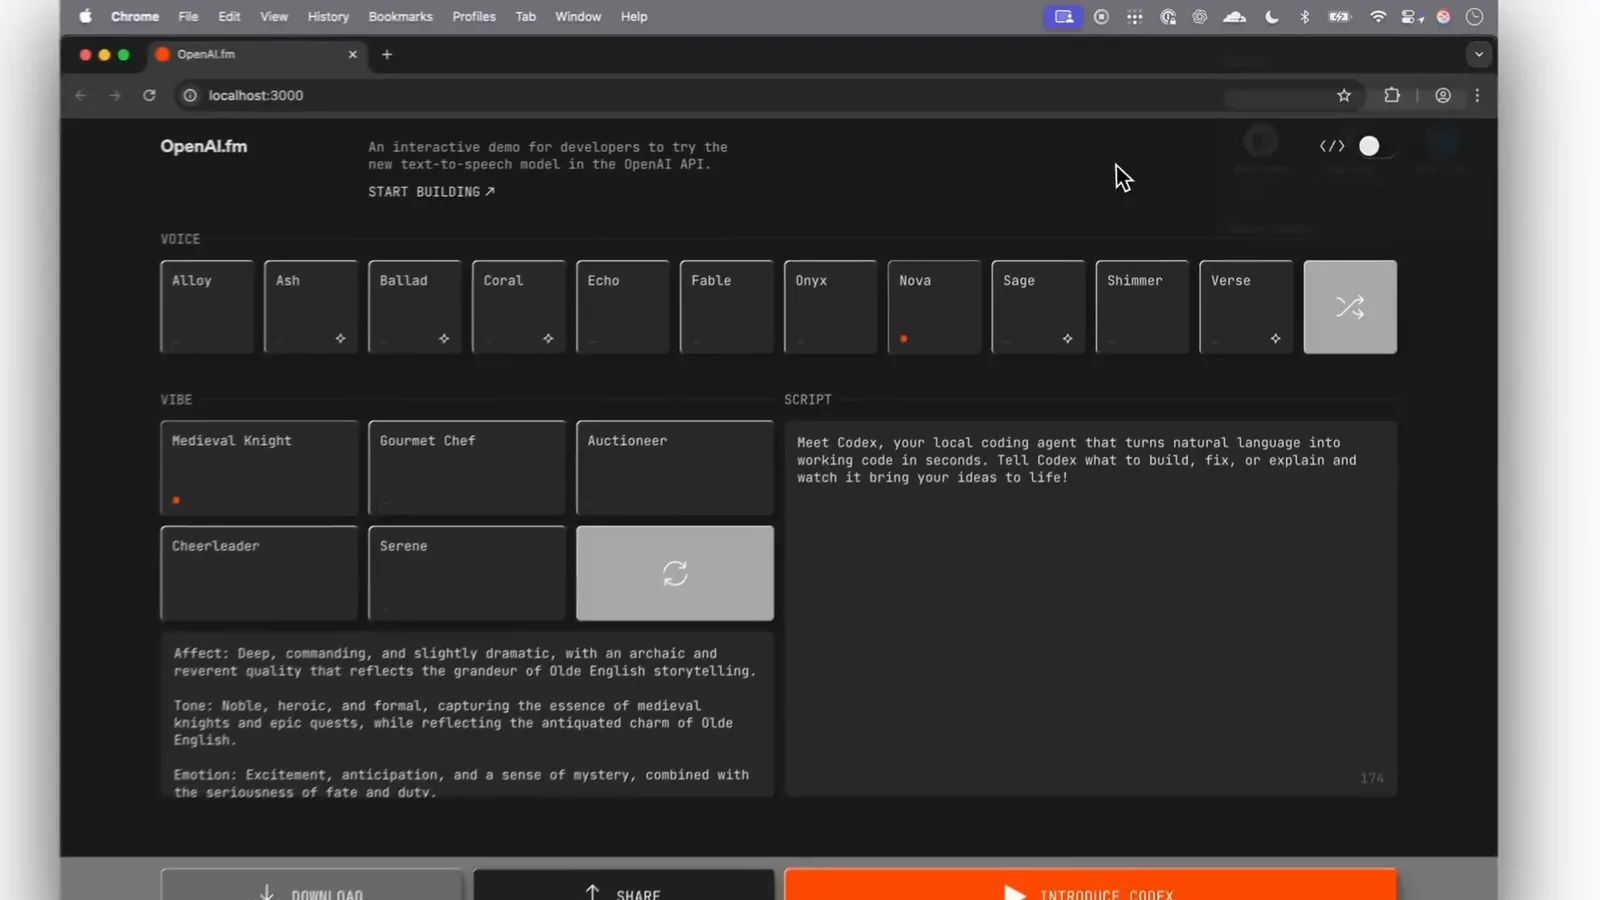
Dark mode after one prompt — with the button copy updated too.Watch at 3:05
From screenshot to working app
- 10
Start from scratch in an empty folder
Screenshot-to-app is Codex's party trick. Create an empty directory, then launch with model, approval mode and attachment in one line: codex -m o4-mini -a full-auto -i <screenshot>. -i attaches an image, -a sets approvals, -m picks the model.
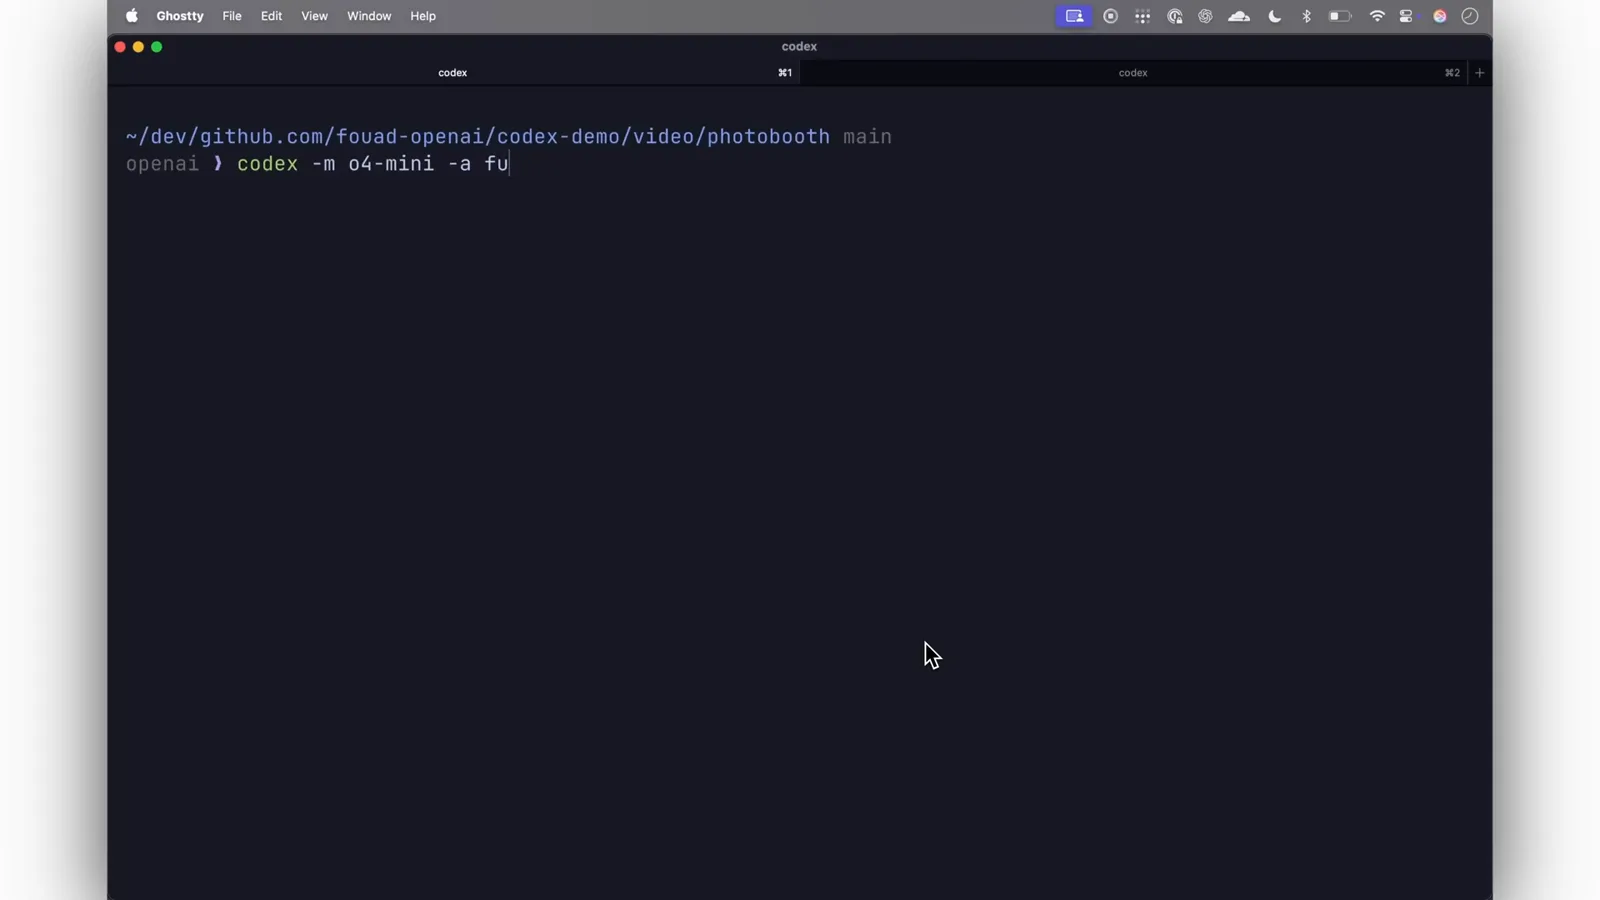
One command sets the model, approvals and the attached image.Watch at 3:50 - 11
Let Codex interrogate the screenshot
The session header confirms what Codex received — workdir, model, approval full-auto and the image path — then the first turn is pure Thinking while it studies the picture, before a single line of code.
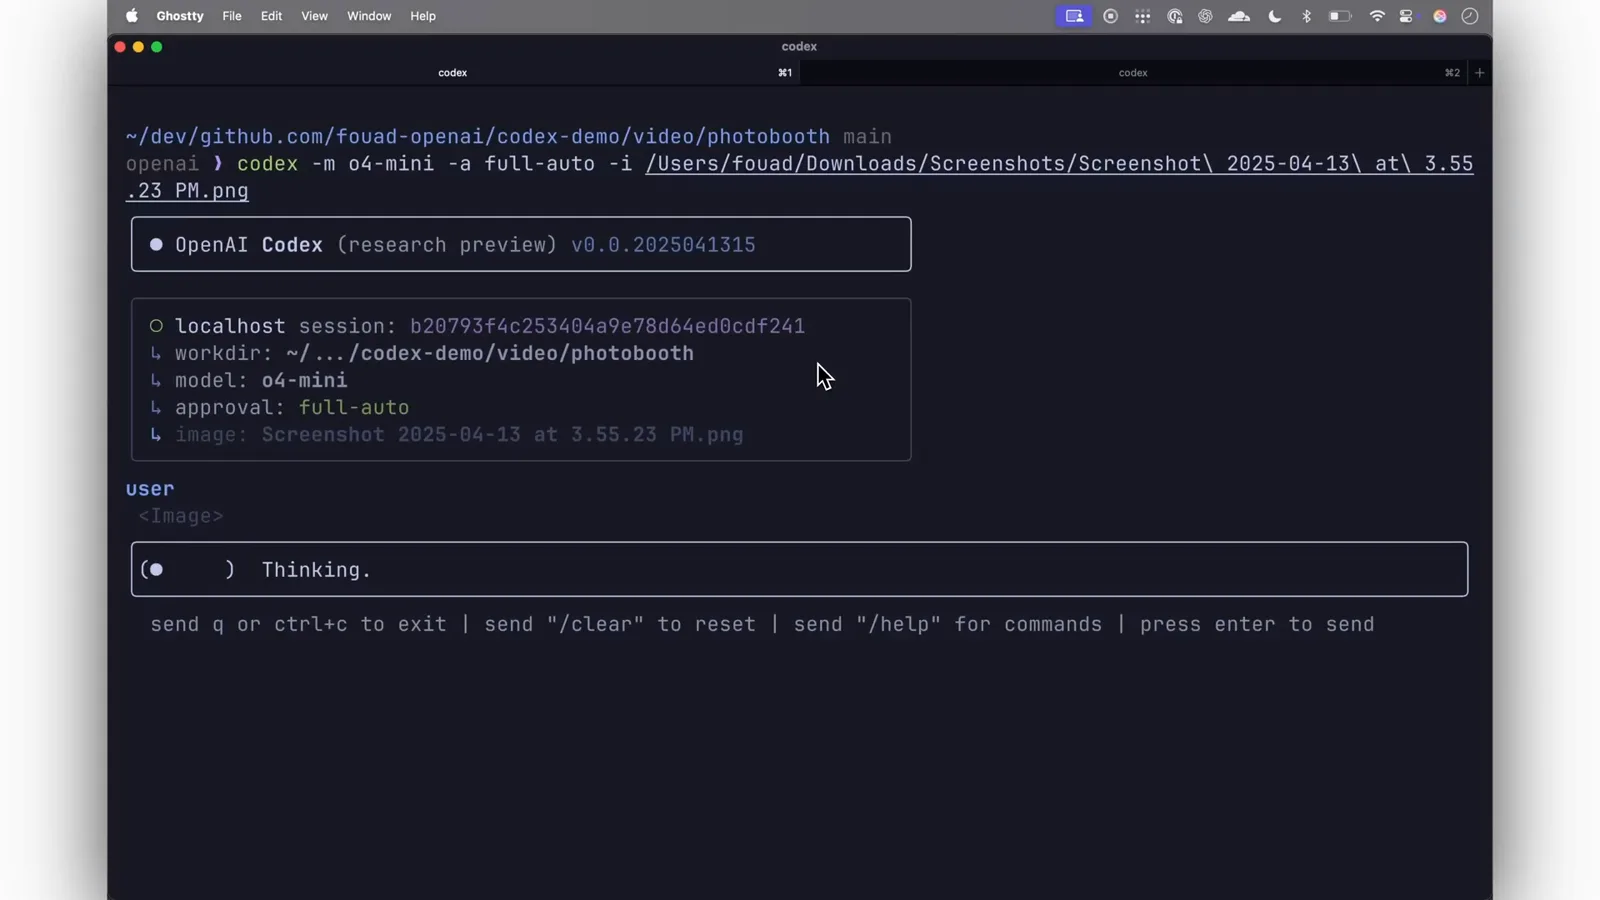
The header lists the attached screenshot before any code is written.Watch at 3:58 - 12
Answer the clarifying questions
Instead of guessing, Codex replies with a Clarifying user intent section: build something like this in Python/OpenCV? implement one specific effect such as thermal-vision? need UI/layout guidance? A short plain-text answer turns the vague screenshot into a spec.
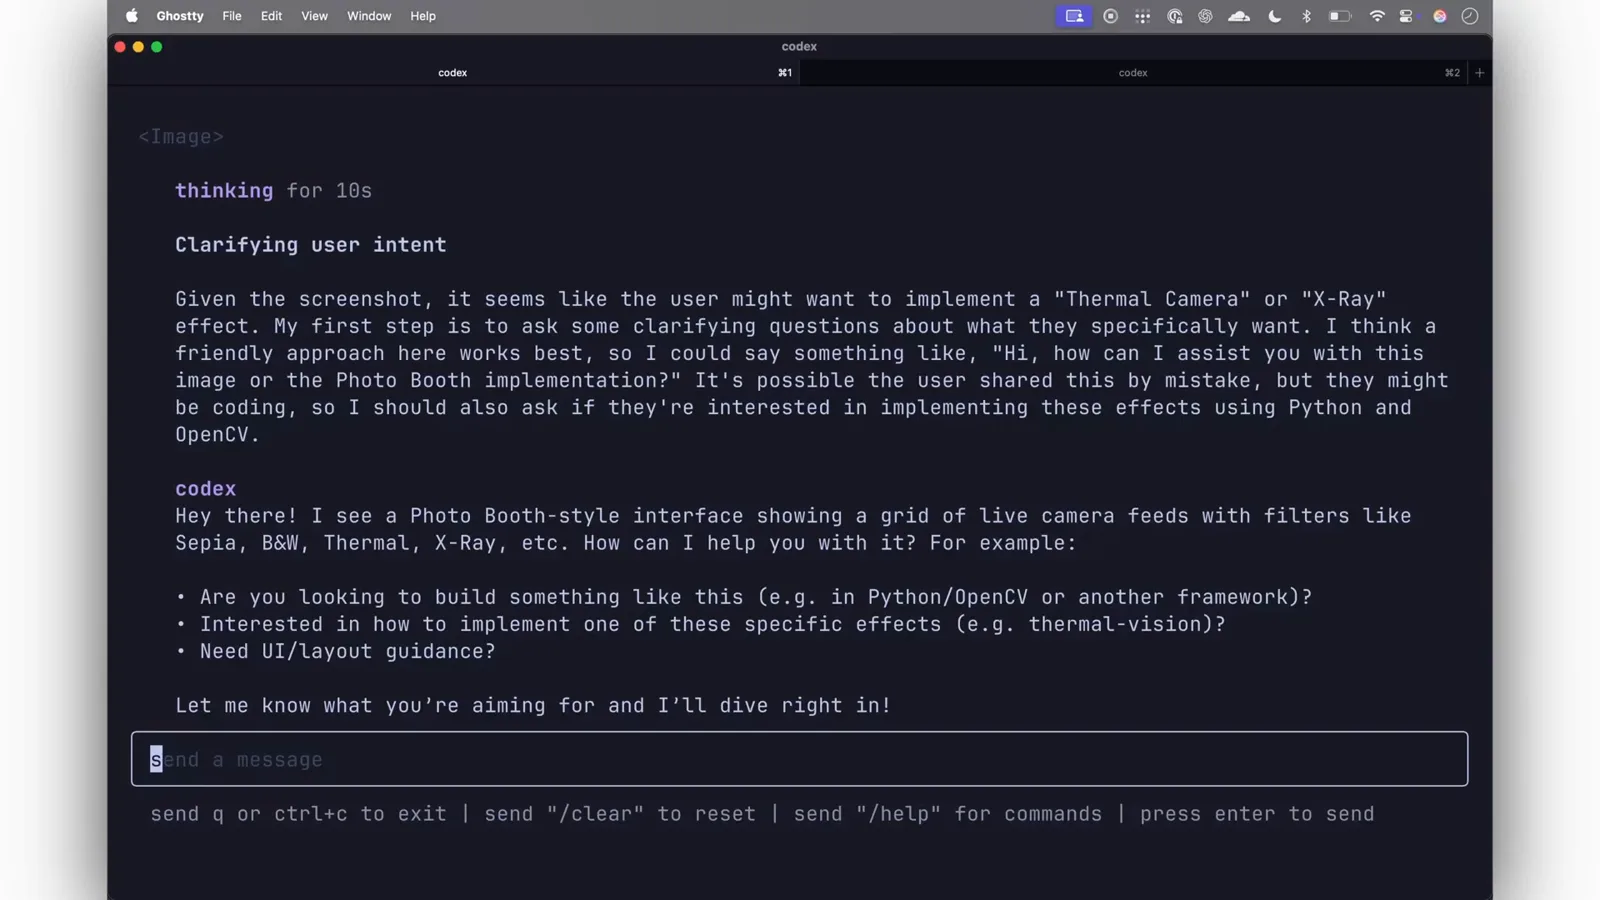
Three questions in, the screenshot becomes a spec.Watch at 4:00 - 13
Watch it write the single-file app
With the spec settled, Codex streams an apply_patch that creates index.html top to bottom: a canvas grid sized with devicePixelRatio, ctx.drawImage per panel, requestAnimationFrame for live video and a load listener — then reports Done.
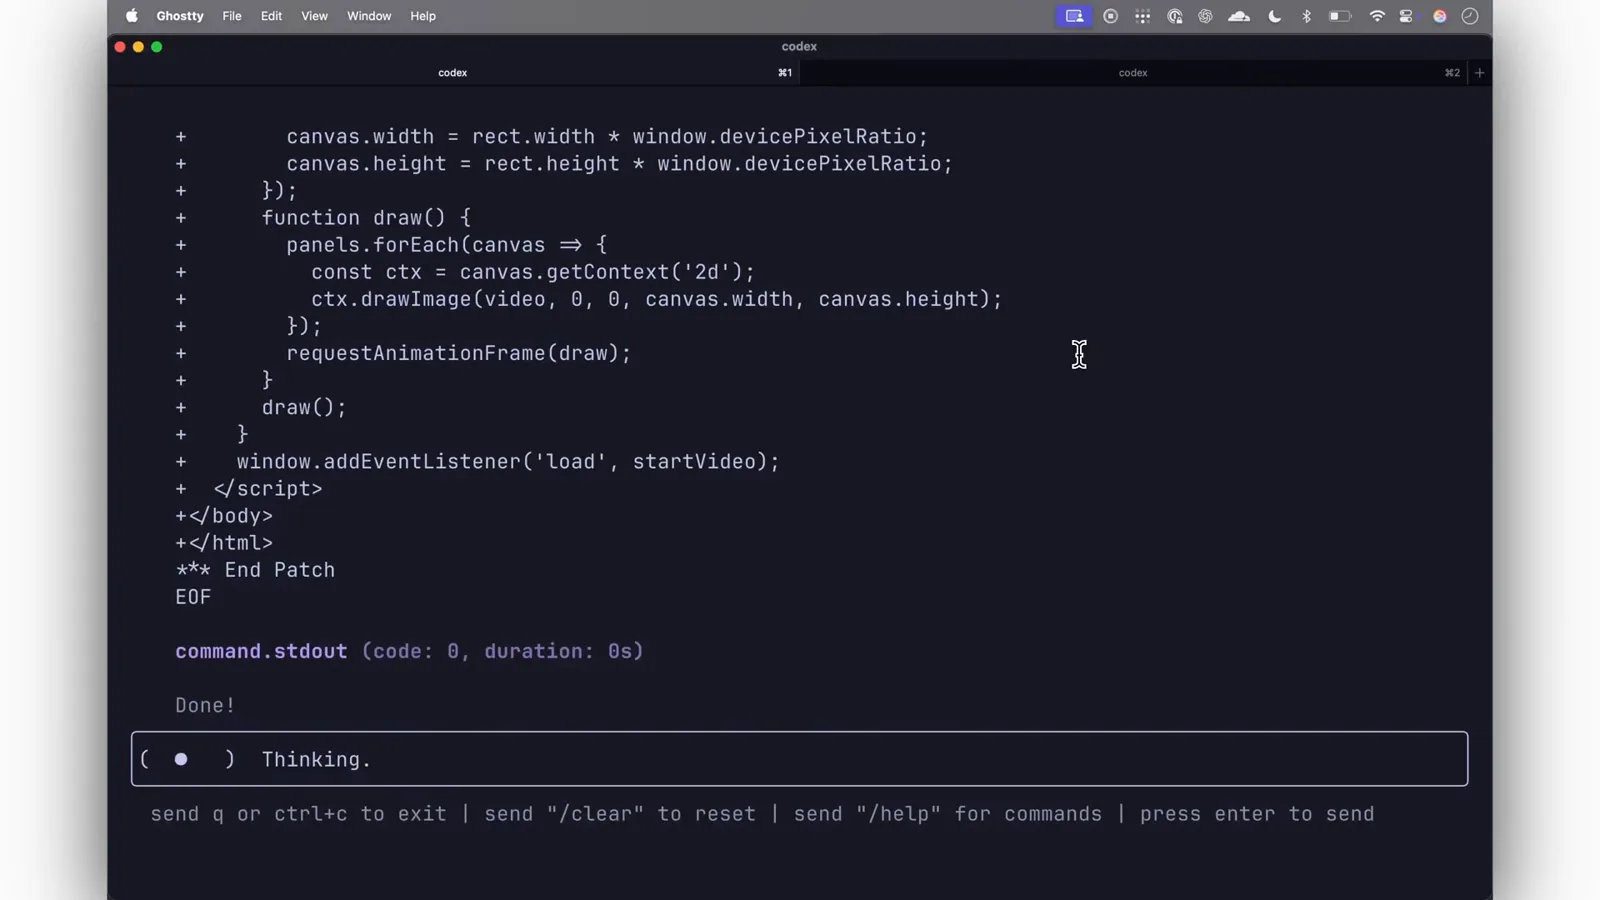
The patch ends with Done — the whole app is one HTML file.Watch at 4:42 - 14
Open index.html and compare
Codex wraps up with the recipe: nine canvases in a 3×3 grid, filters from Sepia and B&W to Comic Book, Thermal and X-Ray, landscape orientation via the Screen Orientation API — and the instruction to just open index.html over HTTPS or localhost so the camera works.
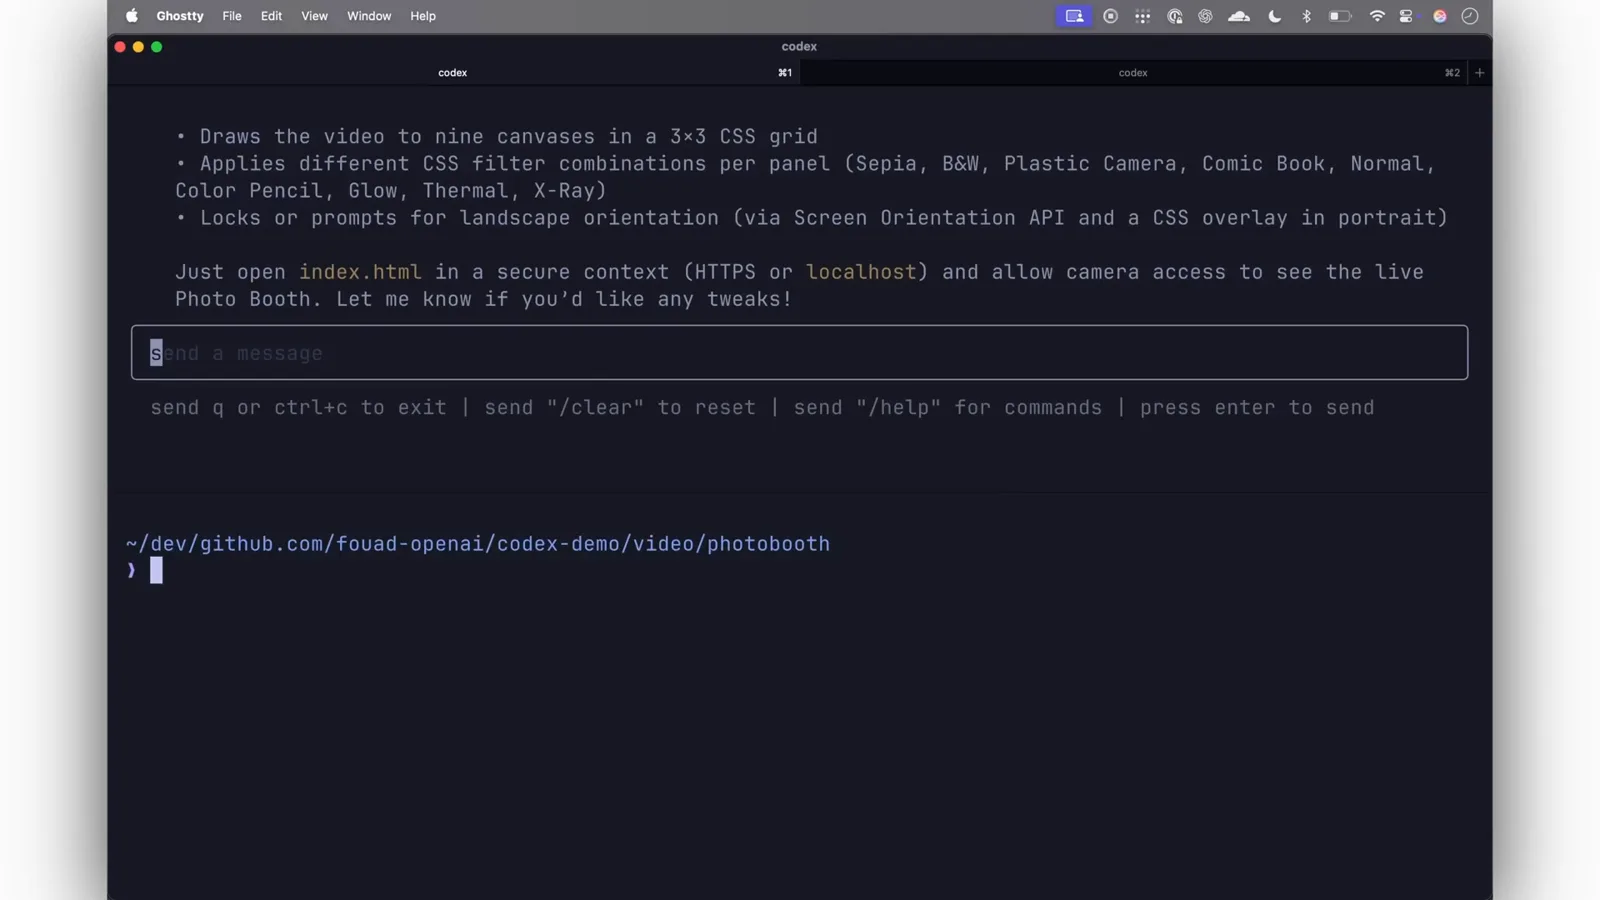
The wrap-up message doubles as the README of the generated app.Watch at 4:50
House rules: AGENTS.md, sandbox and the commands worth knowing
Run /init and Codex generates an AGENTS.md in the repo — a system-prompt-style file it reads before tasks, so naming, framework and test conventions live in the project instead of being retyped every session.
Approvals and isolation are the two dials to understand. /permissions toggles full access inside a session; --ask-for-approval (untrusted, on-request, never) and --sandbox (read-only, workspace-write, danger-full-access) set the defaults, and ~/.codex/config.toml stores them permanently. The --yolo combination means approval never plus danger-full-access — convenient, and exactly as dangerous as it sounds.
Daily drivers: /model switches model and reasoning effort (medium is a sensible default — high burns tokens), /plan turns a request into a reviewed plan, /review audits uncommitted changes or a branch, /compact frees context after long runs, /new starts a clean chat. Outside the TUI, codex exec "…" runs one-off non-interactive tasks and codex resume (or codex resume-last) reopens a closed session. Reference files with @ and load skills with $ — skills are folders with an instructions file, installed under ~/.codex/skills.
New in Codex CLI 0.157.0: GPT-6 Sol and Luna, Amazon Bedrock, fork key
Version 0.157.0 landed on September 25, 2026. Five changes from the official changelog are worth updating for:
- 1GPT-6 Sol and Luna were added to the model catalog — they appear in /model like any other entry.
- 2Amazon Bedrock support arrived, including Bedrock catalogs for the new models and migration prompts that help older model names move over.
- 3The fullscreen transcript is now enabled by default, with extended Shift-click text selection.
- 4A new f shortcut forks the conversation you have open into another app, preserving drafts and queued prompts.
- 5/import now works in remote sessions and local background-server sessions, which start automatically for eligible interactive runs.
Which model should you pick? GPT-6 Sol is what the status line shows by default — keep it for demanding agentic work. Luna is labeled the fast and affordable agentic model, so it suits quick edits and high-volume runs, and Terra sits between them as the balanced everyday option. Switch with /model, set reasoning effort per model, or pin a default in config.toml — our Codex model picker tutorial walks the whole switch.