
Codex Resume Session: codex resume, Picker & Fixes
How to reopen a past Codex CLI conversation with codex resume — the interactive session picker, type-to-search, codex resume --last — plus where sessions are stored and what to do when the picker comes up empty.
TL;DR
- Quit a session with Ctrl+C or /quit, then run codex resume from the same project folder — the "Resume a previous session" picker lists every past chat for that directory.
- Move with the arrow keys and press Enter to reopen a session; the full transcript is restored, including the original token and context totals.
- Type to search: the picker filters sessions by their first prompt, so "summ" isolates the conversation that started "can you give me a brief summary".
- codex resume --last skips the picker and reopens the most recent chat from the current directory; --all widens the search to other directories (official CLI reference).
OpenAI Codex Tutorial #5 - CLI Commands & Resuming Sessions
Channel: Net Ninja6:28
CLI reference — official documentation
Official docs: developers.openai.com/codex
Every screen on this page comes from the Net Ninja recording — a clean VS Code terminal capture with no facecam and no burned-in captions. The picker flow, the search behavior and the restored session were verified frame by frame; the --last, --all and directory-mismatch behaviors come from the official CLI reference.
Screenshots belong to their creators and deep-link to the matching timestamp; no facecam frames are used.
Resuming a Codex CLI session, step by step
Part 1 — Inside a session: the built-in slash commands
- 1
Start a session and read the welcome banner
Run codex in your project folder. Codex (v0.36.0 in the recording) greets you with the active model — gpt-5-codex, changeable with /model — the working directory, and four suggested commands: /init, /status, /approvals and /model.
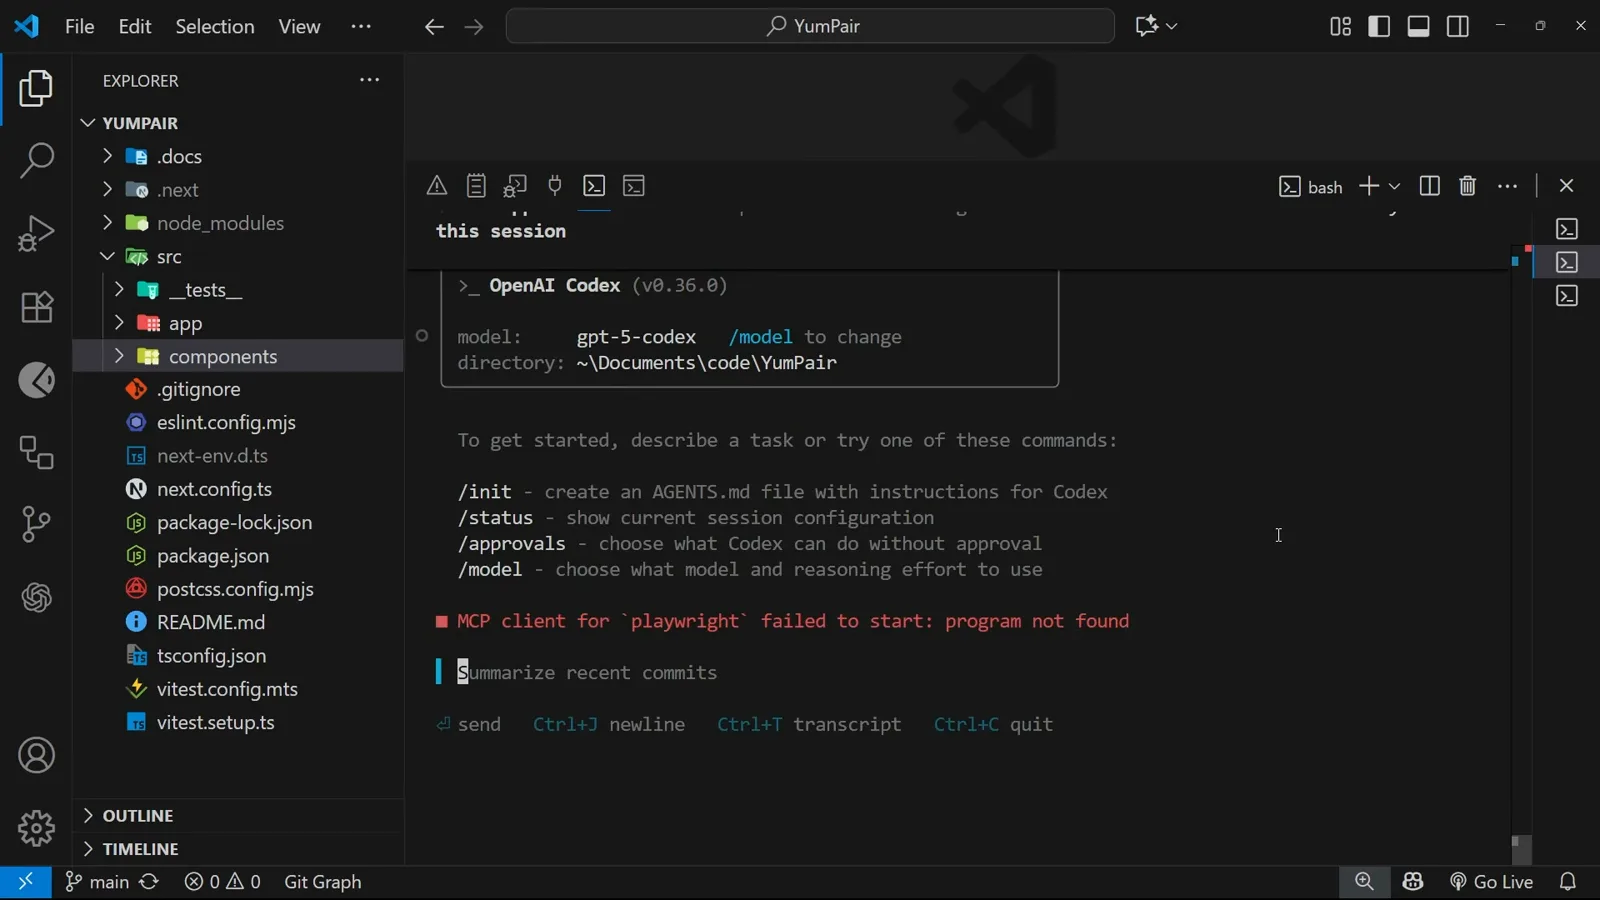
The welcome banner names the model and directory before you type anything.Watch from 0:46 - 2
Type a forward slash to list every built-in command
Every Codex command starts with a slash, like Claude Code. Typing / opens the full menu: /new starts a fresh chat mid-conversation, /compact summarizes the history to protect the context limit, /diff shows changes, /mention attaches a file, and /status shows session configuration and token usage.
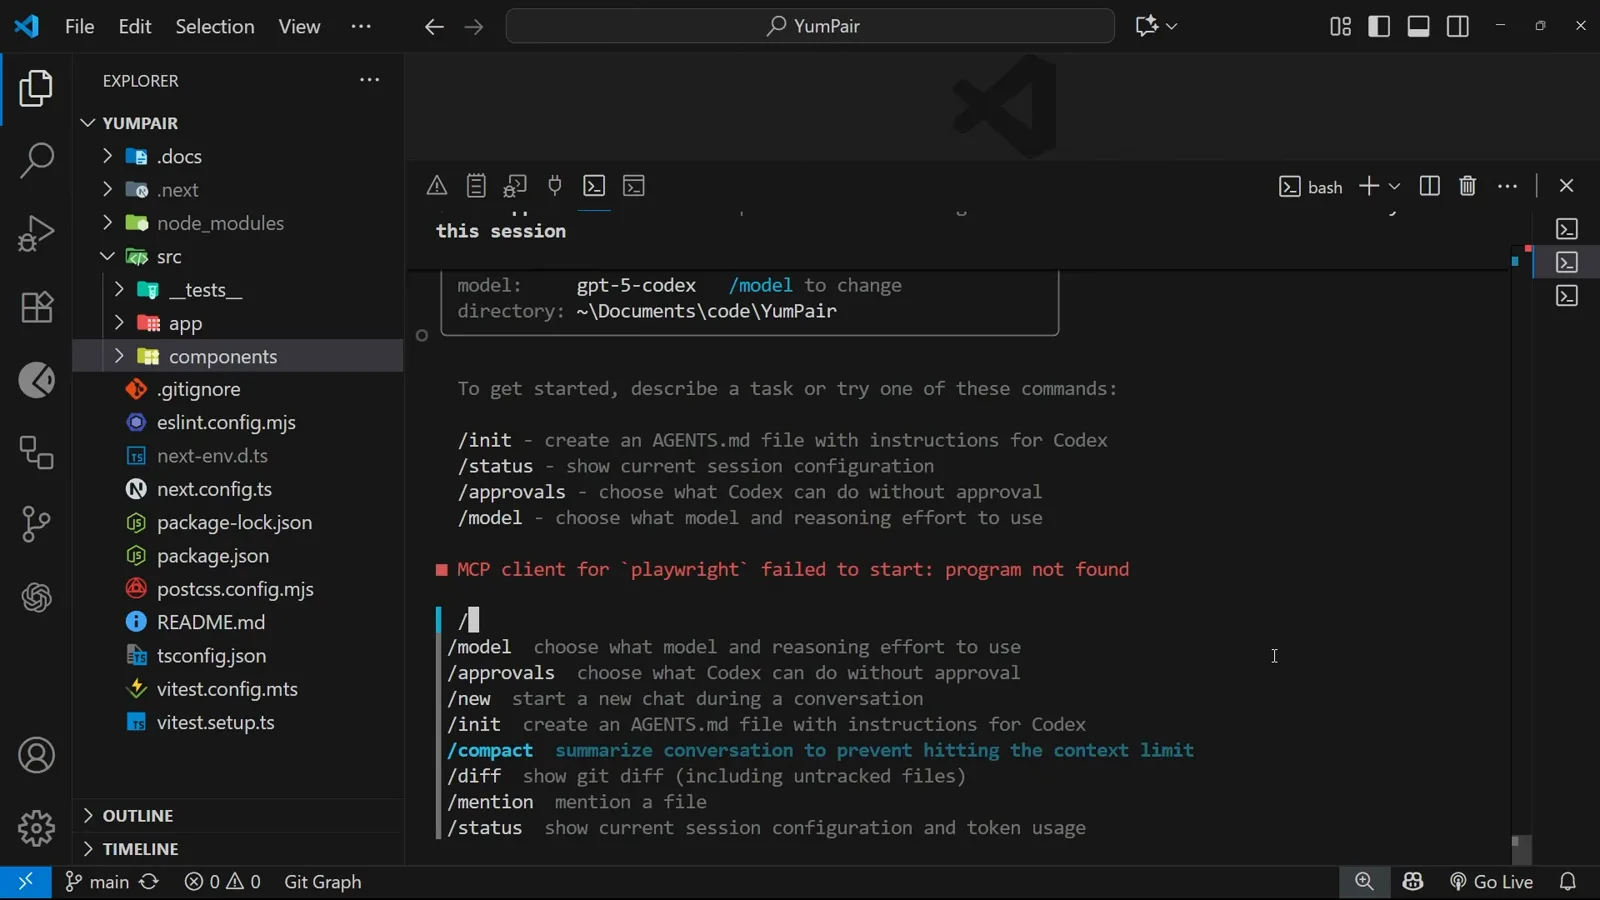
The slash menu is where /new lives — the counterpart to resuming an old session.Watch from 2:00 - 3
Check /status for the current session ID
/status prints the workspace, the account (signed in with ChatGPT), the model, the CLI version and a Token Usage block that includes the current session ID — handy when you need to reference a specific session elsewhere.
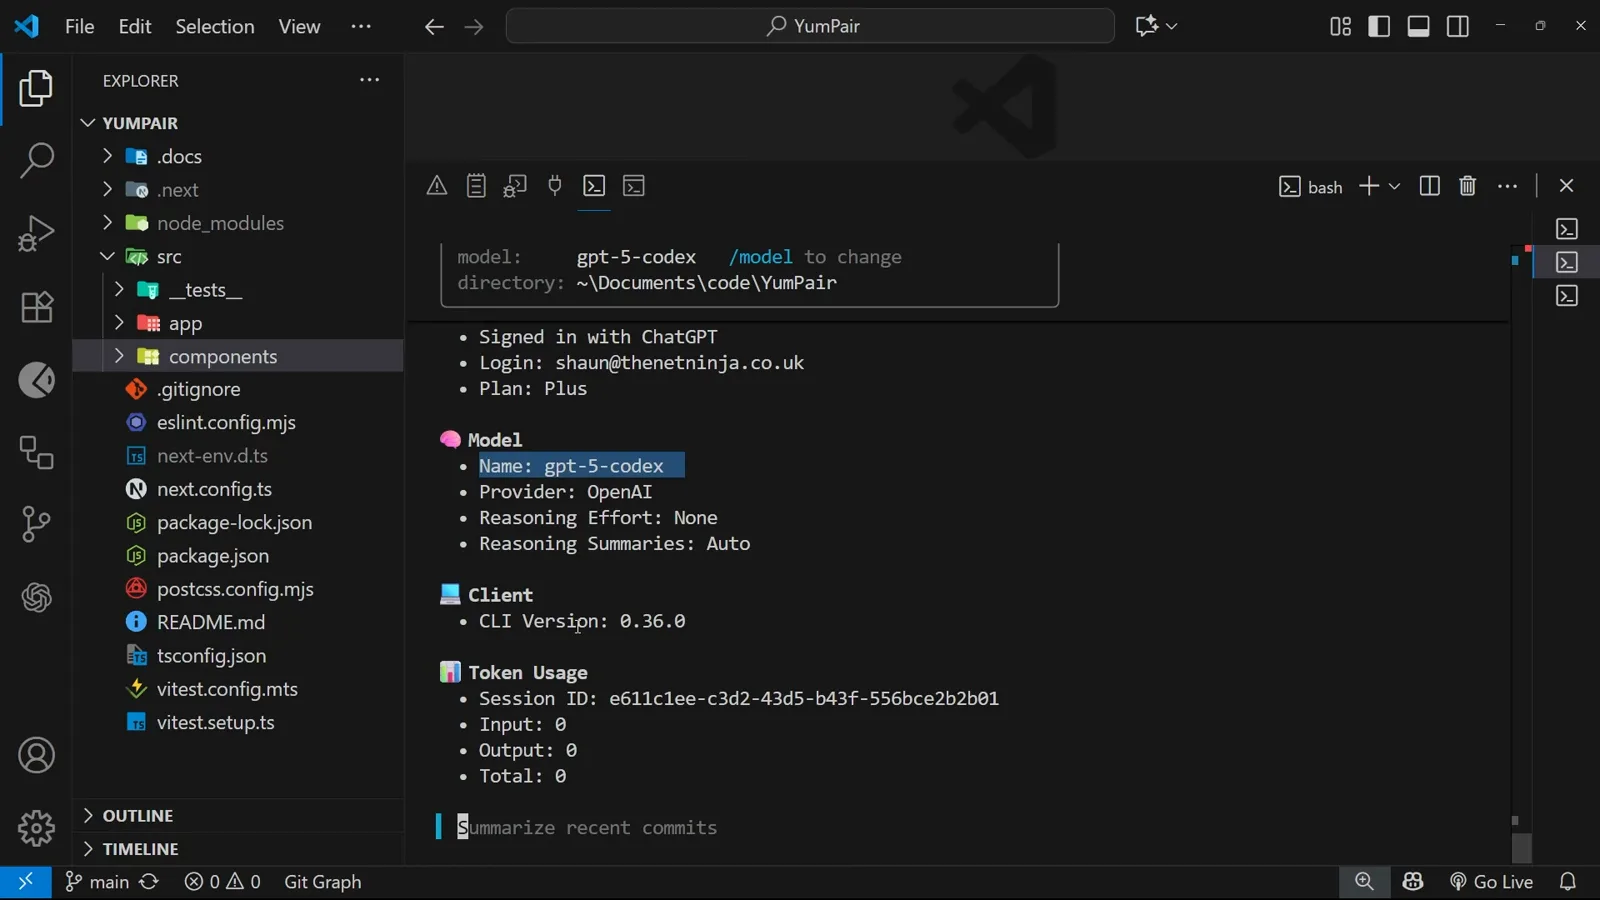
Token Usage exposes the session ID alongside input and output counts.Watch from 3:20 - 4
Pick the model and reasoning effort with /model
The /model command opens the "Select model and reasoning level" picker: gpt-5-codex low, medium (current) and high, plus gpt-5 minimal through high. Press Enter to confirm or Esc to go back.
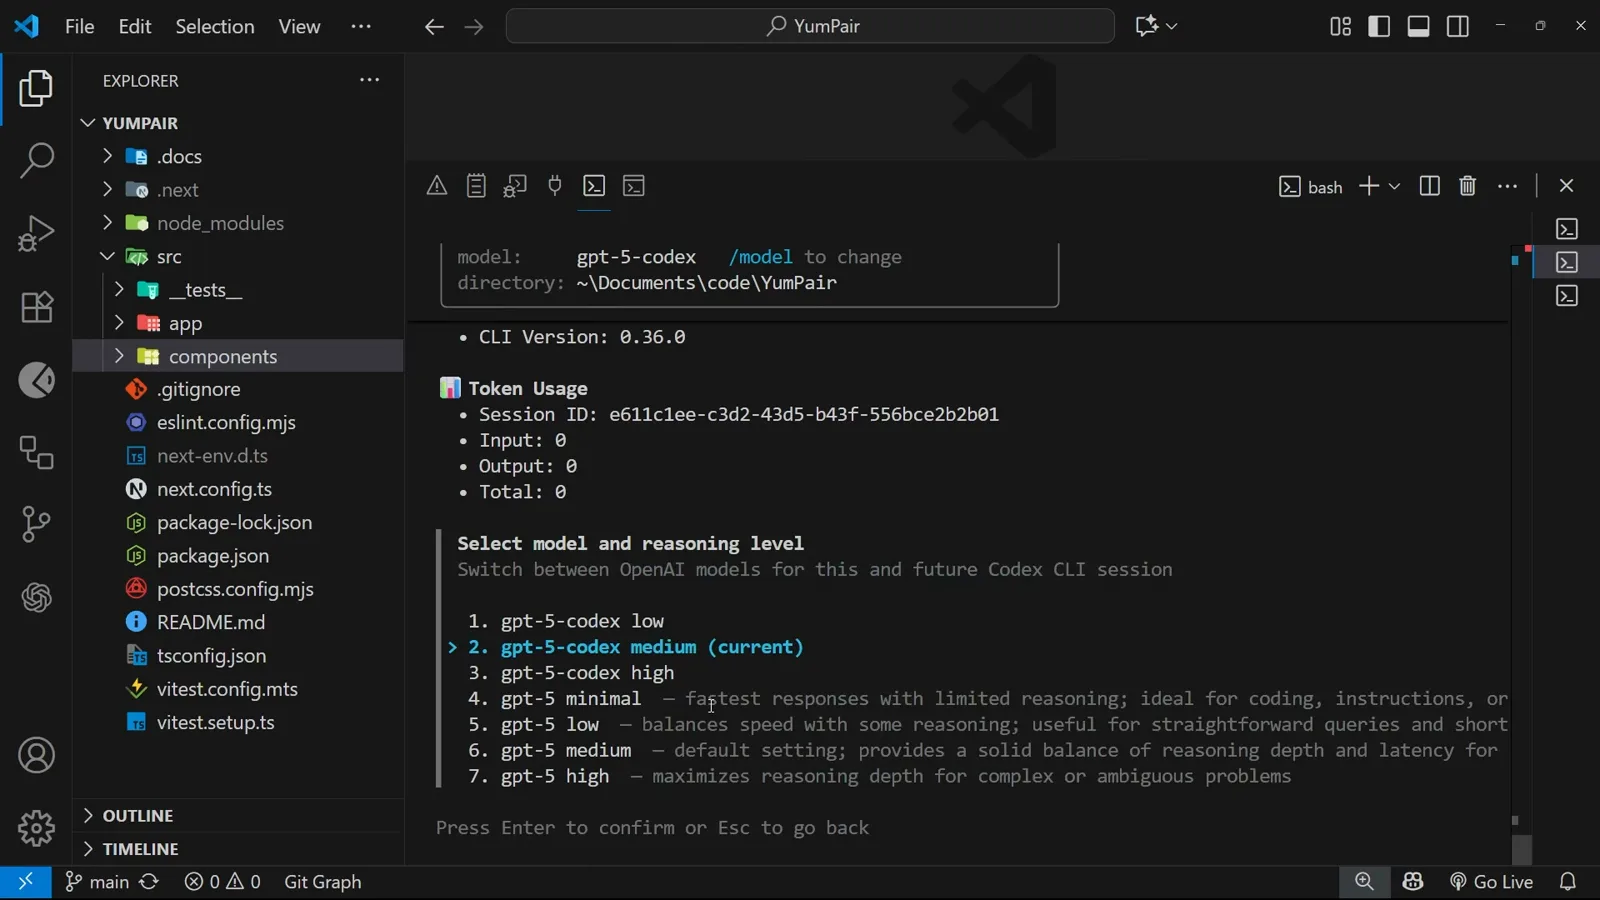
Model choice applies to this and future Codex CLI sessions.Watch from 3:42 - 5
Set approval mode with /approvals
/approvals switches what Codex may do in this project: Read Only (read files and answer questions, approval required for anything else), Auto (current — reads, edits and runs commands in the workspace) and Full Access (everything, with network access).
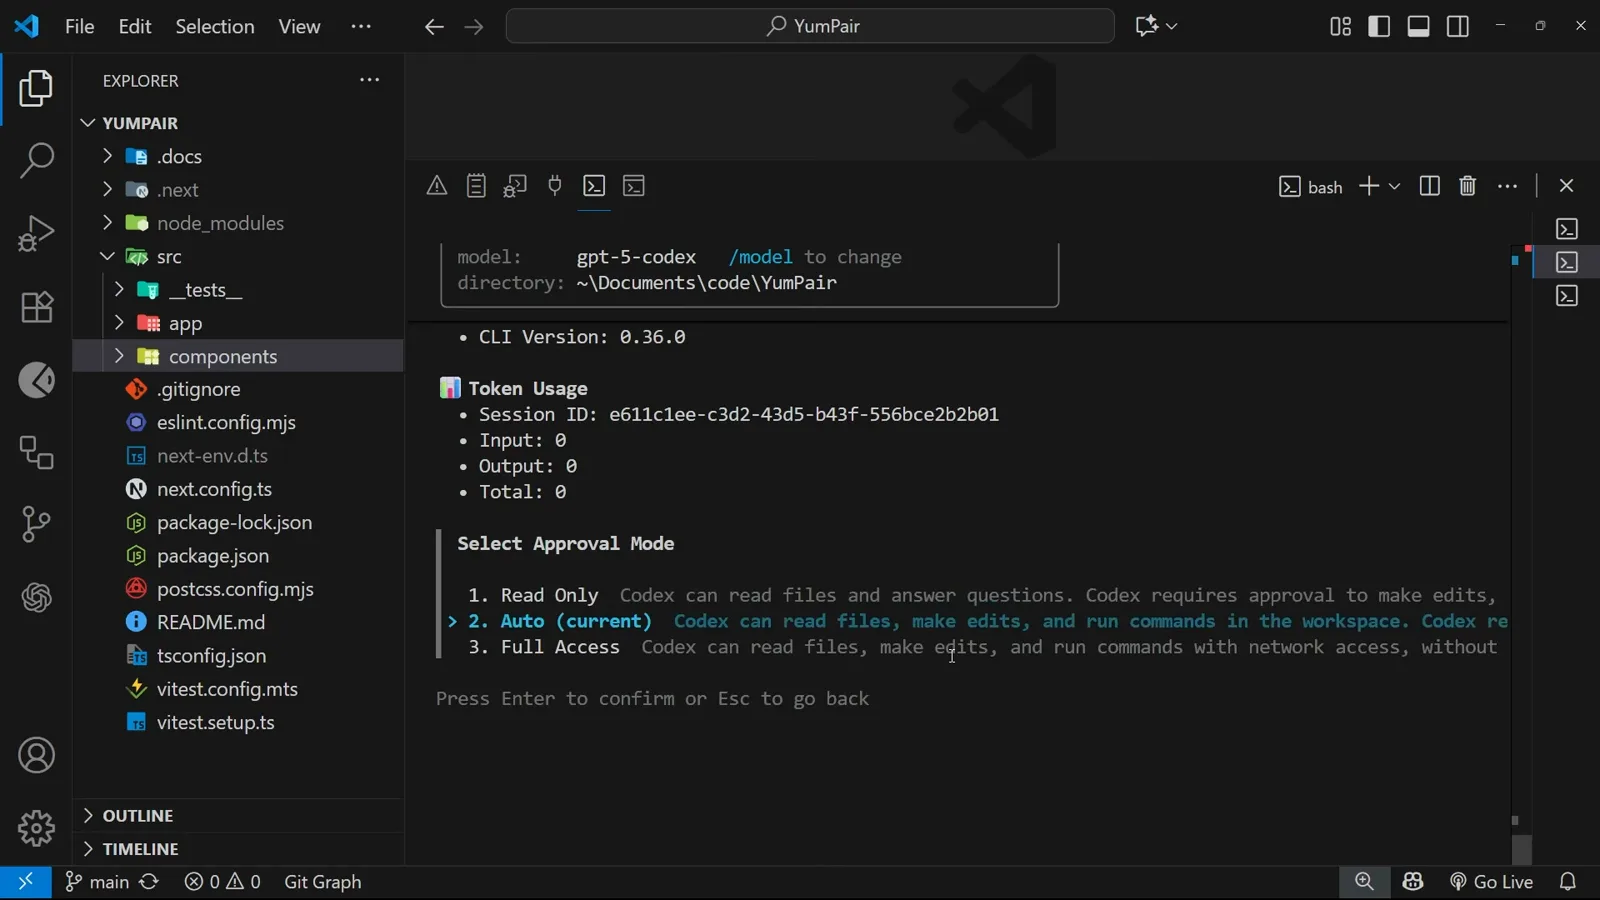
Approval modes scope what Codex may do without asking.Watch from 4:05
Part 2 — Quit, then run codex resume
- 6
Quit the session with Ctrl+C or /quit
Ctrl+C exits a running session and /quit ends it deliberately — either way you land back in the regular terminal, here the project folder in Git Bash on Windows. Sessions end all the time; that is exactly what codex resume is for.
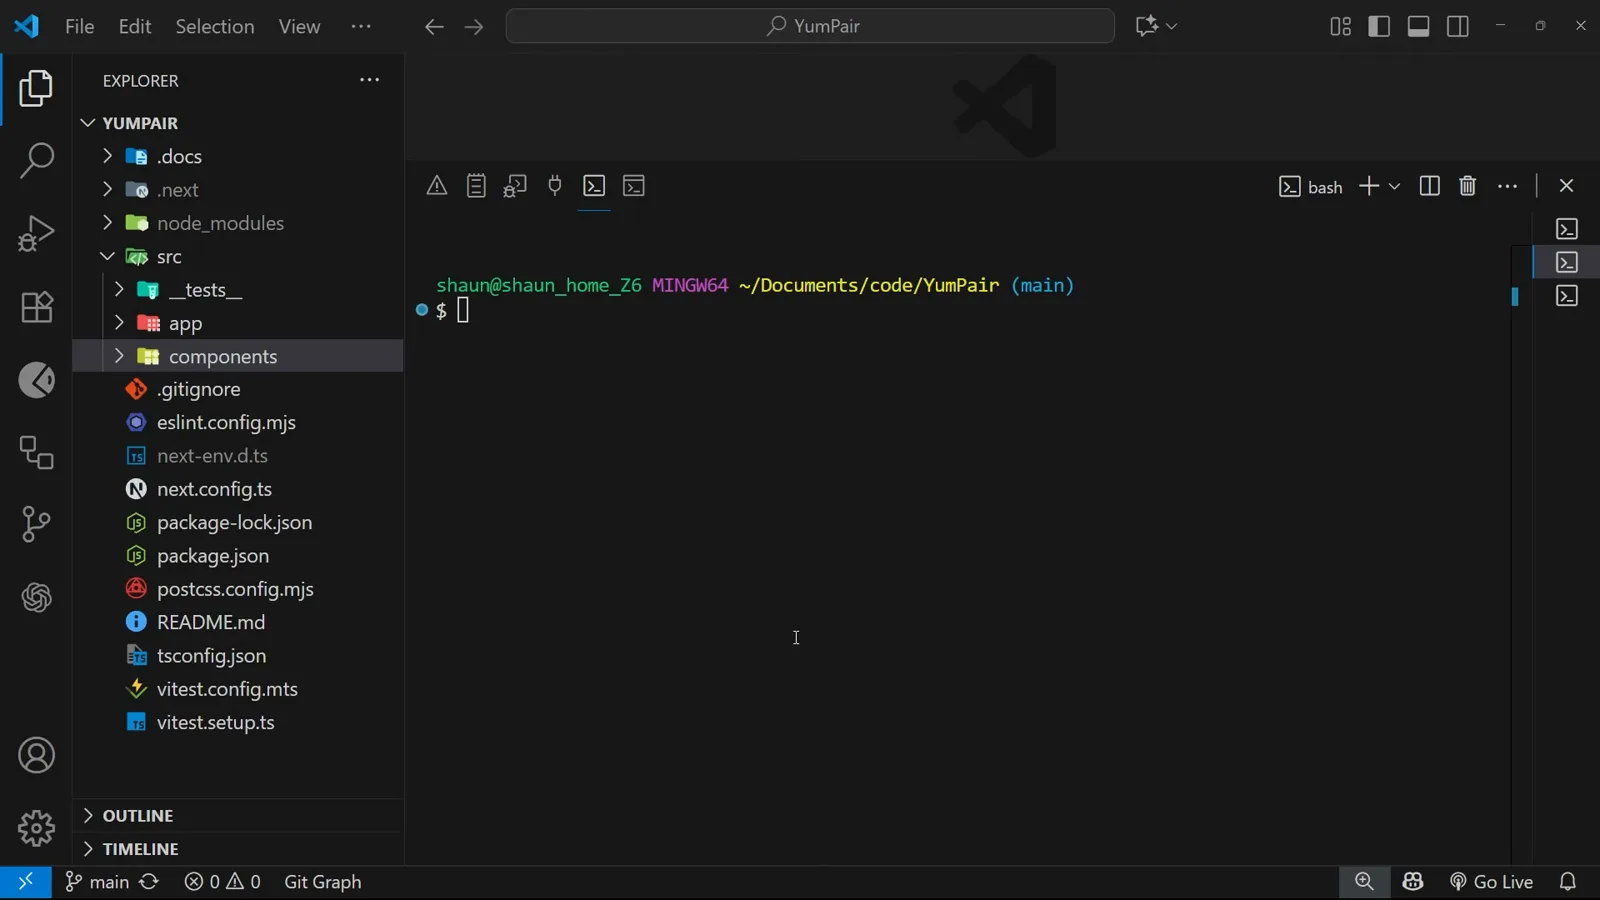
Back at the bash prompt, still inside the YumPair working directory.Watch from 5:10 - 7
Type codex resume and press Enter
From the project folder, run codex resume — no task prompt, just the two-word command. Codex opens the session picker for this directory instead of starting a new chat.
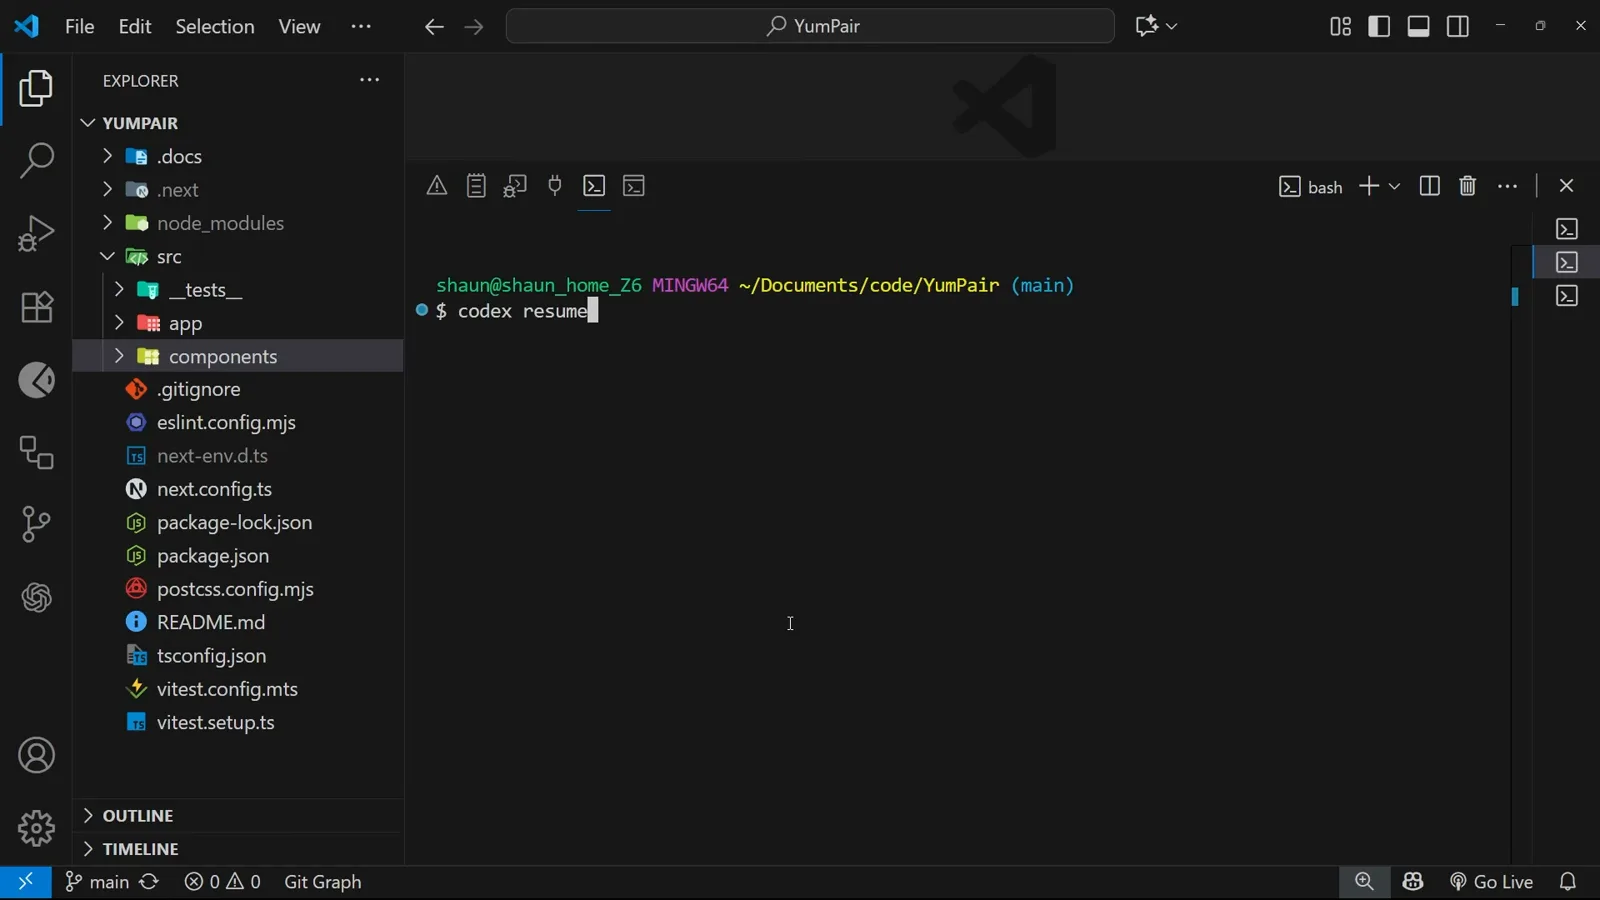
The full command, typed at the prompt just before Enter.Watch from 5:20 - 8
Choose a session in the picker
"Resume a previous session" lists each past chat with its age and first prompt — "1 hour ago · can you give me a brief summary of this project?" — with the key hints underneath: Enter to resume, Esc to start new, Ctrl+C to quit, and left/right arrows to page through the list.
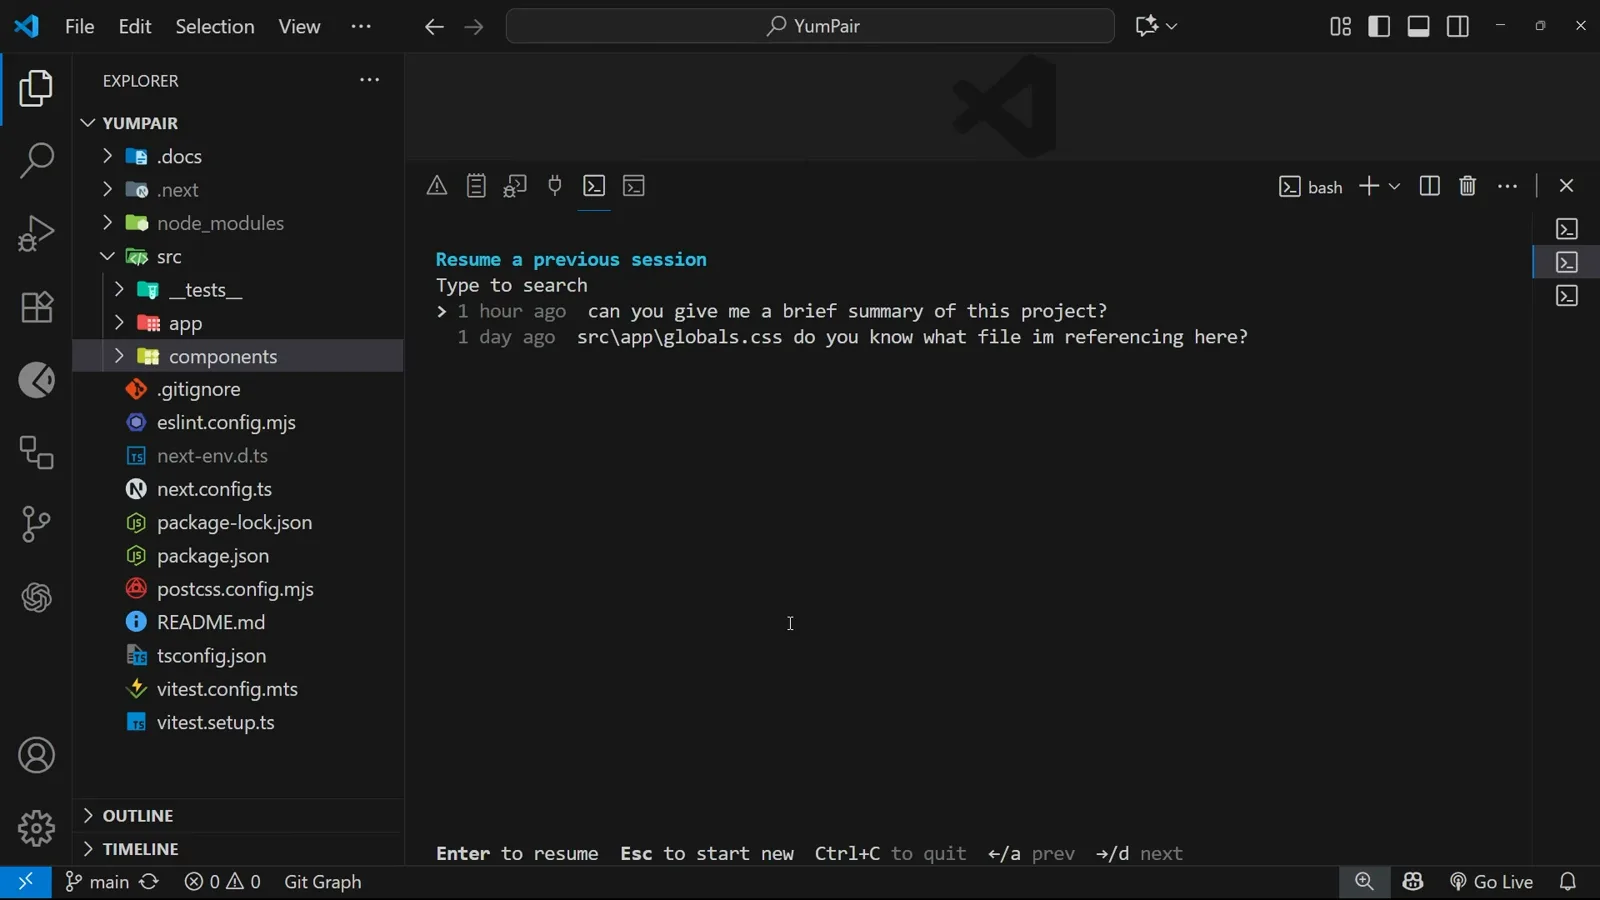
Sessions are scoped to the project directory you ran the command from.Watch from 5:22
Part 3 — Search the picker and drop back in
- 9
Type to search the list
Just start typing: "Search: su" already filters the list down to the summary session. The search matches the sessions' descriptions — their opening prompts — so a word you remember beats scrolling.
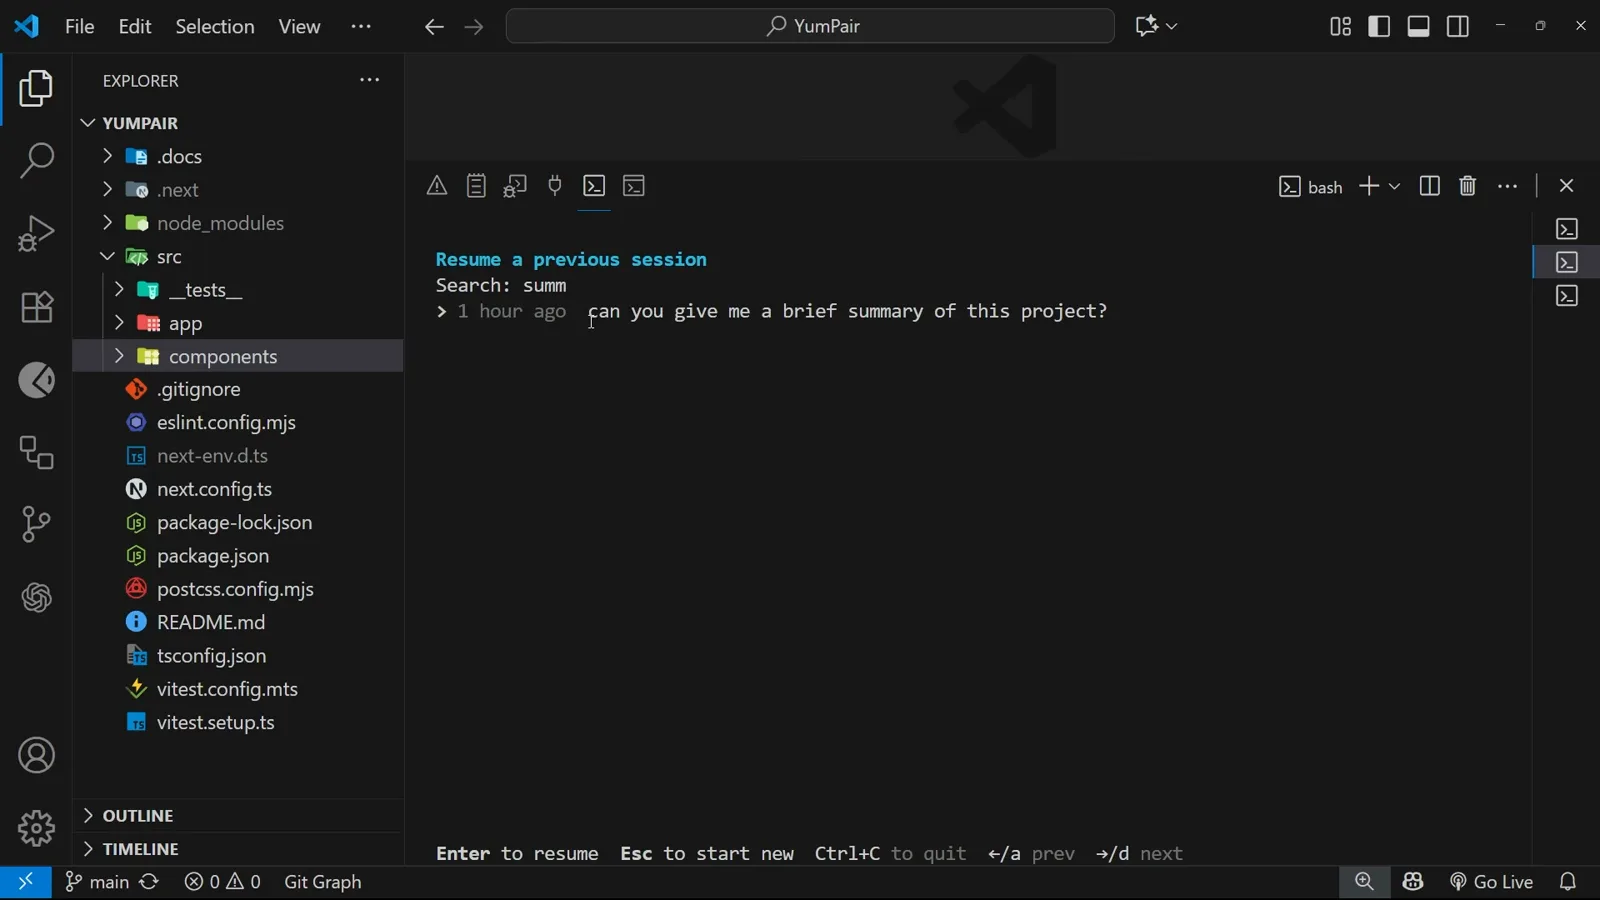
Two keystrokes in, and the list is already down to one session.Watch from 5:40 - 10
Narrow it with a longer query
"Search: summ" isolates the "can you give me a brief summary of this project?" conversation from an hour ago. Press Enter and Codex reopens that exact chat.
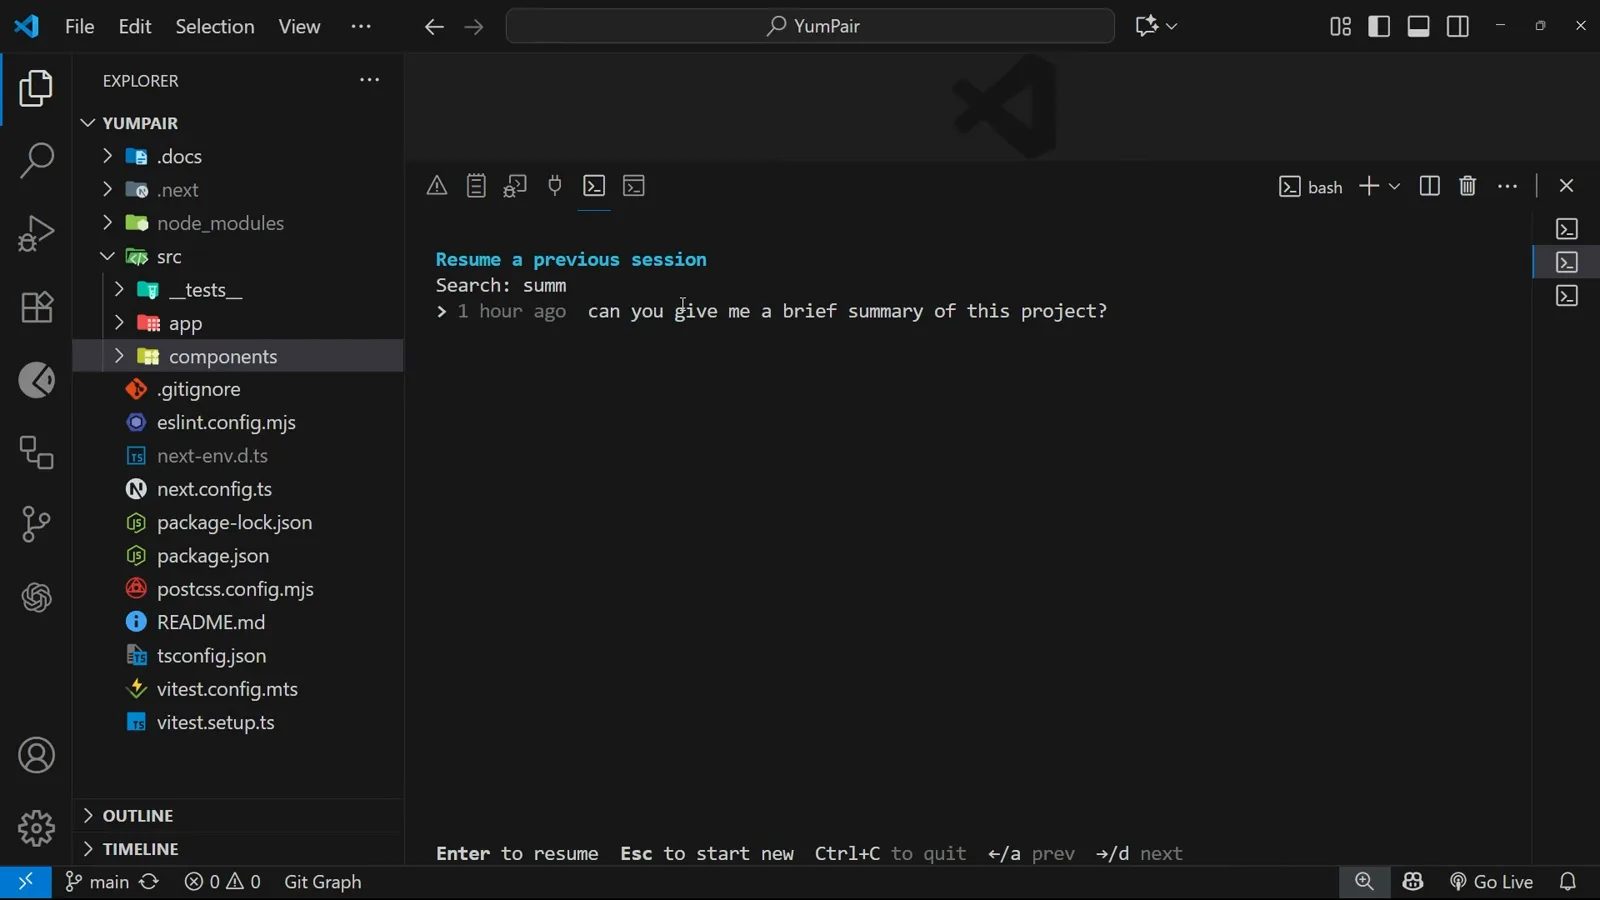
The filtered picker — Enter resumes the highlighted session.Watch from 5:48 - 11
Continue exactly where you left off
The resumed session restores the whole transcript: the Next Steps list, the earlier Flutter theme-token work, even the /exit and "Take care!" sign-off — with the original totals intact (120K tokens used, 91% context left). Carry on coding.
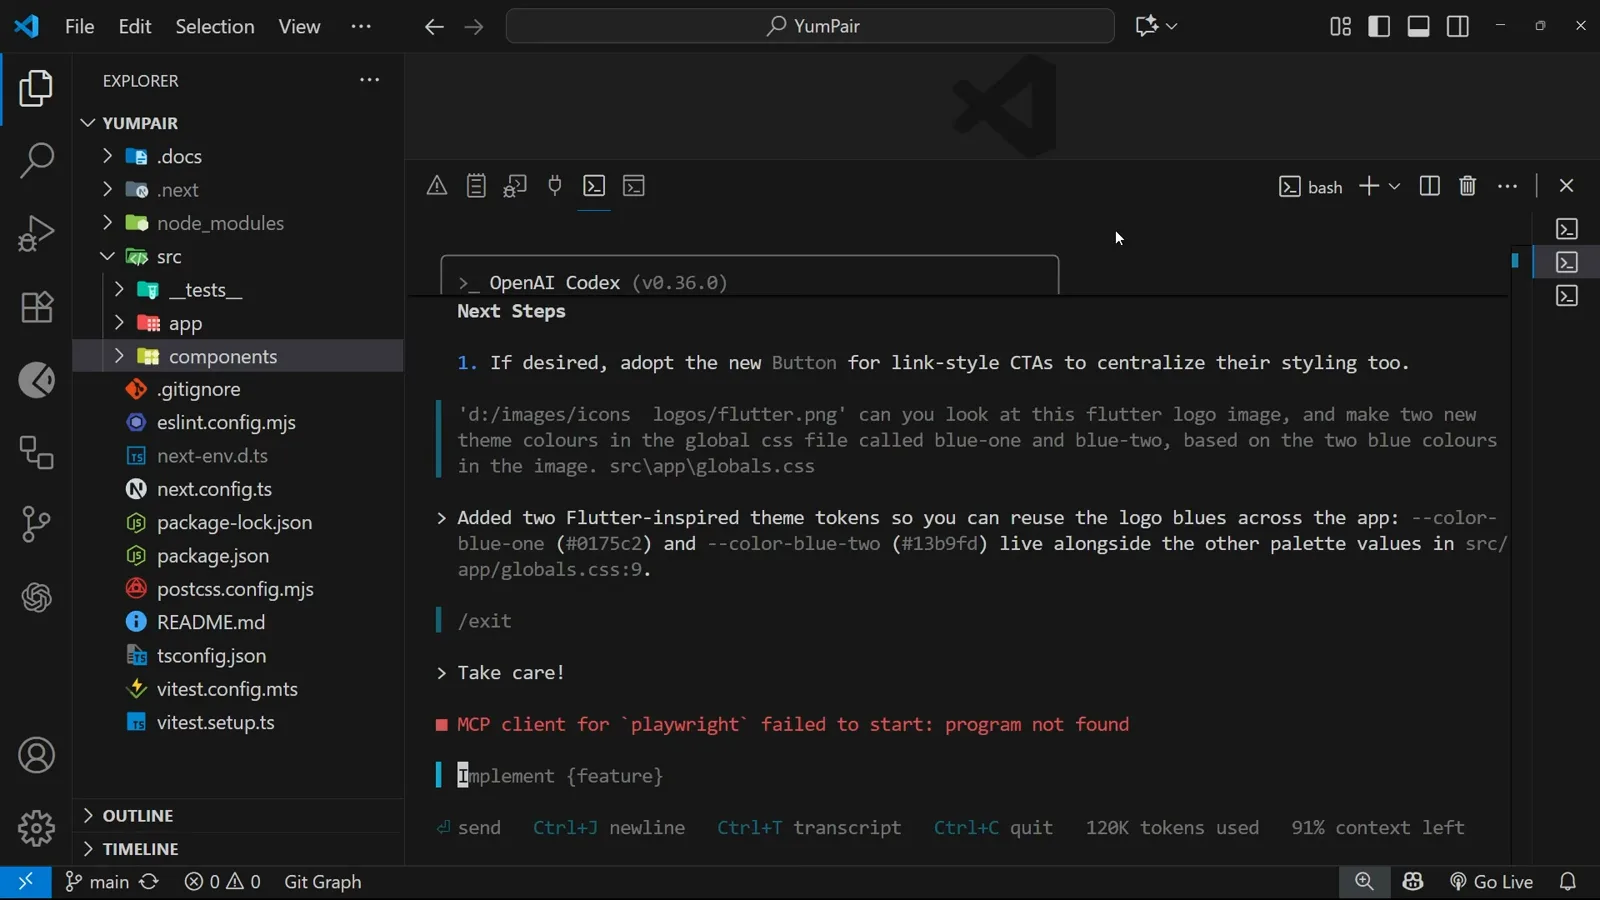
Full history restored, ready for the next prompt.Watch from 5:52
codex resume shows nothing — empty list and wrong-directory fixes
The picker is scoped to the directory you run it from, so most "no sessions" reports are a working-directory mismatch rather than lost data. Work down the list:
- 1Empty list in the wrong folder. The Resume a previous session picker only lists sessions started in the current working directory. cd into the project folder you originally used and run codex resume again.
- 2Sessions from other projects. To search across projects, codex resume --all includes sessions outside the current directory (also honored by --last).
- 3The directory question on resume. If the current working directory differs from the session's saved directory, Codex asks which one to use. Answer the prompt, or set tui.resume_cwd to "current" or "session" in config.toml to settle it permanently — an explicit --cd override wins over both.
- 4Skip the picker entirely. codex resume --last reopens the most recent chat from the current working directory with no list at all — the closest thing to "continue last session".
- 5Headless sessions missing. Sessions created by codex exec are non-interactive and hidden from the picker by default; add --include-non-interactive to surface them in the list and in --last.
- 6No delete option in the picker. The recording points out there was no built-in way to delete old sessions at the time — the picker still has none. Sessions live on disk as JSONL rollout files under ~/.codex/sessions, sorted into date folders, so cleanup means removing files there yourself while Codex is closed.
Codex CLI moves fast, and flags occasionally change meaning between releases. When in doubt, codex resume --help and the official CLI reference are the source of truth.