
How to Use Claude Projects: A Step-by-Step Tutorial
Claude Projects gives every goal its own workspace: standing instructions, reusable file knowledge and all related chats in one place. This 15-step screenshot walkthrough follows Kevin Stratvert's full tutorial and Anthropic's official overview — from the left-rail icon to your first instructed, file-grounded chat.
TL;DR — what Claude Projects are
- Projects live in the left rail of claude.ai. Each project is a self-contained workspace: its own chats, its own custom instructions and its own knowledge base of files — nothing leaks between projects.
- Instructions are saved once and applied to every chat in the project — tone, formatting, role, workflow. The video's cookie-emoji rule just makes the effect visible; in real work you would set tone, branding and output formats.
- Knowledge comes from four sources: Upload from device, Add text content, GitHub and Google Drive. Files added to the project are referenced by every chat in it; files attached inside one chat stay in that conversation.
- Free accounts can create up to 5 projects. Retrieval-augmented knowledge that stretches past the context window needs a paid plan, and sharing with Can edit / Can view permissions needs Team or Enterprise.
How to Use Claude Projects (Full Tutorial)
Video walkthrough:Kevin Stratvert6:35
Getting started with projects in Claude.ai
Product facts:Anthropic7:08
Steps 1-3, 5-8, 10-13 and 15 are stills from Kevin Stratvert's hands-on tutorial; steps 4, 9 and 14 are stills from Anthropic's official projects overview. Plan and limit facts come from Anthropic's help center.
Frames are credited screenshots from the source videos, each deep-linked to its timestamp. This guide's text is original — not a transcript.
Claude Projects, step by step
1 · Find Projects and create your first one
- 1
Open Projects from the left rail
Sign in at claude.ai and look at the icon rail on the far left of the home screen. Click the Projects icon among the icons below your chat history, and Claude opens the Projects page. That single icon is the whole entry point — there is no separate app or mode to switch on.
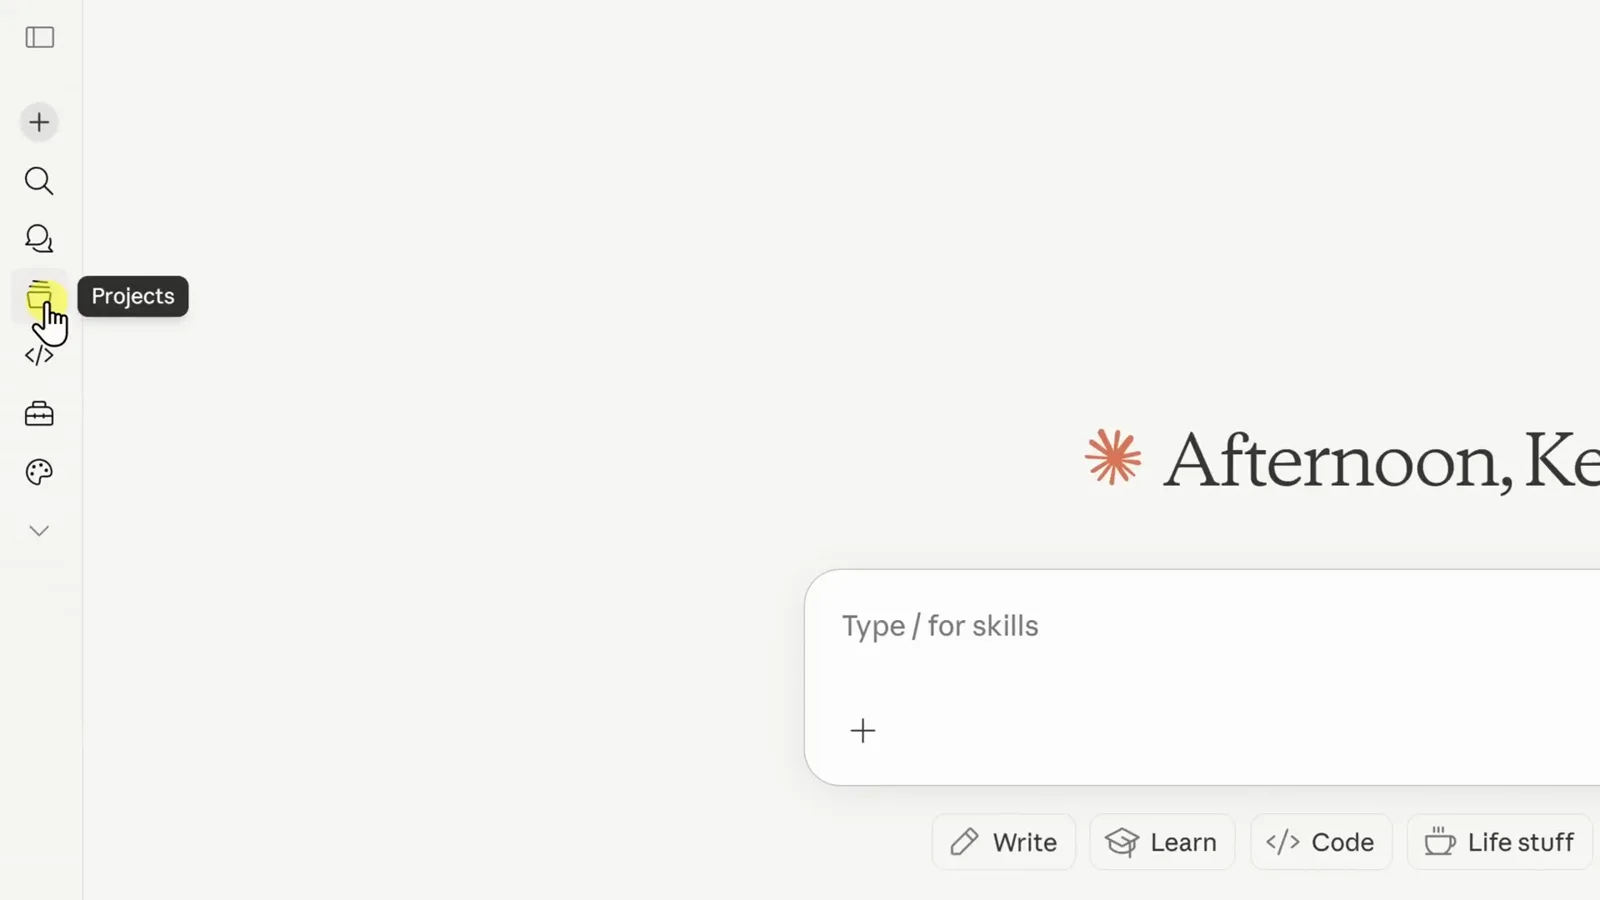
The Projects icon in the left icon rail is the only entry point you need.Watch at 0:33 - 2
Start a new project
On the Projects page, click the black New project button in the top right corner. Existing projects show up as cards under Your projects, and anything you have archived waits under the Archived tab, so starting something new never buries finished work.
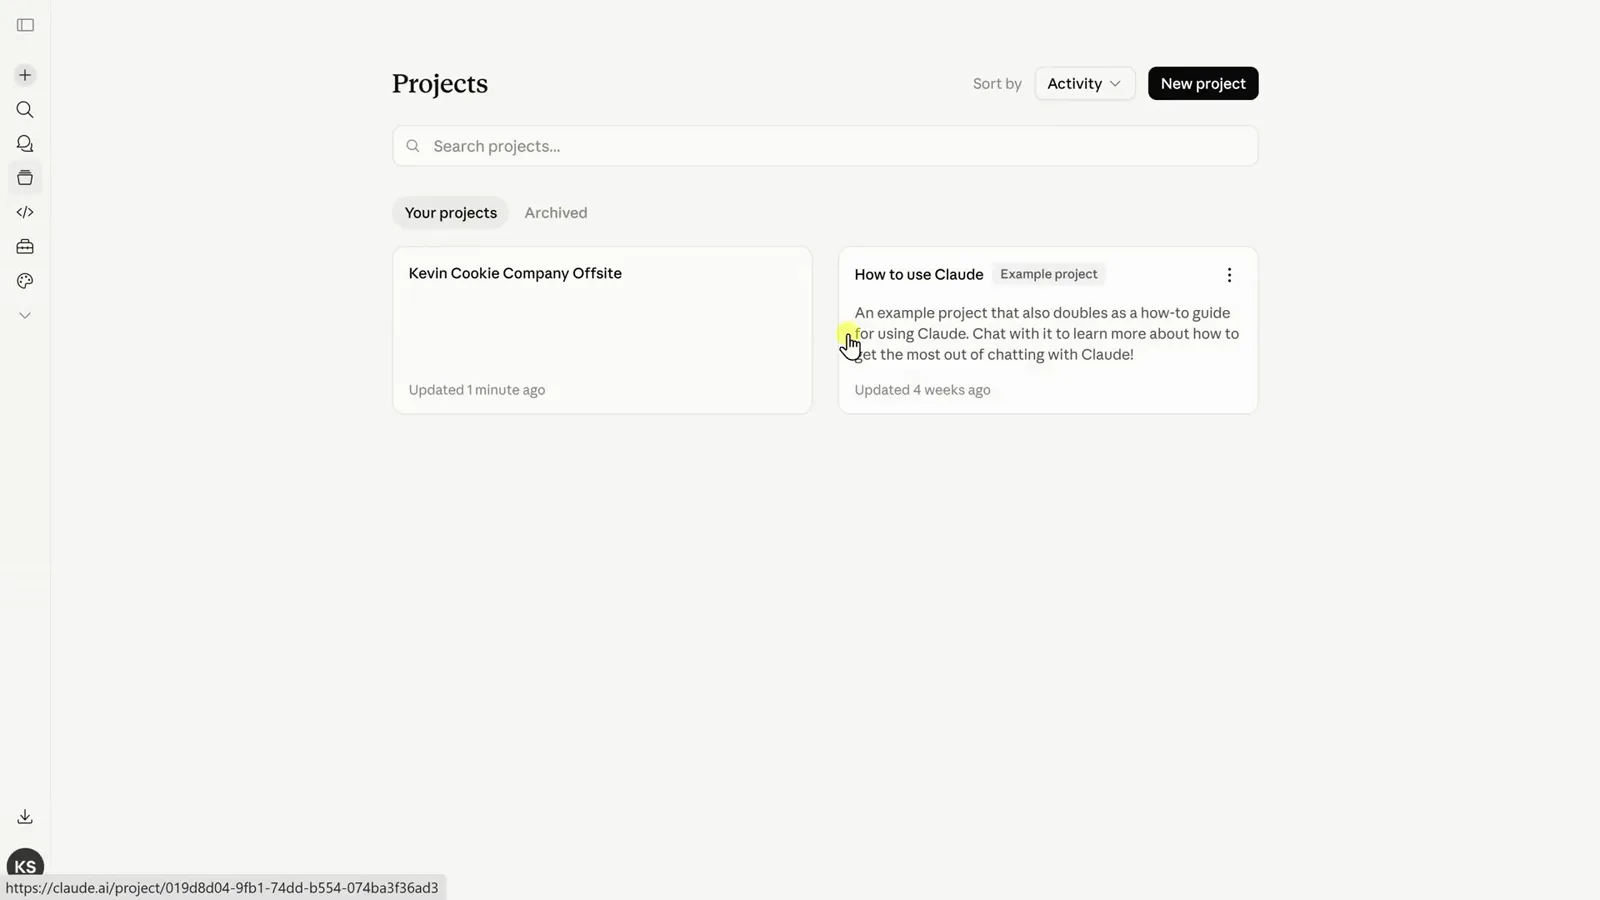
New project sits in the top right of the Projects home.Watch at 0:37 - 3
Name the project and describe the goal
The Create a personal project dialog asks two things. What are you working on? takes the name — the video launches a Brown Butter Salted Caramel Cookie for the Kevin Cookie Company. What are you trying to achieve? is optional and editable later, but a one-line goal orients Claude. Kevin's rule of thumb: one project per type of work — marketing, research, coding.
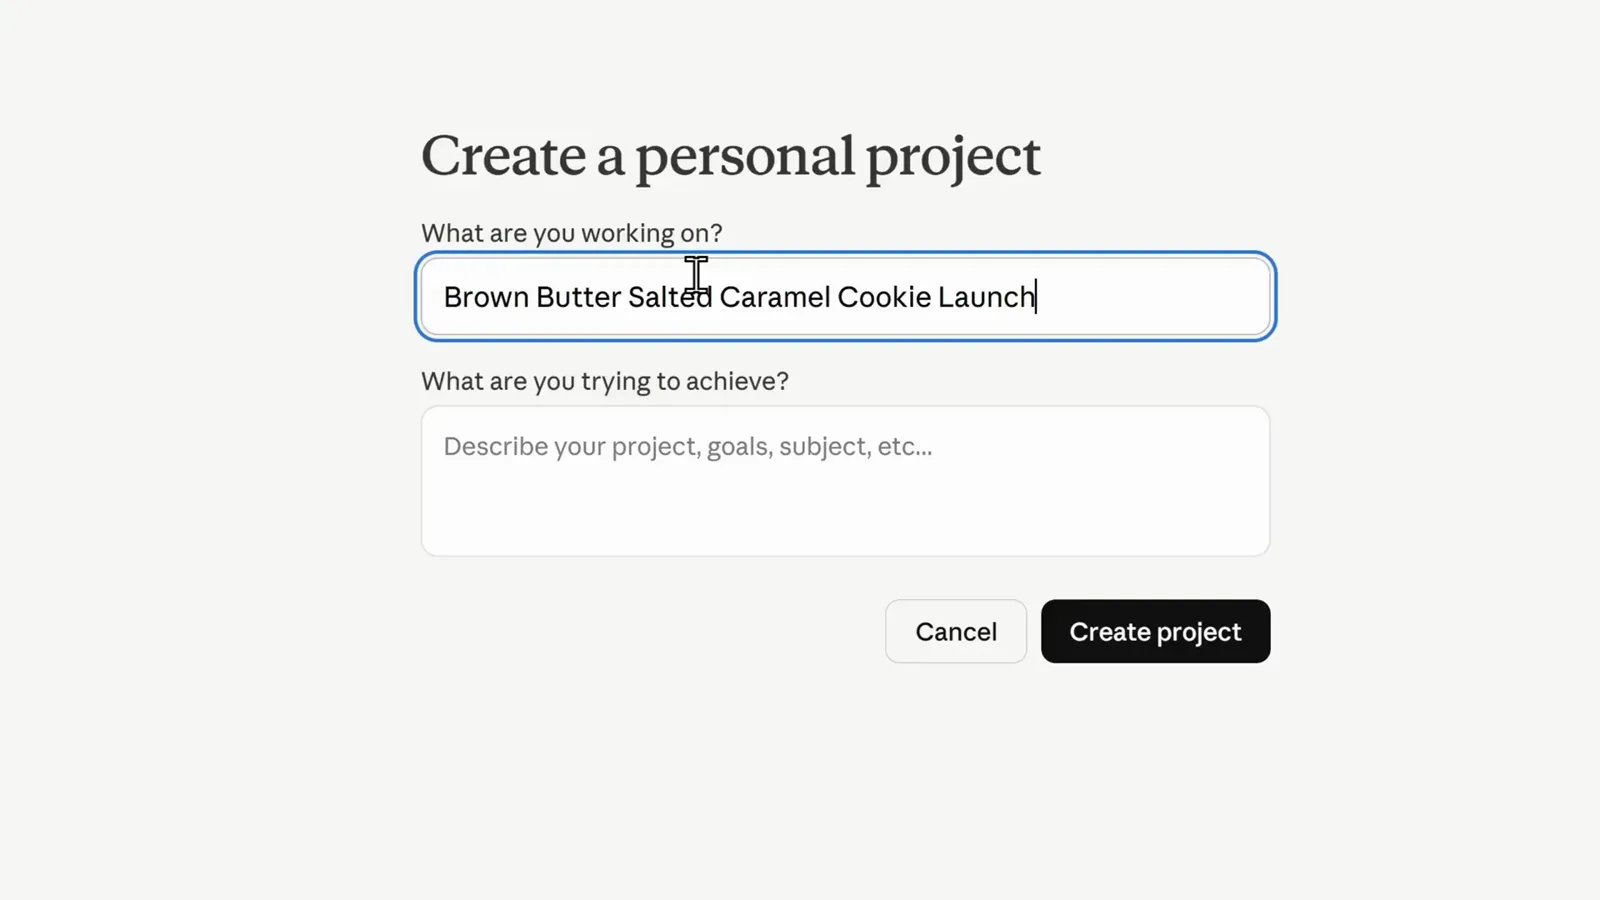
A clear name plus an optional one-line goal is all creation asks for.Watch at 0:49 - 4
Pick Private or Public visibility
Anthropic's own walkthrough adds one more field before Create project: visibility. Private keeps the project to you and the people you invite; Public opens it to your whole organization. Choose Public for team assets like brand guidelines, Private for personal work.
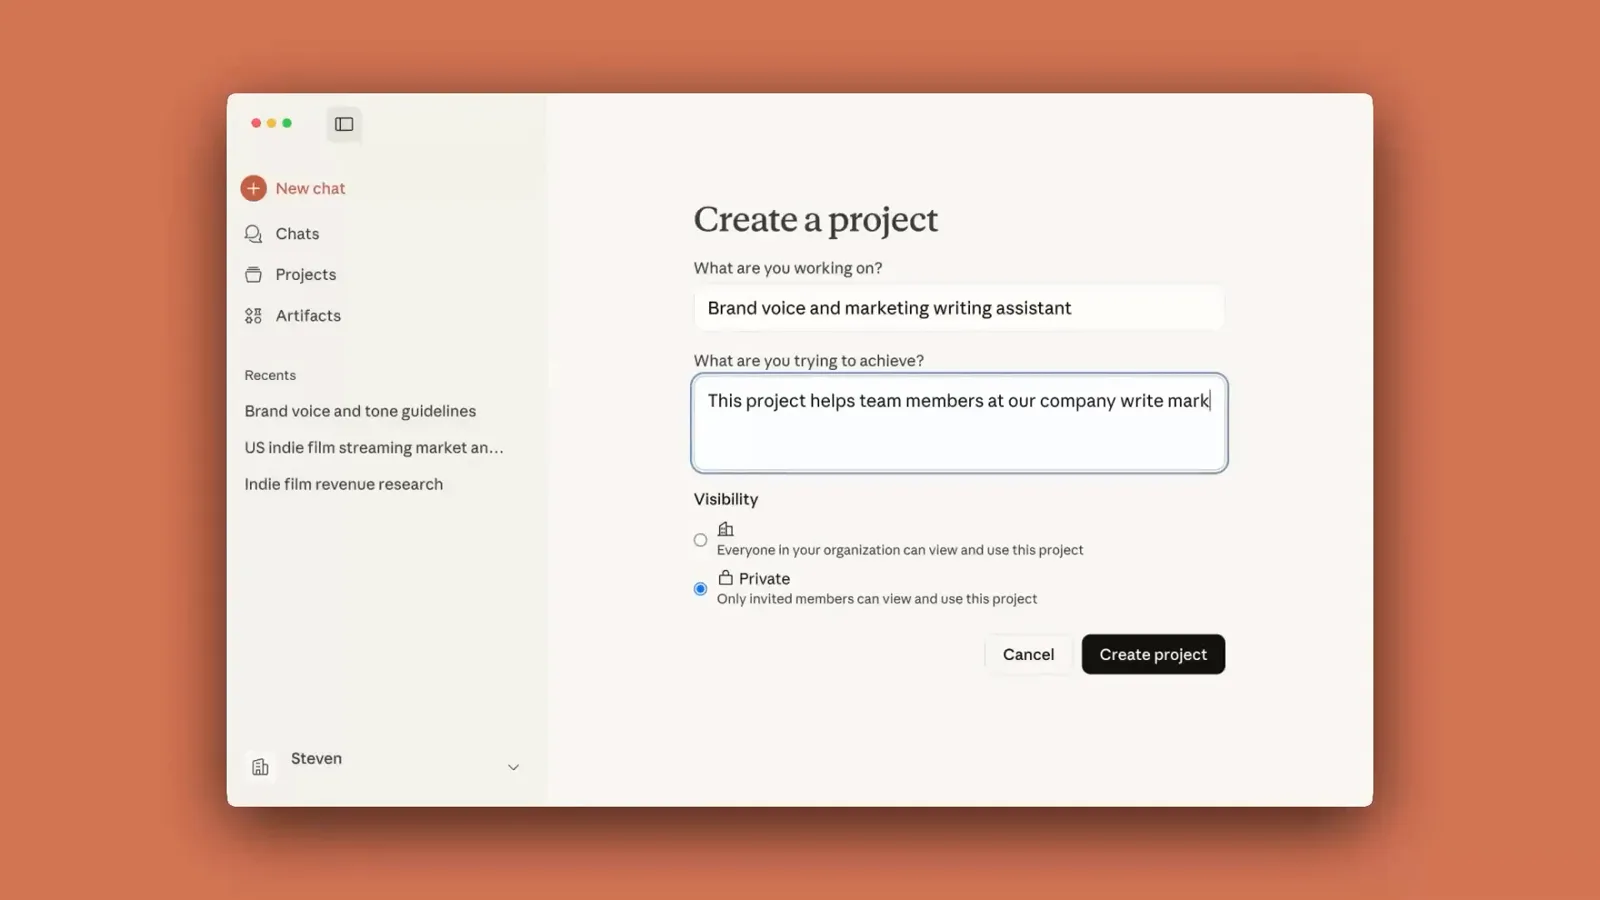
Visibility is chosen at creation — Private for you, Public for the org.Watch at 1:45
2 · Teach Claude how to respond
- 5
Tour your empty project
Claude drops you straight into the project. The header carries the title, a star icon and a three-dot menu. Down the right side run three panels: Memory fills itself after a few chats, Instructions holds your standing rules, and Files stores shared knowledge. The composer in the middle starts chats that stay inside this project.
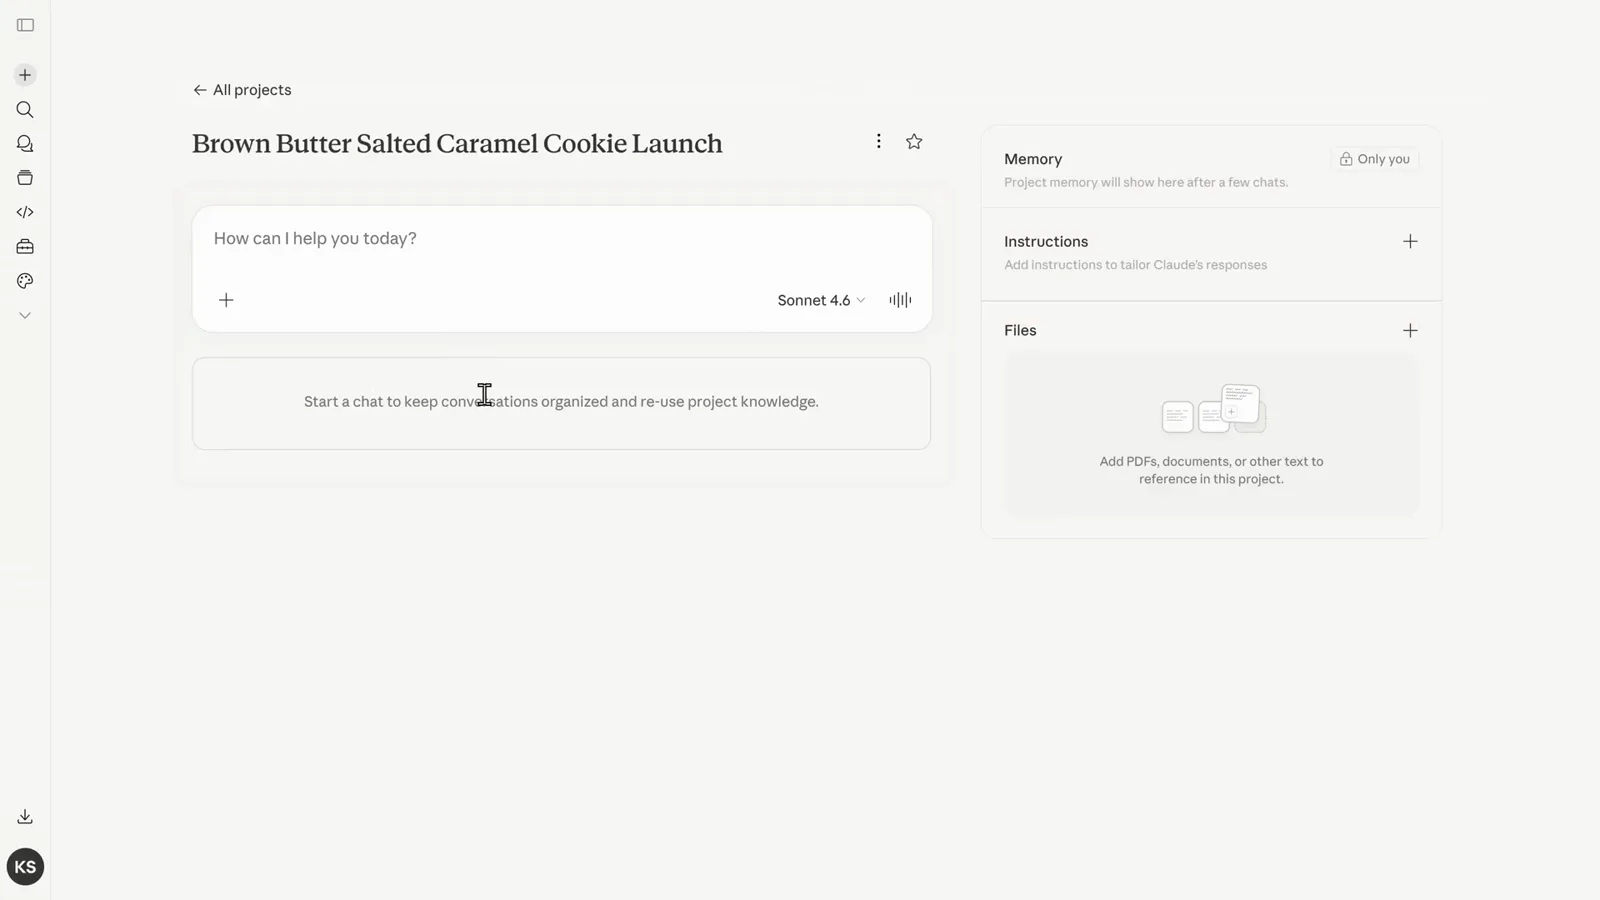
Title and star in the header, Memory / Instructions / Files on the right.Watch at 1:36 - 6
Write project instructions
Click the plus next to Instructions and the Set project instructions dialog opens. Whatever you save here applies to every chat in the project — tone, formatting, expertise level, workflow. Kevin types a deliberately obvious rule, Always start every response with a cookie emoji, so the effect is impossible to miss, then clicks Save instructions.
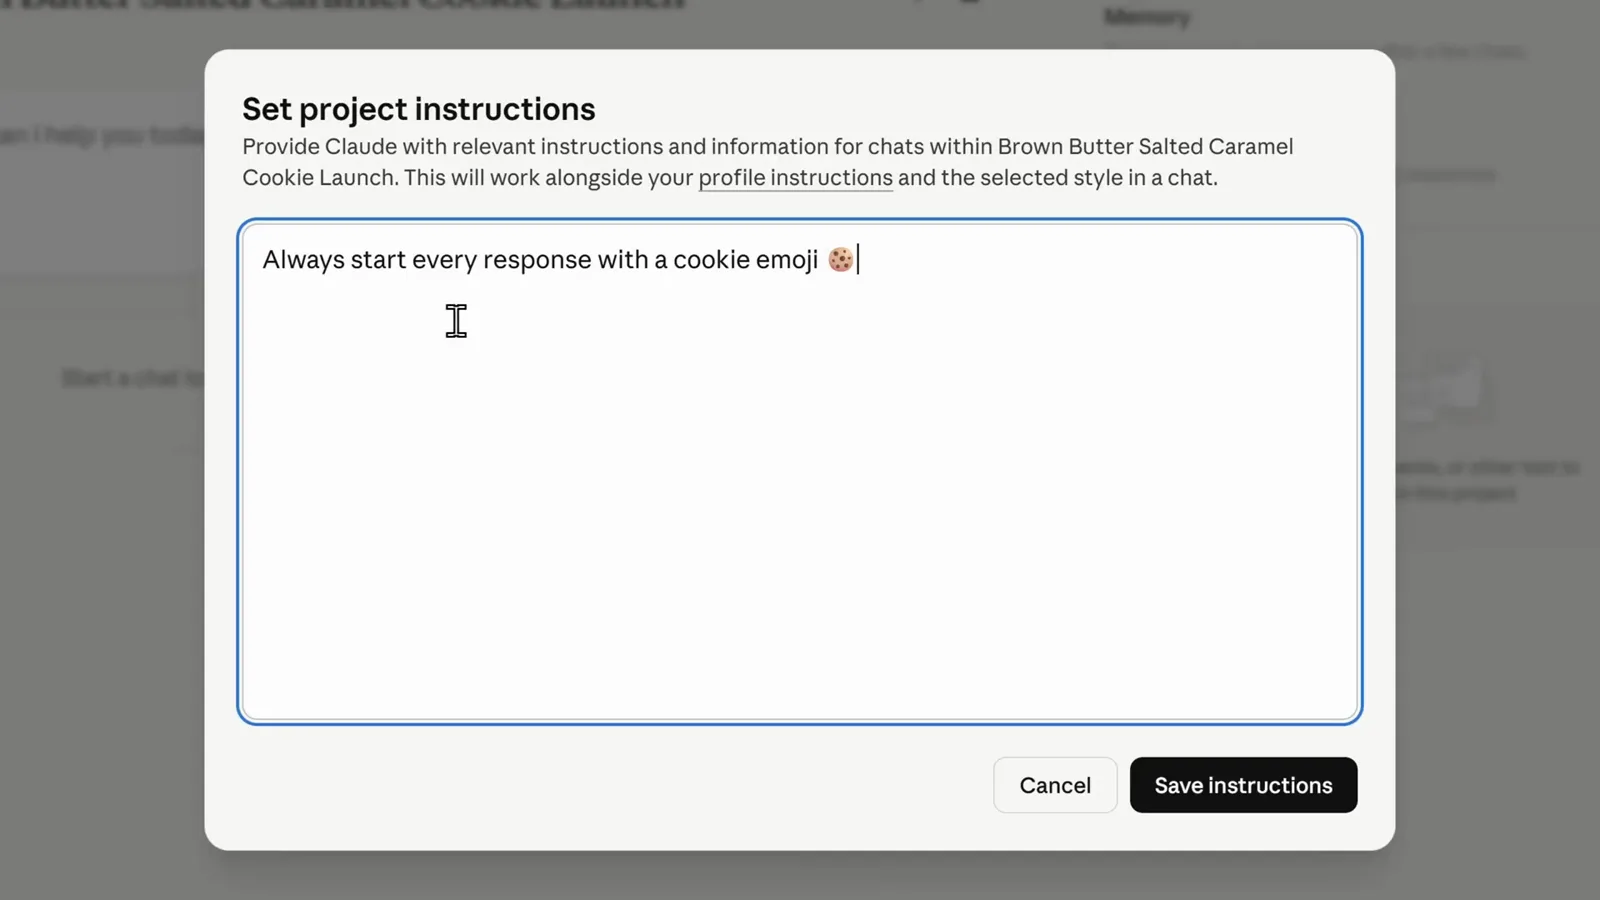
An obviously testable rule proves instructions really reach every chat.Watch at 2:19 - 7
Test it with a real prompt
Ask for a tagline for the new cookie. The reply starts with the cookie emoji, exactly as instructed — no reminding, no re-explaining. That is the core payoff of Projects: configure once, and every conversation inside the project inherits the context.
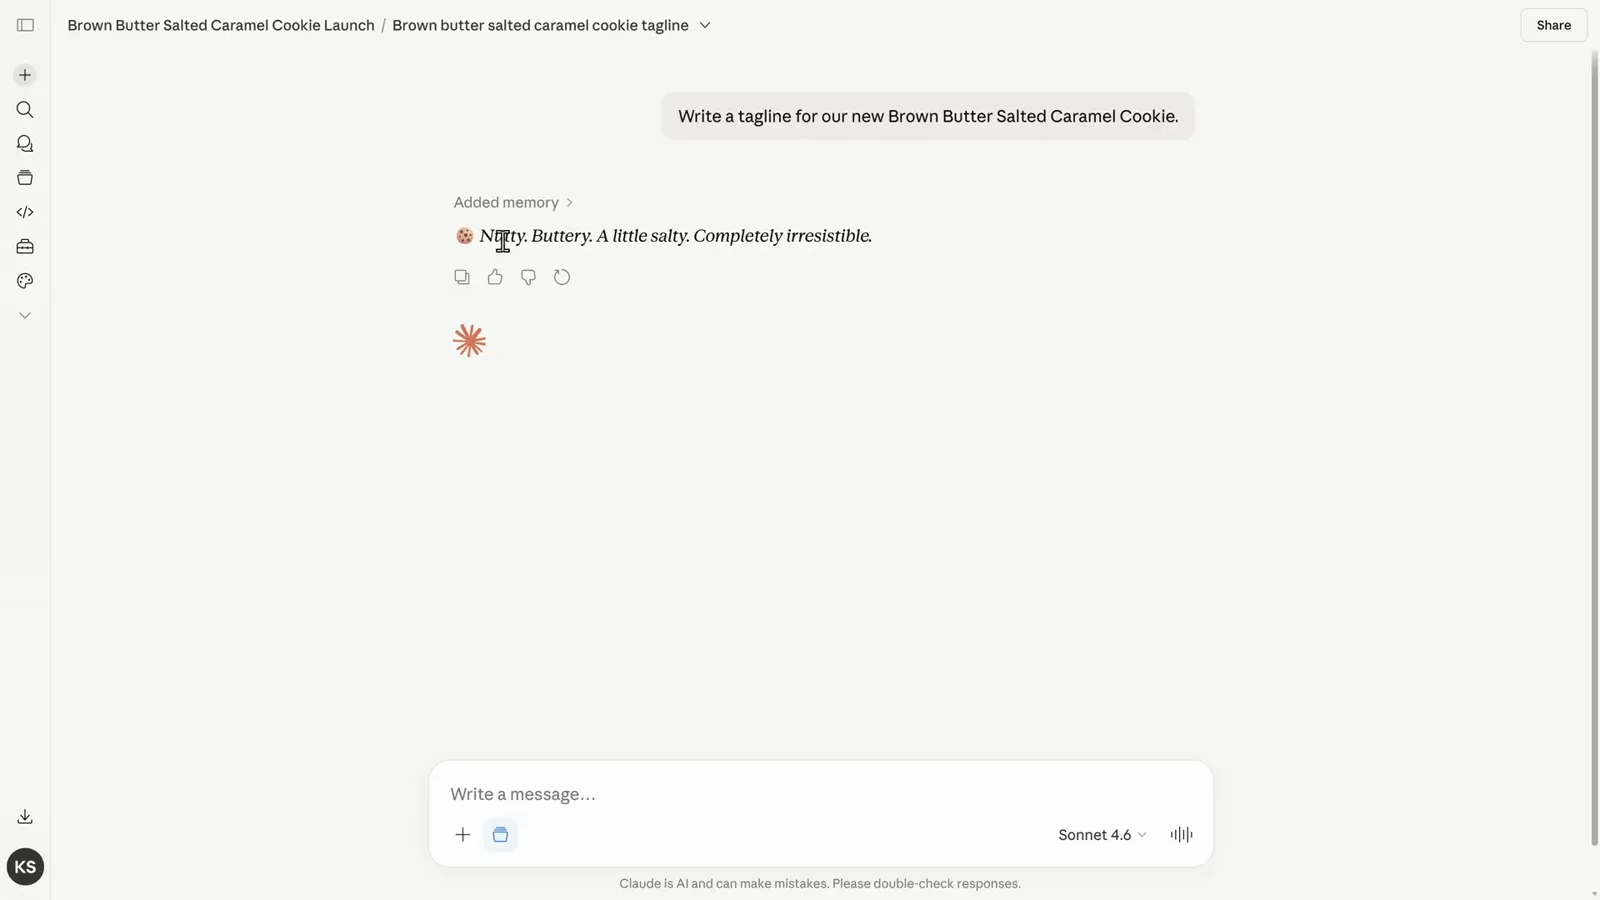
The cookie emoji opening the reply confirms the instruction took.Watch at 2:43
3 · Add knowledge Claude can reuse
- 8
Open the Files add-content menu
Back on the project page, find the Files panel on the right and click its plus icon. The menu offers three sources: Upload from device, Add text content for pasted text, and GitHub — typically for coding projects. Anything added here becomes knowledge that every chat in this project can reference.
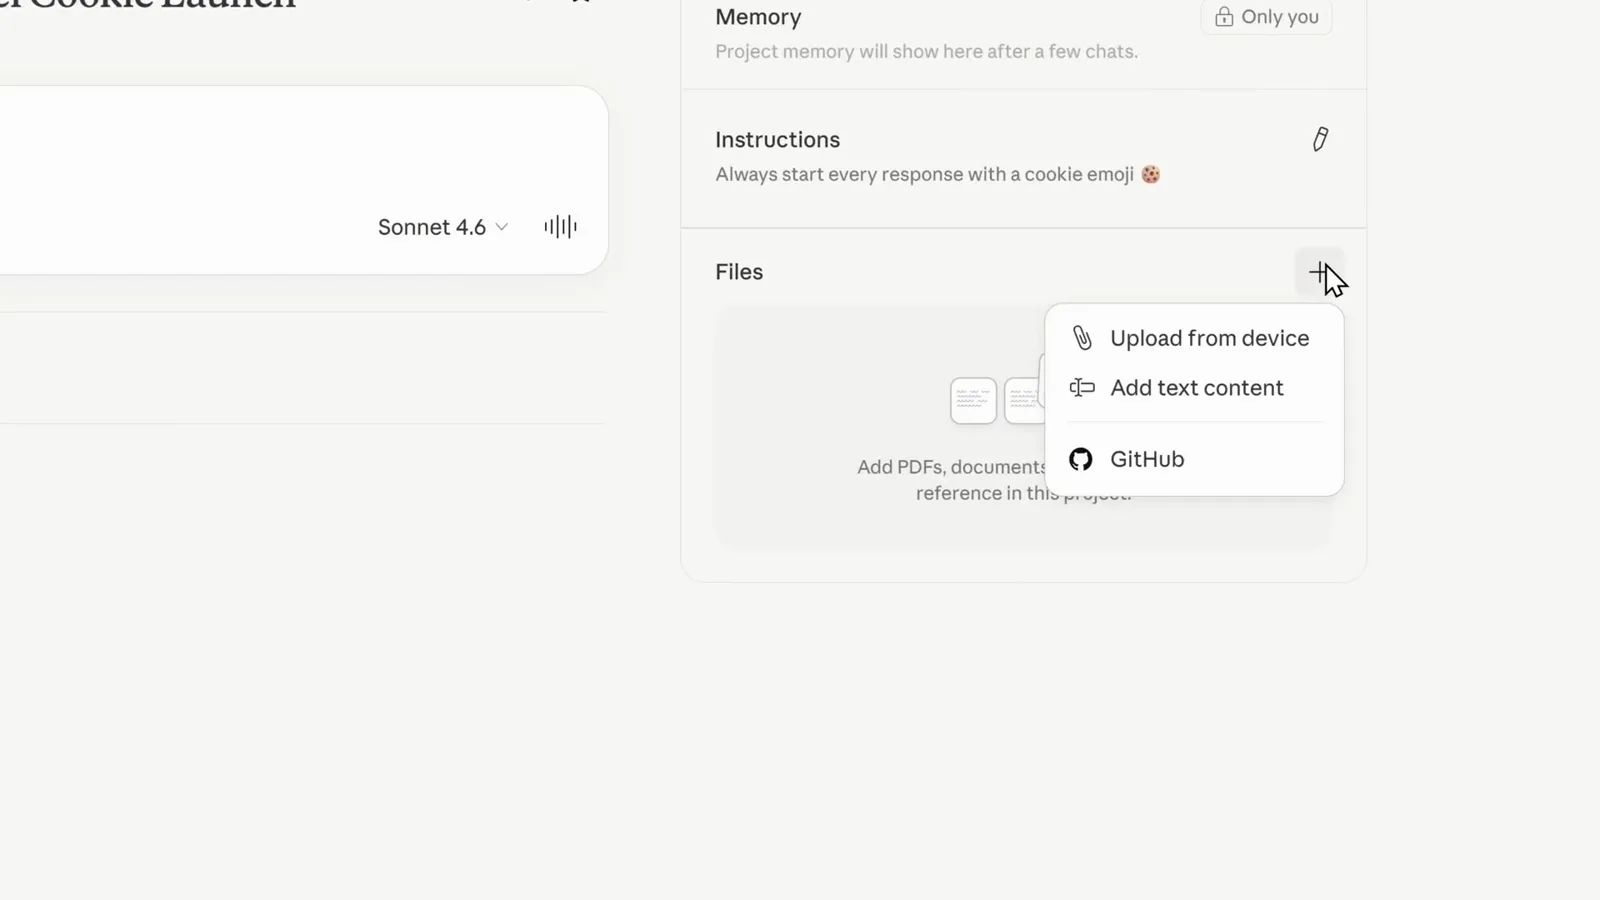
Three ways in: device files, pasted text or a GitHub repository.Watch at 3:19 - 9
Or connect Google Drive
Anthropic's version of the same menu adds a fourth source: Google Drive. Connecting a drive pulls shared docs straight in — no downloading and re-uploading. Claude processes whatever lands in the panel and references it automatically in project chats.
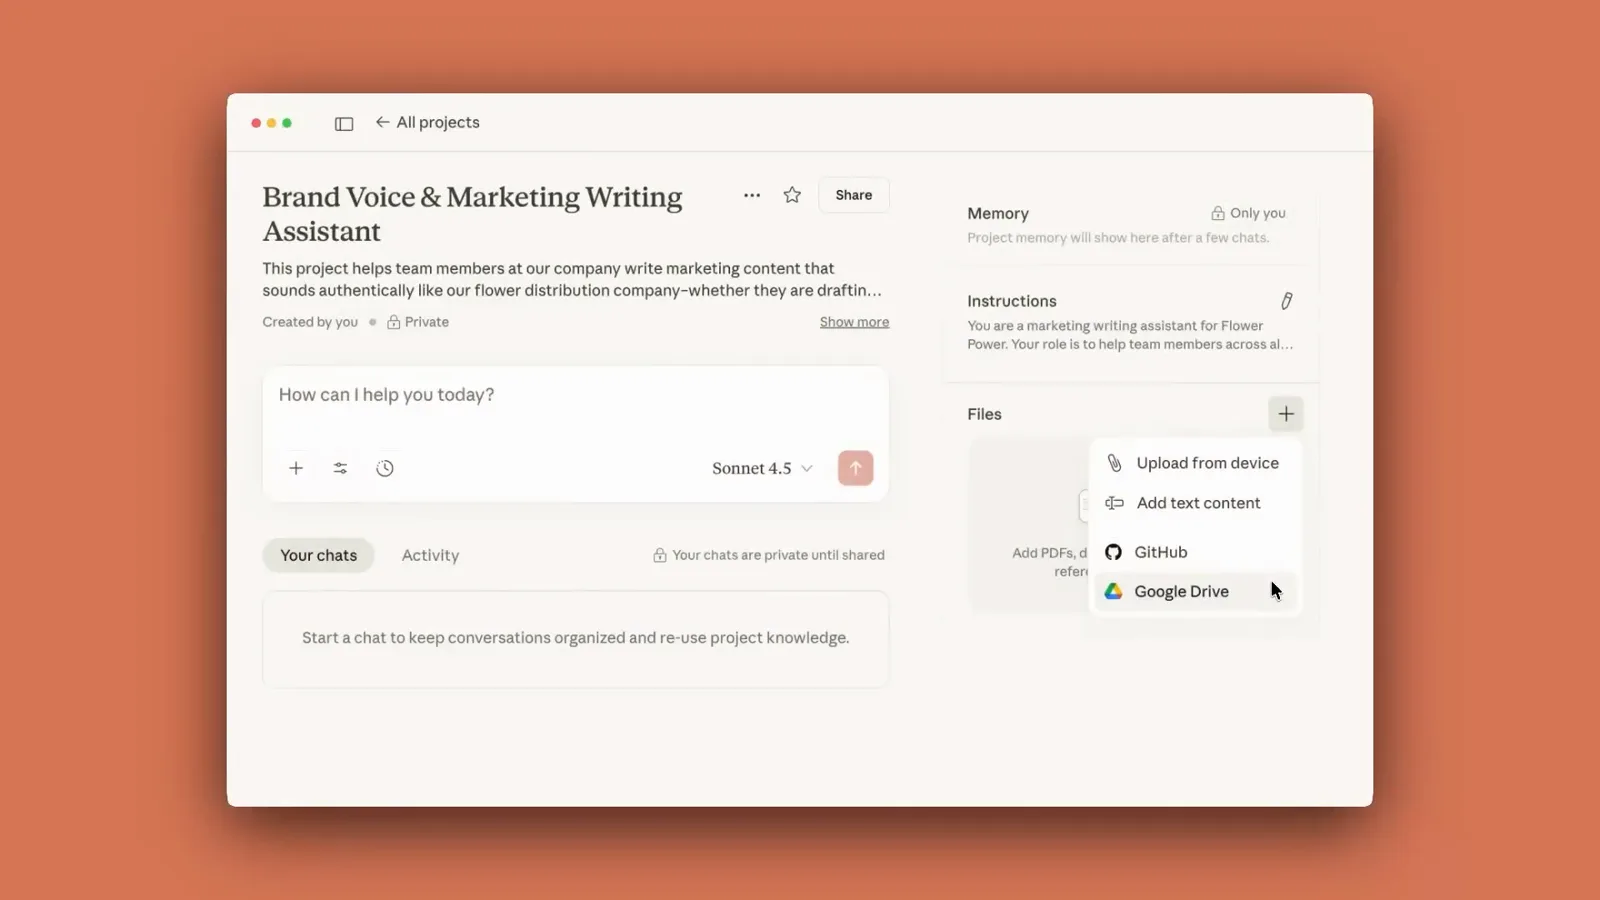
Google Drive connects shared team docs without download-reupload cycles.Watch at 3:16 - 10
Check your files and remove stray ones
Uploaded files appear as thumbnails in the Files panel — the video adds a customer survey, a pricing spreadsheet and branding notes. Documents, spreadsheets, images and PDFs all work. Second thoughts about one file? Click the X on its thumbnail to remove it from the knowledge base.
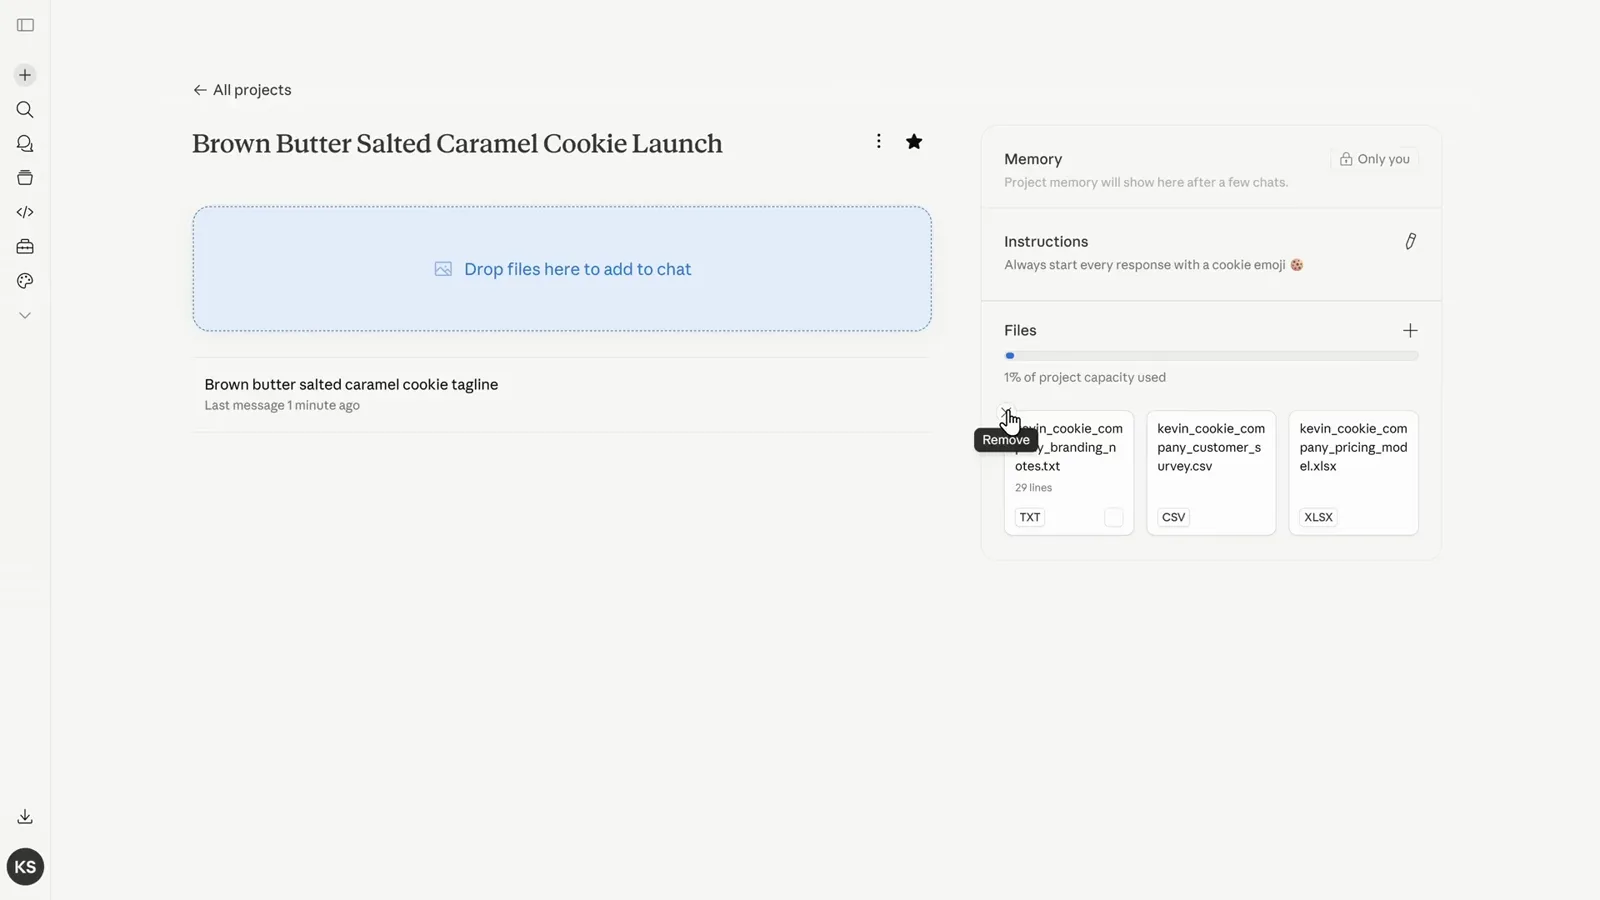
Three files parked as project knowledge, one X click from removal.Watch at 4:00 - 11
Put the knowledge to work
Ask Claude to summarize the customer feedback. It reads the survey from project knowledge — the file was never attached to this chat — and answers with the themes that recur across responses. When a project's knowledge grows close to the context window limit, Claude automatically switches to retrieval-augmented mode to keep expanding capacity.
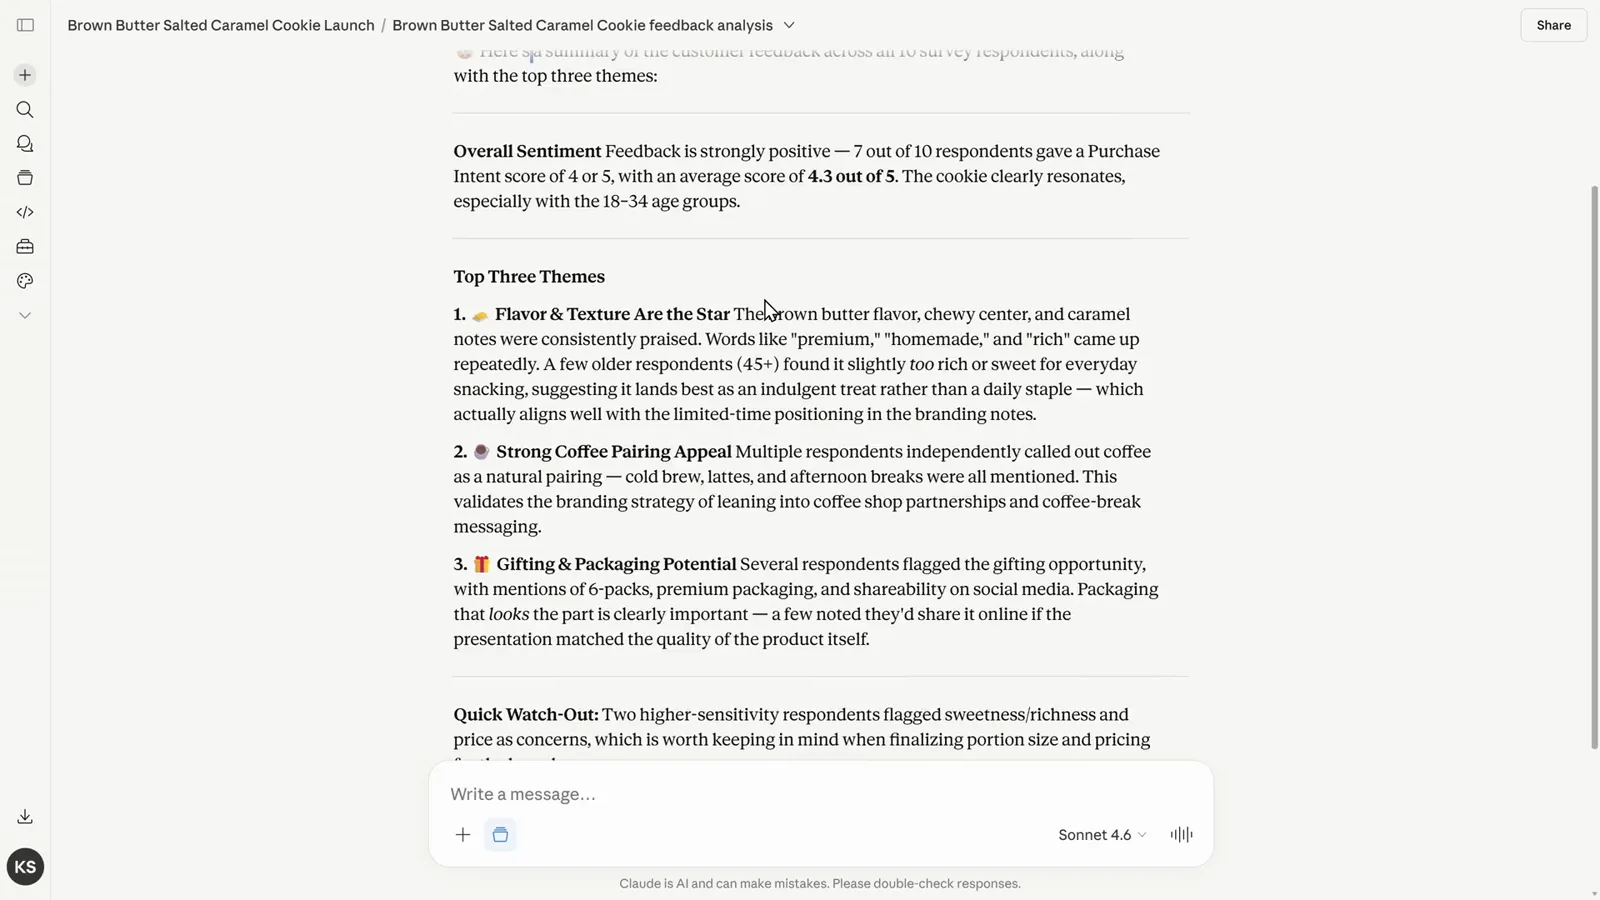
Project knowledge answered a question about a file this chat never saw.Watch at 4:28
4 · Organize, share and archive
- 12
Keep every related chat in the project
Chats started inside the project list right on its home page, ready to resume. Existing conversations can move in too: open the sidebar, click the three dots on any chat and choose the add-to-project option. Prune the other direction as well — Kevin recommends keeping unrelated chats out so Claude stays focused on the right context.
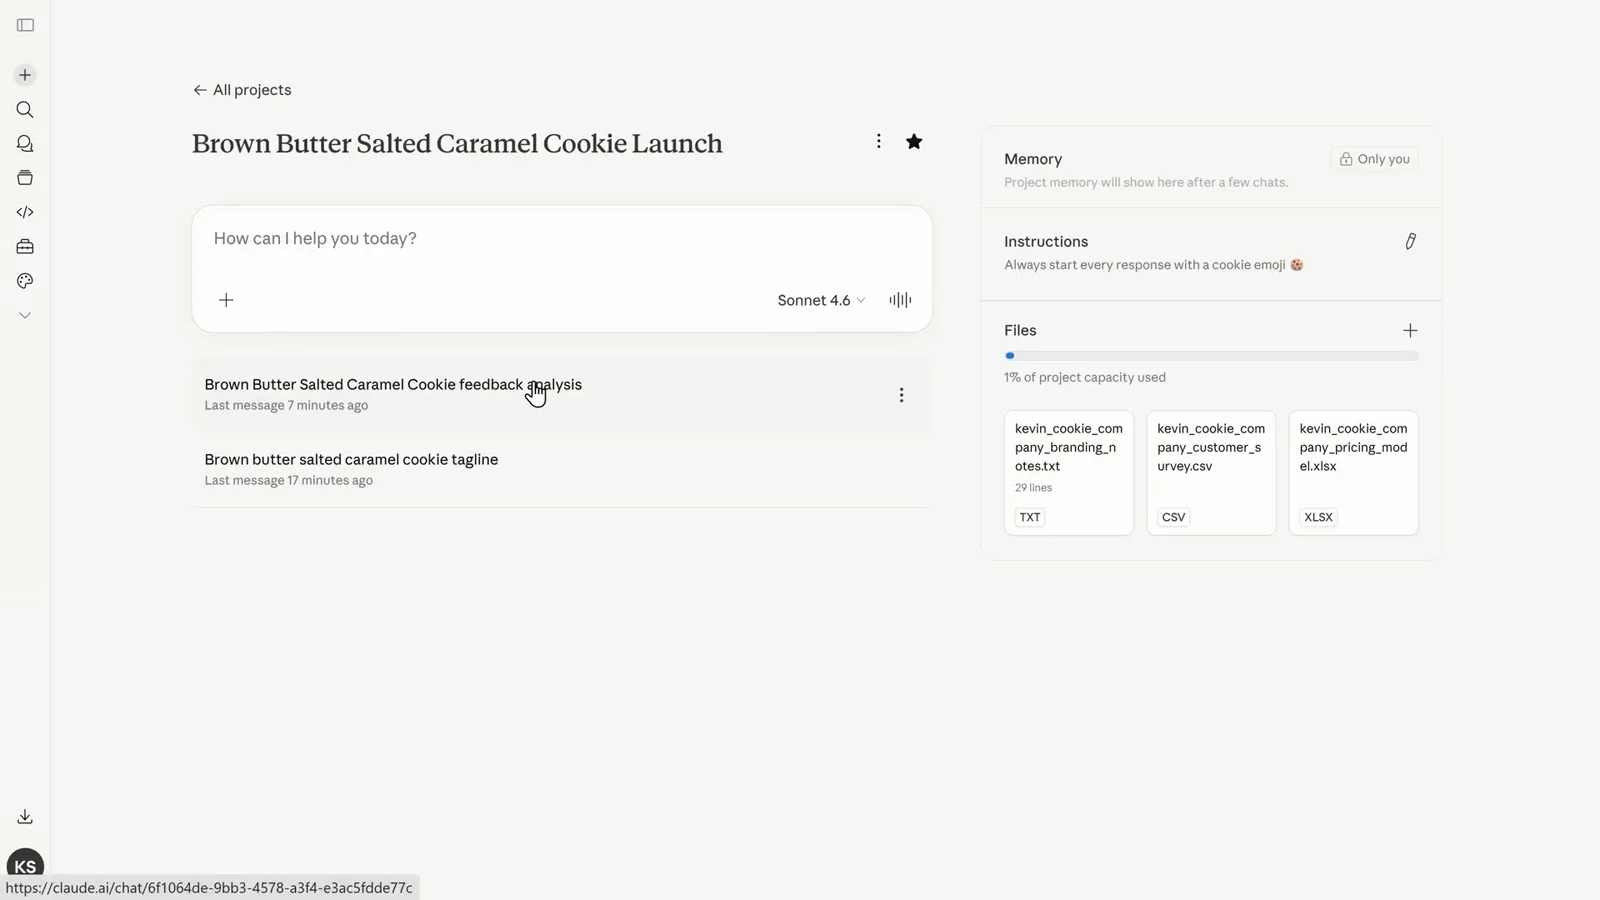
Past project chats stay one click away on the project home.Watch at 5:08 - 13
Star it, rename it or let it go
The star in the header pins a project for quick access. The three-dot menu on a project card is the management console: Unstar (proof this one is starred), Edit details for the name and description, then Archive and Delete for projects you no longer need front and center.
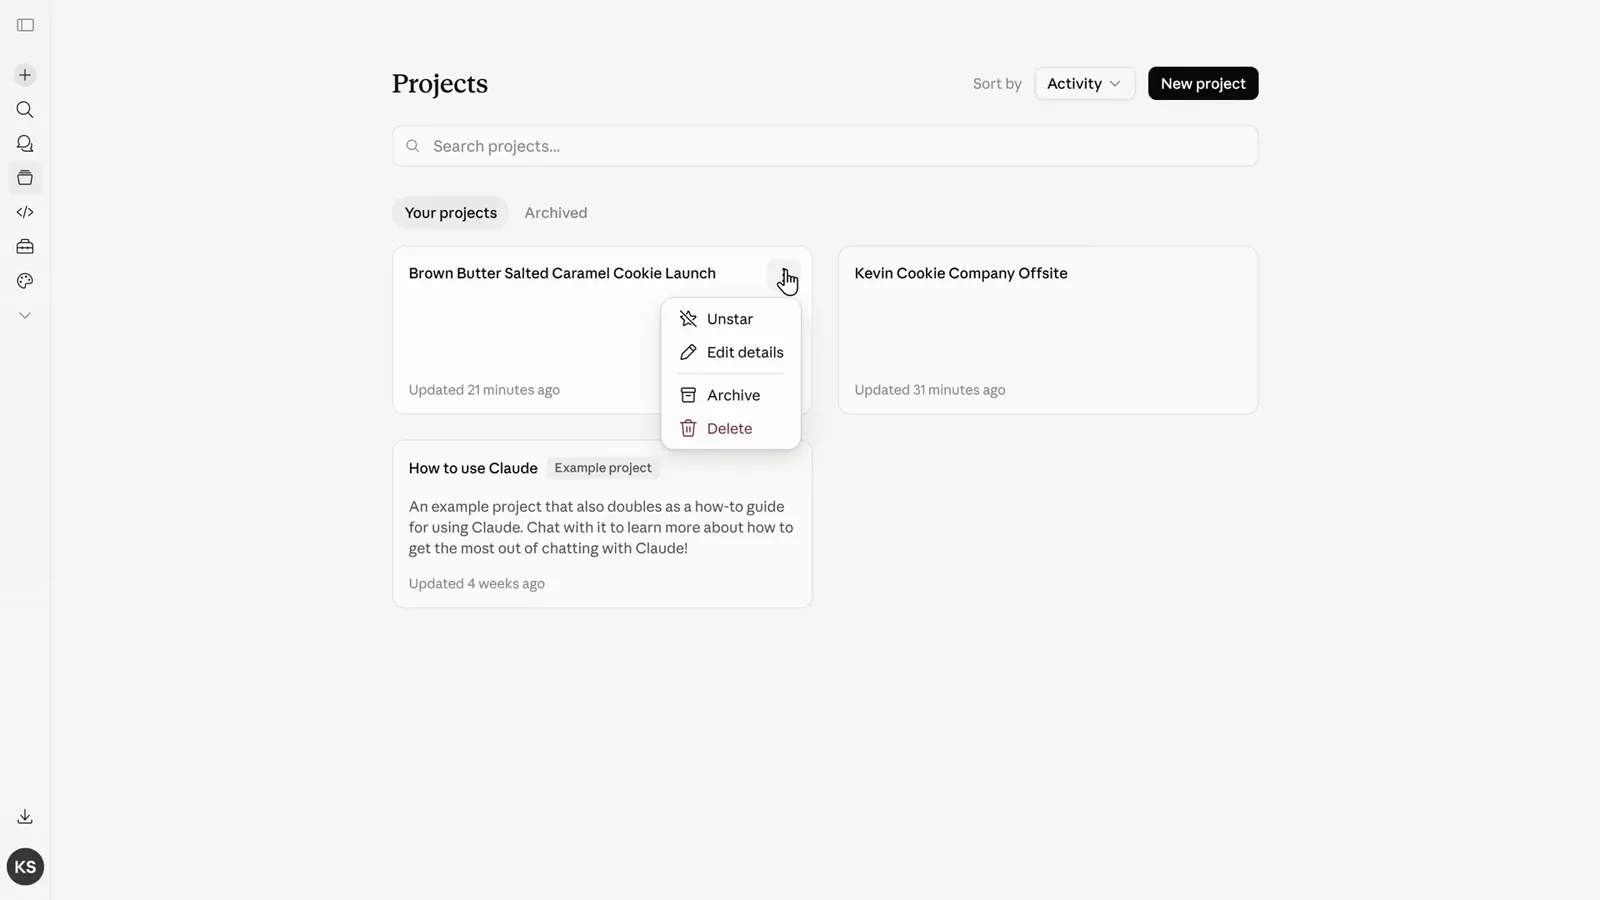
One menu handles star, details, archive and delete.Watch at 6:03 - 14
Share the project with your team
On Team and Enterprise plans, the Share dialog invites people by name or email and sets a permission per member: Can edit to change instructions, knowledge and members, Can view for read-only access with discussion. General access stays Only people invited unless you deliberately widen it, and a Copy link button rounds it off.
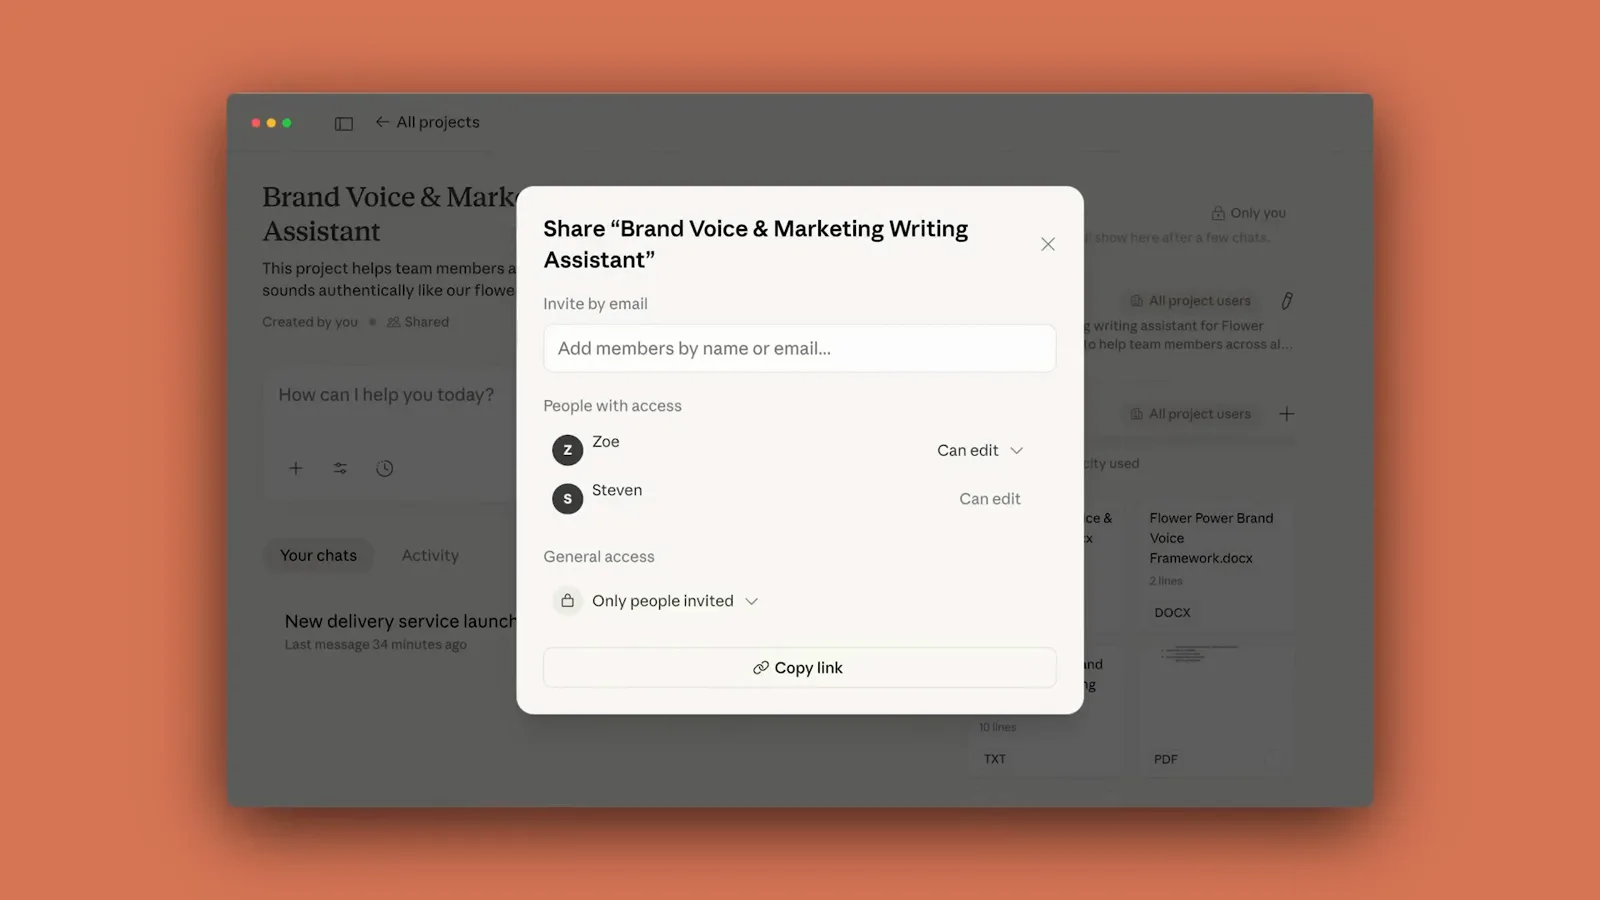
Per-member permissions: editors run the project, viewers read along.Watch at 4:45 - 15
Archive when the launch is over
When the work ships, pick Archive from the project's menu and confirm in the dialog. The project slides under the Archived tab on the Projects page — out of the way but never lost, which keeps your home page down to active work only.
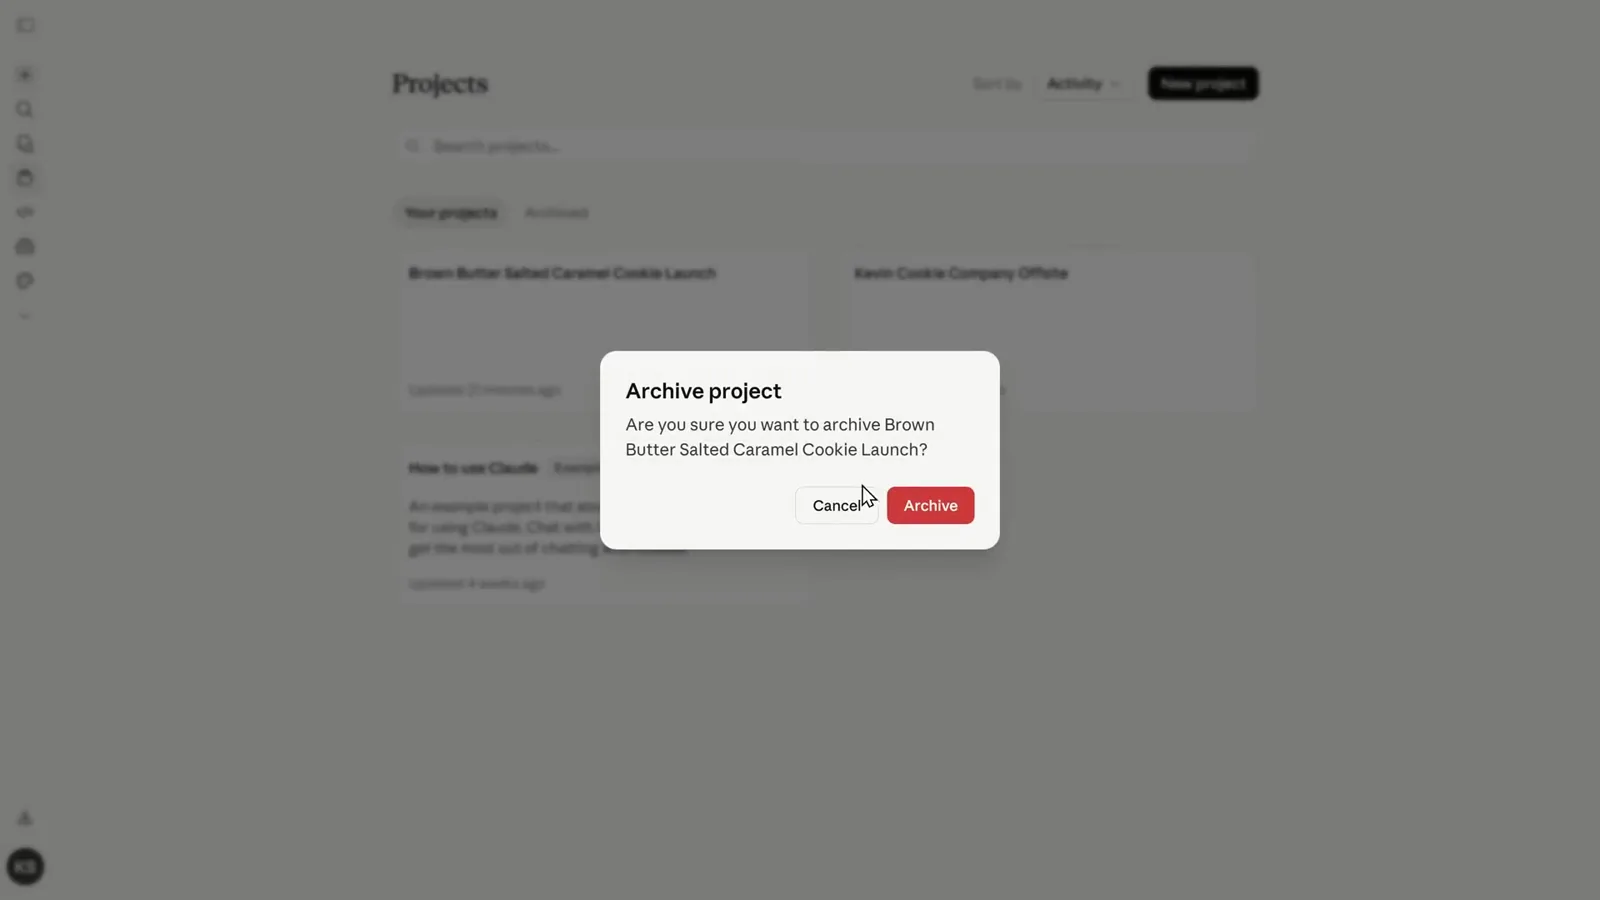
Archiving is reversible: the project waits under the Archived tab.Watch at 6:07