
Claude Code on Raspberry Pi: Install, SSH In, and Put It to Work
The illustrated, fact-checked path to running Claude Code on a Pi 4 or Pi 5: flash 64-bit Raspberry Pi OS, install with one command, authorize your account, and manage the whole box headlessly over SSH.
The short version
- Claude Code officially supports Linux on ARM64 with 4 GB+ RAM — a Raspberry Pi 4 or Pi 5 running 64-bit Raspberry Pi OS meets the documented requirements.
- One command installs it: curl -fsSL https://claude.ai/install.sh | bash — no Node.js needed. Only the npm route requires Node.js 22 or later.
- Enable SSH in the Imager before the first boot. That single toggle is what turns the Pi into a headless agent you manage from your laptop.
- Sign in with a Claude subscription or API billing, switch to Haiku for routine work, and save the bigger models for hard problems.
Installing Claude Code on a Raspberry Pi (full agent setup walkthrough)
Channel: Jason Welsh31:02
Running Claude Code on a Raspberry Pi
Channel: akash.gg
Setup — official documentation
Official docs: code.claude.com/docs
Every requirement, command and flag on this page is verified against the official setup documentation and the akash.gg "Running Claude Code on a Raspberry Pi" write-up; the video above is the visual source.
Screenshots are attributed to the creator with deep links to the exact timestamps. No face-cam frames are used.
From an empty SD card to a working Pi agent
Part 1 — Prepare the Pi and the SD card
- 1
Flash 64-bit Raspberry Pi OS with Imager
On a regular computer, install the Raspberry Pi Imager from raspberrypi.com, pick your board (a Pi 4 or Pi 5 with 4 GB+ RAM fits Claude Code's documented ARM64, 4 GB RAM requirement), choose Raspberry Pi OS (64-bit), and select your SD card. The 64-bit image is the one non-negotiable choice here — the ARM64 build of Claude Code will not run on a 32-bit OS.
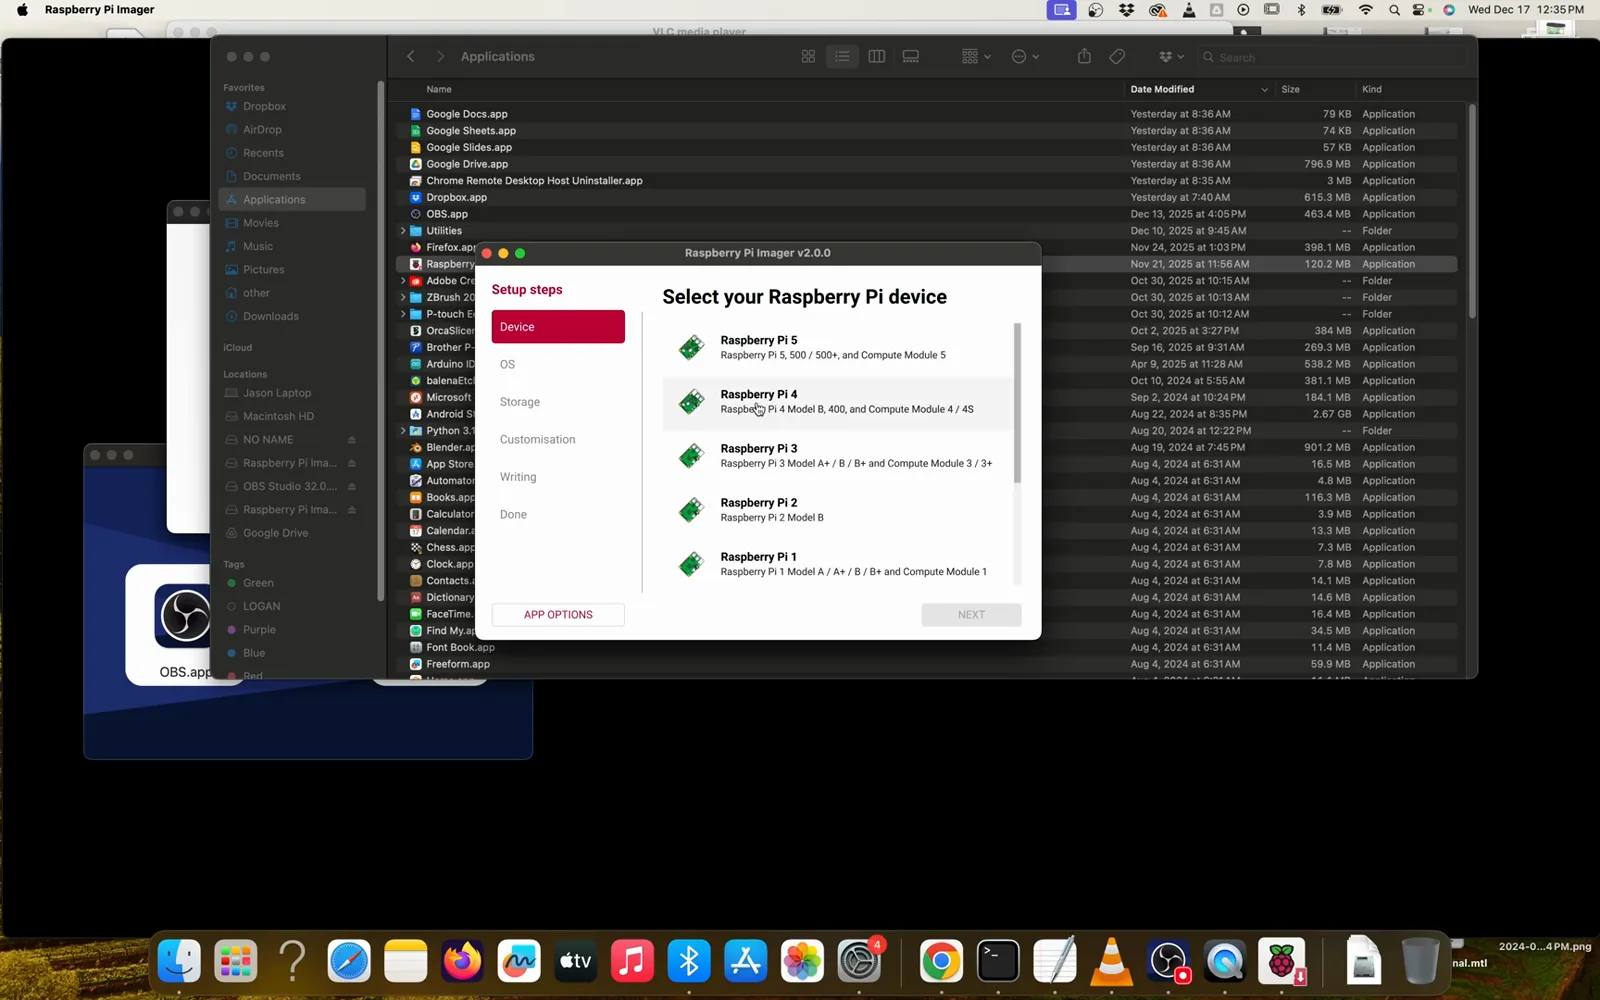
Pick your board in the Imager — Pi 4 and Pi 5 both qualify.Watch at 3:12 - 2
Turn on SSH before the first boot
In the Imager's OS customisation, set your username and password, pre-load your Wi-Fi network, and switch Enable SSH on. The walkthrough calls this "very important" for good reason: SSH is what later lets you unplug the monitor and manage the Pi entirely from your laptop.
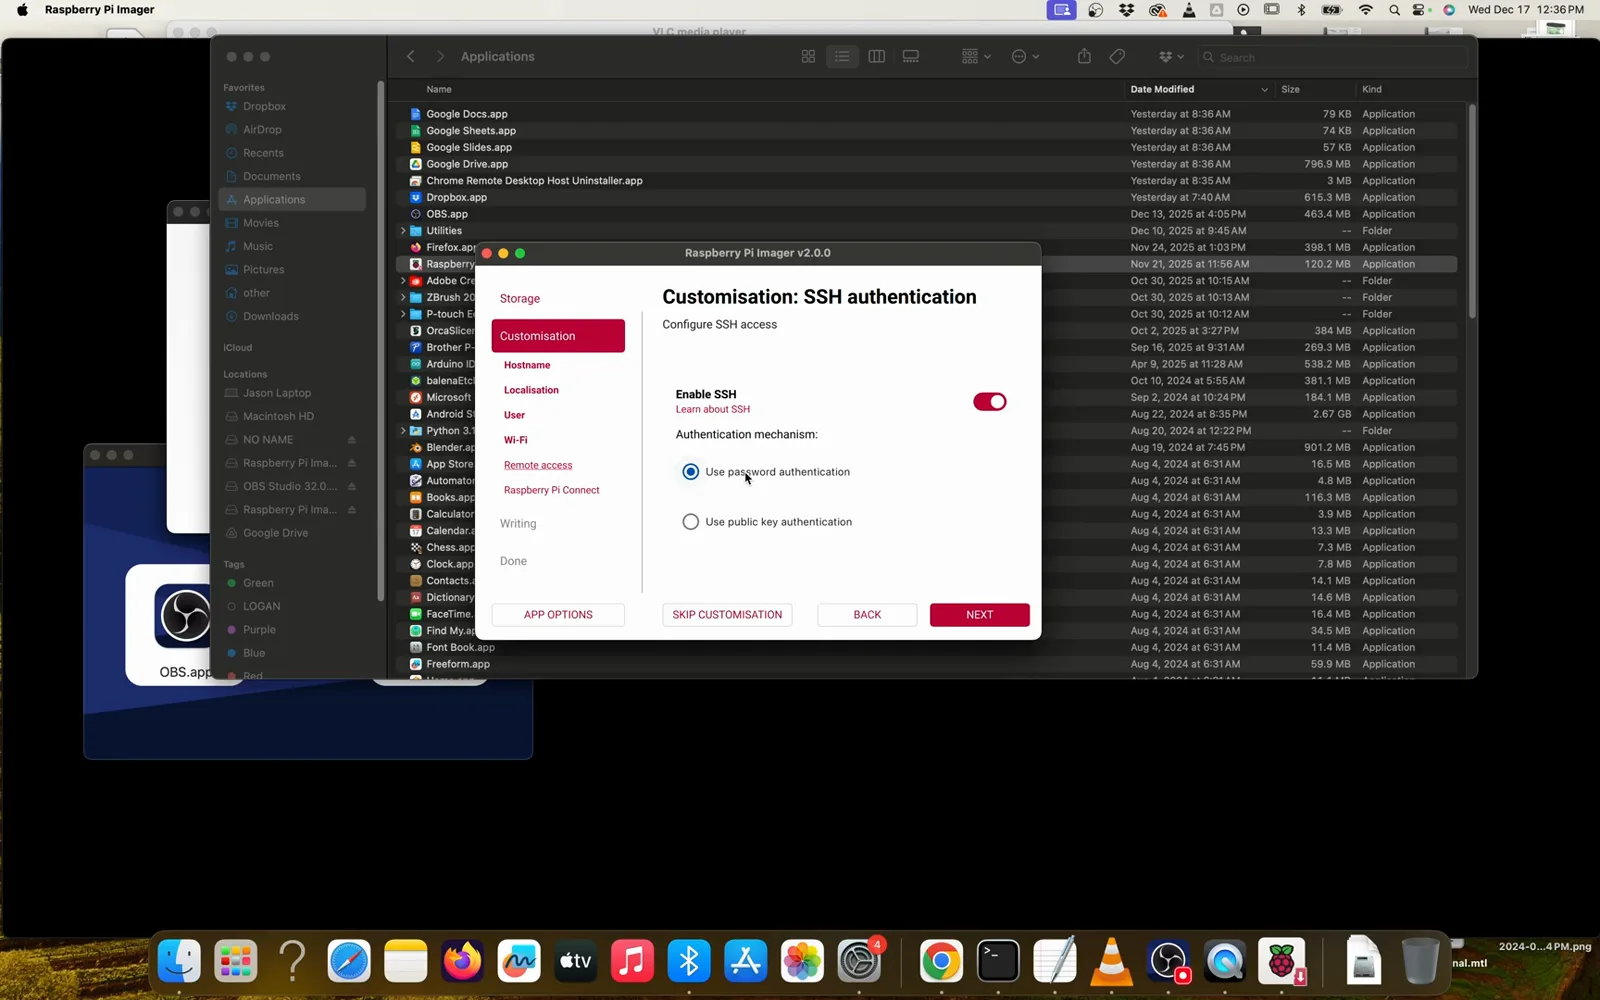
Enable SSH now and thank yourself later.Watch at 4:16 - 3
Boot up and confirm 64-bit
Eject the card, slide it into the Pi, and power it up — you should land on the Raspberry Pi OS desktop welcome. If the text is microscopic on a TV, open Preferences → Screen Configuration, set the HDMI resolution to something like 1024×768, and Apply.
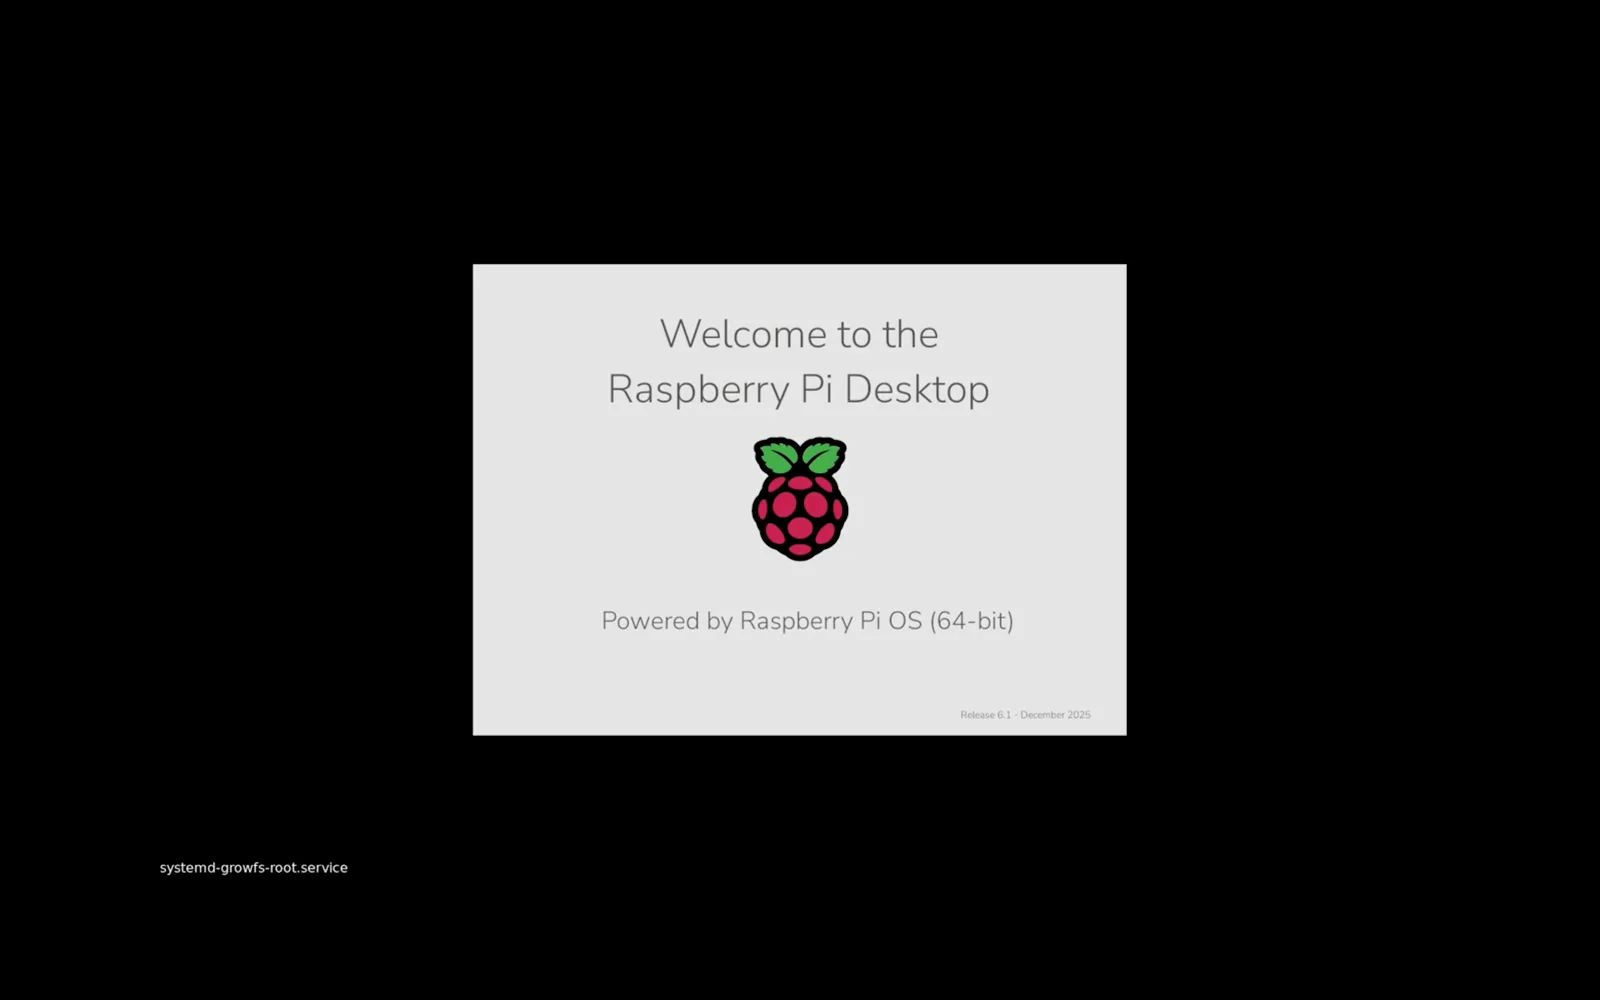
The 64-bit welcome means you flashed the right image.Watch at 7:00 - 4
Get the install plan
Sign in to claude.ai in the Pi's browser and ask for a step-by-step Claude Code install on a fresh system. You can skip this and paste the official command from step 6 directly — but having the plan on screen made the recorded walkthrough easy to follow.
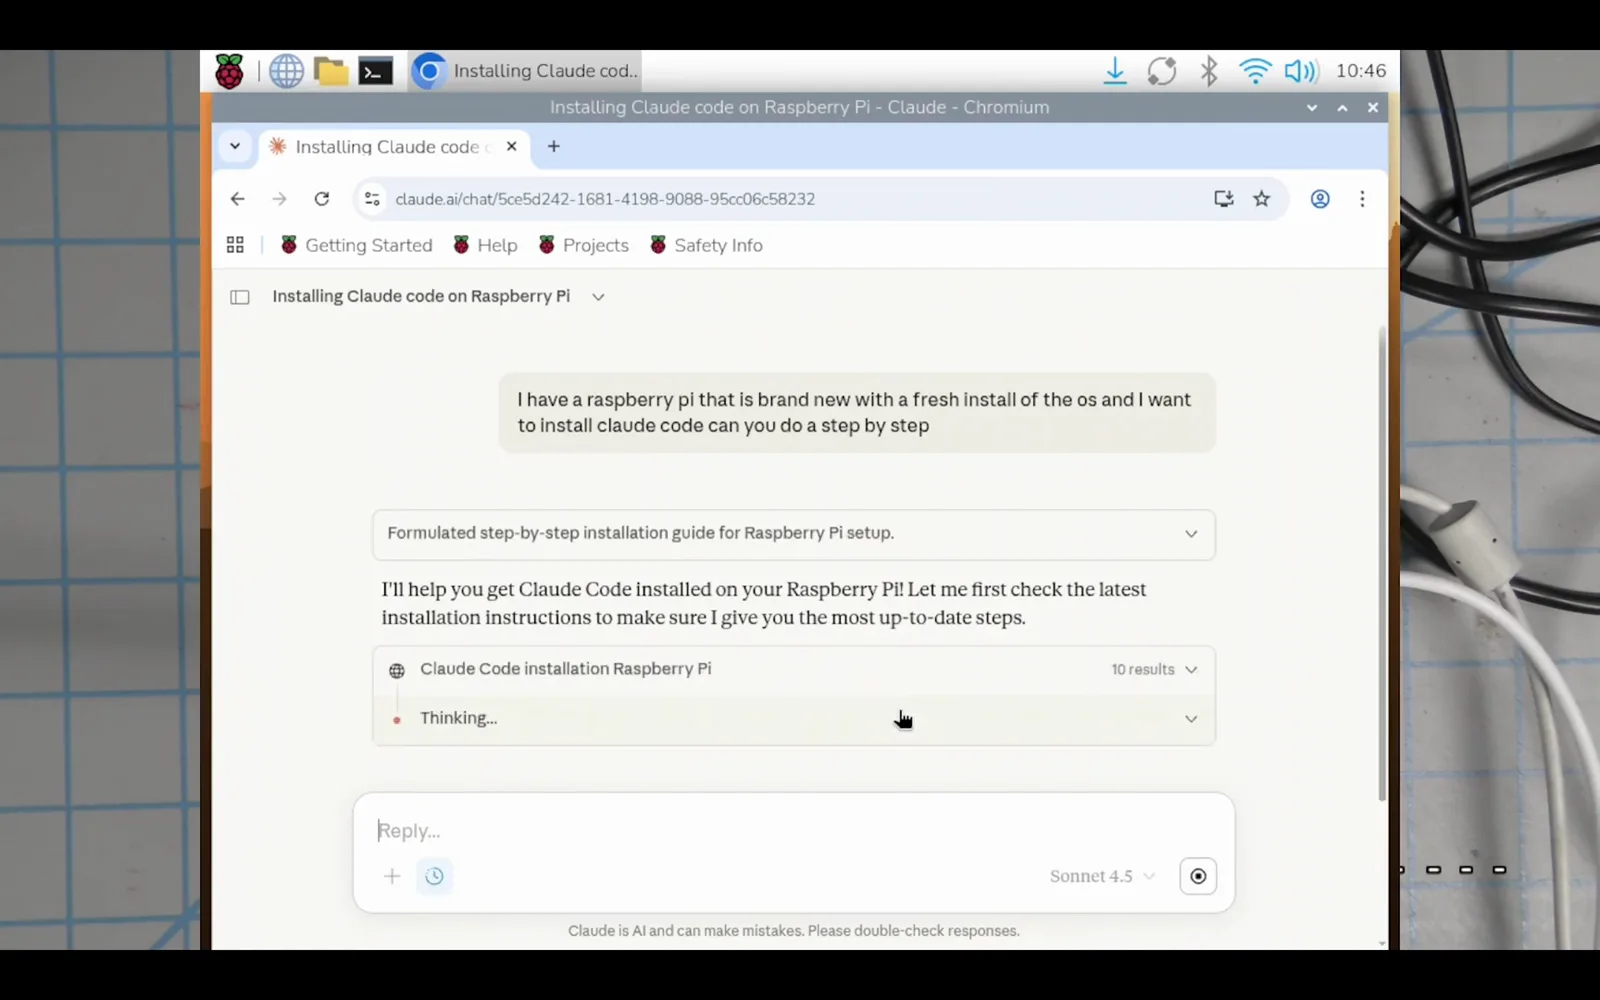
Ask Claude for the plan, or jump straight to the command in step 6.Watch at 12:00
Part 2 — Install and authorize
- 5
Update the system first
Open a terminal and bring the system current with sudo apt update && sudo apt full-upgrade -y. On a fresh image this can pull dozens of arm64 packages and take a few minutes.
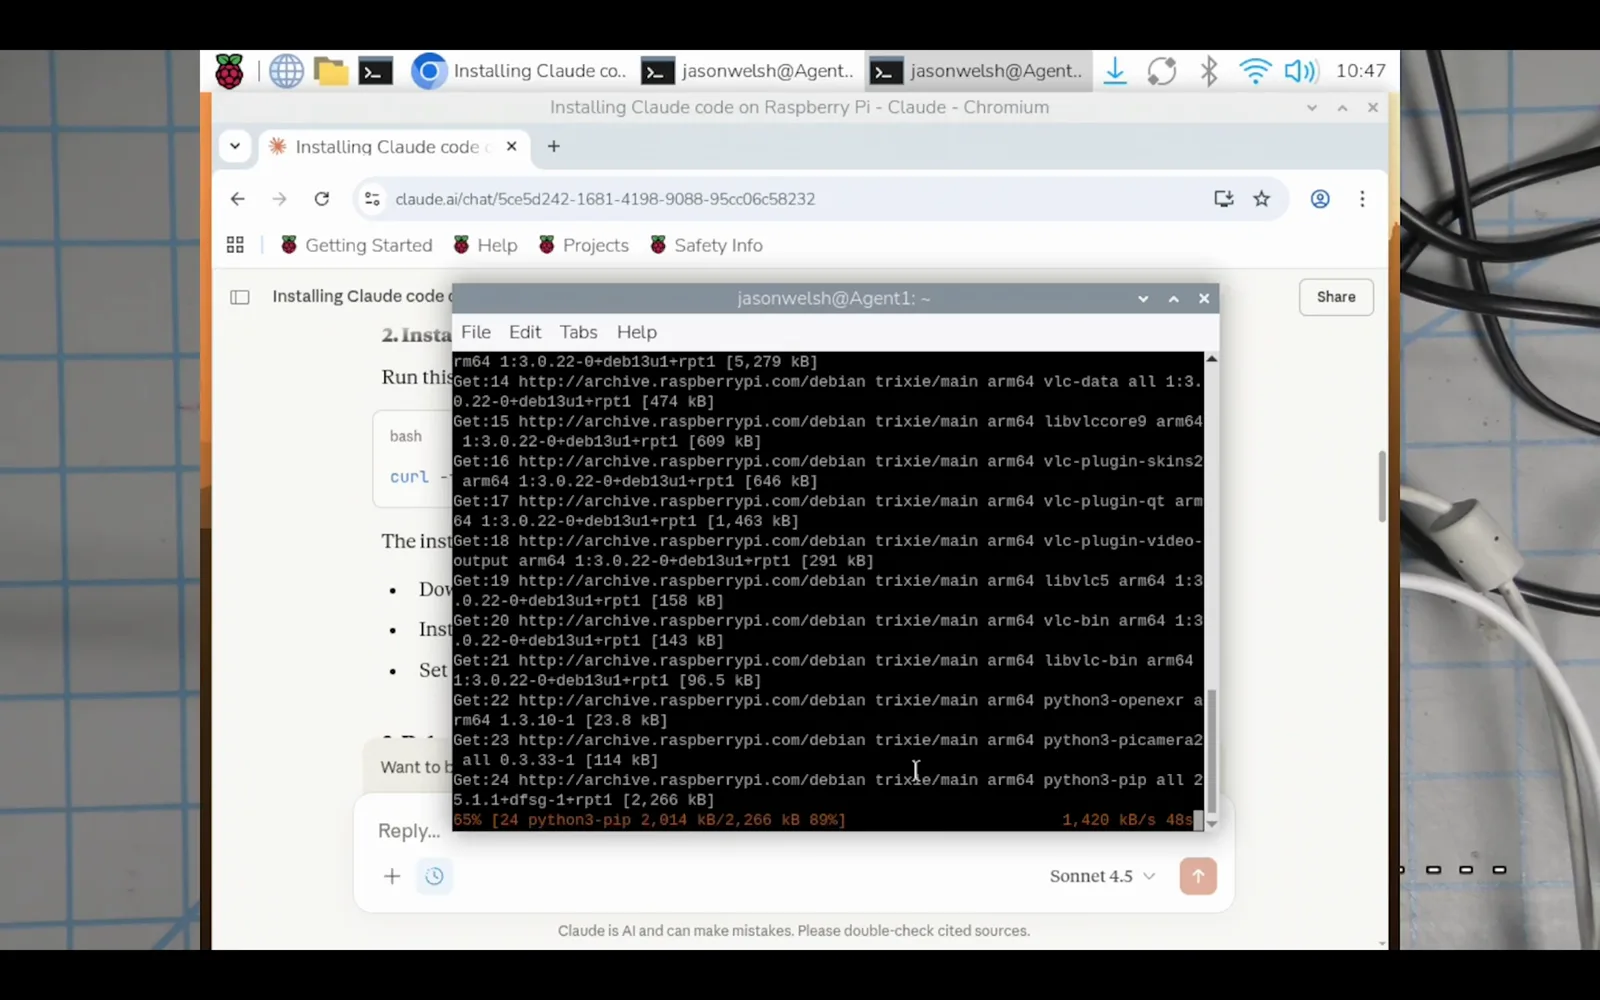
A fresh image can pull a surprising amount of updates.Watch at 13:50 - 6
Run the official installer
Install Claude Code with one command: curl -fsSL https://claude.ai/install.sh | bash. This path needs no Node.js at all. (Prefer npm? Install Node.js 22+ for ARM64, then run npm install -g @anthropic-ai/claude-code — and skip the sudo, which the official docs warn against.)
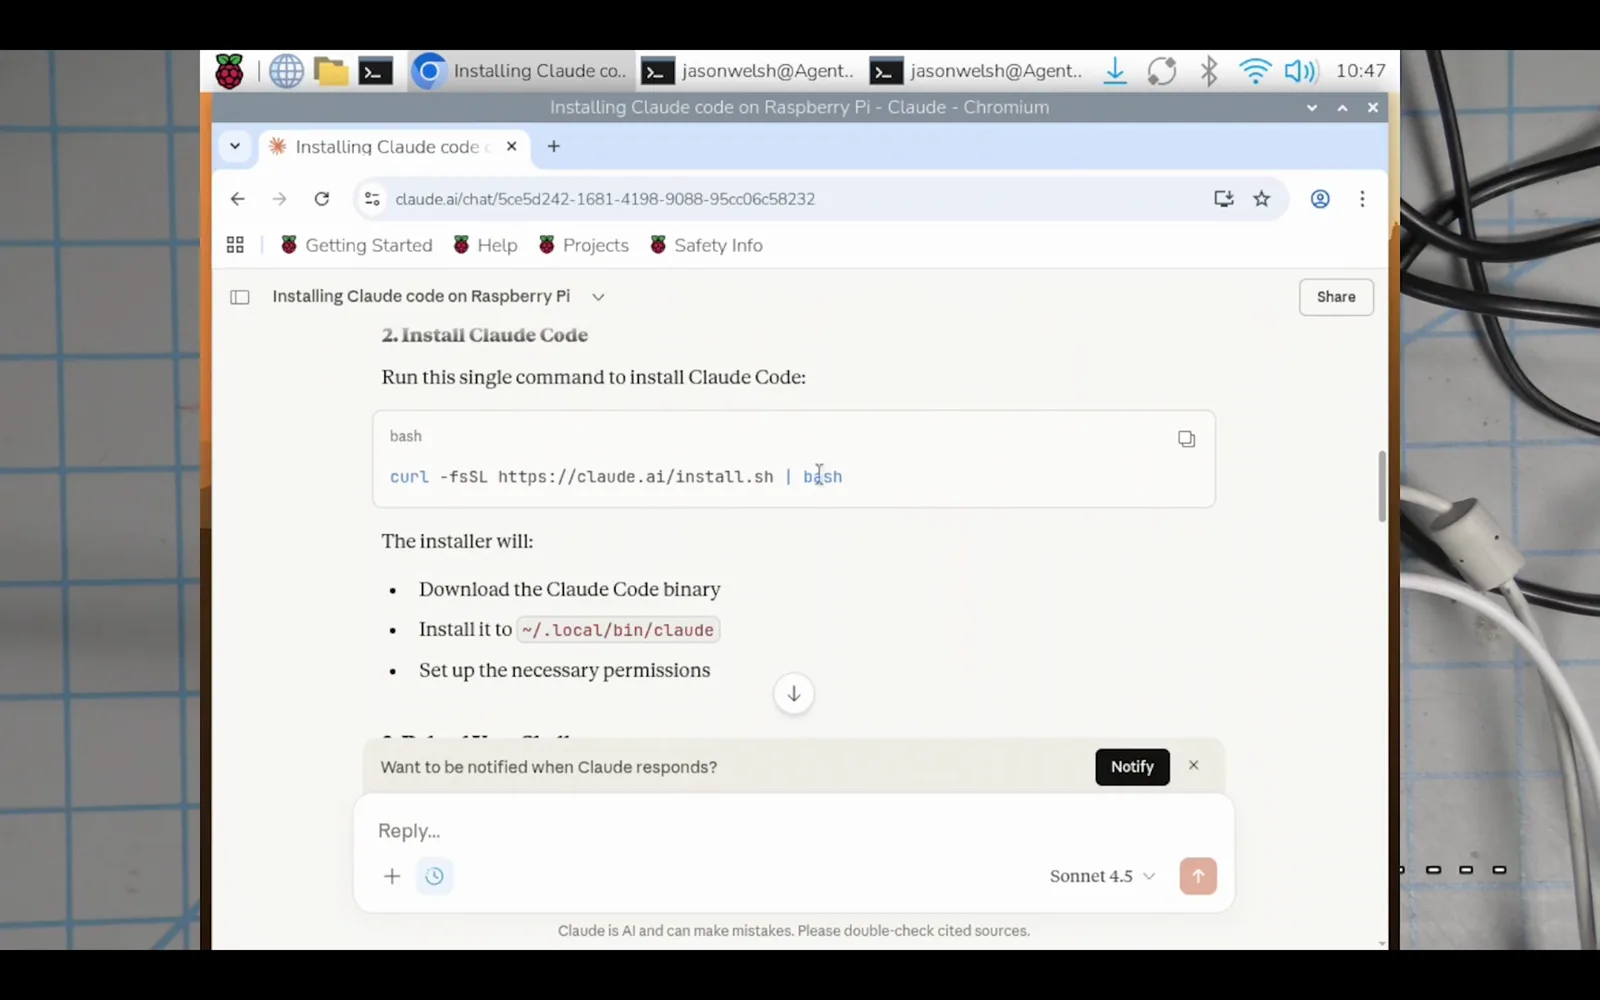
One line installs Claude Code — the docs' recommended path.Watch at 13:00 - 7
Fix PATH and verify
The installer ends with a version banner and where it put the binary. If it warns that the local bin folder is not on your PATH, run the export command it prints to append it to .bashrc, then source ~/.bashrc. Confirm with claude --version.
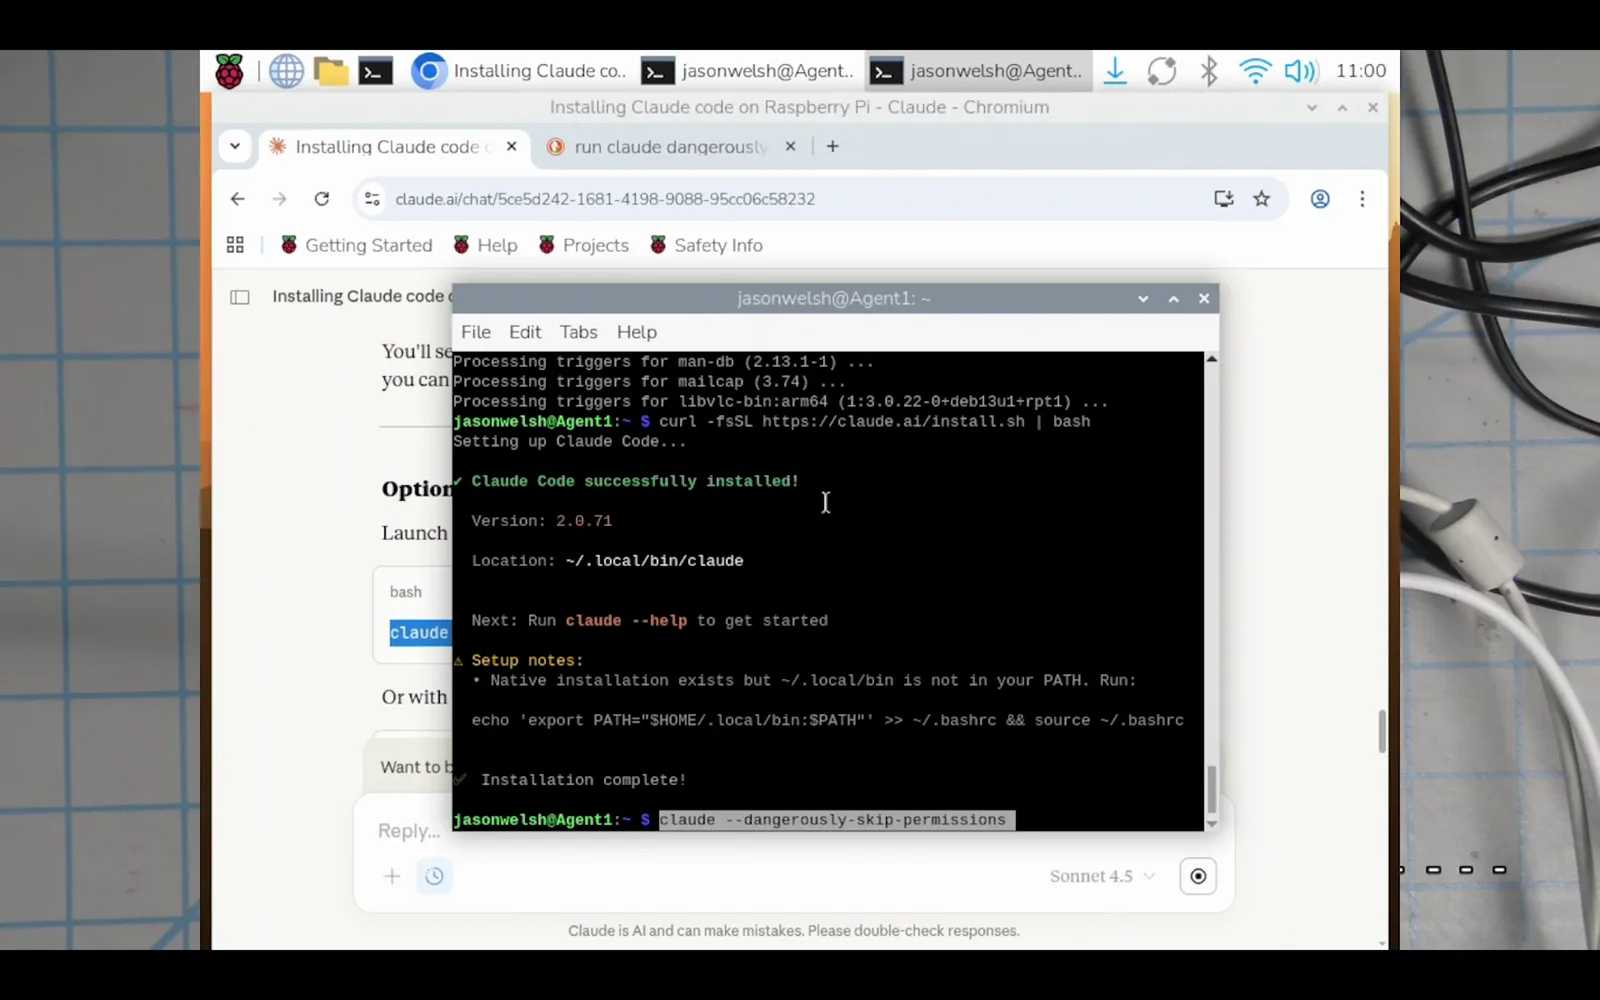
The success banner, plus the PATH fix you may need.Watch at 16:30 - 8
Authorize your Claude account
Start Claude Code with claude in your project folder, pick a theme, and choose "Claude account with subscription" (or Anthropic Console for API billing). The Pi's browser opens the consent page — click Authorize, return to the terminal, and press Enter.
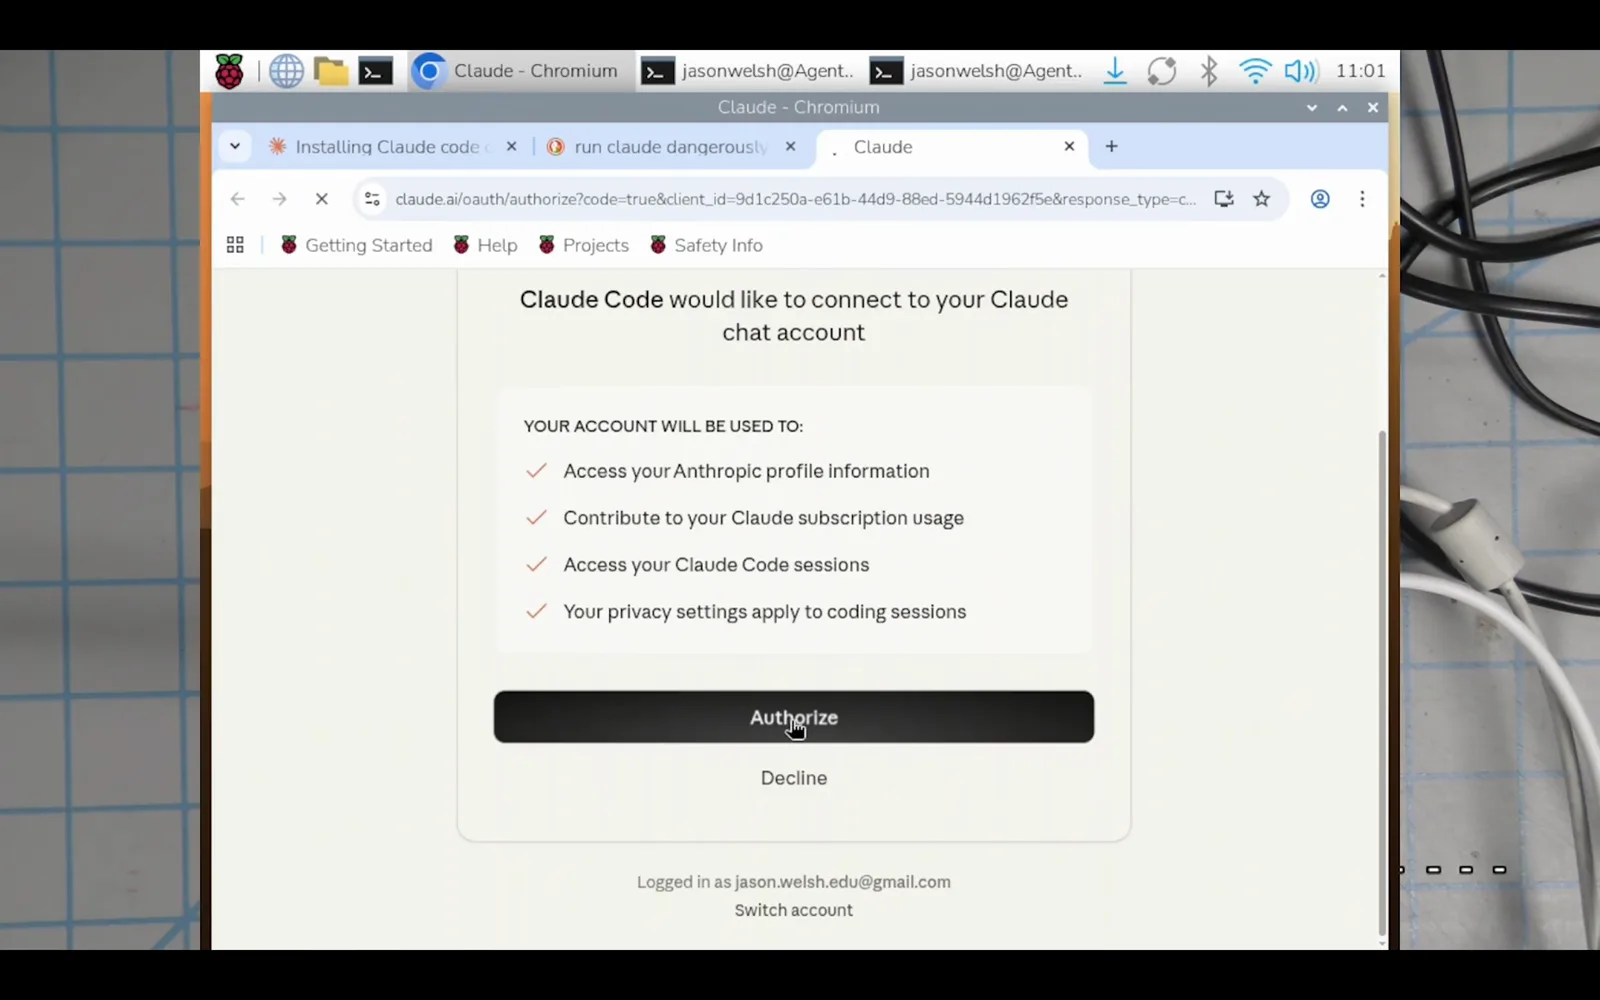
The consent screen appears in the Pi's own browser.Watch at 17:05
Part 3 — Tune it and go headless
- 9
Switch to Haiku to save usage
On a Pi, big-model responses are for hard problems. Type /model and pick Haiku for everyday setup and scripting — the recorded session switched right after signing in. You can move up to Sonnet or Opus any time.
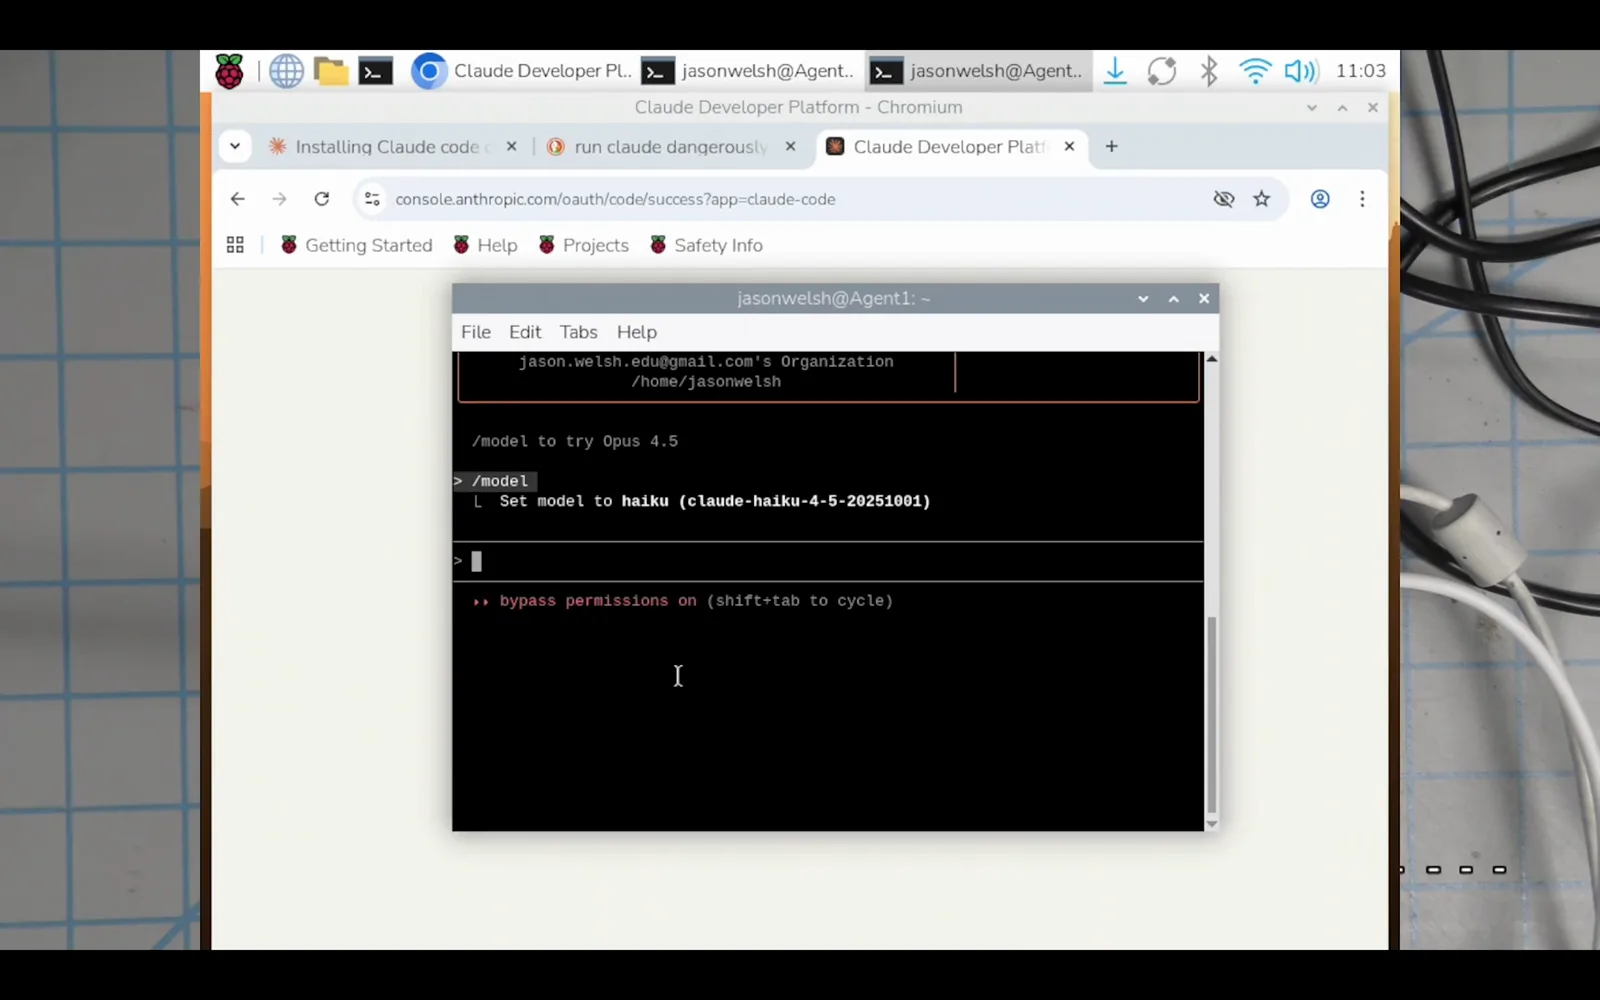
Haiku keeps subscription usage low while you set things up.Watch at 18:30 - 10
Cut the cables: SSH in from your laptop
Now remove the training wheels. With SSH enabled back in step 2, unplug the HDMI cable and keyboard and connect with ssh youruser@pi-ip from your laptop. Ask Claude Code to verify itself — "make sure SSH is fully working and what is my login and IP" — and it will run whoami, check the IP, and confirm the ssh service. For a fully headless box, mint a long-lived token on a machine with a browser (claude setup-token) and export it on the Pi as CLAUDE_CODE_OAUTH_TOKEN.
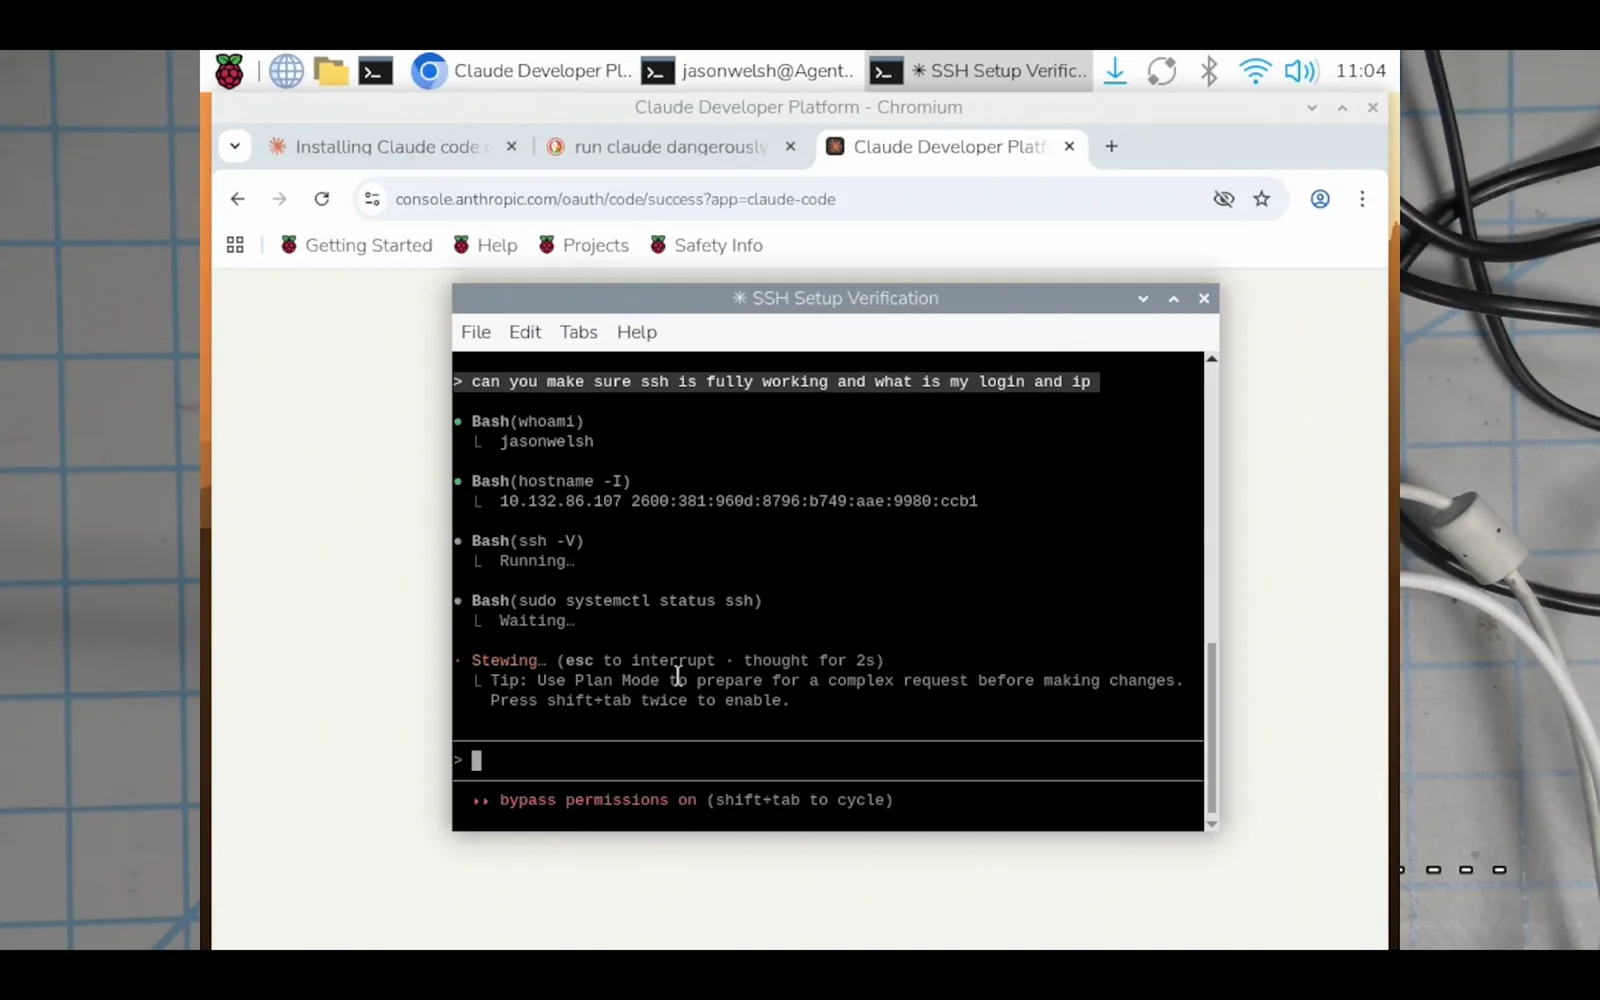
Claude can audit its own SSH setup and report the IP.Watch at 19:30 - 11
Put your Pi agent to work
Once it's running you own an always-on, low-power coding agent you can reach from anywhere: maintain self-hosted services on your network, SSH into other machines to apply changes, write and schedule maintenance scripts like rsync backups and cron jobs, or program the microcontrollers in your hardware projects. Start small, review what it runs, and widen its permissions as trust builds.
Which Raspberry Pi can actually run Claude Code?
Claude Code ships an ARM64 build, and the documented floor is 4 GB of RAM on a Debian 10+/Ubuntu 20.04+ base. Translated into Pi models:
- 1Raspberry Pi 5 (4/8/16 GB) — the comfortable choice; it behaves like a small laptop.
- 2Raspberry Pi 4 (4 GB and up) — the model the illustrated walkthrough was recorded on; pair it with Haiku for snappy everyday work.
- 3Raspberry Pi 500 / Pi 400 — the keyboard form factors carry 4/8 GB of ARM64 RAM, so they meet the documented requirements too.
- 4Raspberry Pi 3, Zero 2 W and older — 1 GB or 512 MB of RAM and often 32-bit images; that's below what the docs specify, so treat them as untested territory rather than a supported target.
- 5Compute Modules — a CM4/CM5 with 4 GB+ RAM meets the same requirements, and nothing in the installer is Pi-specific.
Not sure what you have? Run uname -m: aarch64 means a 64-bit ARM system the installer targets; armv7l means 32-bit, and you should re-flash with 64-bit Raspberry Pi OS first.
Install problems on the Pi, solved
Almost every failure you'll hit on a Pi falls into one of these buckets:
- 1claude: command not found after installing — the binary landed in ~/.local/bin, which isn't on your PATH yet. Run the export command from the installer's setup notes (step 7) and reopen the terminal.
- 2EBADENGINE warnings during an npm install — your Node.js is older than the required version 22. Upgrade Node for ARM64, or switch to the curl installer, which doesn't involve npm at all.
- 3Install or launch fails outright — double-check you flashed 64-bit Raspberry Pi OS. The ARM64 build cannot run on a 32-bit image: pick the 64-bit or it will not work, as the walkthrough puts it.
- 4Never sudo npm install -g — the official docs call this out for permission and security problems. Use the native installer or fix your npm global prefix instead.
- 5No browser on a headless box — the OAuth login wants one. Authenticate once on a machine that has a browser, or generate a long-lived token with claude setup-token and export CLAUDE_CODE_OAUTH_TOKEN on the Pi.
Still stuck? Paste the exact error back into Claude Code itself (from another machine if needed) — the recorded workflow's core loop is exactly that: state your goal once, then paste errors until it works.