
Claude Code in a Dev Container: the Safe, Reproducible Setup
Install the Dev Containers extension, keep Docker running, add the official claude-code feature, reopen in container, sign in from the terminal, and keep auth alive across rebuilds — every step verified against Anthropic's dev container docs.
TL;DR
- Install the Dev Containers extension, keep Docker running, then Reopen in Container on any repo with .devcontainer/ — Claude Code and every command it runs execute inside the container, not on your machine.
- The official feature — "ghcr.io/anthropics/devcontainer-features/claude-code:1.0" in the features block — installs the CLI into any devcontainer; VS Code also gets the extension, and both share one ~/.claude.
- Sign in from the container terminal; if the browser callback can't reach it, paste the code at the prompt. Make auth survive rebuilds with a ~/.claude volume plus containerEnv.CLAUDE_CONFIG_DIR.
- A dev container replaces the environment (the /sandbox instead confines individual commands on your host). They compose — container for the environment, sandbox and permission prompts for behavior.
Run Your AI Coding Agent in Dev Containers - Complete Beginner's Guide
Channel: Visual Studio Code15:39
Step-by-Step: Run Claude Code SAFELY in a Dev Container
Channel: Fuzz Puppy6:56
Development containers — official documentation
Official docs: code.claude.com/docs
Every setup step, feature name and credential path on this page is verified against the official development containers documentation; the videos above are the visual and fact sources.
Screenshots are attributed to their creators with deep links to the exact timestamps. No face-cam frames are used.
Run Claude Code in a dev container, step by step
Part 1 — Prerequisites: VS Code meets Docker
- 1
Install the Dev Containers extension
Open the Extensions view in VS Code and install Dev Containers from Microsoft. This extension adds the remote indicator in the status bar, the Reopen in Container command, and the Remote Explorer — the entire workflow below runs through it. No Docker needed yet.
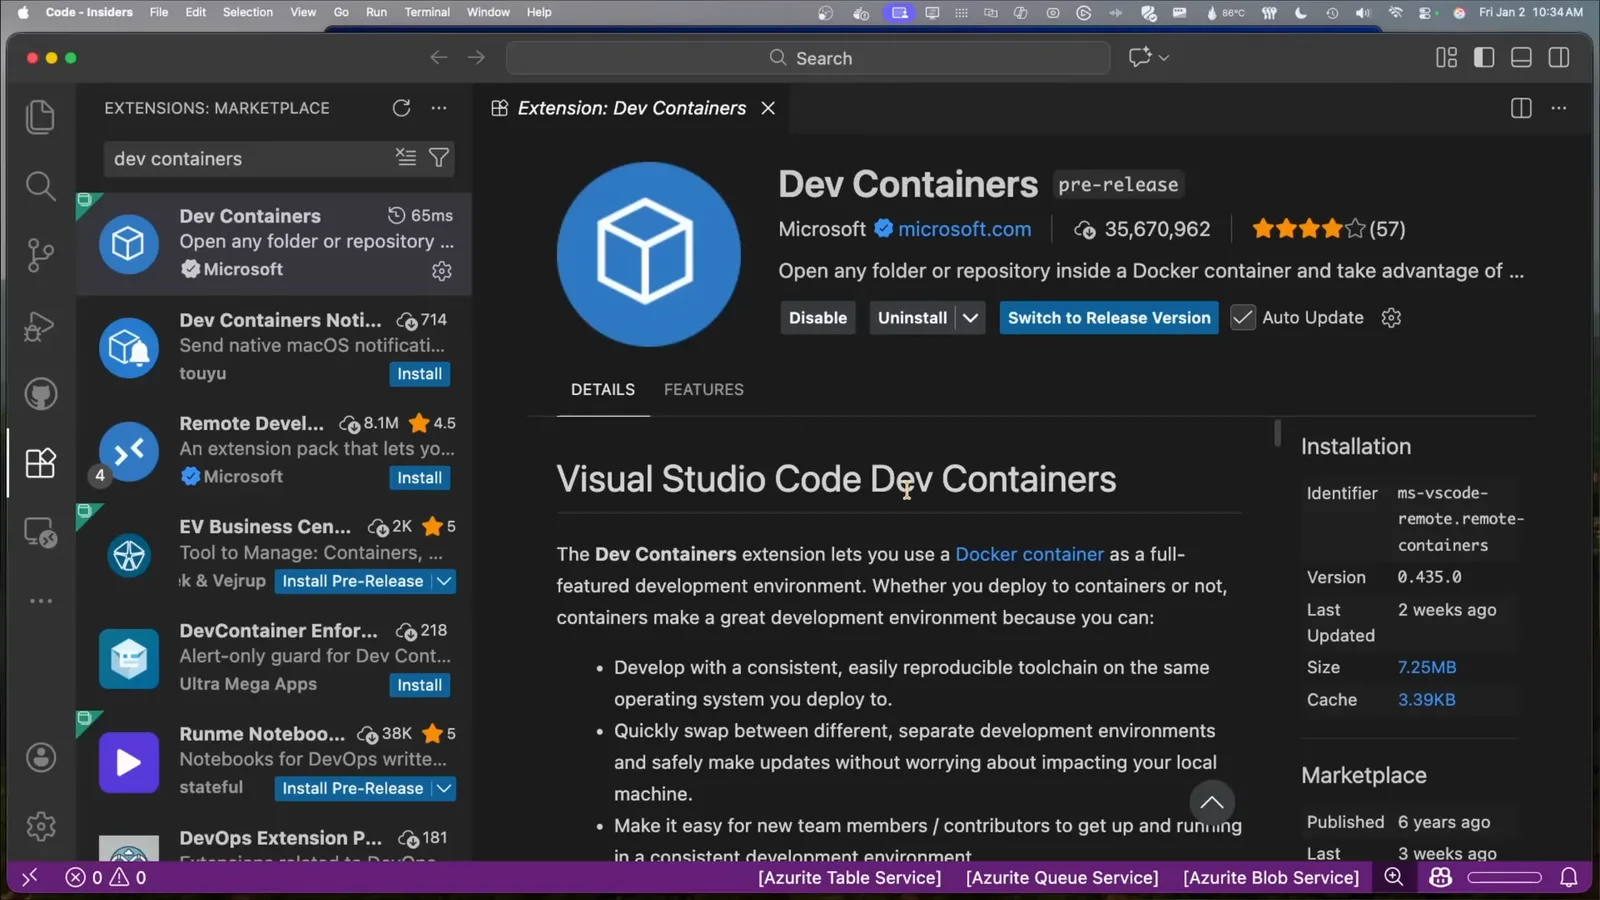
The Dev Containers extension is what adds Reopen in Container to VS Code — install it from the Extensions view first.Watch at 2:00 - 2
Install Docker Desktop and start it
Dev containers are real containers, so a container engine has to be running before anything opens. Docker Desktop is the usual choice on macOS and Windows; Docker Engine works on Linux. Start it and leave it running — an idle engine is the number one cause of a stuck "Opening Remote" on the first attempt.
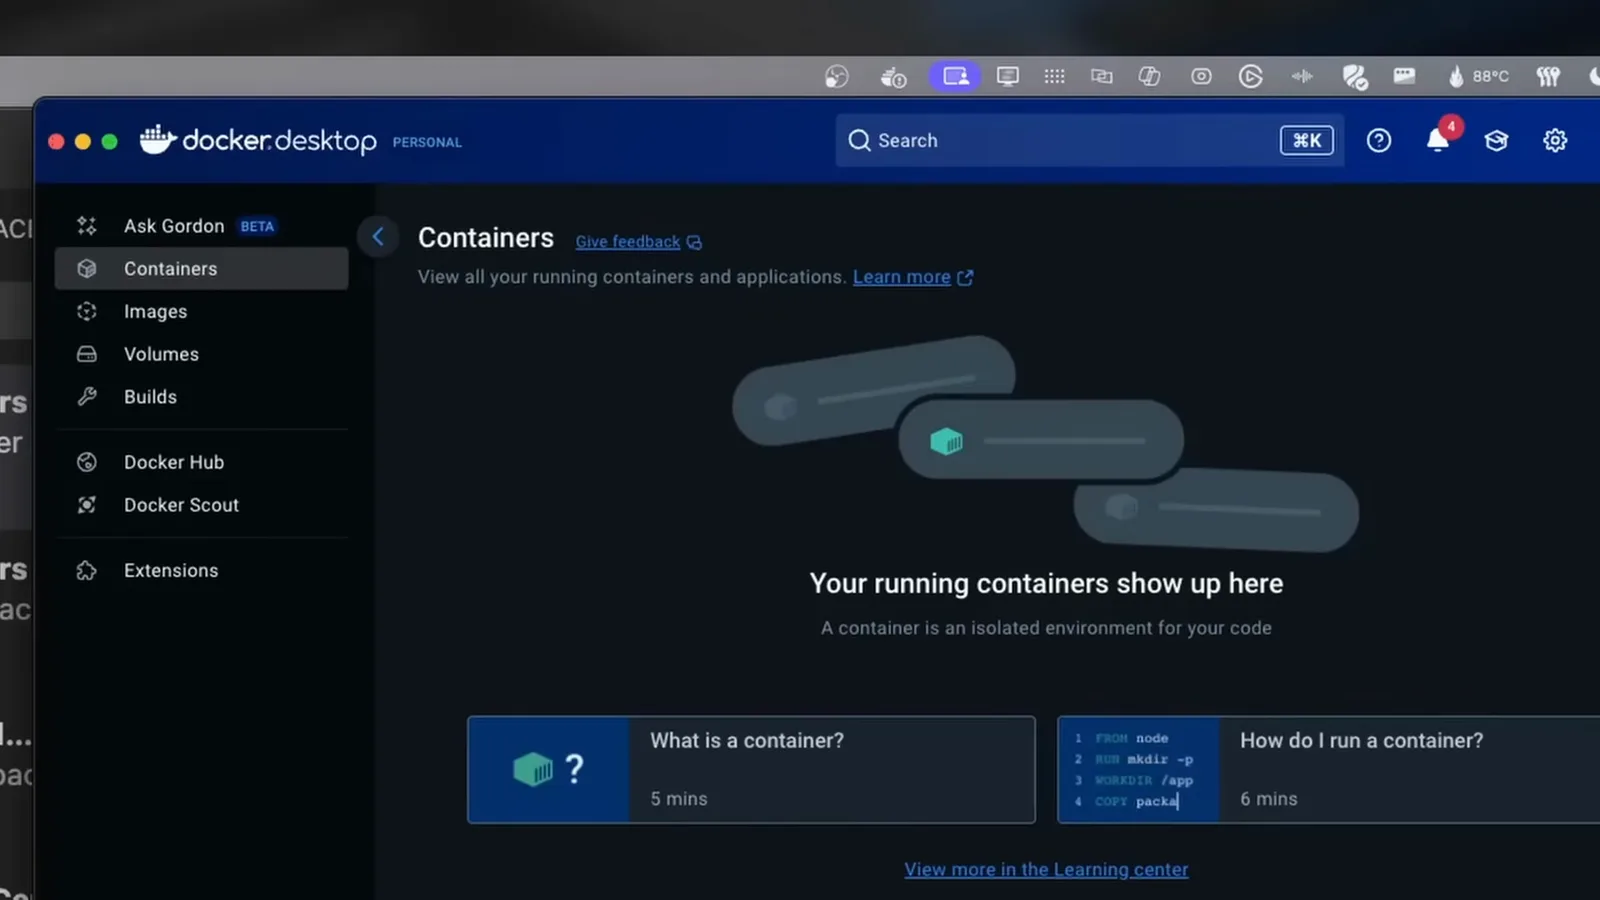
Docker Desktop just needs to be running; an empty Containers list is exactly what a healthy pre-container setup looks like.Watch at 2:12 - 3
Know what changes for Claude Code
After Reopen in Container, VS Code runs its server inside the container — and so does every command Claude Code executes. Installs, test runs, and file edits stay inside the container while the workspace folder is mounted back into your repo. Your machine only needs VS Code and Docker; toolchains and dependencies live in the image, and a stray agent experiment cannot touch anything outside.
Part 2 — A working container, end to end
- 4
Open a ready-made dev container
The fastest way to see the machinery work: in the Remote Explorer, pick a sample such as the Go dev container. VS Code clones github.com/microsoft/vscode-remote-try-go and opens it inside a container volume — no configuration written by you yet.
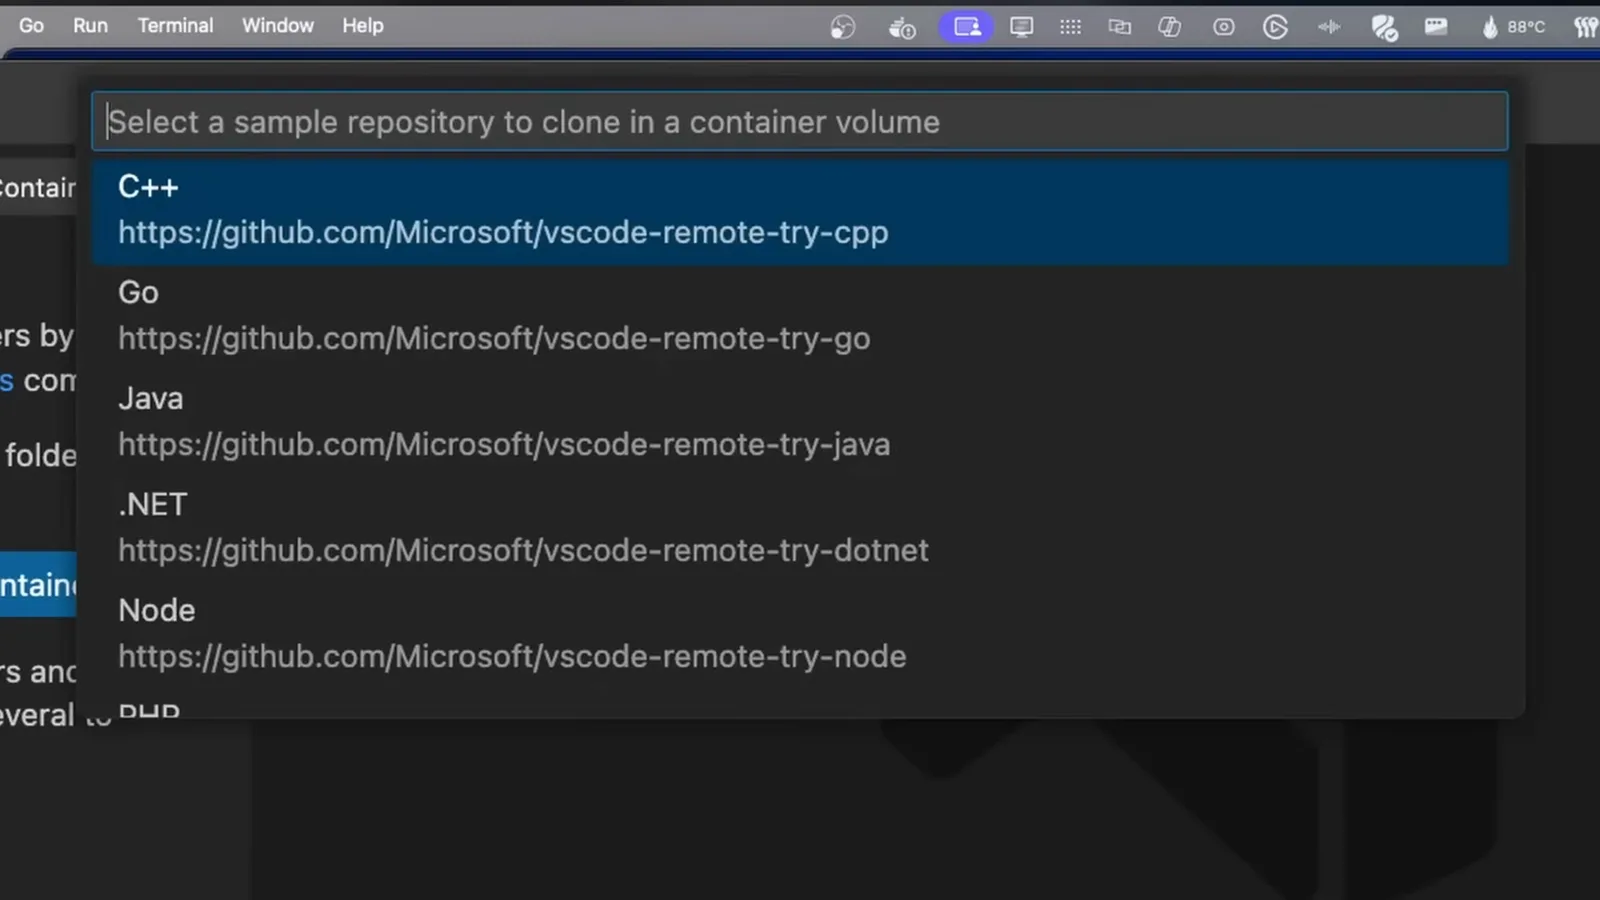
The Remote Explorer ships ready-made samples — pick one and VS Code clones the repo straight into a container volume.Watch at 2:30 - 5
Let VS Code build and connect
The first connect clones the repo, pulls the container image layer by layer, and starts the container — the status bar calls out "Connecting to Dev Container". On a slow connection this is the longest wait of the setup; every later open reuses the image and takes seconds.
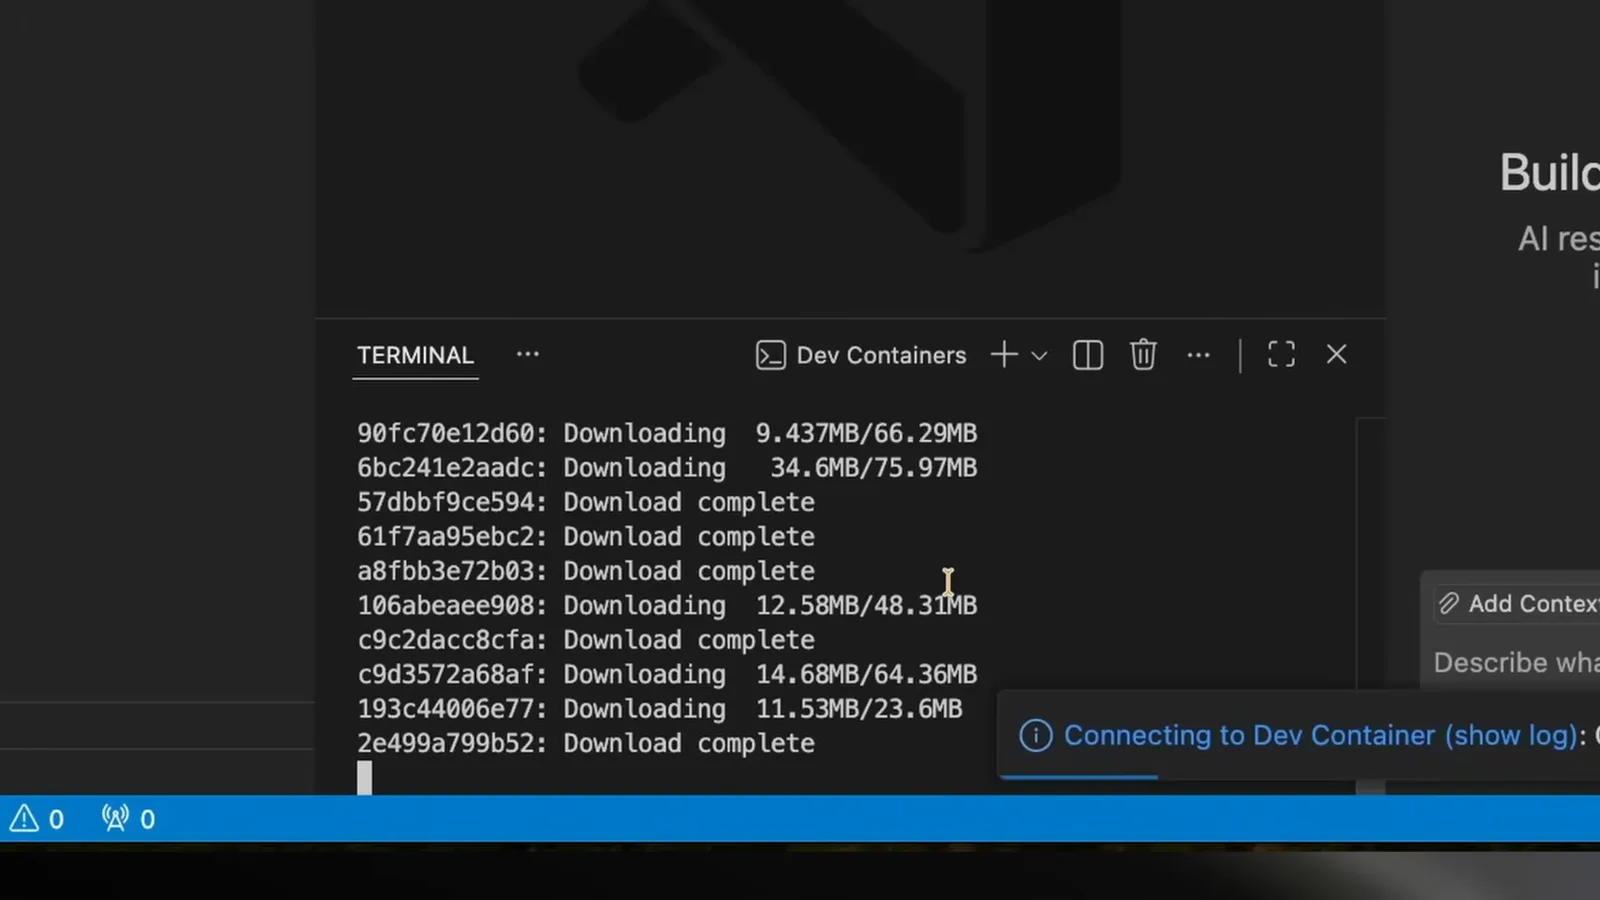
First build downloads the container image layer by layer; the status bar tracks the connection to the dev container.Watch at 2:52 - 6
Confirm the terminal is inside the container
Open a new terminal and print the toolchain version (go version here). The output names the container's OS and architecture, not your laptop's. This terminal is exactly where you would launch claude — and anything it executes stays inside the container.
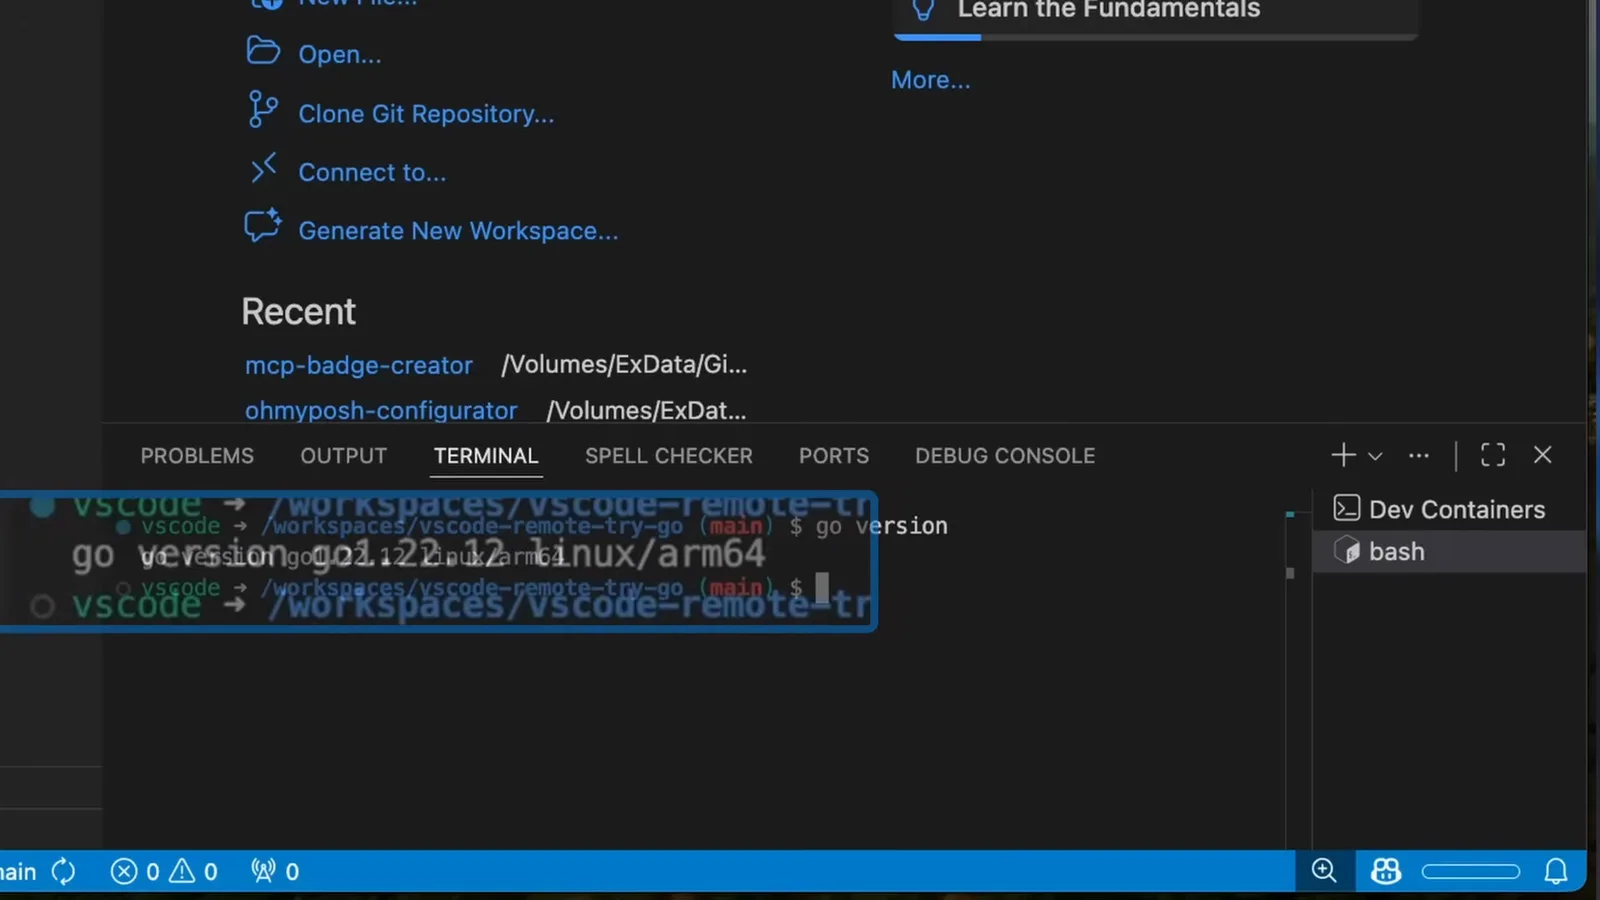
go version prints the container's toolchain, not your laptop's — run claude in this terminal and it stays inside too.Watch at 3:50 - 7
Read the devcontainer.json
The .devcontainer/devcontainer.json file defines the whole environment: the base image (or a Dockerfile), the VS Code extensions to install in the container, forwarded ports, postCreateCommand setup steps, and the remoteUser. For Claude Code this file is also where the official feature and the credential volume go — covered in steps 9 and 13.
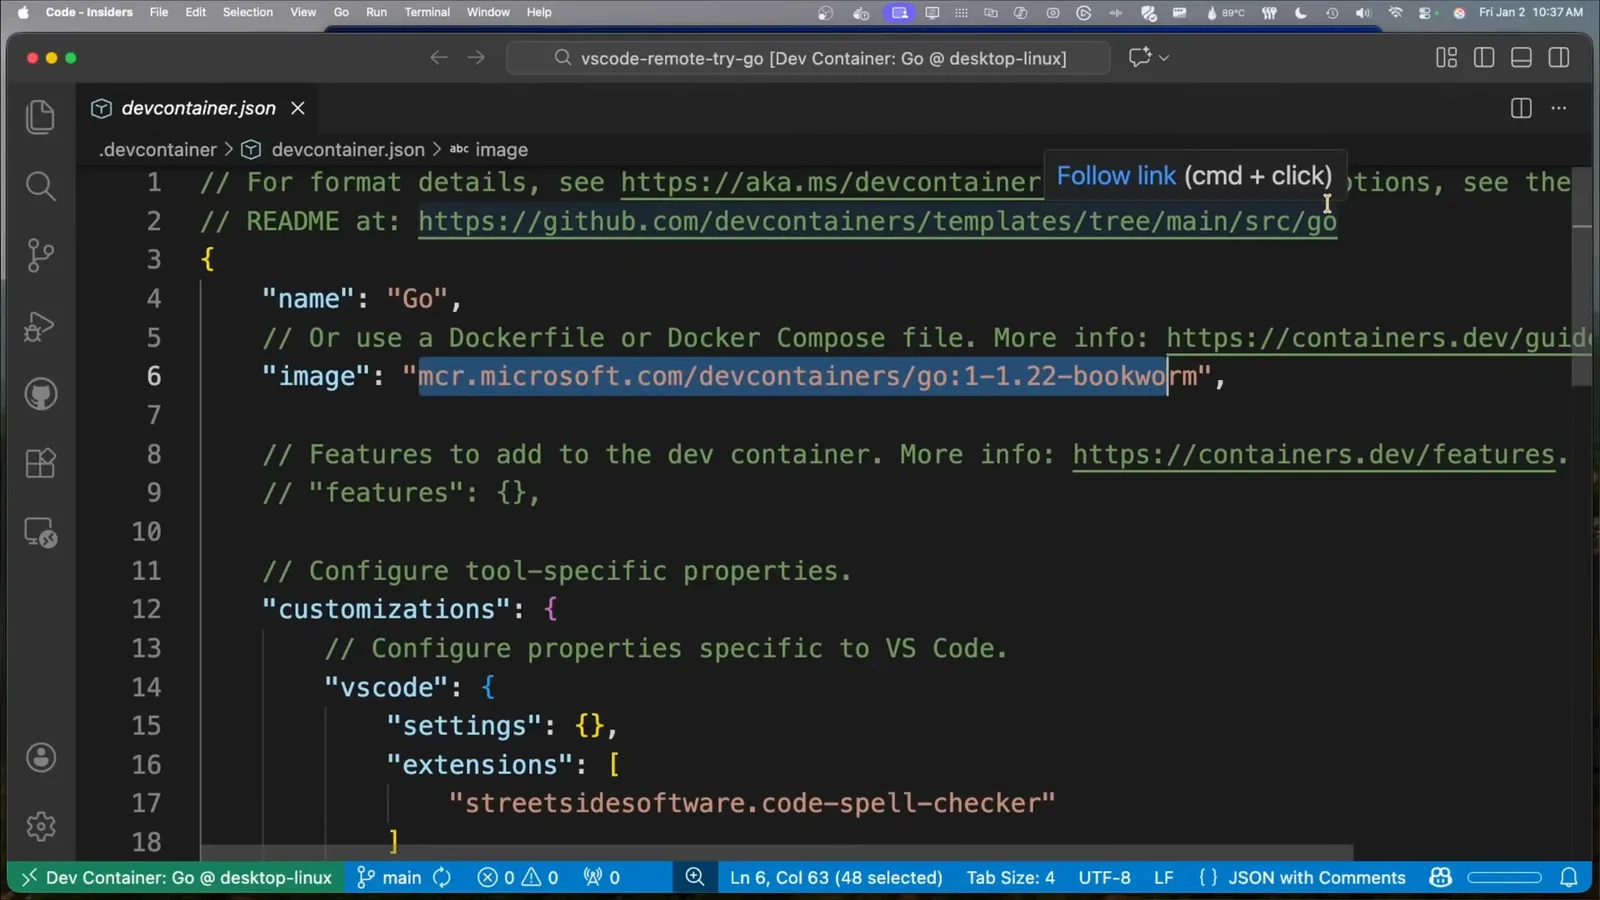
Everything the container is built from lives in .devcontainer/devcontainer.json: image, extensions, forwarded ports, post-create commands.Watch at 4:40 - 8
Point the agent at the workspace
Attach @workspace in the agent panel and ask it to explain the project. The explanation and every command behind it execute inside the container. Claude Code works the same way once its CLI is installed in the image: @workspace-style context plus commands that never leave the container.
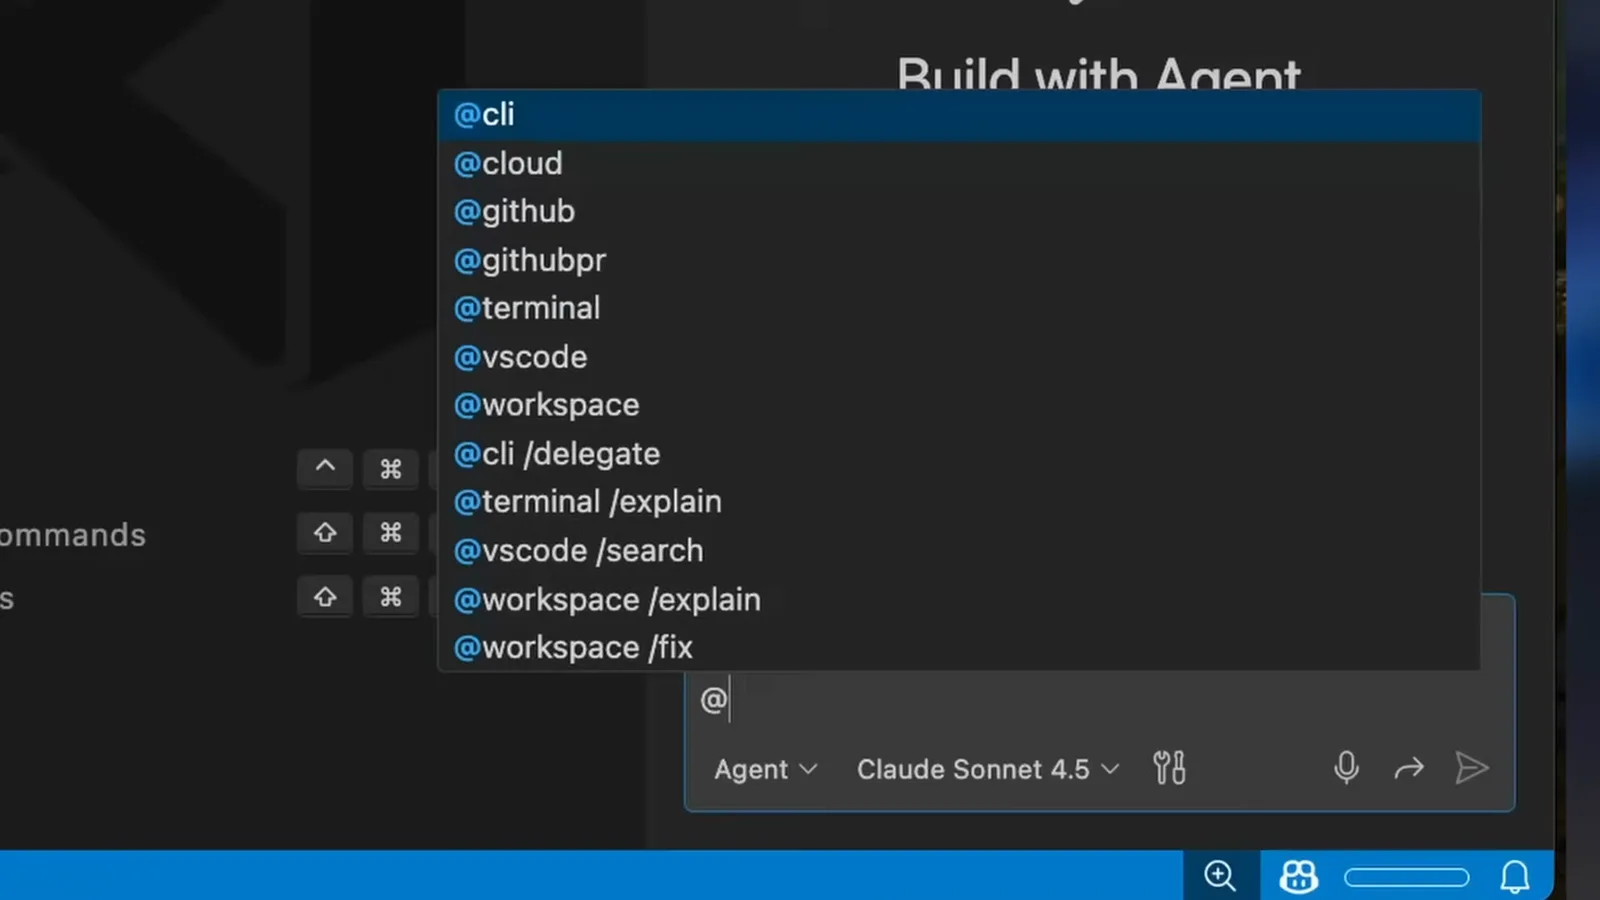
Asking the agent to explain the project via @workspace — every command it runs executes inside the container.Watch at 5:20 - 9
Swap in the official Claude Code feature
No manual installs: add "ghcr.io/anthropics/devcontainer-features/claude-code:1.0" to the features block in devcontainer.json and rebuild. The feature installs the CLI — and, when the container opens in VS Code, the Claude Code extension too, sharing the same ~/.claude as the terminal. If the base image has no Node.js you'll see "Failed to install Node.js and npm": add the Node feature above it. Environment settings such as CLAUDE_CODE_DISABLE_NONESSENTIAL_TRAFFIC or DISABLE_AUTOUPDATER go under containerEnv, and mounts can pull your other local repos into the container.
- 10
Run the app and use the forwarded port
Start the app from inside the container (debug panel, npm run dev, go run — whatever the stack calls for) and VS Code detects the listening port: a notification offers to open it in your local browser. The server never leaves the container; forwarding just makes localhost behave as usual.
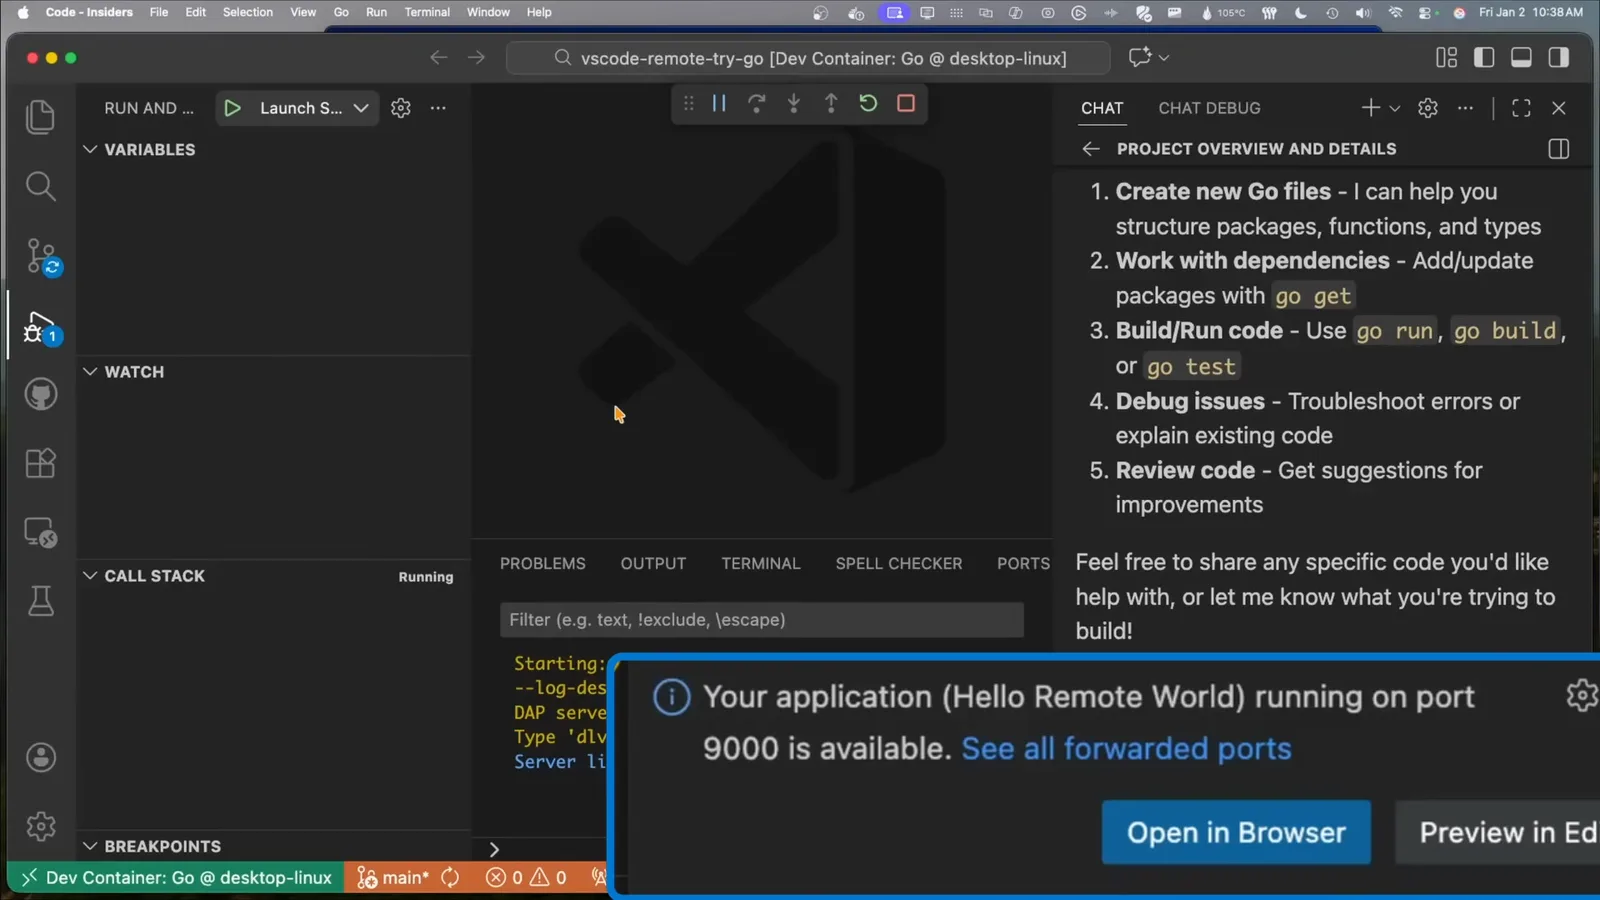
The app runs on port 9000 inside the container; VS Code forwards it so localhost works exactly as usual.Watch at 6:08
Part 3 — Your own repo and the sign-in
- 11
Add a dev container to your own project
In any repo, run Dev Containers: Add Dev Container Configuration Files from the command palette or the remote indicator, and choose "Add configuration to workspace folder". Committed with the code, the config gives teammates — and Codespaces — the identical environment for free.
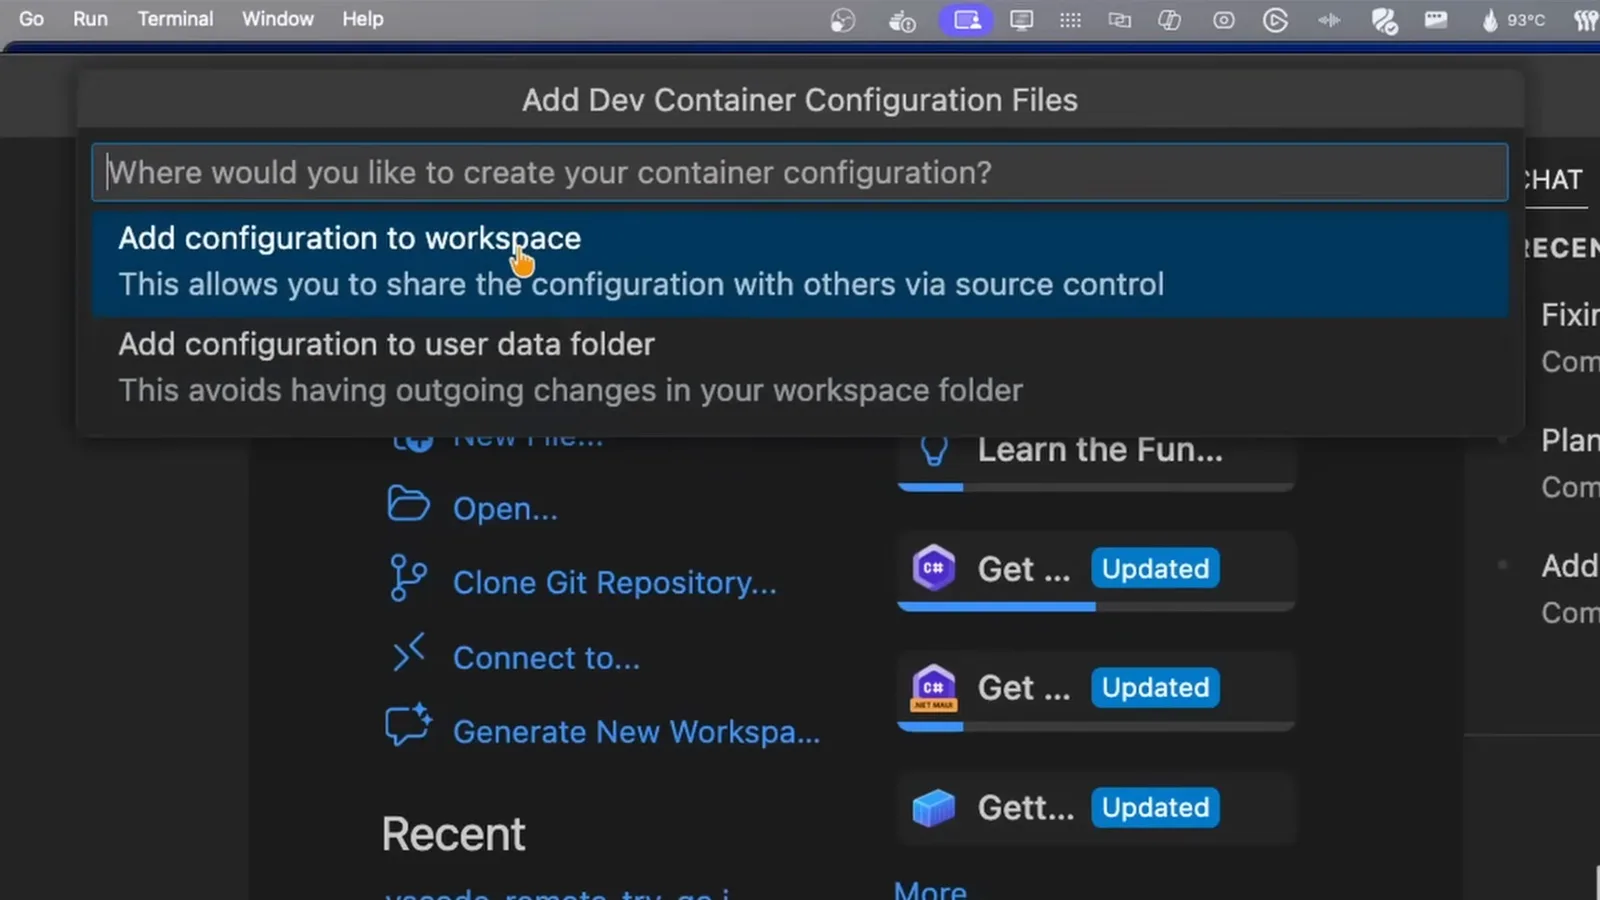
No devcontainer.json yet? VS Code generates one from a template — keep it in the workspace so git shares it.Watch at 9:00 - 12
Pick the template and the features
VS Code suggests a template matching your stack (Node.js, Python, Go…), then shows the features list — reusable installers like Git LFS or the GitHub CLI. The same list is where the claude-code feature from step 9 slots in. Accept the defaults (or have the agent refine the generated file), then reopen in container.
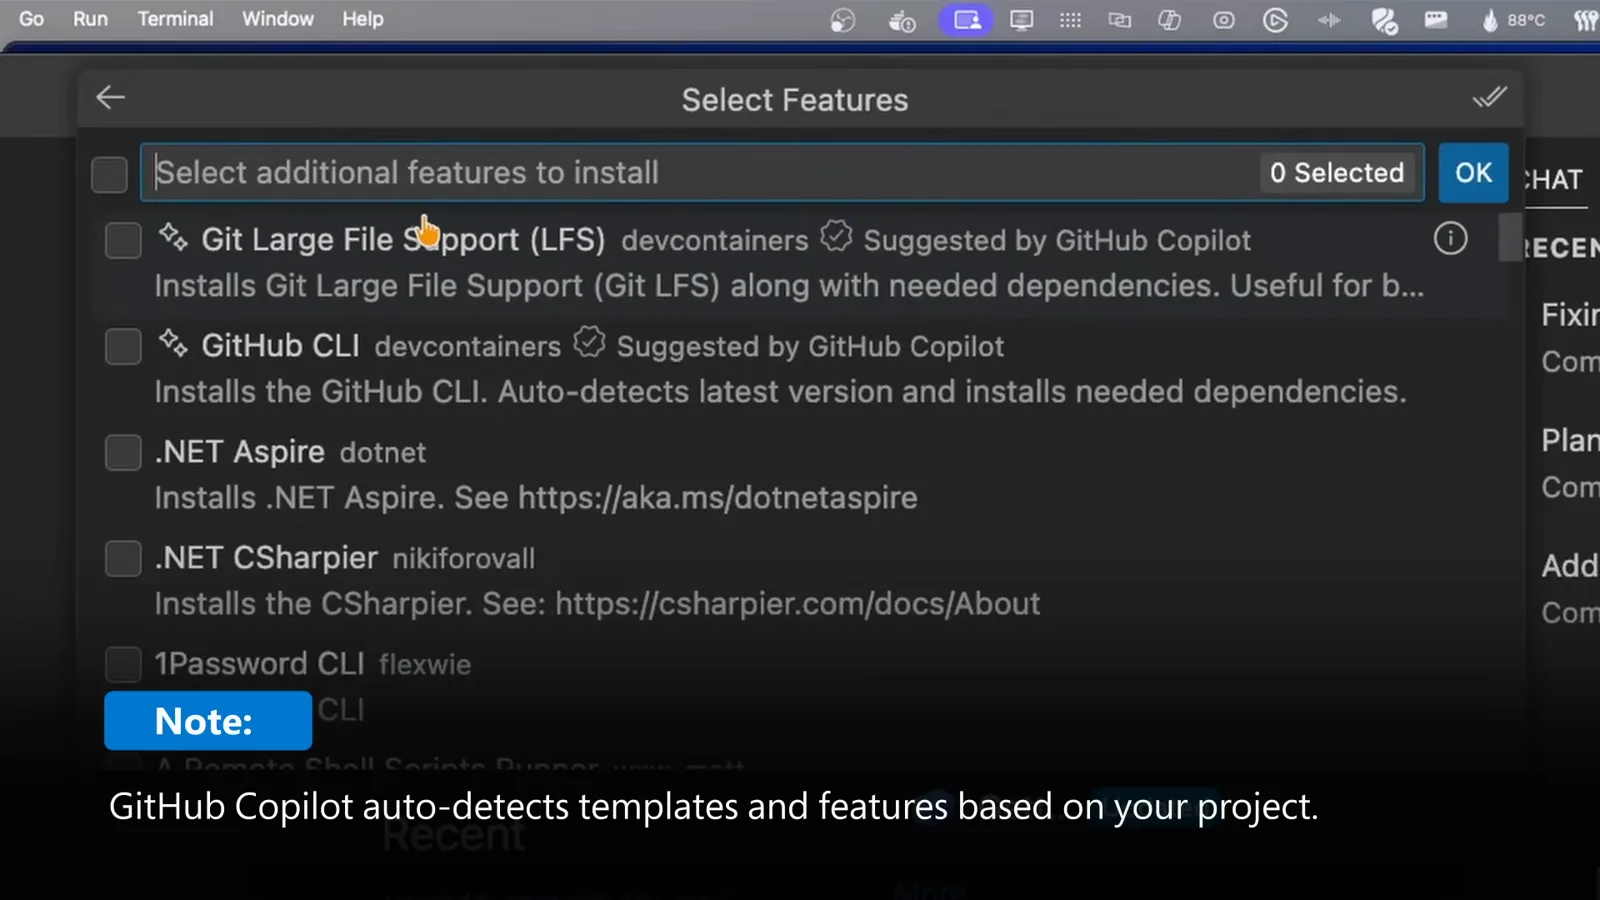
The features list is where a Claude Code feature line slots in alongside whatever the template suggests.Watch at 9:48 - 13
Sign in inside the container
Run claude in the integrated terminal and pick your sign-in (Claude subscription or Anthropic Console). The browser opens on your host; if the callback cannot reach the container, copy the code from the browser and paste it at the "Paste code here if prompted" prompt. To survive rebuilds, mount a volume at ~/.claude and set containerEnv.CLAUDE_CONFIG_DIR to the same path — the account file ~/.claude.json lives outside that folder, which is why both halves matter. For headless runs or Codespaces, generate a token with claude setup-token and pass ANTHROPIC_API_KEY or CLAUDE_CODE_OAUTH_TOKEN.
Dev container vs /sandbox: which isolation do you need?
Claude Code ships two isolation answers and they solve different problems. A dev container replaces the environment the agent works in; the built-in sandboxing confines the commands it runs on your current machine. The official docs position them as complementary — the reference devcontainer even bundles an egress-restriction script.
- 1Scope. A dev container swaps the whole environment — OS, toolchain, dependencies — for the one defined in devcontainer.json. Sandboxing keeps your machine and restricts what each bash command can read, write, and reach on the network.
- 2Requirements. Dev containers need Docker (Desktop or Engine) plus the Dev Containers extension; sandboxing is built into Claude Code and needs neither.
- 3Team mechanics. devcontainer.json is committed, so every teammate and every Codespace builds the identical environment; sandbox policy lives in Claude Code settings and follows the user, not the repo.
- 4Blast radius. In a container, a bad rm -rf or a rogue install hits a disposable filesystem and your host is untouched. The sandbox aims at the same outcome per command — without a container boundary.
- 5Pick a dev container when the project itself needs an environment: multiple runtimes, clean onboarding, cloud development. Pick the sandbox as the everyday guardrail for sessions on your host. They compose — run Claude Code inside a dev container and keep sandboxing and permission prompts on.
One more line differentiates them: /sandbox is a per-session policy you can adjust mid-conversation, while a dev container is decided before the session starts — changing it means a rebuild. Unattended batch runs lean on both at once: a non-root container user, restricted egress, and --dangerously-skip-permissions only ever inside the container.
Something not behaving? Start here
Most dev-container friction with Claude Code falls into a handful of known patterns. Every fix below comes straight from the official development containers documentation.
- 1"Failed to install Node.js and npm" during the feature install: the base image has no Node.js. Add the Node feature (ghcr.io/devcontainers/features/node:1) above the claude-code feature in the features block and rebuild.
- 2Sign-in completes in the browser but the container stays logged out: the OAuth callback cannot reach the container. Copy the code shown in the browser and paste it into the "Paste code here if prompted" prompt in the terminal.
- 3Login and settings vanish after every rebuild: nothing persists ~/.claude. Mount a named volume at that path and set containerEnv.CLAUDE_CONFIG_DIR to it — include the devcontainerId variable in the volume name so projects stay isolated. On Codespaces the folder survives stop/start but is cleared on a full rebuild, so provide ANTHROPIC_API_KEY or a CLAUDE_CODE_OAUTH_TOKEN from claude setup-token as a secret instead.
- 4Claude Code version surprises: the claude-code:1.0 feature tag pins the install script, not the CLI — the latest release is installed and auto-updates inside the container. To freeze a version, install it in the Dockerfile with npm install -g @anthropic-ai/claude-code@X.Y.Z.
- 5"Is Docker running?" or a stuck "Opening remote": the engine is not reachable — start Docker Desktop (or the daemon) and retry. If --dangerously-skip-permissions refuses to start, the container is running as root; set remoteUser to a non-root user such as "vscode". Organizations can disable bypass mode entirely via managed-settings.json at /etc/claude-code.
Rebuilding is the universal retry: command palette → "Dev Containers: Rebuild Container" re-reads devcontainer.json and re-runs the features after any edit. If a rebuild behaves differently from a fresh clone, delete the container and reopen — images and named volumes survive the deletion.