
太长不看:四条看懂 GitHub Copilot CLI
- 一条命令装完:Node 22+ 加有效的 Copilot 订阅,npm install -g @github/copilot,然后在任意仓库输入 copilot。登录时会顺手连上 GitHub MCP server——仓库、issue、PR 从第一条提示词起就能摸到。
- 动手之前先请示:启动时确认信任文件夹,shell 命令逐条批准(本次允许或始终允许),每次改文件前先给你看 diff 三选一。Shift+Tab 切换计划模式,Ctrl+T 展开模型推理过程。
- 用 markdown 教它你的规矩:/init 生成 copilot-instructions.md(常驻上下文),.instructions.md 用 applyTo 通配符把规则圈定到特定文件,gh.io/awesome-copilot 有 React、Playwright 等现成规则集。
- 然后放大招:.github/skills 放可复用的任务剧本(斜杠命令或自然语言都能触发),.github/agents 放专家(无障碍审查、SEO、代码评审),/delegate 还能把整个会话交给云端 coding agent。
The ultimate guide to the GitHub Copilot CLI - Full demo
演示视频:GitHub Checkout · GitHub6:18
Using GitHub Copilot CLI — commands, shortcuts, permissions
产品事实:docs.github.comDocs
全部截图取自 GitHub 官方频道的纯净录屏:步骤 1-8 出自"Getting started with GitHub Copilot CLI",instructions、skills、agents 各帧出自"How to use agents, skills, and instructions in Copilot CLI"。/mcp、预装 GitHub MCP server、issue 实现与端口排查等事实来自上方"The ultimate guide to the GitHub Copilot CLI";命令名、批准选项文案与快捷键均与 docs.github.com 交叉核对过。
截图均来自 GitHub 官方视频并注明出处,每张图深链到对应时间点。文字为本站原创,并非字幕搬运。
GitHub Copilot CLI 逐步图文
1 · 安装与登录
- 1
用 npm 安装 Copilot CLI
前置条件:Node.js 22 以上、npm,以及有效的 GitHub Copilot 订阅。在任意终端执行 npm install -g @github/copilot——这是 GitHub 文档给的核心跨平台装法。偏爱包管理器的话,Homebrew(brew install --cask copilot-cli)和 Windows winget 也都支持。
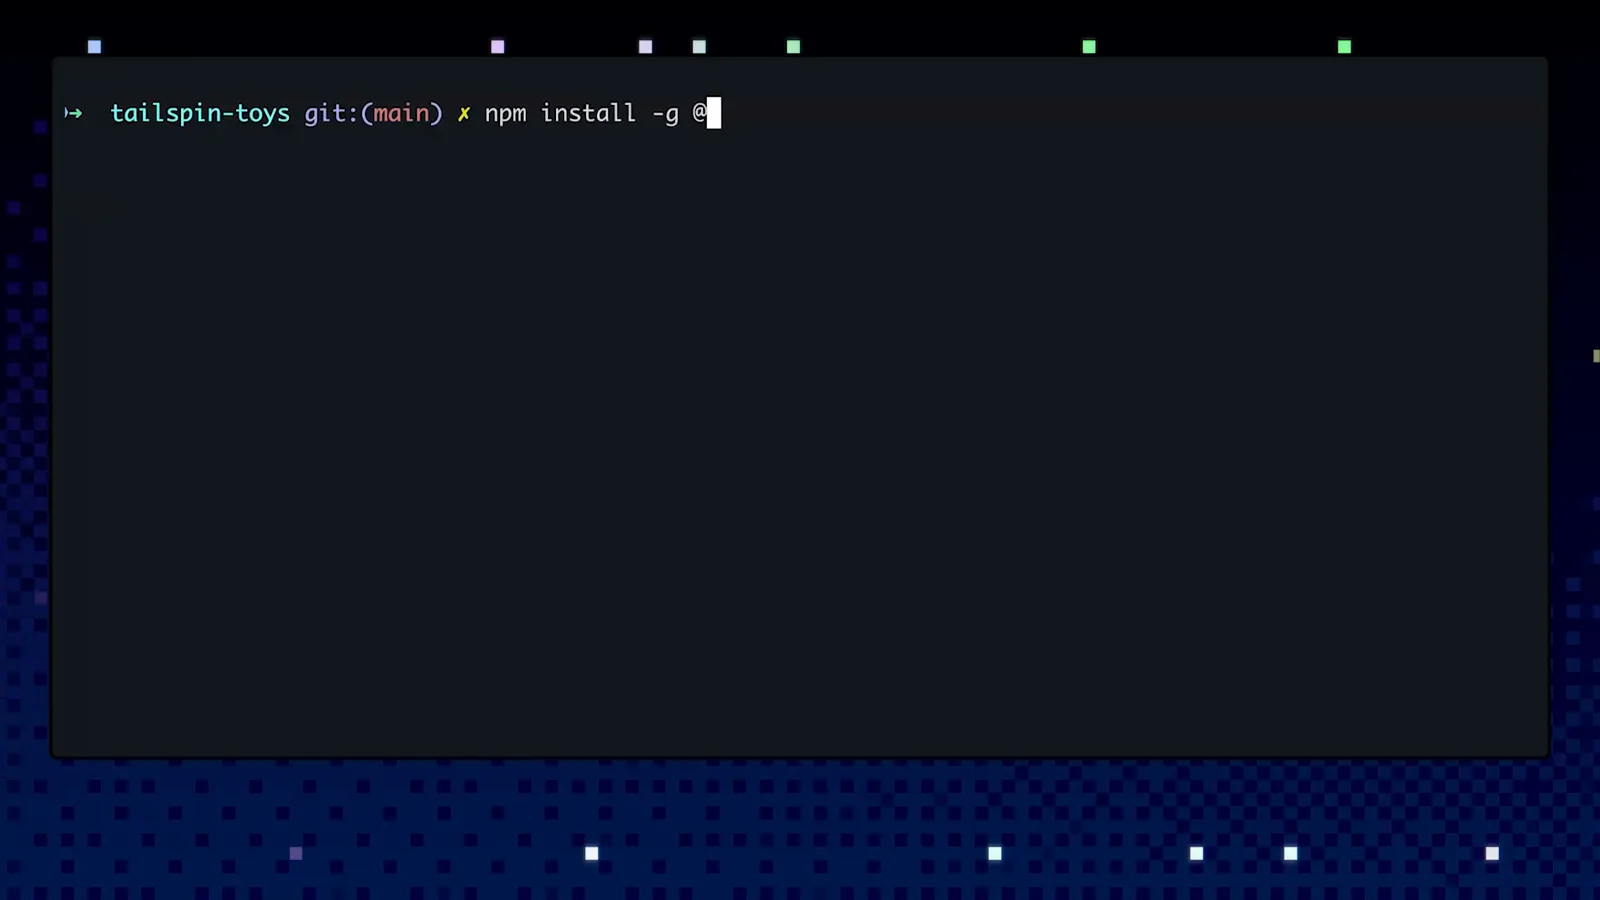
在演示仓库的终端提示符下输入 npm install -g @github/copilot。看原视频 1:24 - 2
启动并选择账户
在项目文件夹里输入 copilot 启动 agent。首次启动会问登到哪个账户:GitHub.com,或是跑在 *.ghe.com 域名下、要求数据驻留的 GitHub Enterprise Cloud。选你的 Copilot 订阅所在的那个。
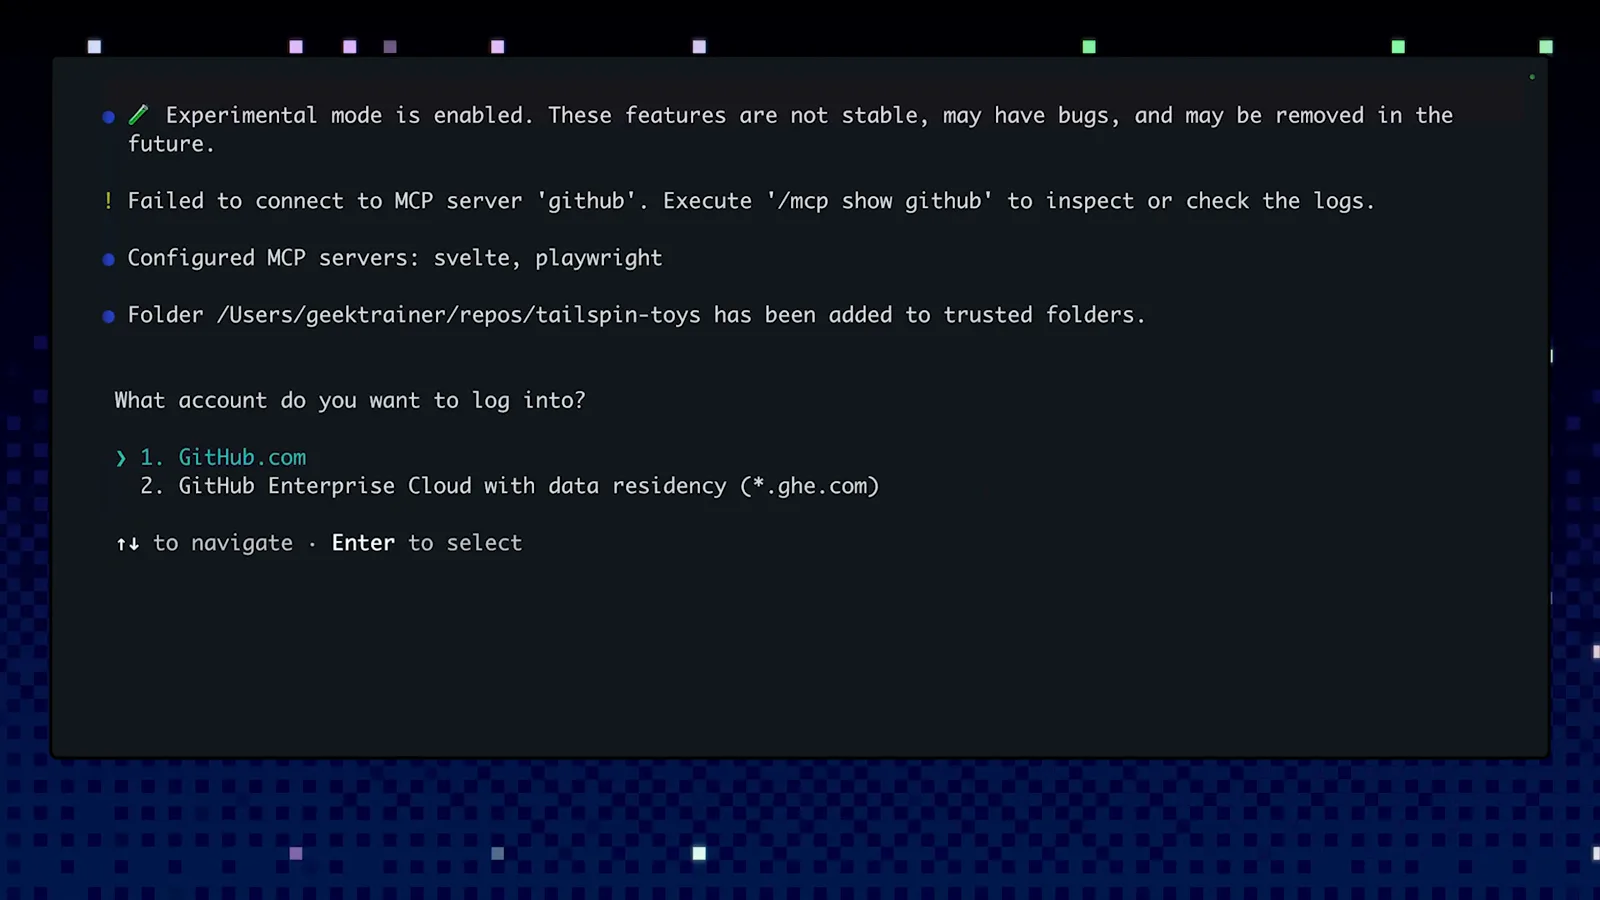
首次启动的账户选择界面,当前选中 GitHub.com。看原视频 2:00 - 3
回浏览器授权设备
Copilot CLI 走 GitHub 设备流完成登录:浏览器自动打开,授权 CLI,然后 GitHub 确认:"Congratulations, you're all set! Your device is now connected." 这一步做两件事——把客户端绑到你的 Copilot 账户,同时连上 GitHub MCP server,后面 agent 能读 issue 和 PR 全靠它。
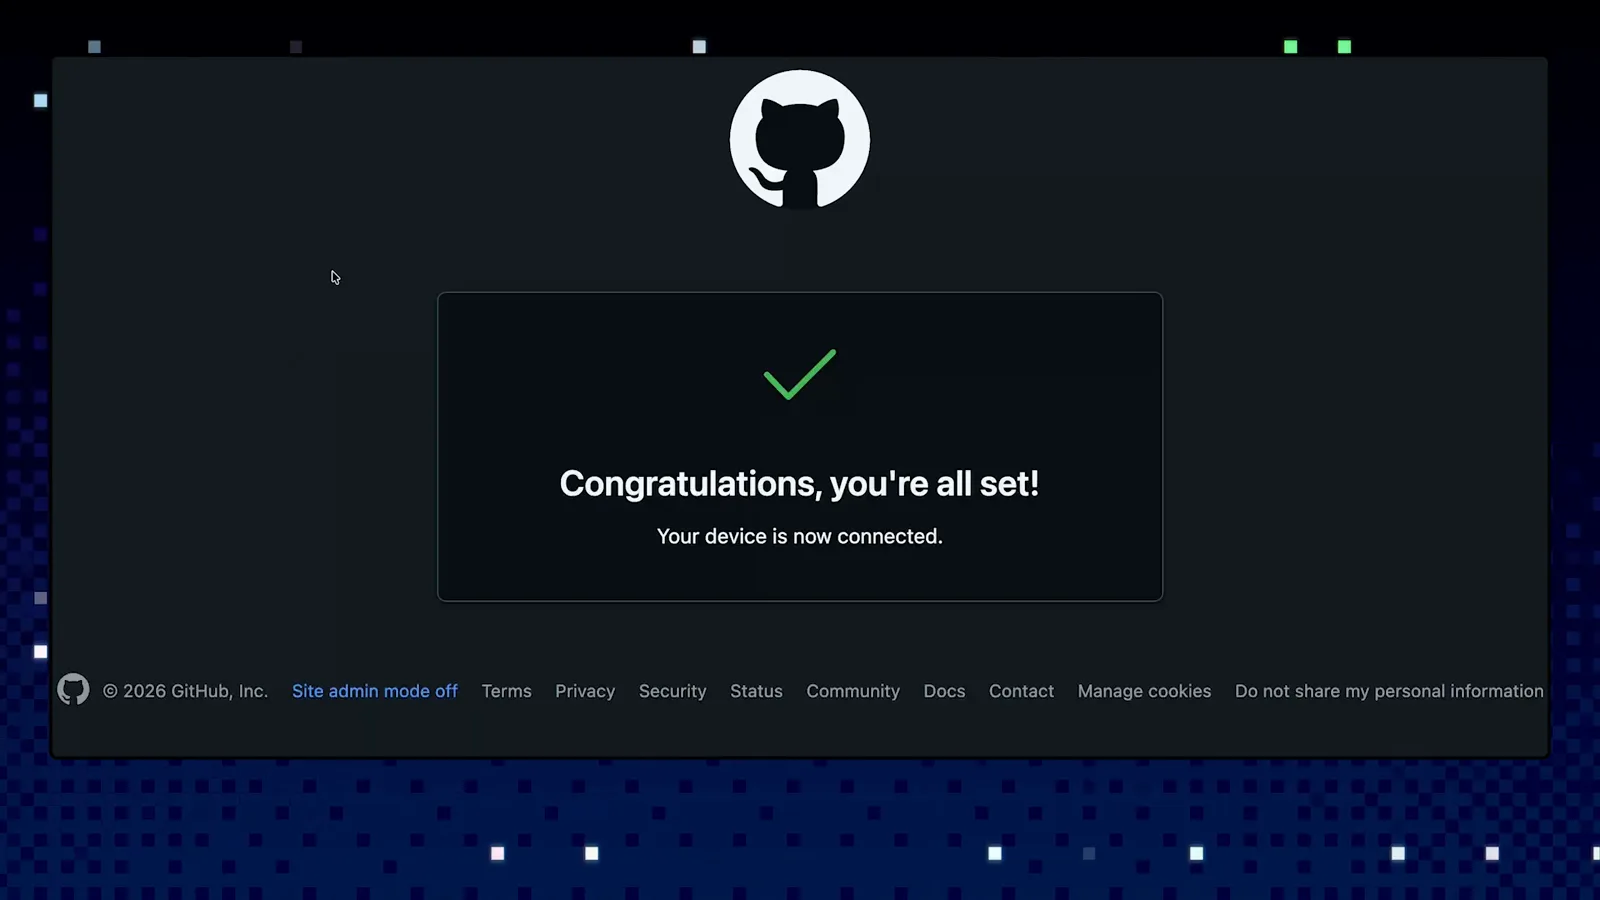
授权 Copilot CLI 后 GitHub 的设备流确认页。看原视频 2:06 - 4
信任项目文件夹
读文件、改文件之前,Copilot 会问 "Do you trust the files in this folder?"——不可信的文件可能诱导 agent 执行危险命令。只在本会话用就选 Yes;常驻仓库直接选 "Yes, and remember this folder for future sessions",以后不再反复批准。之后还可用 /add-dir 追加目录。
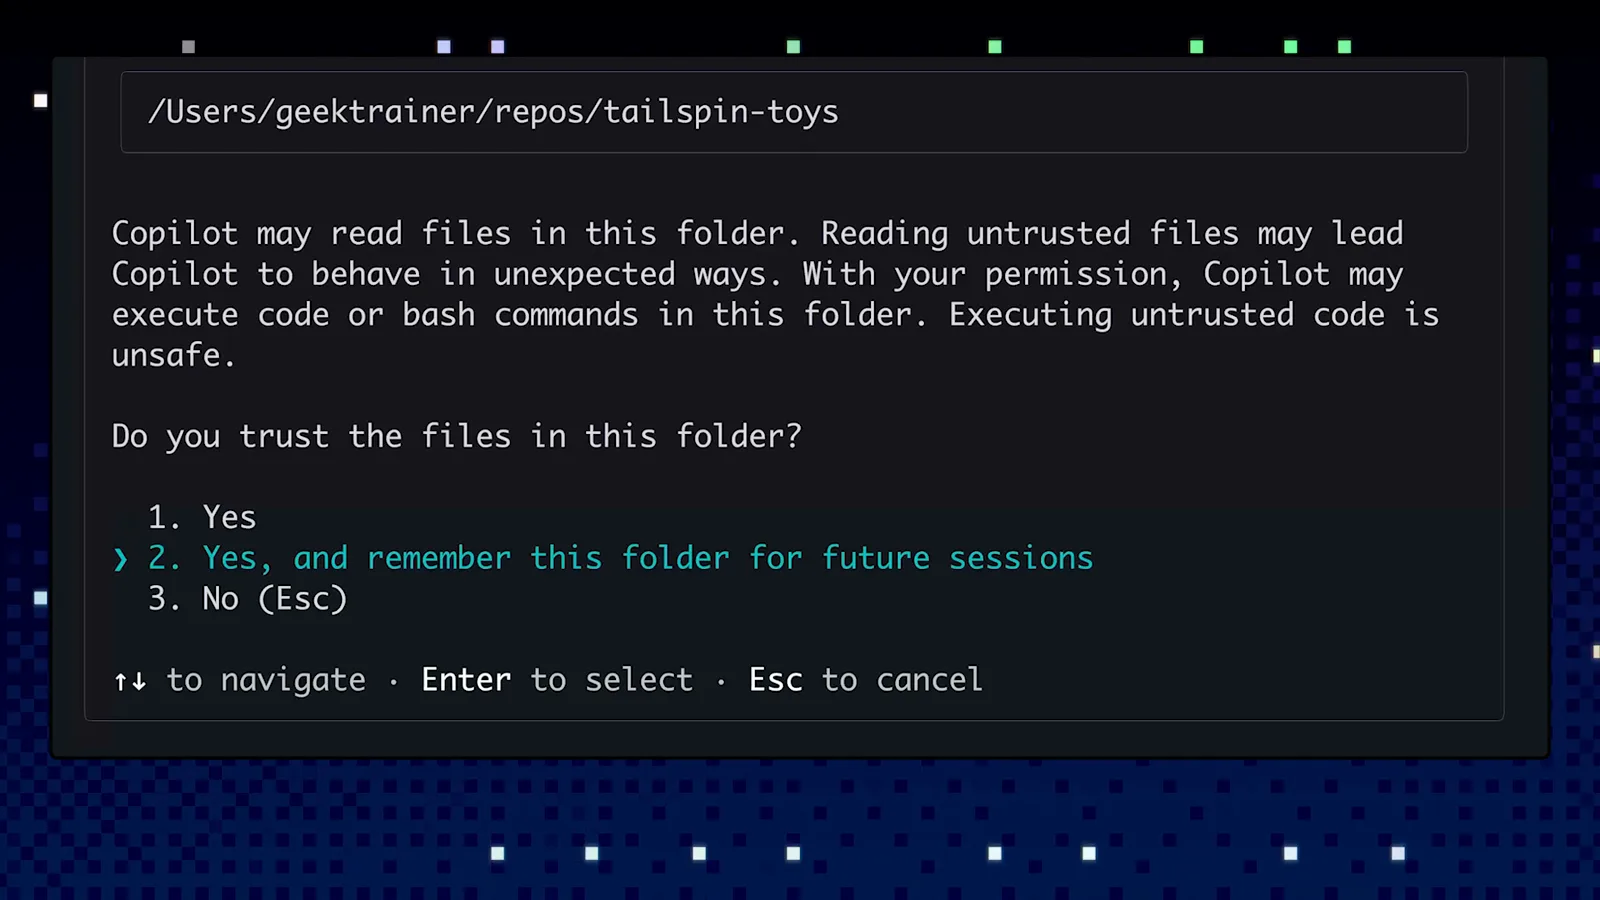
文件夹信任确认,高亮的是"记住此文件夹"选项。看原视频 2:23
2 · 第一批提示词,先看看 agent 的成色
- 5
登录完成——先要一份项目概览
看到 "Signed in successfully" 和 GitHub MCP Server: Connected 之后,就可以发那条经典的第一问:"Give me an overview of this project." Copilot 会翻目录、打开关键文件、汇总汇报——演示里它画出了 src 目录树并列出 Quick Start 命令。提示符行会显示当前模型(本会话是 claude-sonnet-4.5),/model 随时切换。
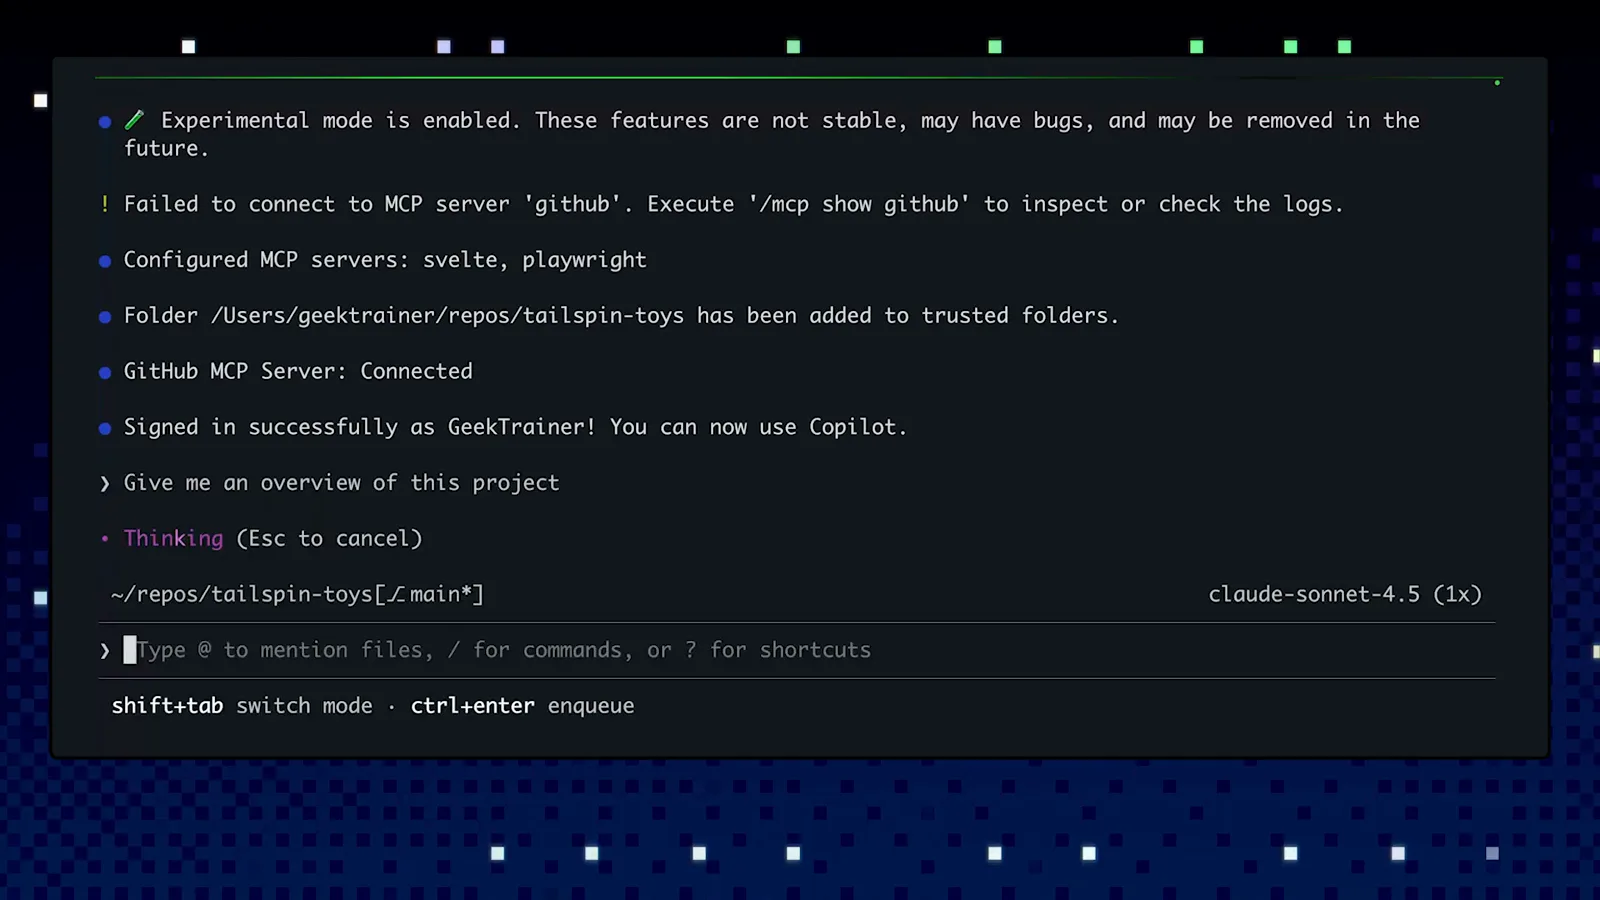
已登录、GitHub MCP server 已连接,第一条提示词已发出。看原视频 2:50 - 6
让它干真活
Agent 的价值在任务上,不在闲聊。演示里概览之后紧跟着 "Let's add a new endpoint to return all categories"——Copilot 重新通读项目、找现成文档和示例,再按摸到的模式设计方案。过程中 Shift+Tab 在计划与编辑模式间切换。
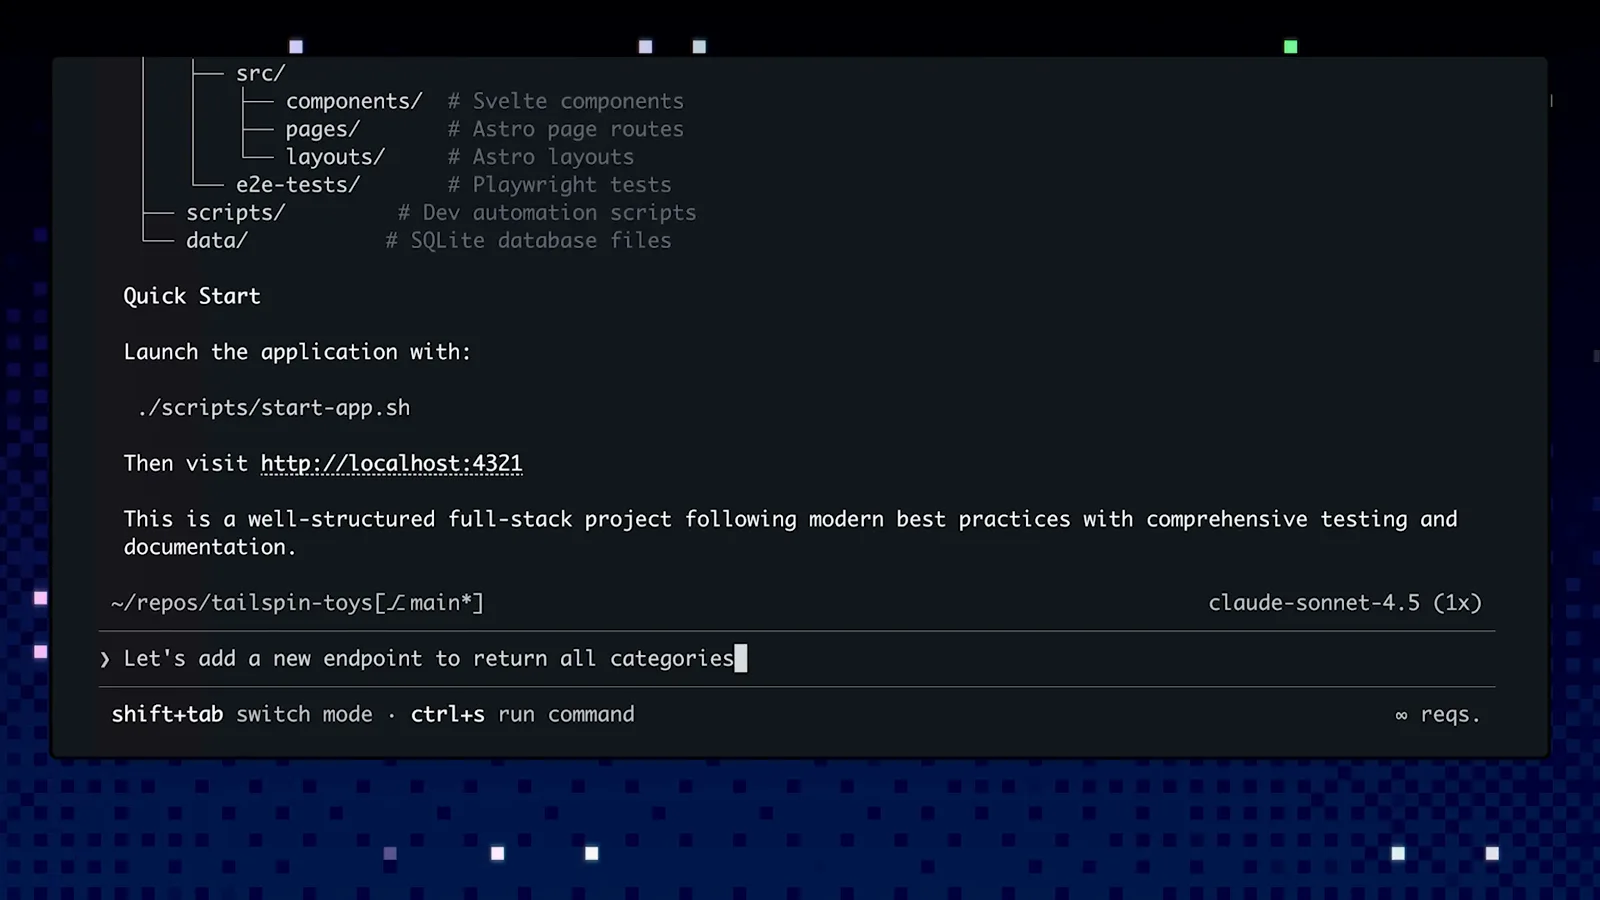
概览回答下方已输入新增 endpoint 的请求。看原视频 3:02 - 7
每次改文件前先审 diff
Copilot 先探索——过程里能看到 "List directory"、"Exploring API structure"——然后才提出改动。每次文件编辑都会停下来等你批准:Yes;"Yes, and approve all file operations for the rest of the running session";或 "No, and tell Copilot what to do differently (Esc)"。演示里的 diff 给 get_publishers_list 补了 docstring,正是项目 instructions 的要求。
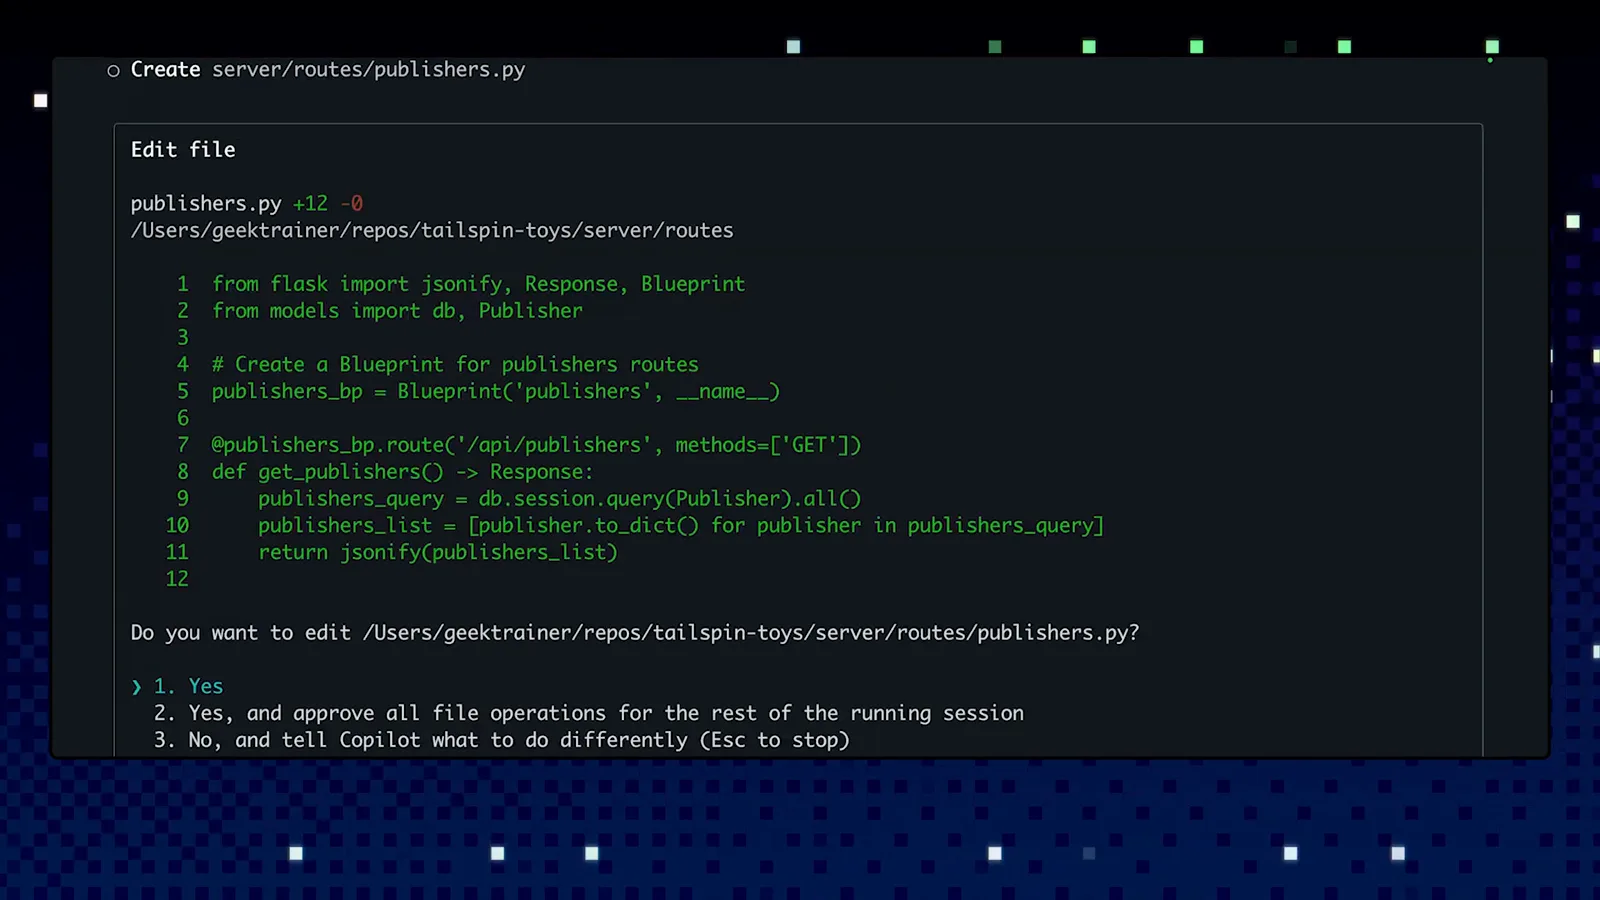
publishers.py 的 diff,下方是三选一的编辑确认。看原视频 1:38 - 8
放手让它测试和自愈
批准之后 Copilot 写完 endpoint,还会自己验证:演示里报告全部 59 个测试通过、两条路由的实测检查和 API 响应示例——并注明实现遵循了仓库的 Flask endpoint guidelines。这就是 agent 擅长的闭环:构建、跑测试、坏了自己修,不用你催第二遍。
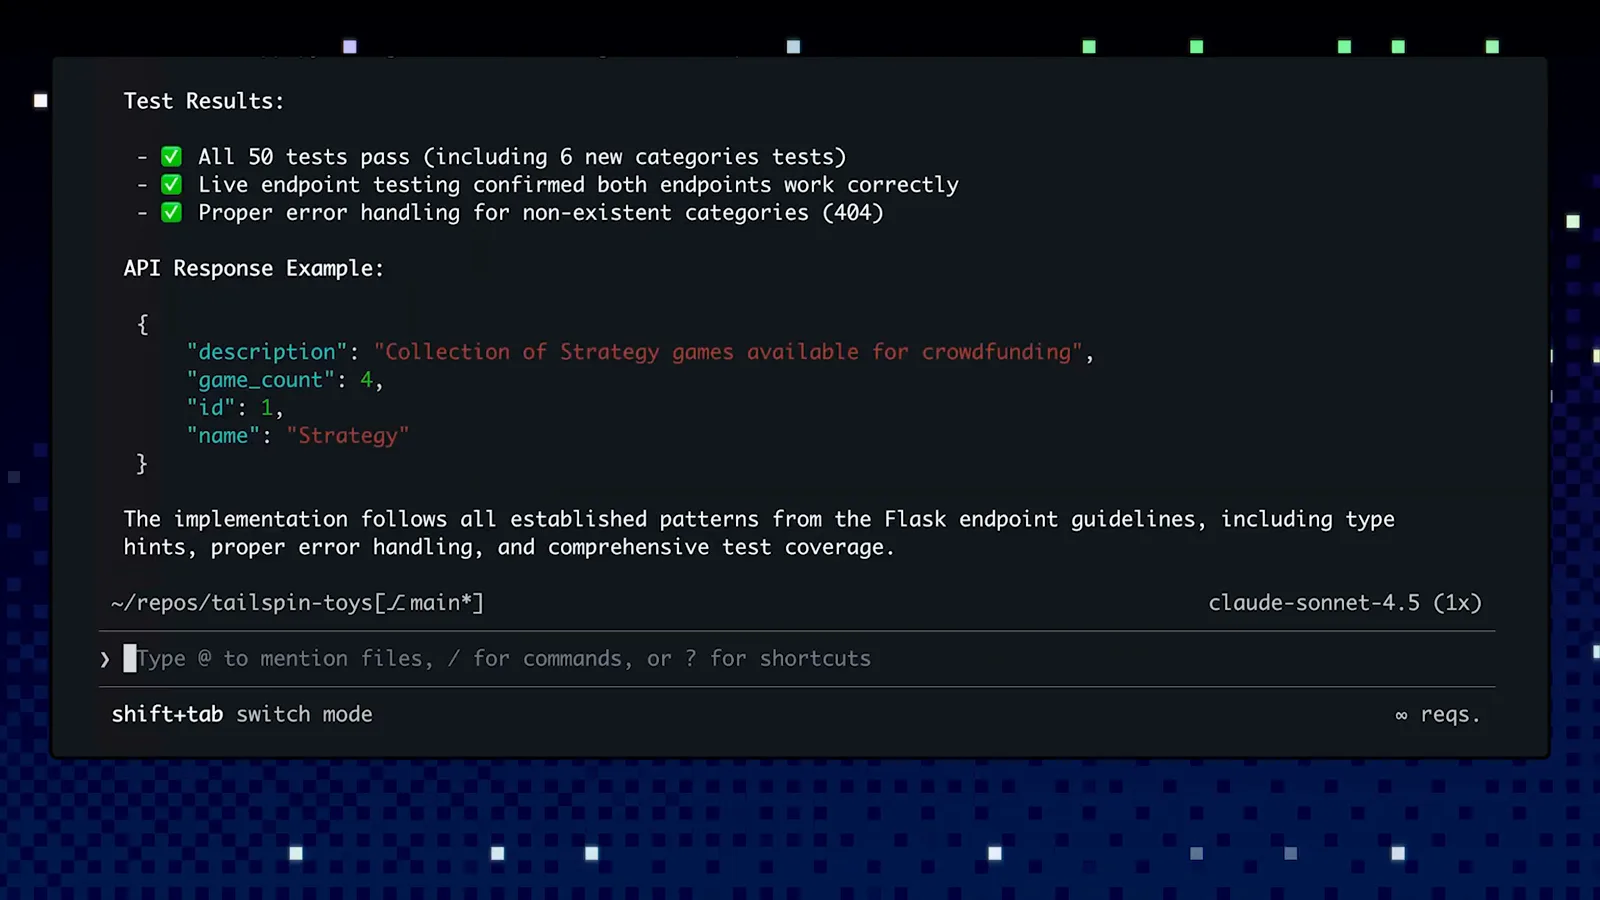
测试汇总、API 响应示例与规范遵循说明。看原视频 3:16
3 · 用 instructions 文件教它你的规范
- 9
先跑 /init 再说别的
欢迎横幅自己就会提示:"No copilot instructions found. Run /init to generate a copilot-instructions.md file for this project." 这个文件作用于整个项目、永远在上下文里——GitHub 团队称之为每个仓库的 table stakes。/init 生成的是可供打磨的起点,不是空白页。同一条横幅还标出了 /model(切模型)和 /delegate(把会话交给云端 coding agent)。
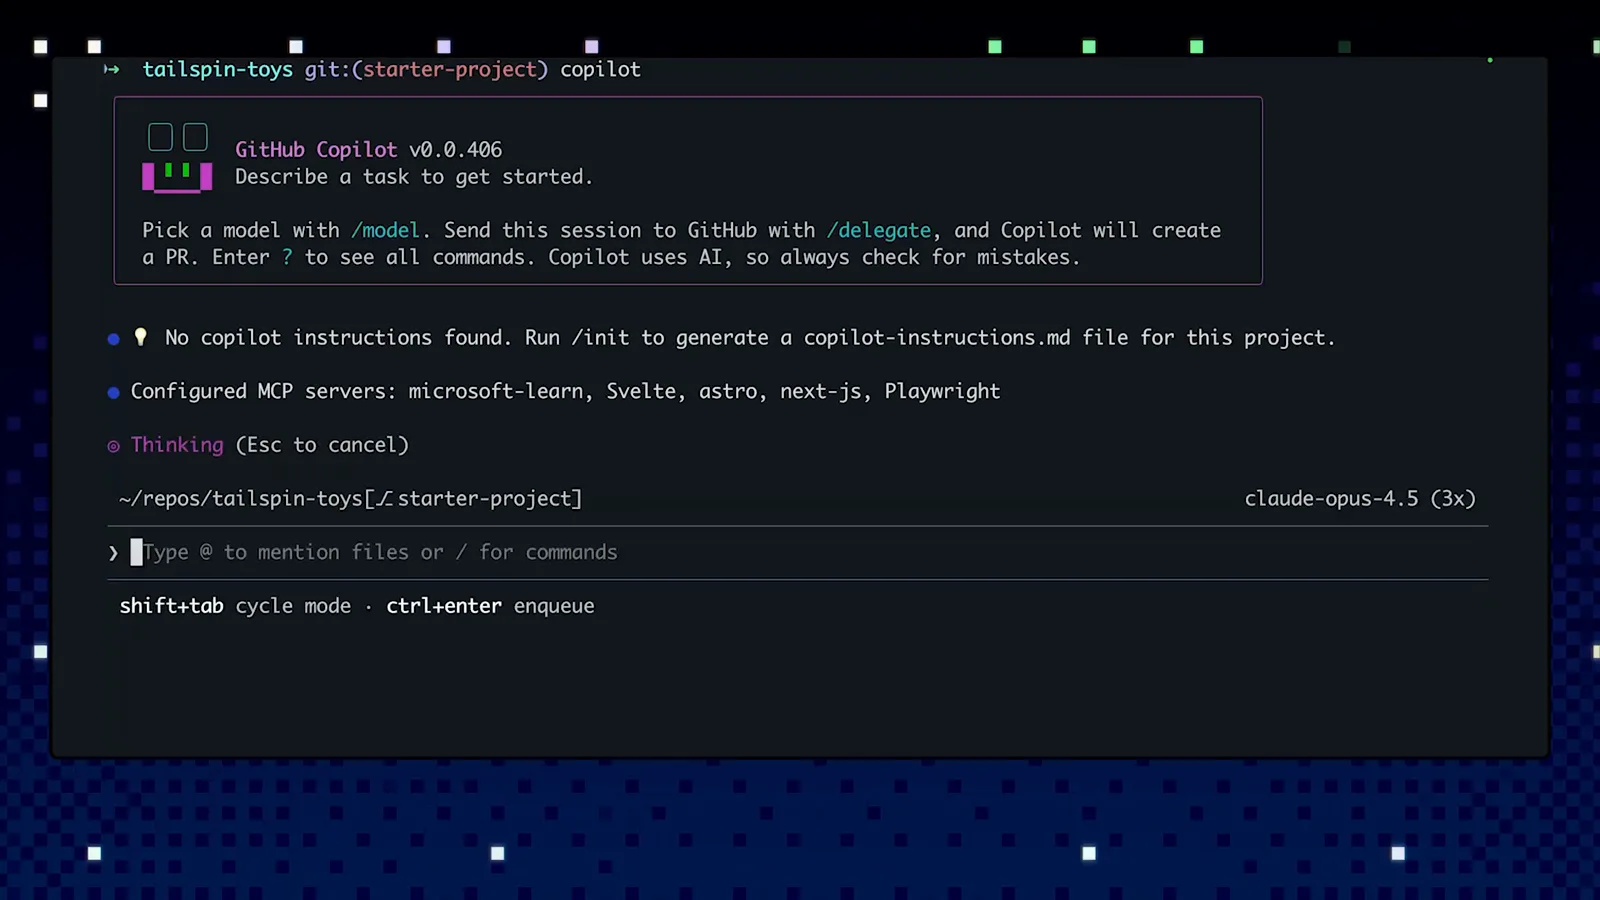
欢迎横幅:/model 与 /delegate 提示和 /init 建议。看原视频 1:30 - 10
把 copilot-instructions.md 写到点子上
生成的文件已经勾勒出项目轮廓——演示里它记下了 "Tailspin Toys is a game crowdfunding platform with a Flask/SQLAlchemy backend and Astro/Svelte frontend",外加 Build, Test, and Run Commands。只写耐久的事实:做什么、什么技术栈、用什么命令。同样的请求,代码立刻不一样:演示里加了一条 docstrings 规则后,重新生成的函数就带上了 docstring。
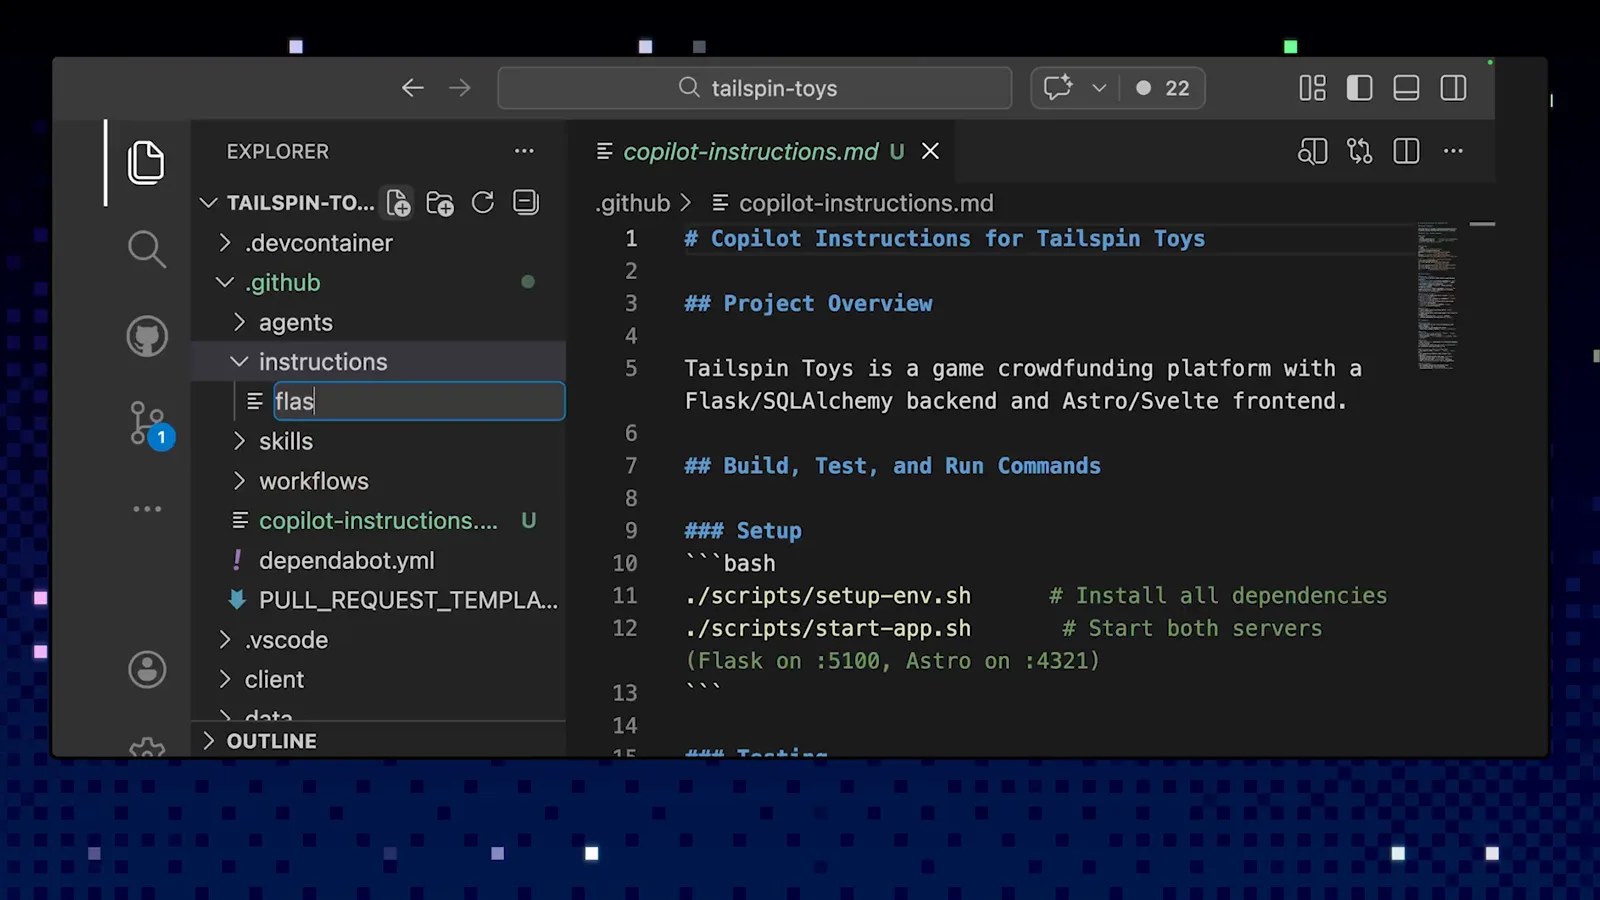
生成好的 copilot-instructions.md:项目概览与运行命令。看原视频 2:30 - 11
用 .instructions.md 圈定规则作用域
规则只对部分文件生效时,拆出去:.github/instructions 下的 .instructions.md 文件在 front matter 里写 applyTo 通配符——演示里 astro.instructions.md 用 '**/*.astro',让 Astro 规则只对 Astro 文件生效。gh.io/awesome-copilot 收录了覆盖 React 组件、Playwright 测试等场景的现成规则集。
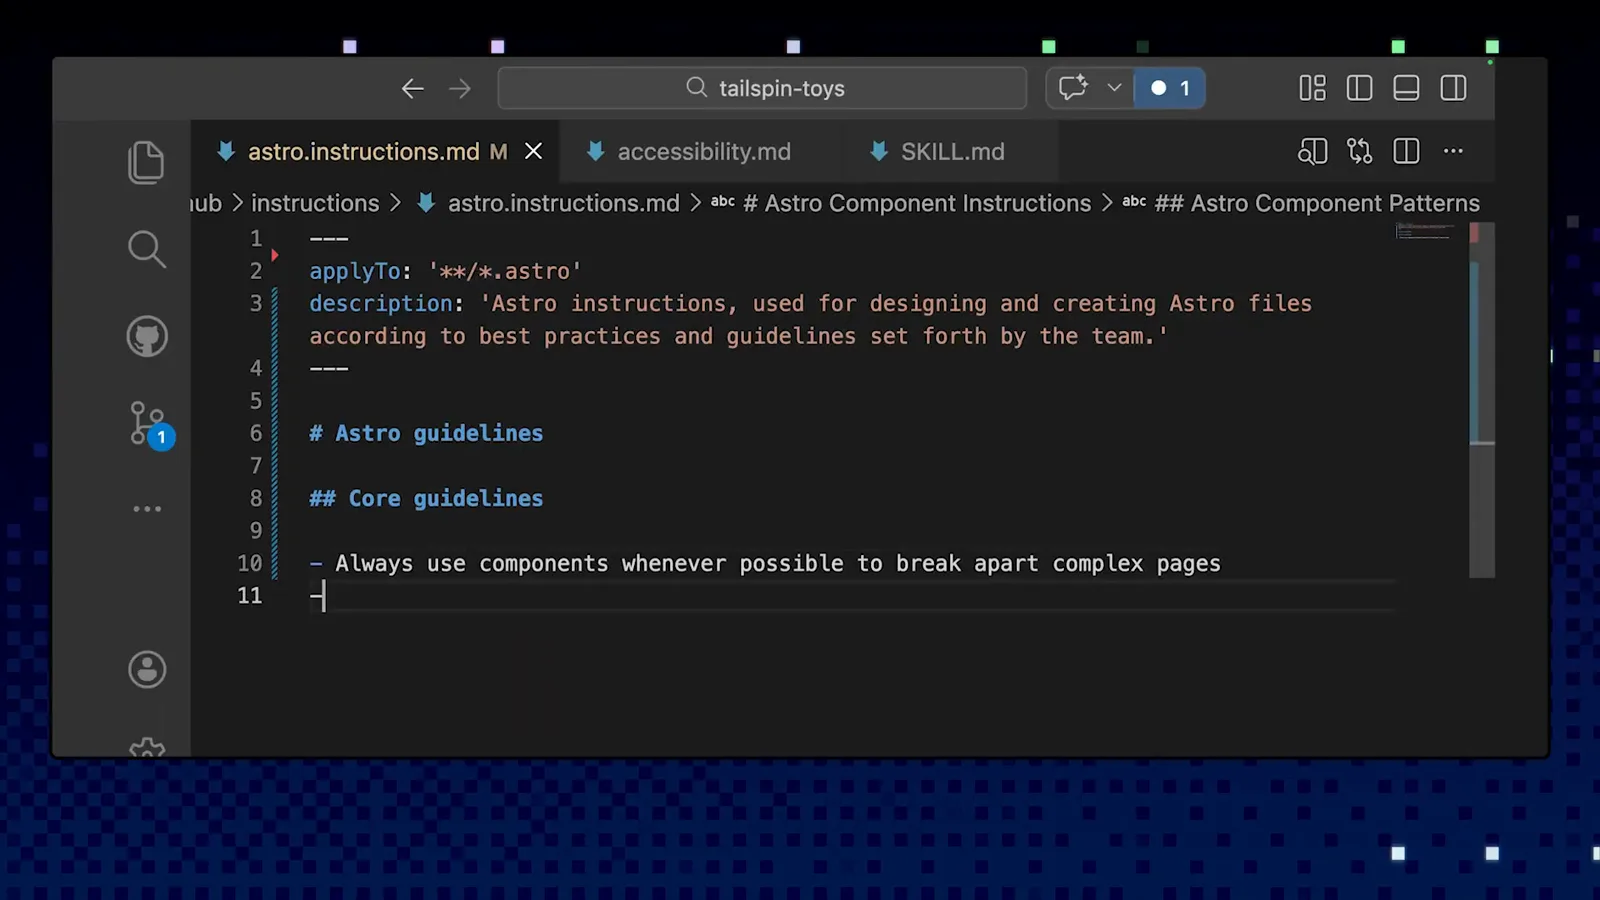
astro.instructions.md 的 applyTo 指向 **/*.astro。看原视频 0:36 - 12
认清这套 markdown 三件套
一切扩展都走 .github 下的 markdown:copilot-instructions.md 管常驻上下文,skills 管任务剧本,custom agents 管专家工人。演示仓库把这些全开在同一个窗口——两个 instructions 文件、一个无障碍 agent、一个 SKILL.md。三者要配合着用:instructions 定代码怎么写,skills 定任务怎么跑,agents 接整件活。
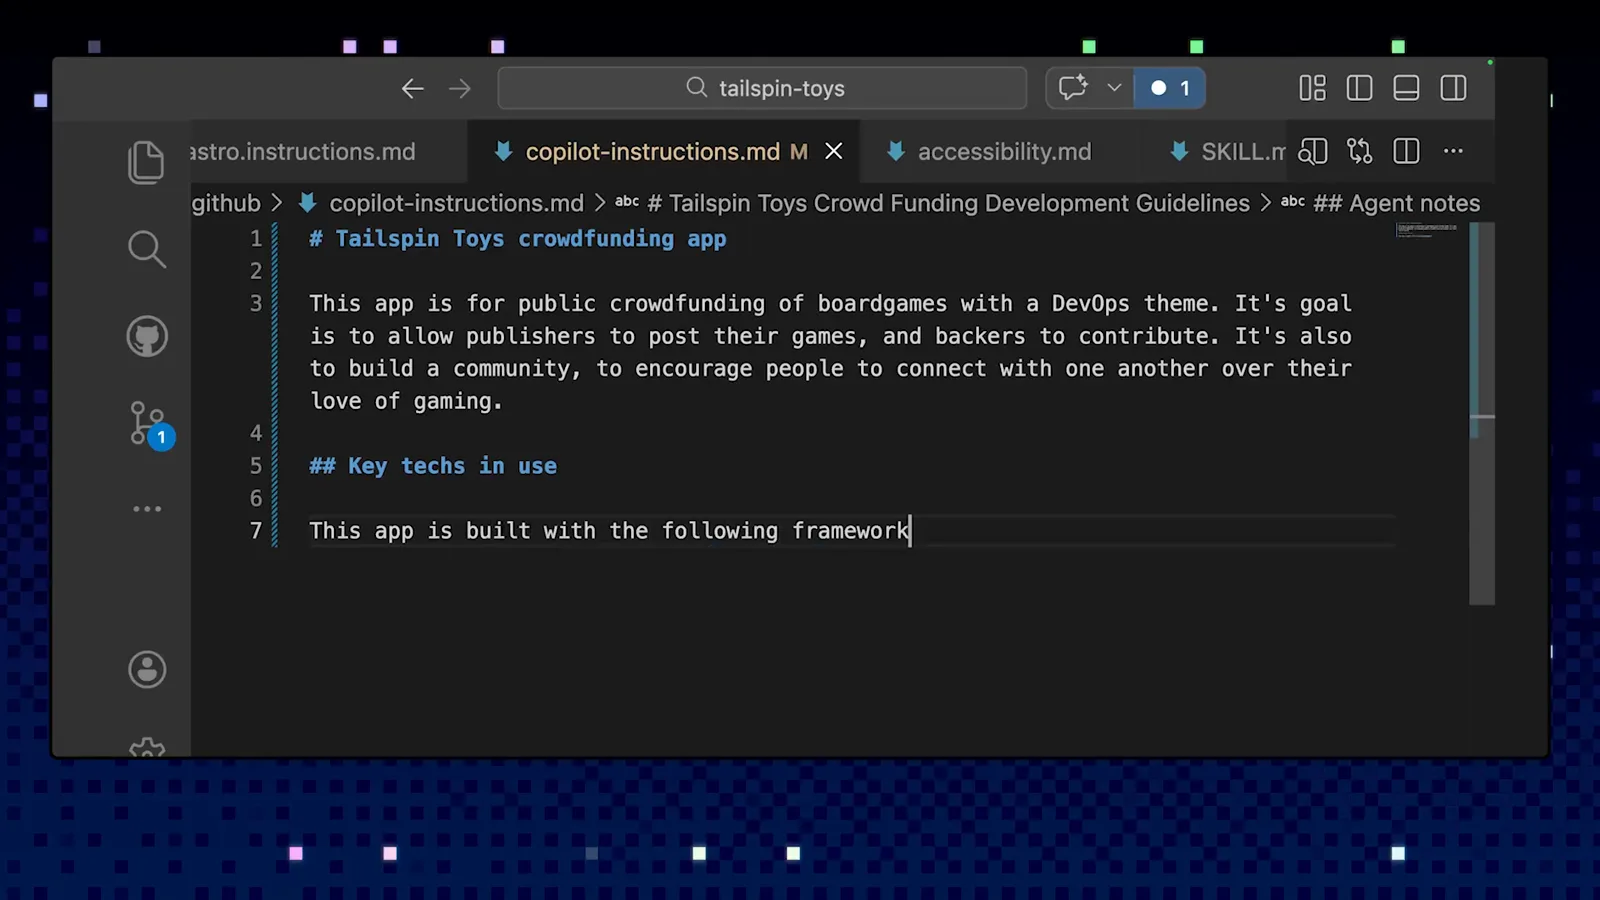
VS Code 里同时打开的 instructions、agent 与 skill 文件。看原视频 1:15
4 · Skills 与自定义 agents
- 13
把 skill 当命令调
Skills 放在 .github/skills 里,markdown 加可选脚本,出现时会进斜杠命令菜单、和内置命令并列——输入 / 就能看到 /make-contribution 和它的描述。演示里的 contribution skill 要求 Copilot 先找仓库的贡献指南和 issue、PR 模板,再照着执行。
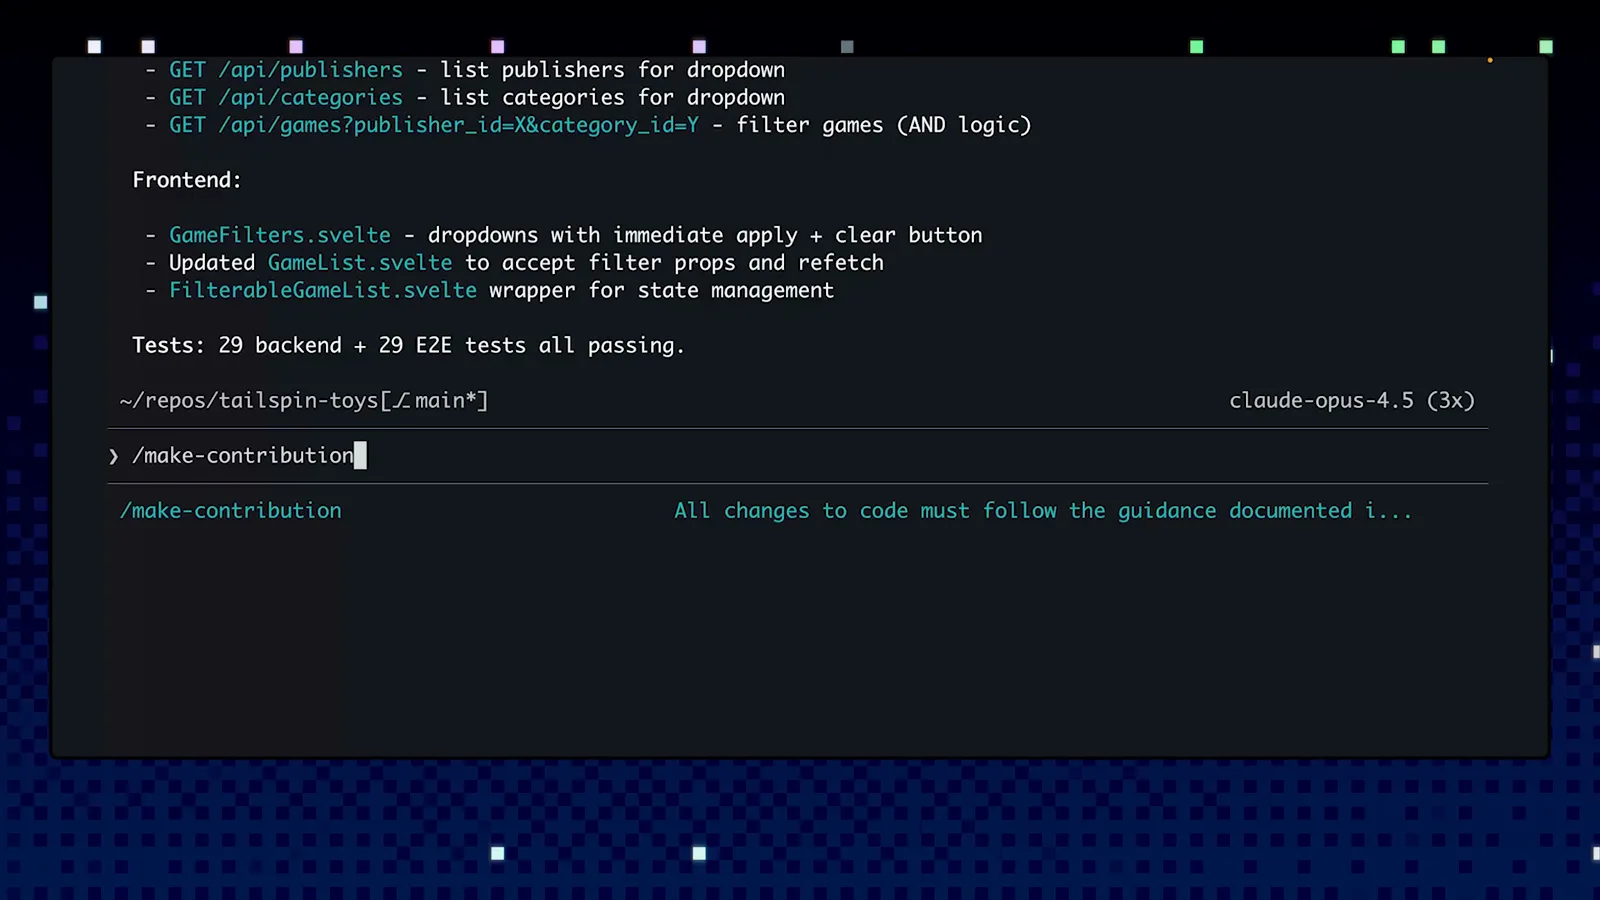
斜杠菜单里的 /make-contribution 及其描述。看原视频 3:50 - 14
或者用自然语言触发
不用背命令。说一句 "let's create a pull request",界面就会显示 skill(make-contribution) 自动激活——skill 会建分支、按逻辑分组提交,并按仓库自带模板开 PR。斜杠命令和自然语言双触发,正是 skill 好用的地方。
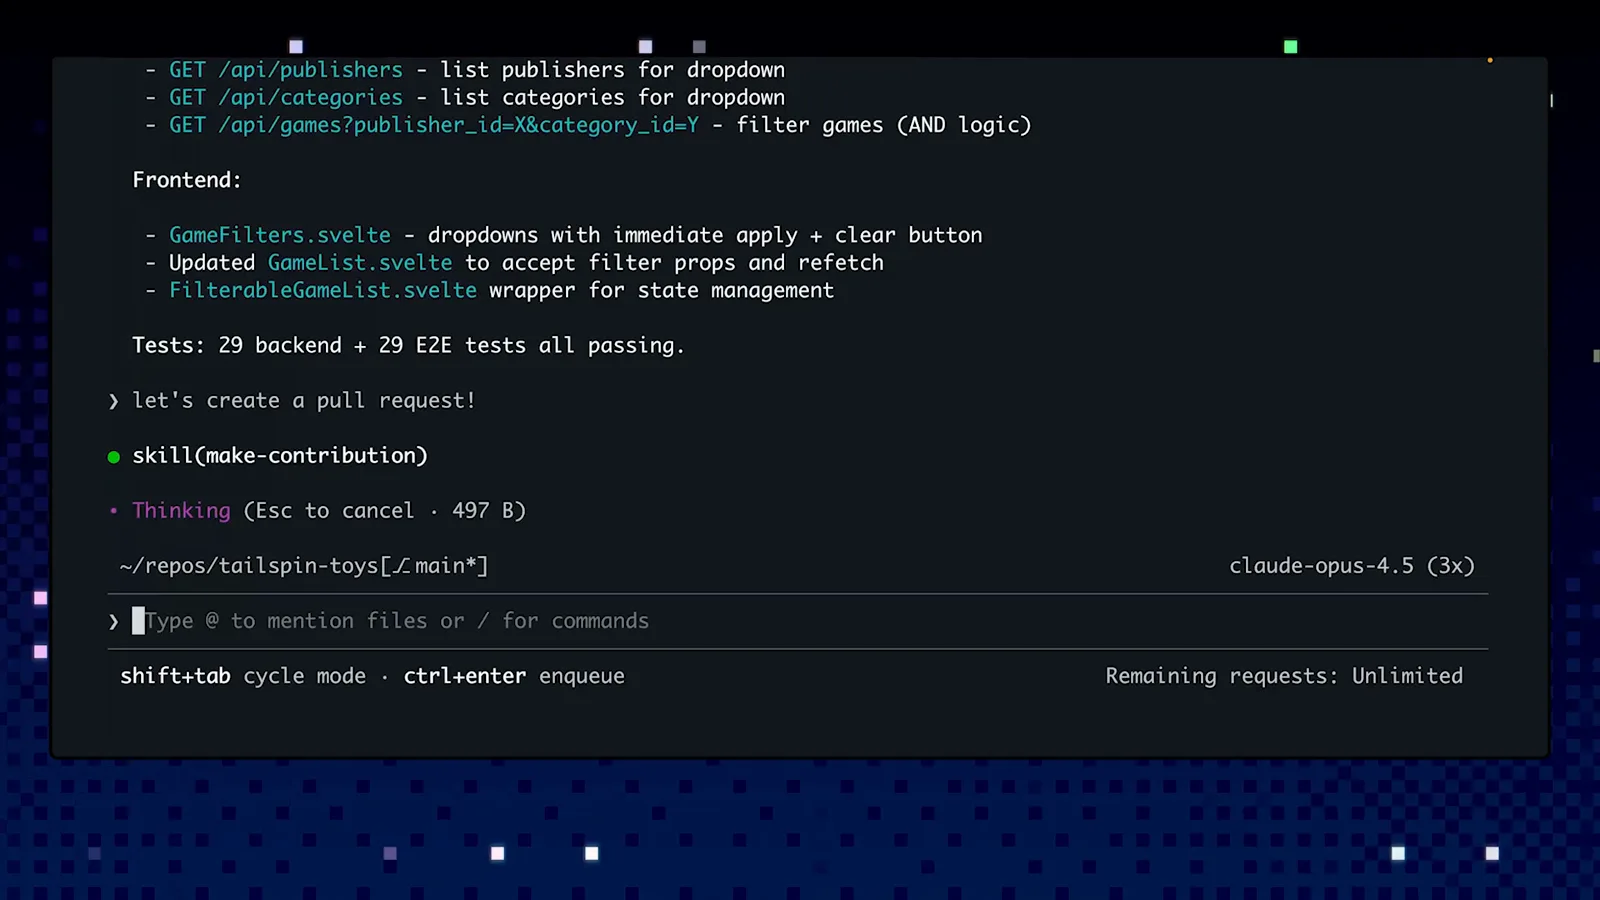
请求创建 PR 后 skill(make-contribution) 自动激活。看原视频 4:06 - 15
大活换 custom agent 上
涉及全项目的活,用 /agent 打开 Select Agent 列表:Default、Accessibility agent、Code review、Compliance、Documentation Specialist、react 19 upgrade、Search engine optimisation (SEO),还有 Create new agent。Agents 是 .github/agents 下的 markdown 文件,各自带独立上下文。演示里选中无障碍 agent,先要一份影响最大的审查清单,再让它动手落实。
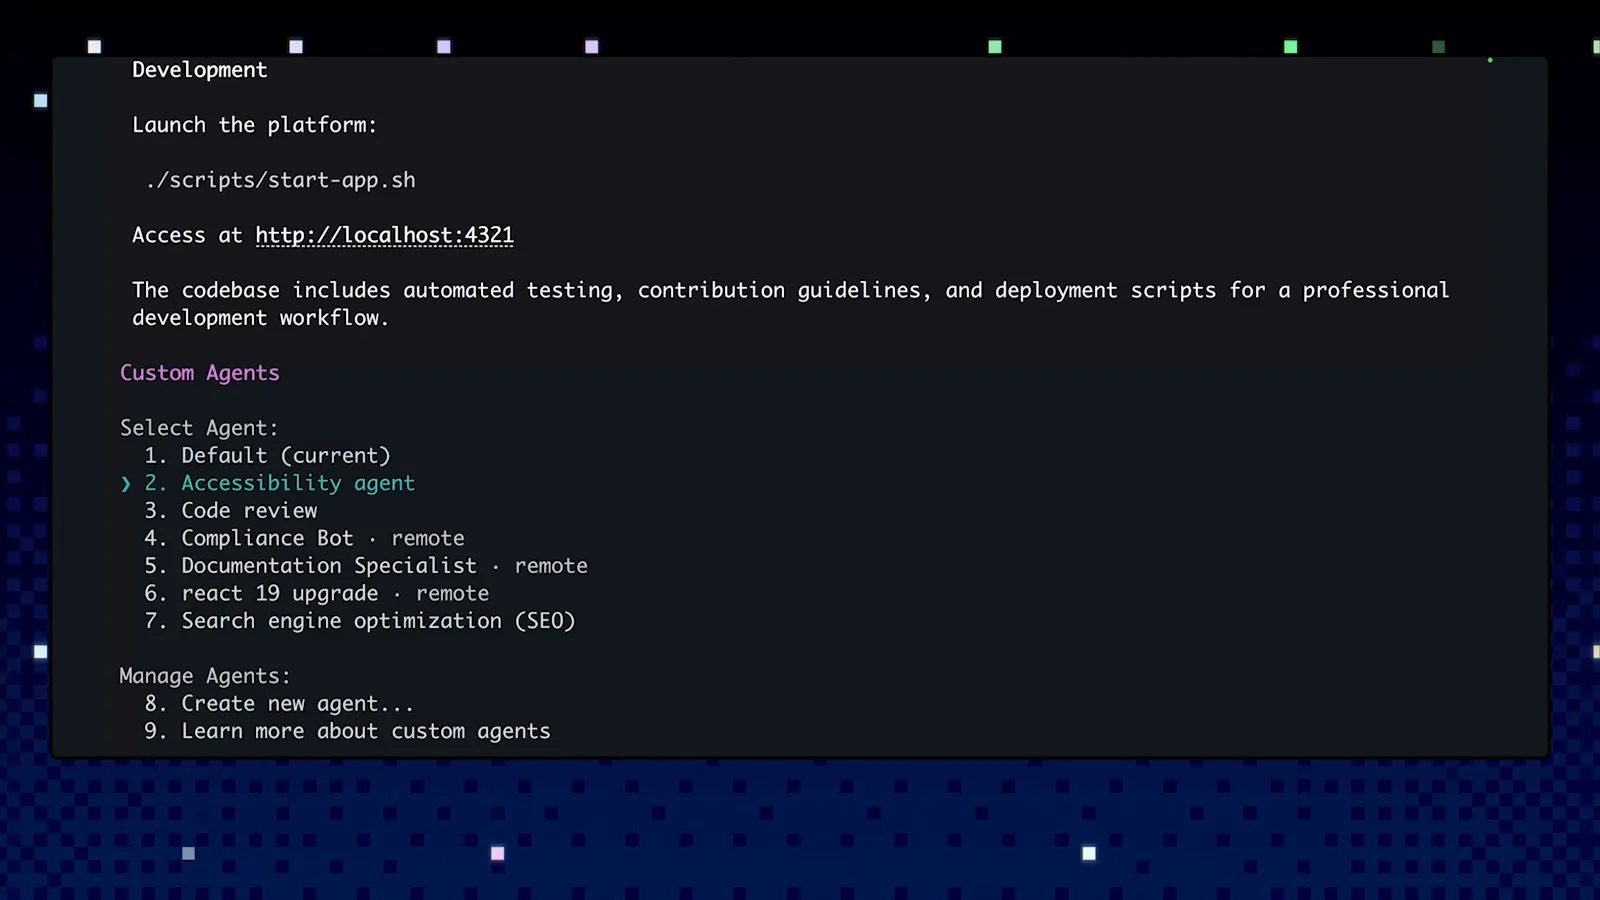
Select Agent 菜单,高亮无障碍 agent。看原视频 5:00