
OpenCode 教程:安装配置、接入 DeepSeek 与首个实战
安装开源终端编程智能体,连接 DeepSeek V4 Flash Free(或你自己的 API Key),跑通一个真实项目并掌握 Plan 模式——13 个步骤,每一步都配有完整实操演示中的真实截图。
太长不看版
- 在 opencode.ai 复制一条 curl 命令完成安装,然后在任意项目目录里运行 opencode。
- /connect 可接任意服务商——直接选免费的 DeepSeek V4 Flash 模型,或填入 DeepSeek、OpenAI、Anthropic 的 API Key。
- Plan 模式先给出带编号的方案并主动提问,确认无误后 Build 模式才会动你的文件。
- /init 会生成 AGENTS.md,之后每个会话都会自动读取其中规则——记得提交到 git。
OpenCode Full Tutorial: Free Models, Skills & MCPs
视频演示:Eric Tech23:11
DeepSeek V4 + OpenCode Is INSANE!
模型信息:Julian Goldie SEO9:51
文字步骤已对照 OpenCode 官方文档(opencode.ai/docs)与 DeepSeek 官方 OpenCode 集成指南(api-docs.deepseek.com)核实:/connect → deepseek → API Key → DeepSeek-V4-Flash,需 OpenCode v1.18.30 以上。
教程画面来自上述视频并注明频道出处;每一步都深链到源视频的对应时间点。文字与截图选帧为本站原创。
13 步:从安装到跑通第一个任务
- 1
复制一行安装命令
打开 opencode.ai,复制安装命令——curl -fsSL https://opencode.ai/install | bash——粘贴到终端执行。也可以用 npm 包、Homebrew 或 Scoop 安装,但 curl 脚本是所有教程的标配路径,而且会自动把 OpenCode 写入 PATH。
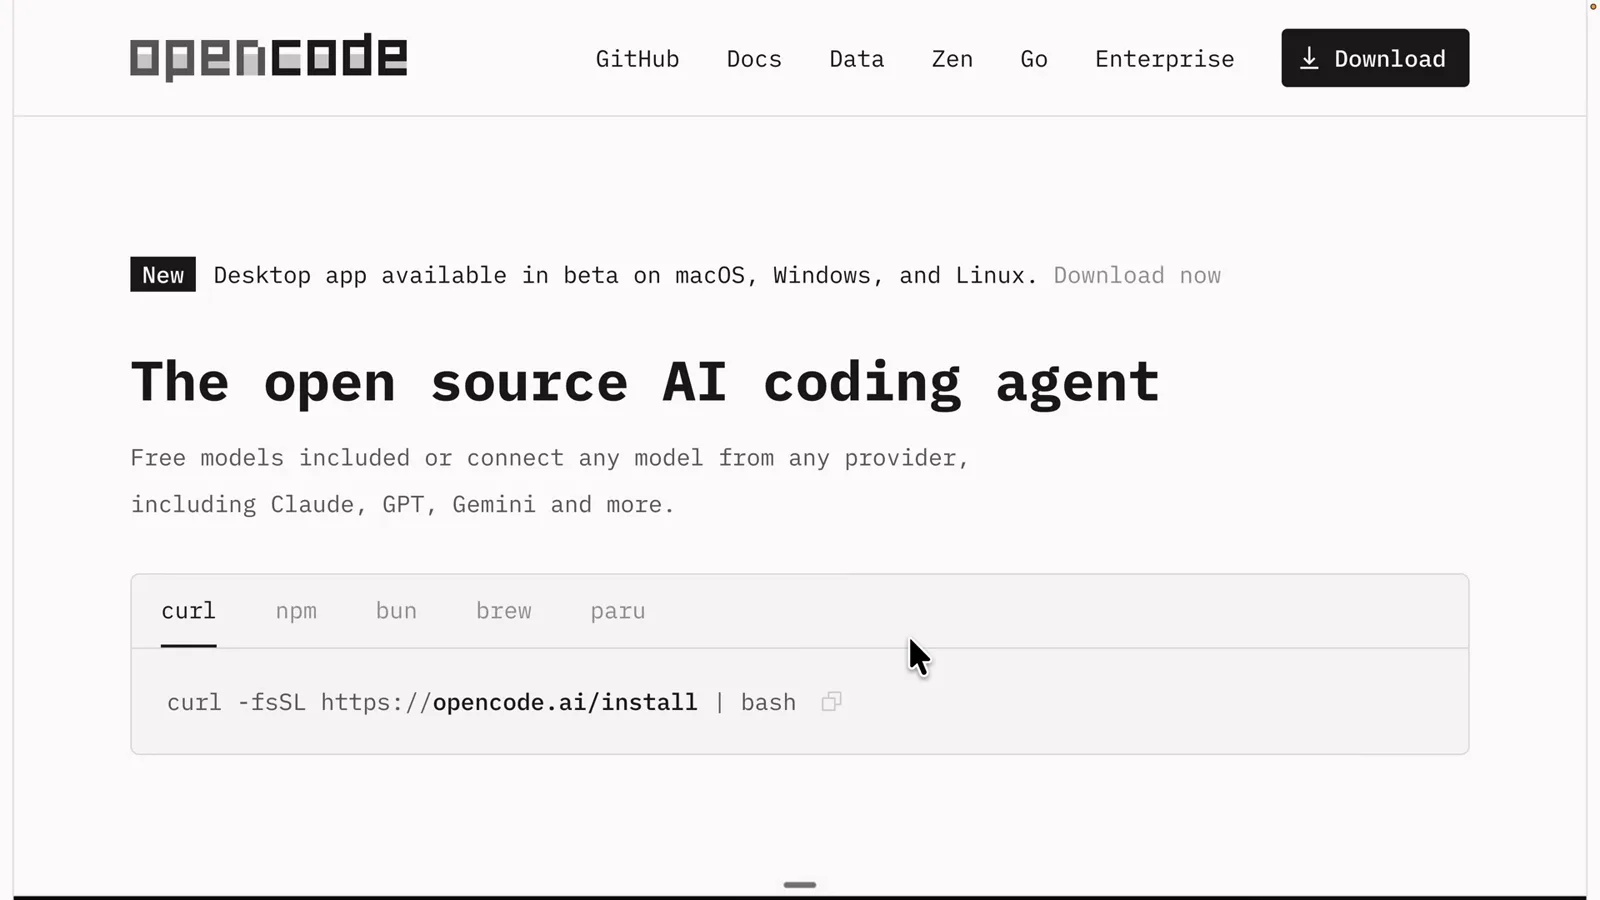
opencode.ai 安装页:curl 一行命令之外还列出各包管理器。观看 1:10 处 - 2
等安装器跑完,开一个新终端
脚本结束时会打印两行关键信息:"Successfully added opencode to $PATH" 和快速上手提示——先 cd 进项目,再运行 opencode。如果命令提示 "command not found",说明当前终端是在安装前打开的;重开一个终端即可。
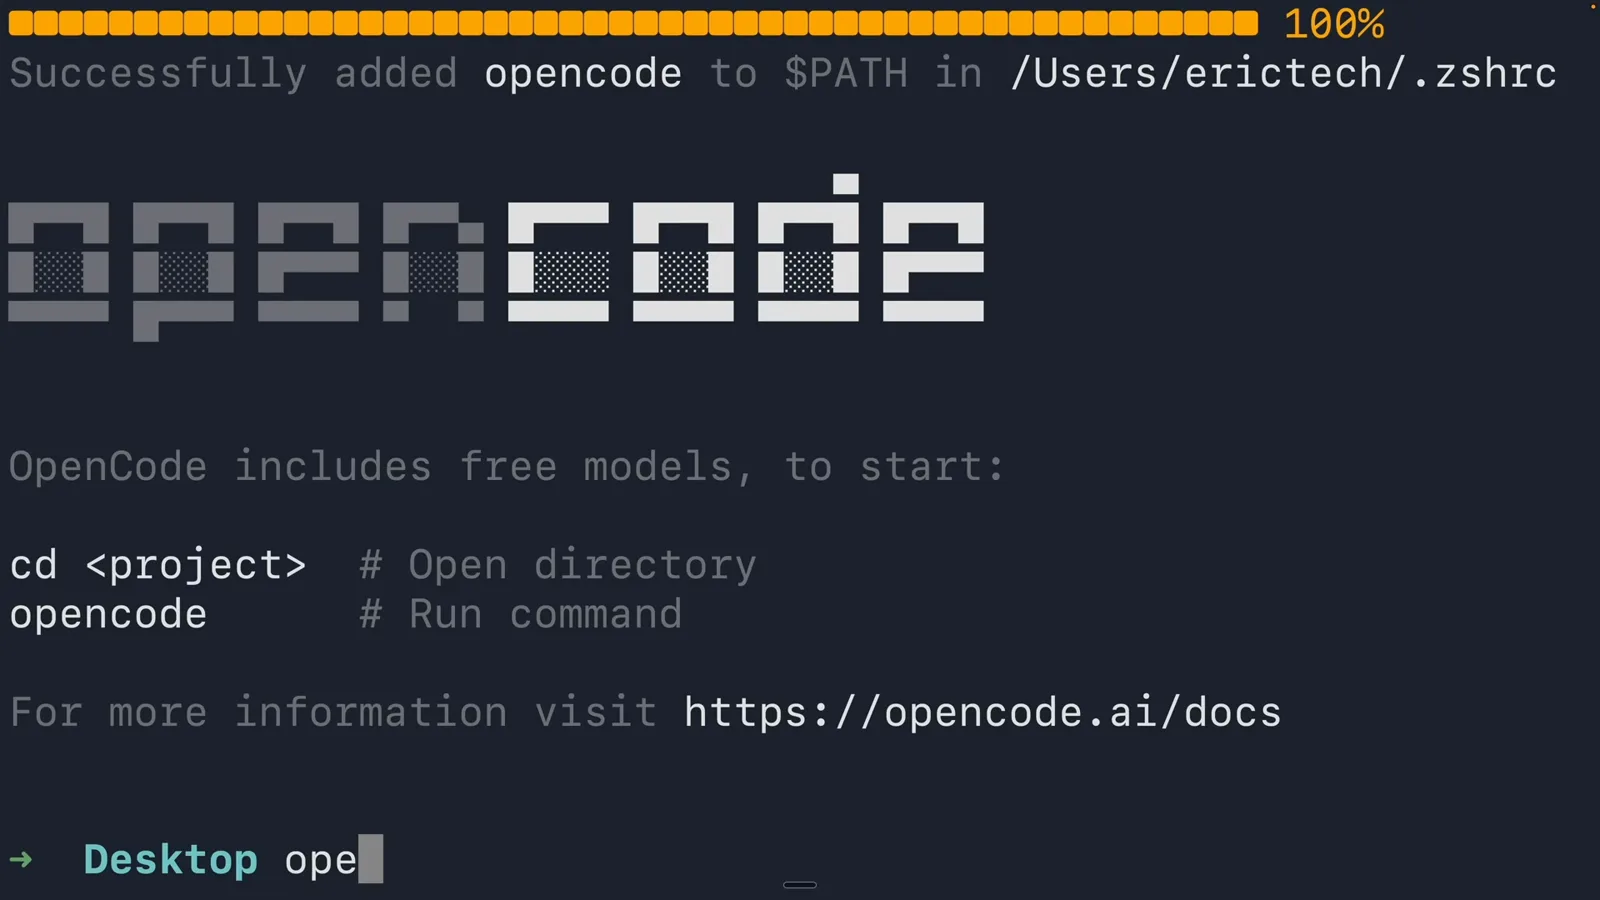
安装完成后自动写入 PATH,并打印快速上手提示。观看 1:30 处 - 3
在项目目录里启动 OpenCode
cd 进入任意项目(或用 VS Code 打开项目、在内置终端里操作),运行 opencode。欢迎界面包含 Ask anything 输入框、底部 Build 徽标显示当前模型,并给出提示:运行 /connect 添加 AI 服务商。Ctrl+C 退出。
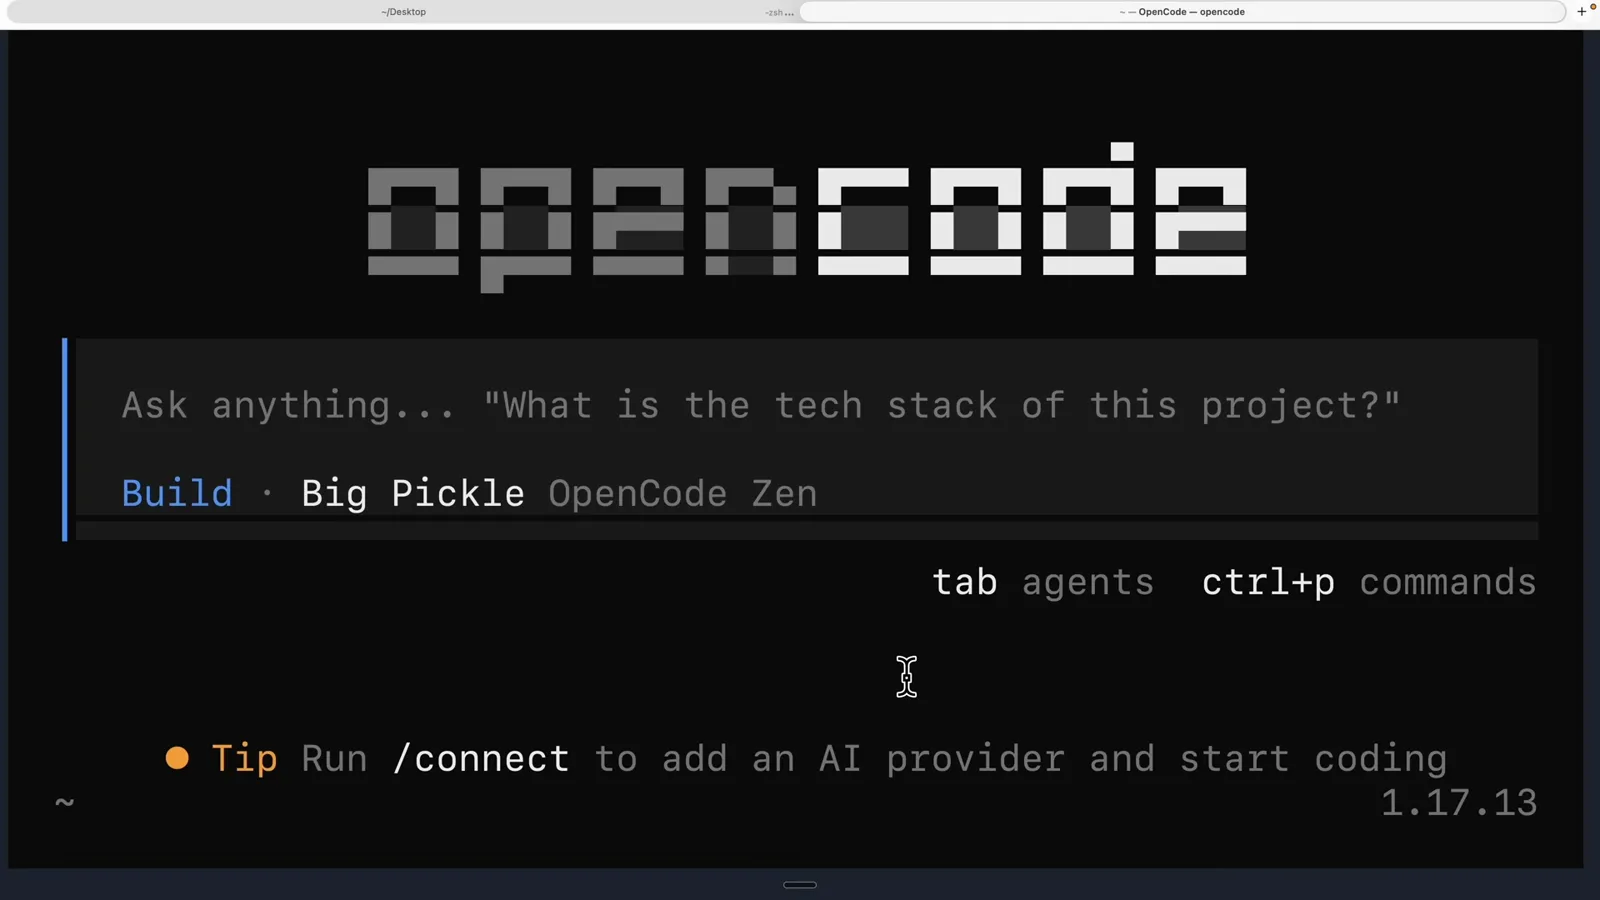
首次启动:欢迎界面直接把 /connect 摆在你面前。观看 2:00 处 - 4
运行 /connect,选择服务商
在输入框里输入 /connect。OpenCode 列出所有获取模型的方式:OpenCode Zen(推荐——一个 API Key 即可使用官方筛选过的模型清单)、OpenCode Go(低价订阅),以及 OpenAI ChatGPT、Anthropic、GitHub Copilot 和 Google 登录。订阅制封顶消费;API Key 按量付费。
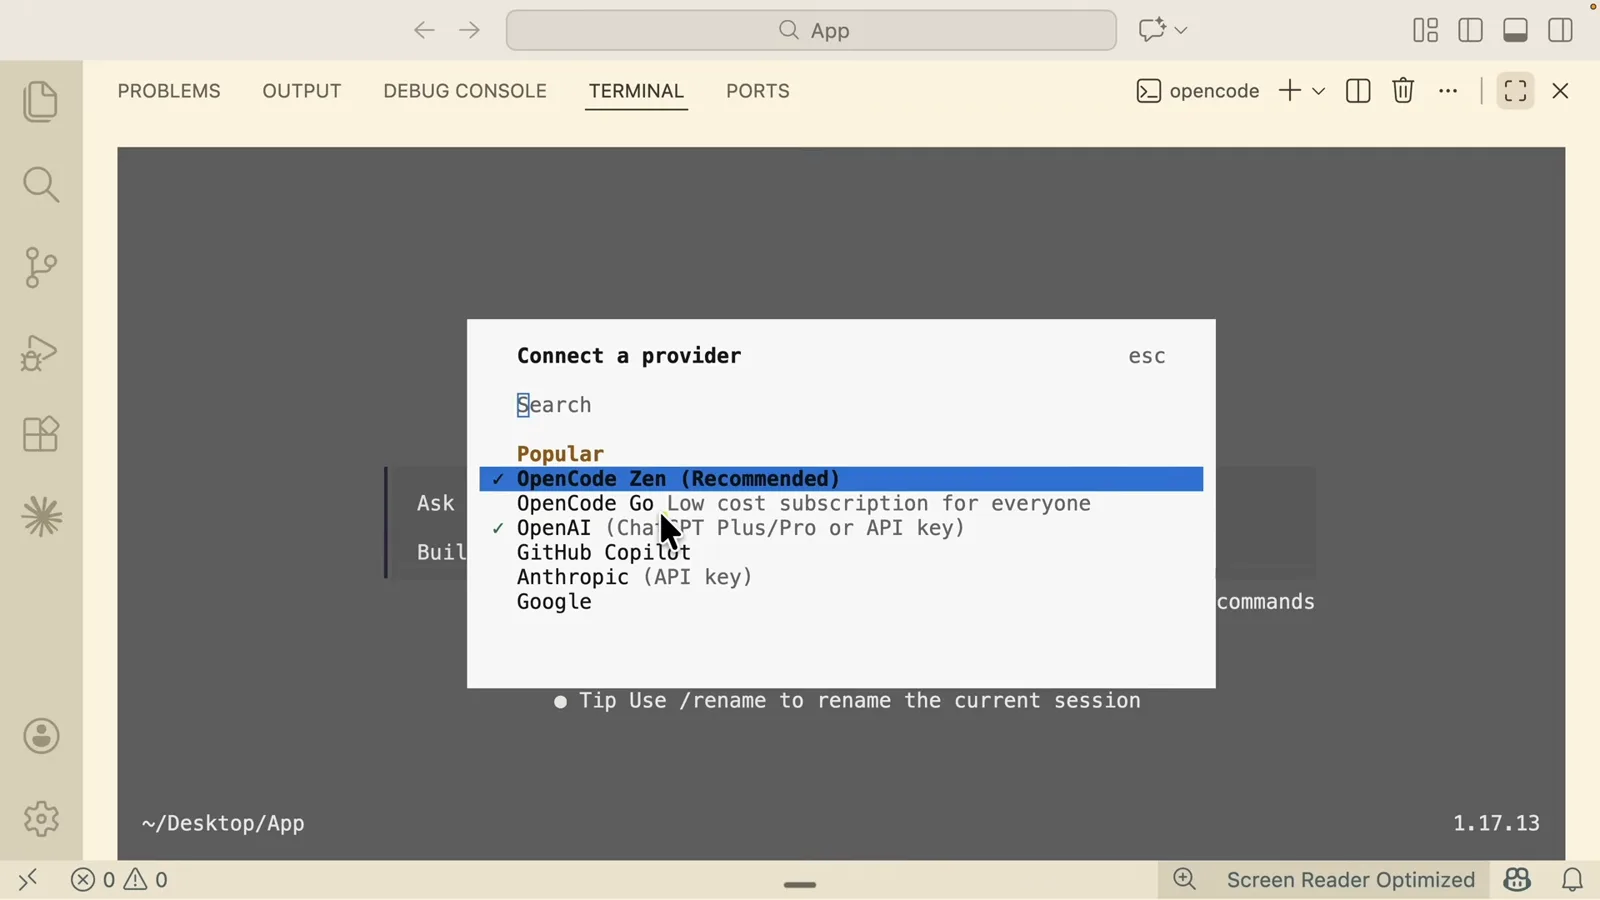
/connect 把 Zen、Go 和各大官方服务商并列在一起。观看 3:40 处 - 5
创建并粘贴 API Key
选择 OpenCode Zen 后会弹出 API Key 输入框并附上 Zen 控制台链接。登录后点击 Create API Key,复制并粘贴回终端——创建 Key 本身免费,只按实际消耗的 token 计费。Key 保存在本地,只需配置一次。
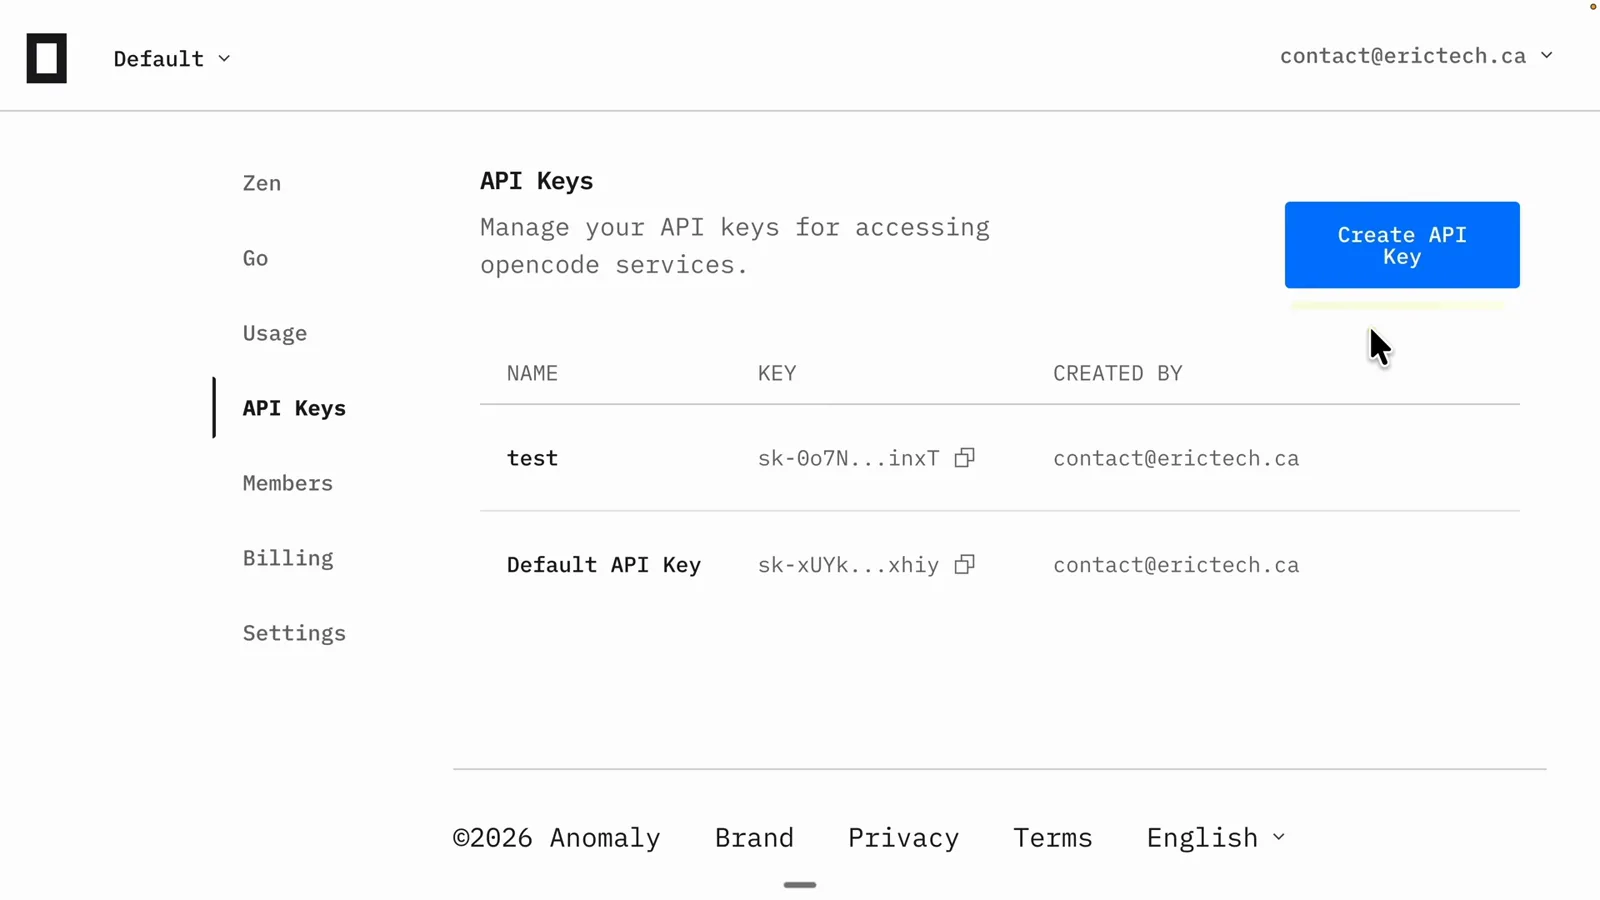
Zen 控制台签发的 Key 用于验证终端智能体身份。观看 4:08 处 - 6
选择 DeepSeek V4 Flash Free 并打个招呼
回到模型选择器,免费模型带 Free 标记——滚动到 DeepSeek V4 Flash Free,回车,然后发一句 "hi" 验证链路。想用自己注册的 DeepSeek 账号?DeepSeek 官方文档走同样的流程:运行 /connect,选择 deepseek 服务商,粘贴 platform.deepseek.com/api_keys 生成的 API Key,再选择 DeepSeek-V4-Flash(需 OpenCode v1.18.30 以上)。
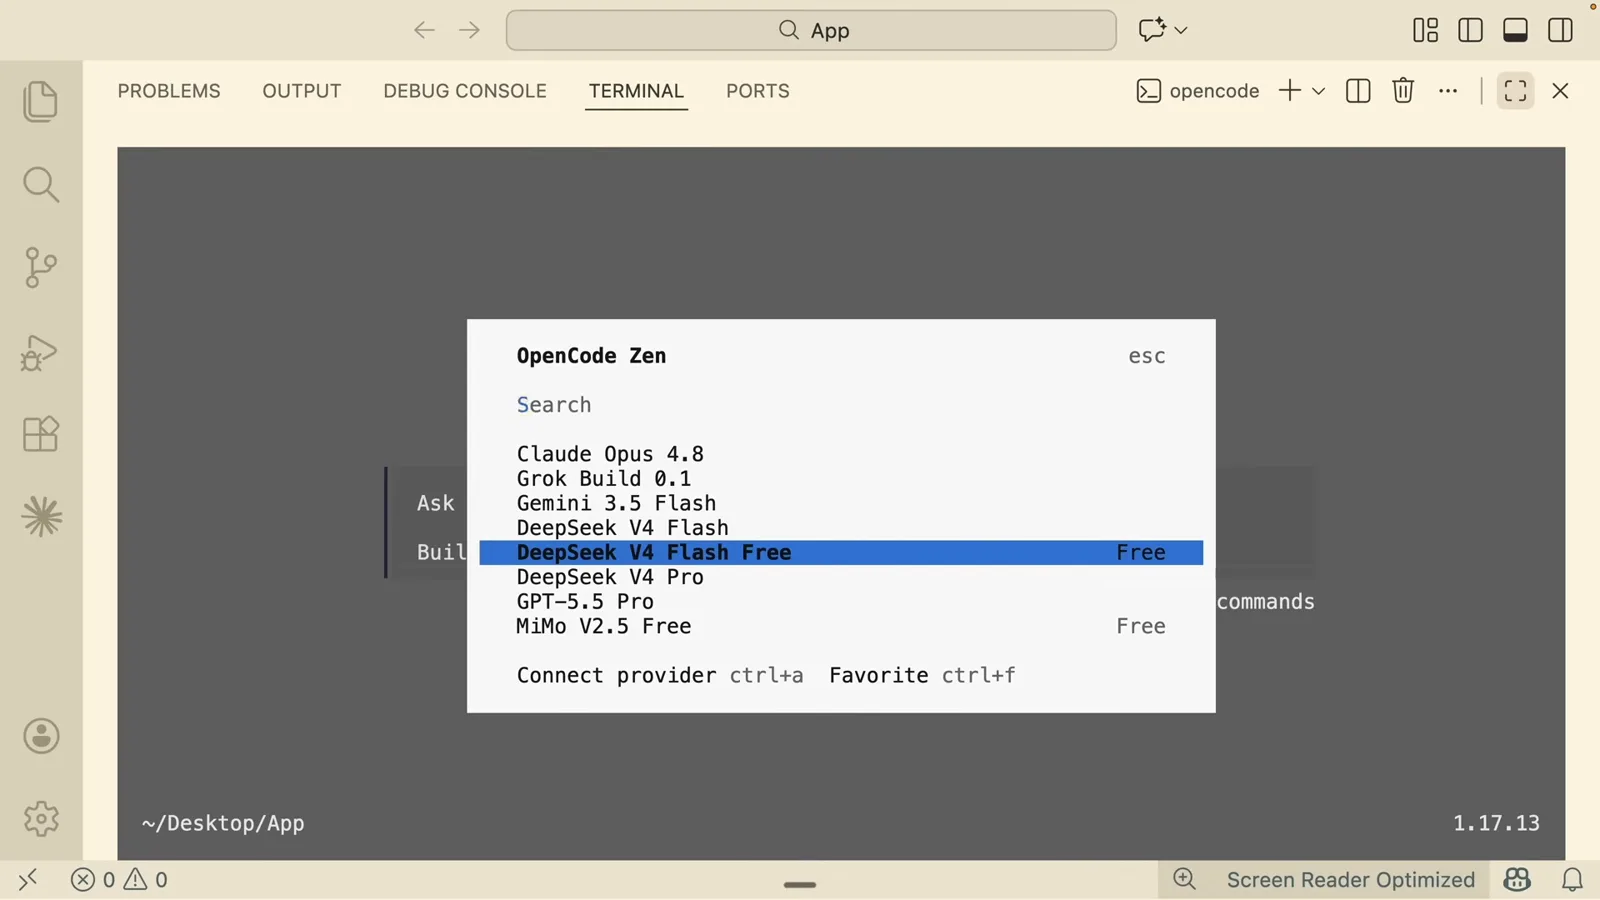
DeepSeek V4 Flash Free 一次回车即可使用,无需绑卡。观看 4:30 处 - 7
开一个干净会话,布置一个真实任务
右下角的计量条显示当前会话消耗的上下文;/new 开启新会话。然后描述一个具体任务——比如:"搭建一个打印 hello world 的 NestJS 服务端应用"。OpenCode 会列出文件清单、写代码并逐项勾掉待办。连按两次 Esc 可中断,输入 continue 继续。
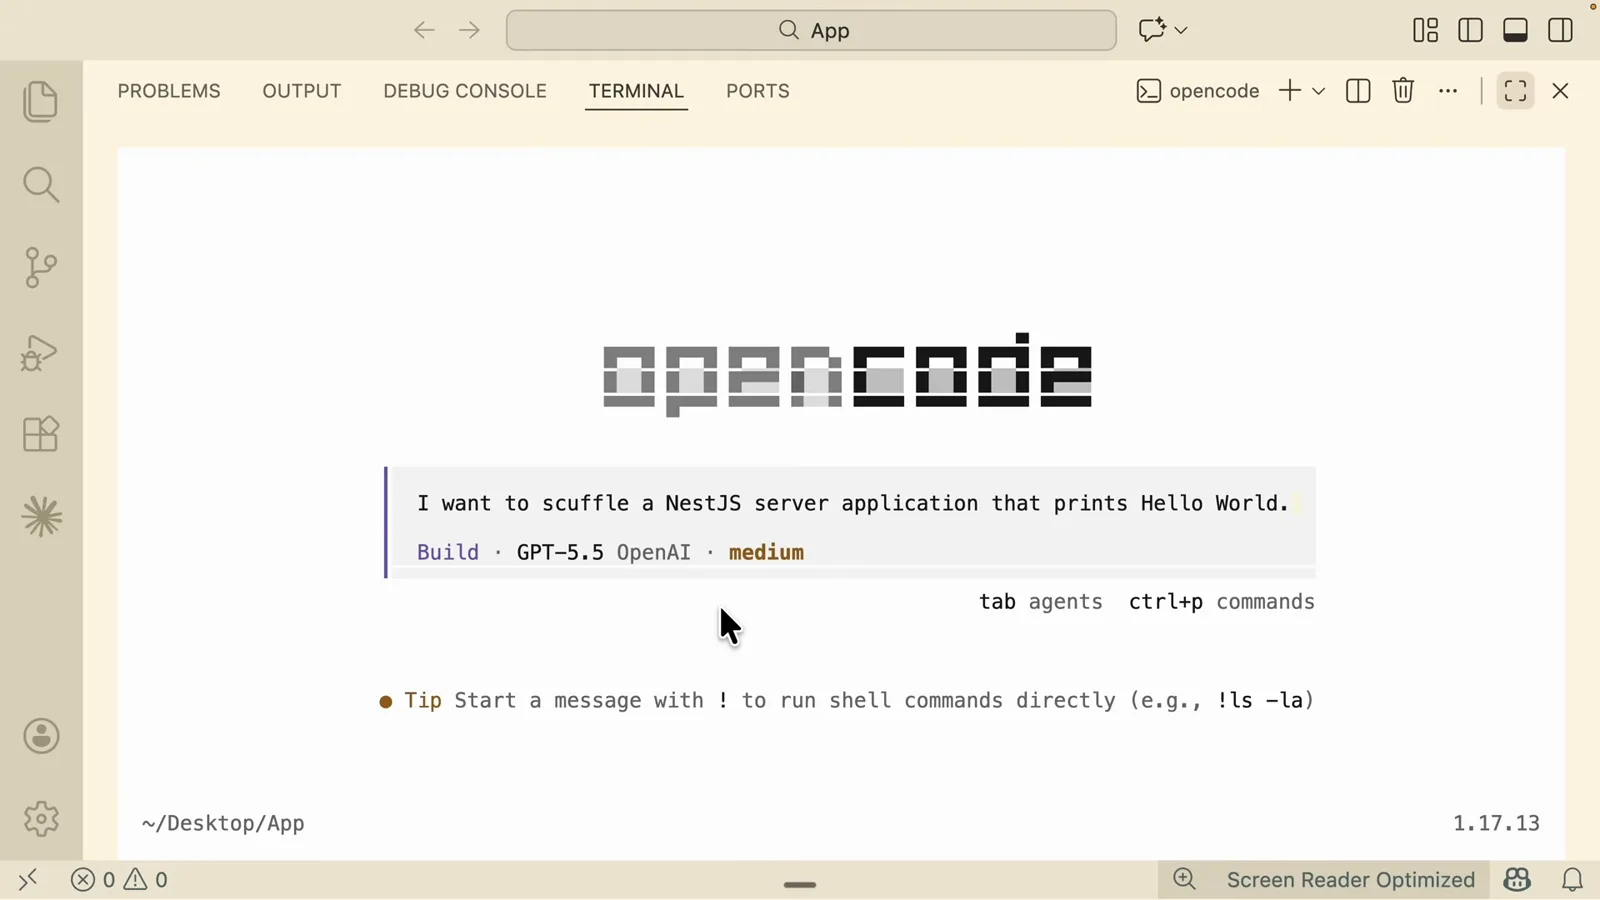
一句话就足以让 OpenCode 搭出整个应用。观看 7:20 处 - 8
亲自验证结果能跑
OpenCode 结束时会给出总结:创建的文件、安装、构建,以及 curl 服务器并打印响应的运行时检查。自己在另一个终端再跑一遍——启动开发服务器并打开 http://localhost:3000 看 Hello World。亲眼看到页面之前,智能体的汇报只是它的说法。
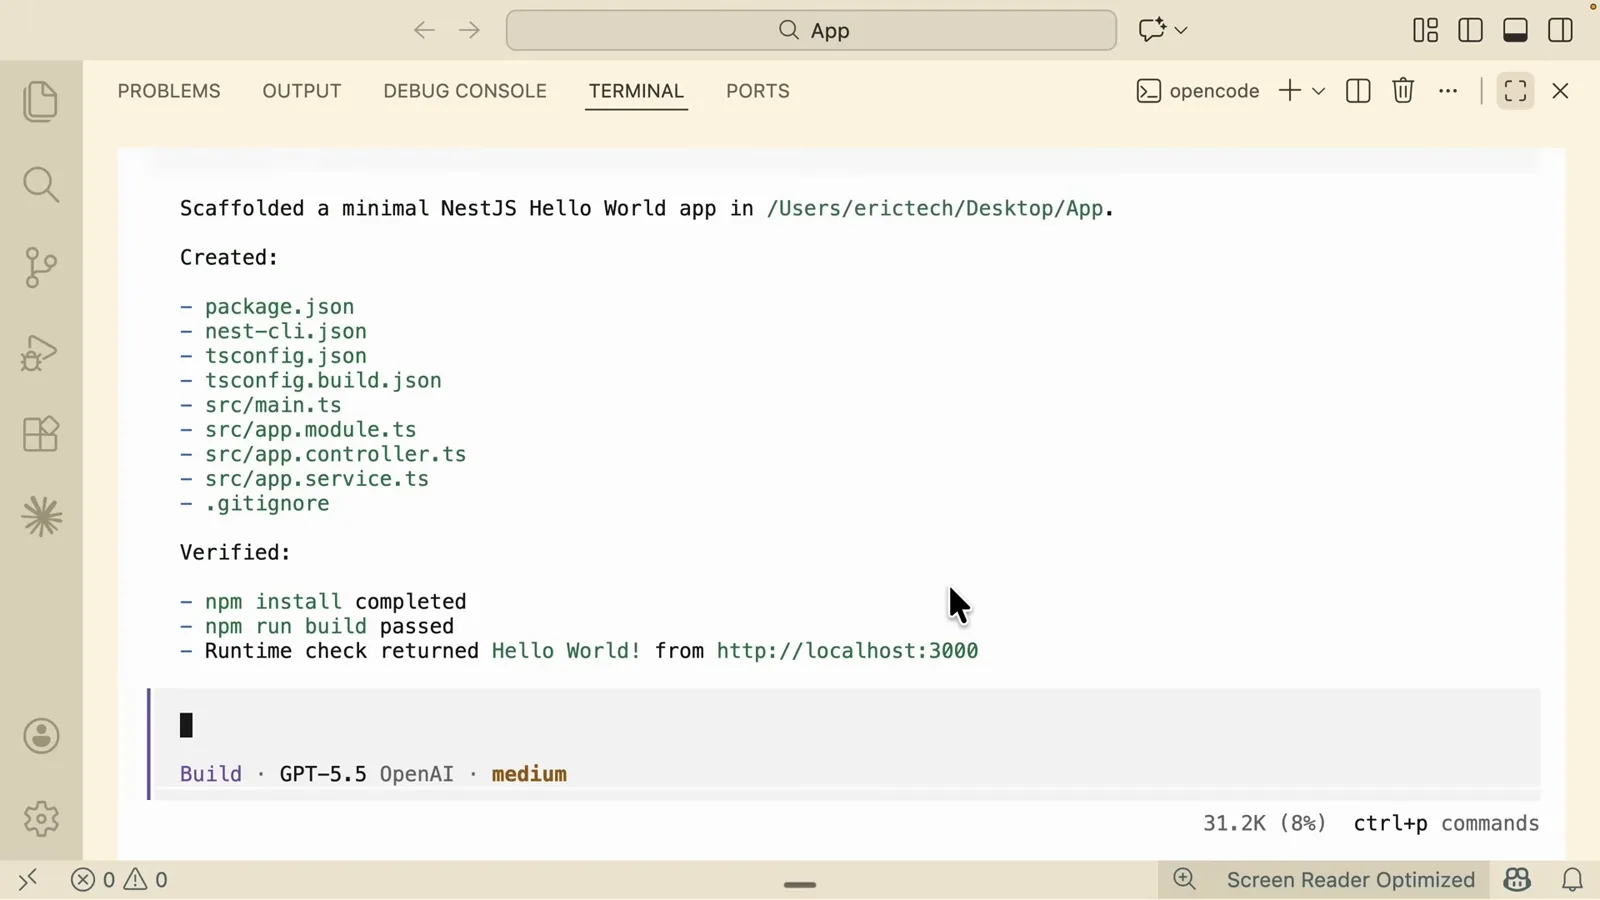
脚手架总结的最后一项是返回 Hello World 的运行时检查。观看 7:40 处 - 9
用 /variants 调节推理力度
/variants 打开 Select variant 对话框:default、none、low、medium、high。力度越高思考越久、花费也越高;机械性修改用 low 就够。当前档位显示在状态栏模型名旁边,用哪档一目了然。
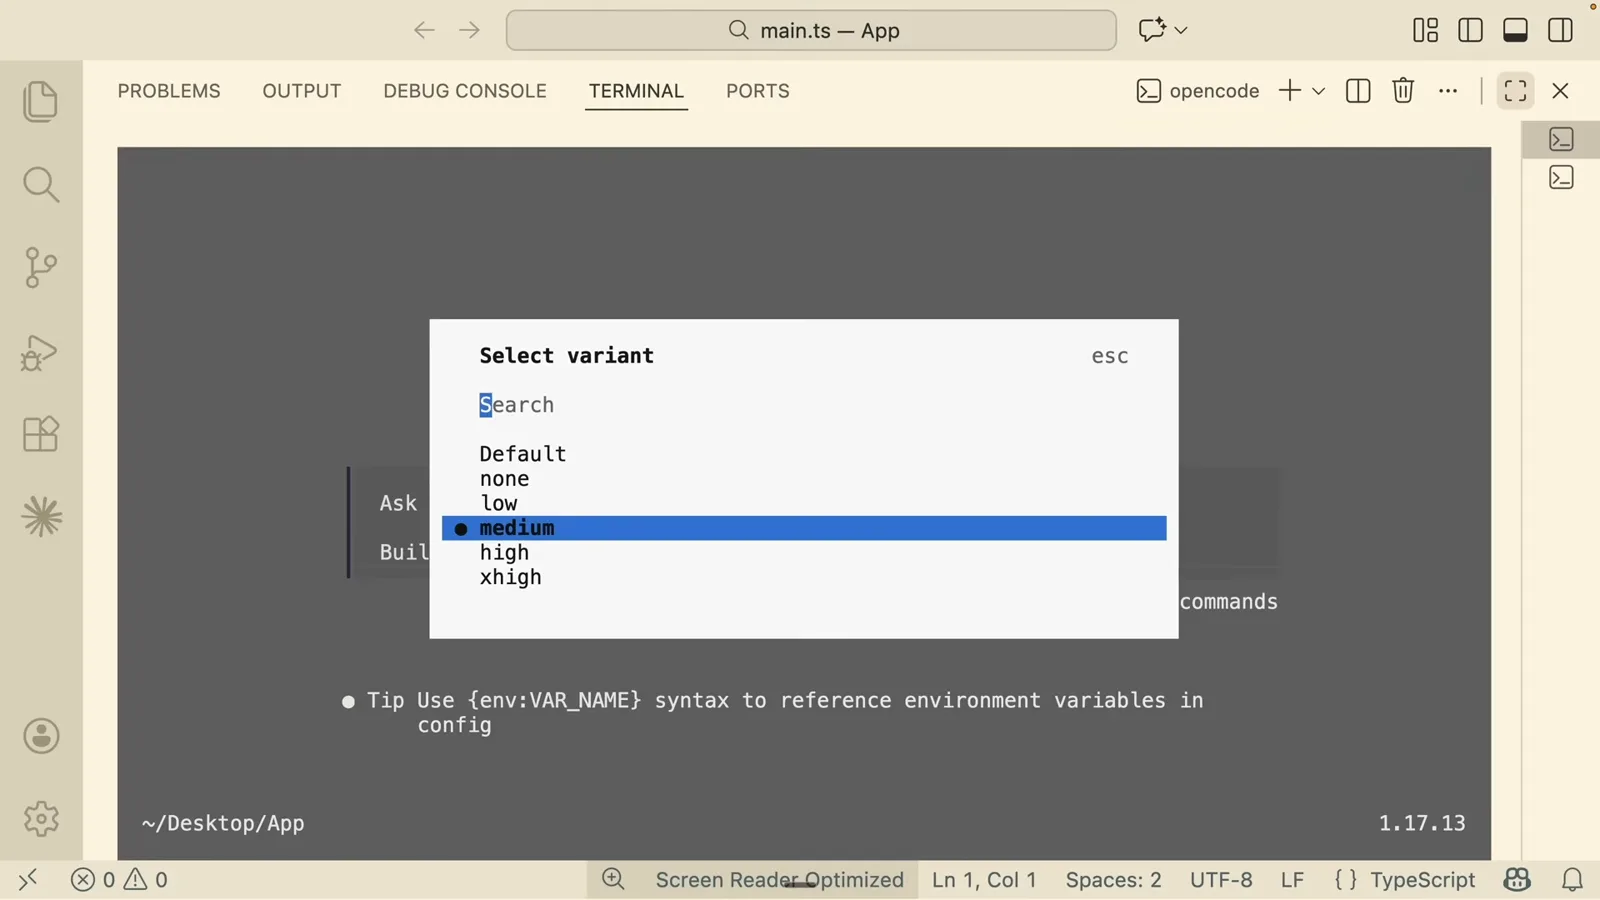
/variants 不离开会话即可切换推理力度。观看 8:34 处 - 10
多任务用多会话隔离
/sessions 列出项目里的所有对话——回车切换,按提示的快捷键重命名或删除。长时间任务互不干扰:一个会话做重构,另一个写文档。/share 把对话变成公开链接,/export 导出为 Markdown 文件,/timeline 回退到任意早前消息。
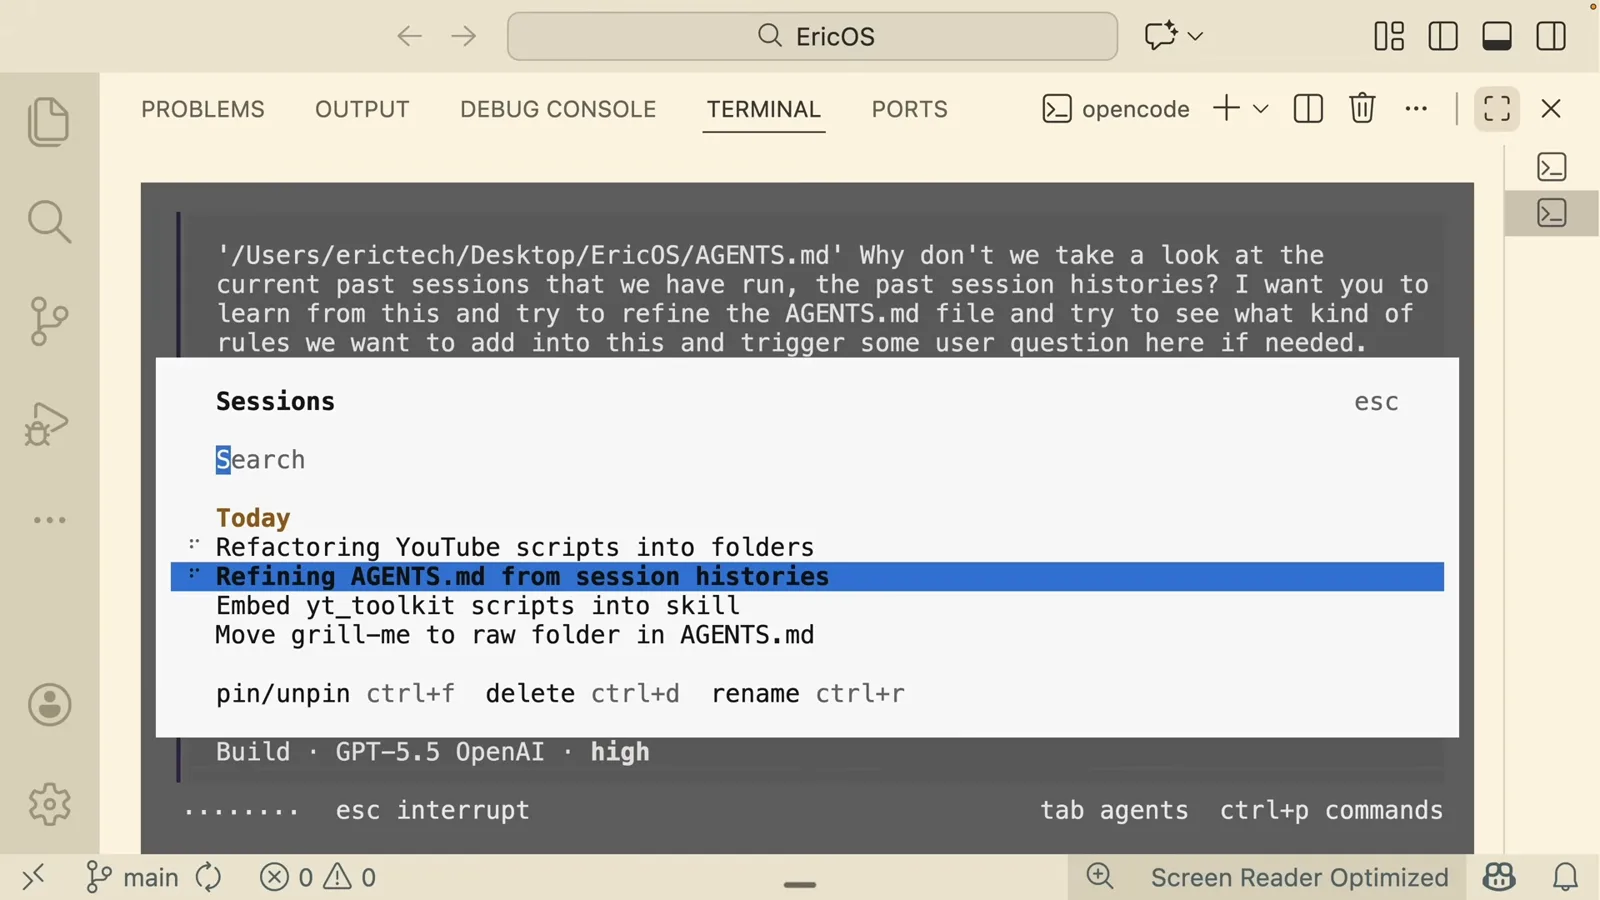
会话对话框让每个任务的历史与上下文互不相扰。观看 10:30 处 - 11
先 Plan 再 Build
Shift+Tab 切换 Plan 模式——徽标从 Build 变为 Plan——此时智能体只读不写:给出带编号的方案并以澄清问题收尾。(当前版本文档将该切换键写为 Tab,认准右下角指示器。)回答问题、确认方案,切回 Build 模式,它就按你批准的内容执行。
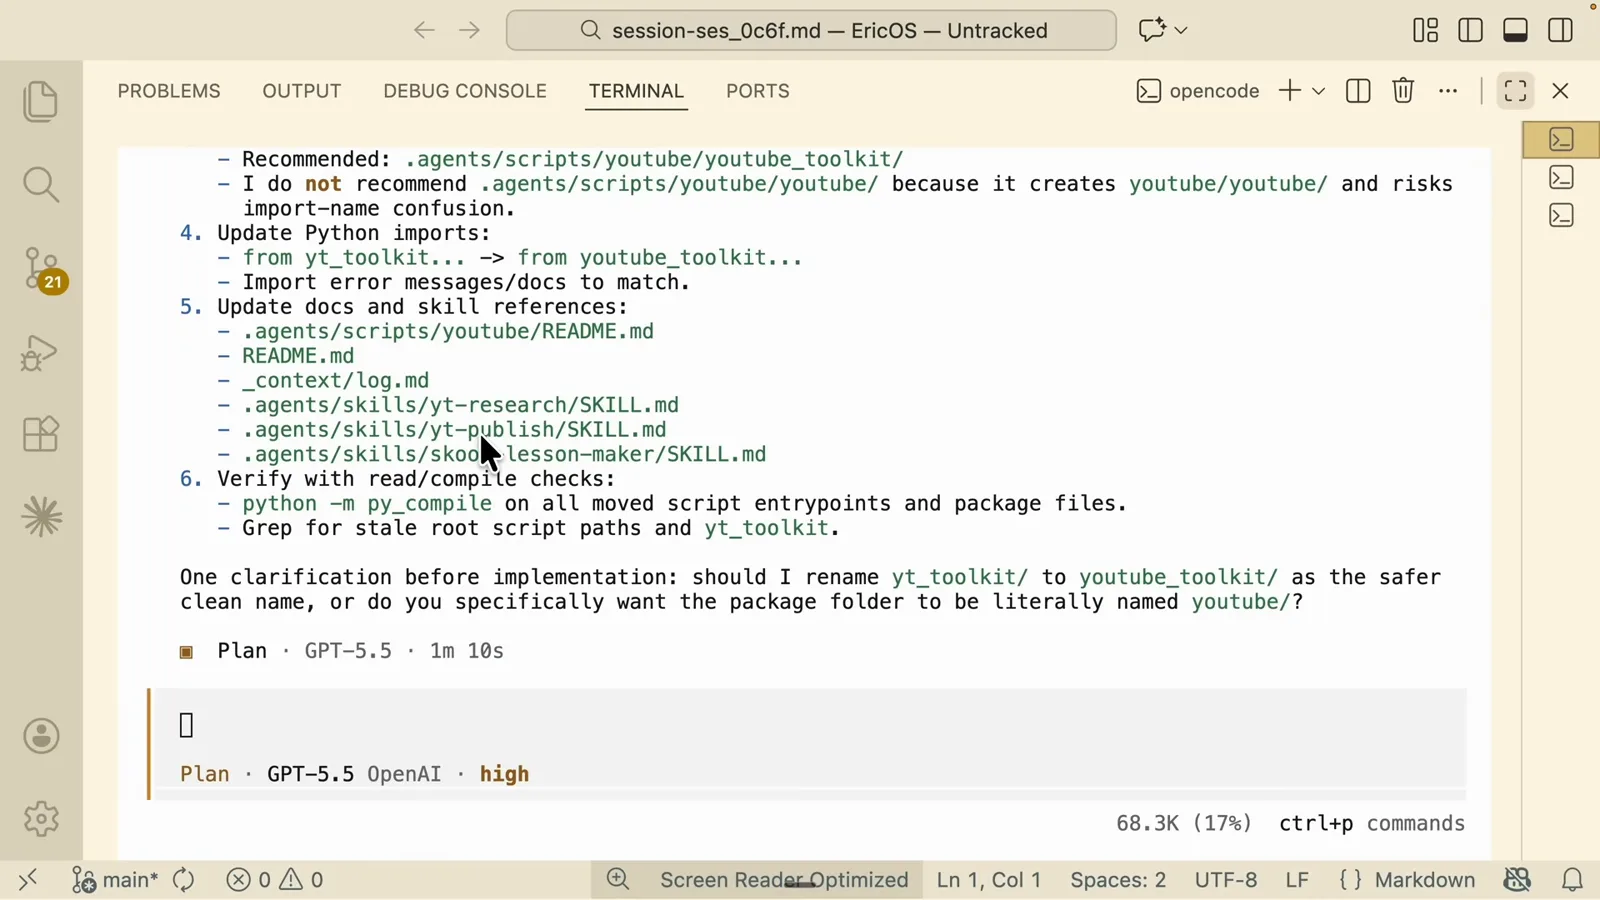
Plan 模式以提问收尾而非直接改代码——确认后再开建。观看 13:29 处 - 12
用技能(skills)扩展能力
Skill 是任何编程智能体都能复用的操作手册。在 skills.sh 浏览排行榜,挑一个——Superpowers 是经典——批准权限提示后,OpenCode 会把它装进项目的 agents/skills 目录。重启 OpenCode 让其生效,再运行 /skills 查看所有可用技能。
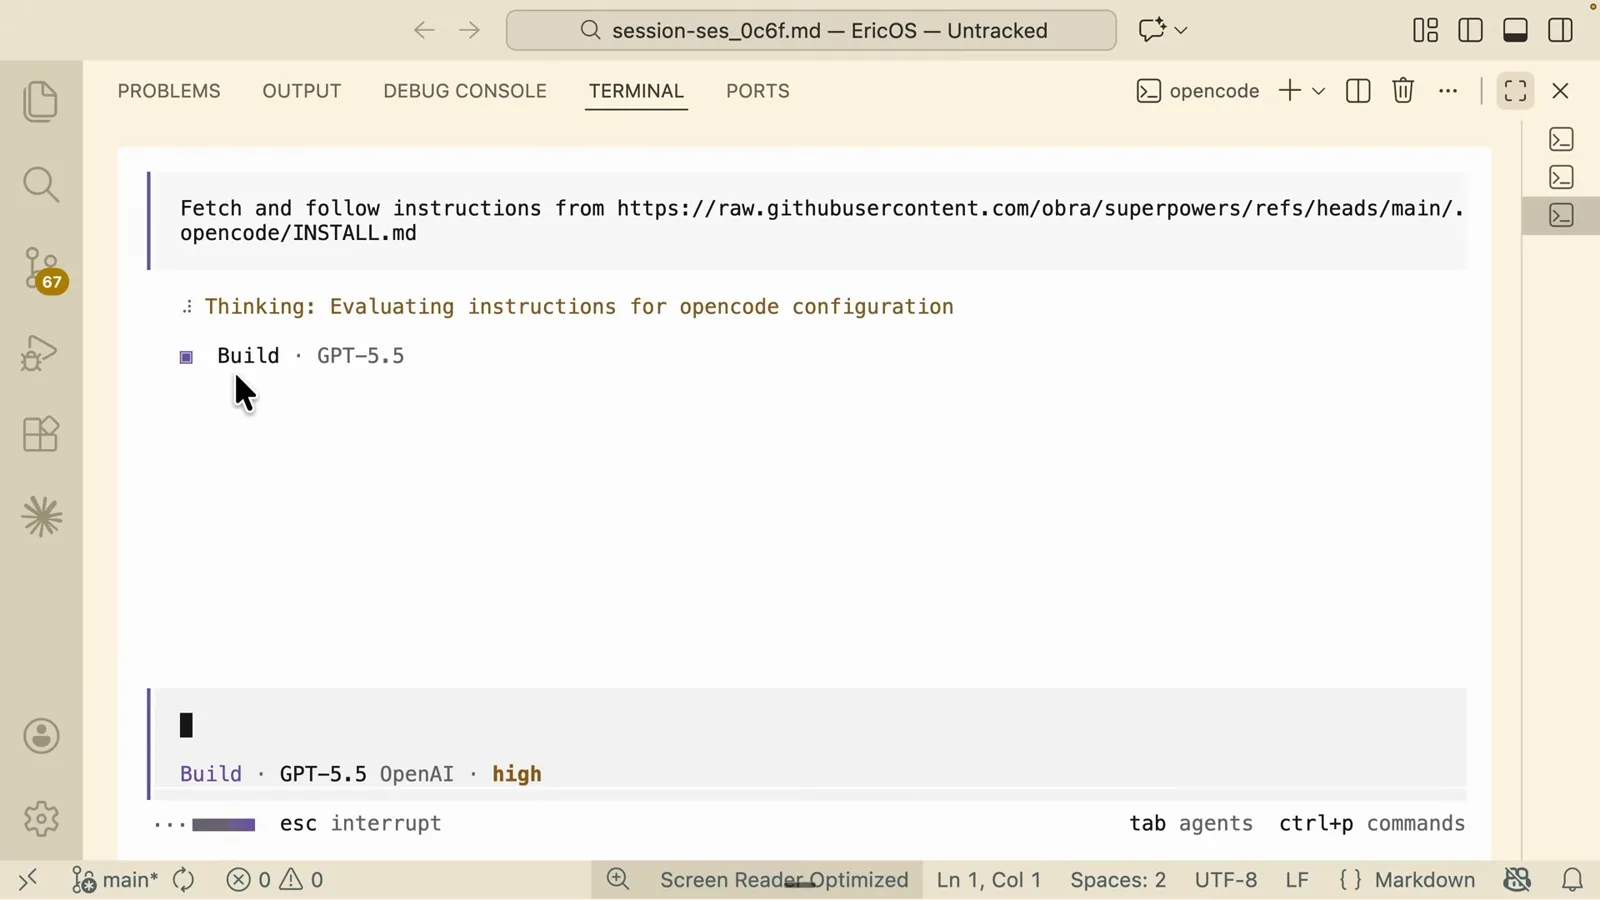
从 skills.sh 把 Superpowers 技能直接装进项目。观看 15:55 处 - 13
用 /init 教它认识你的项目
/init 分析仓库并在根目录生成 AGENTS.md:项目规则、目录地图、编码约定。之后每个会话都会读取它——你写进去的命名规范、禁改路径、回复风格都会自动生效。官方文档建议把 AGENTS.md 提交进 git,让整个团队共享同一份智能体配置。
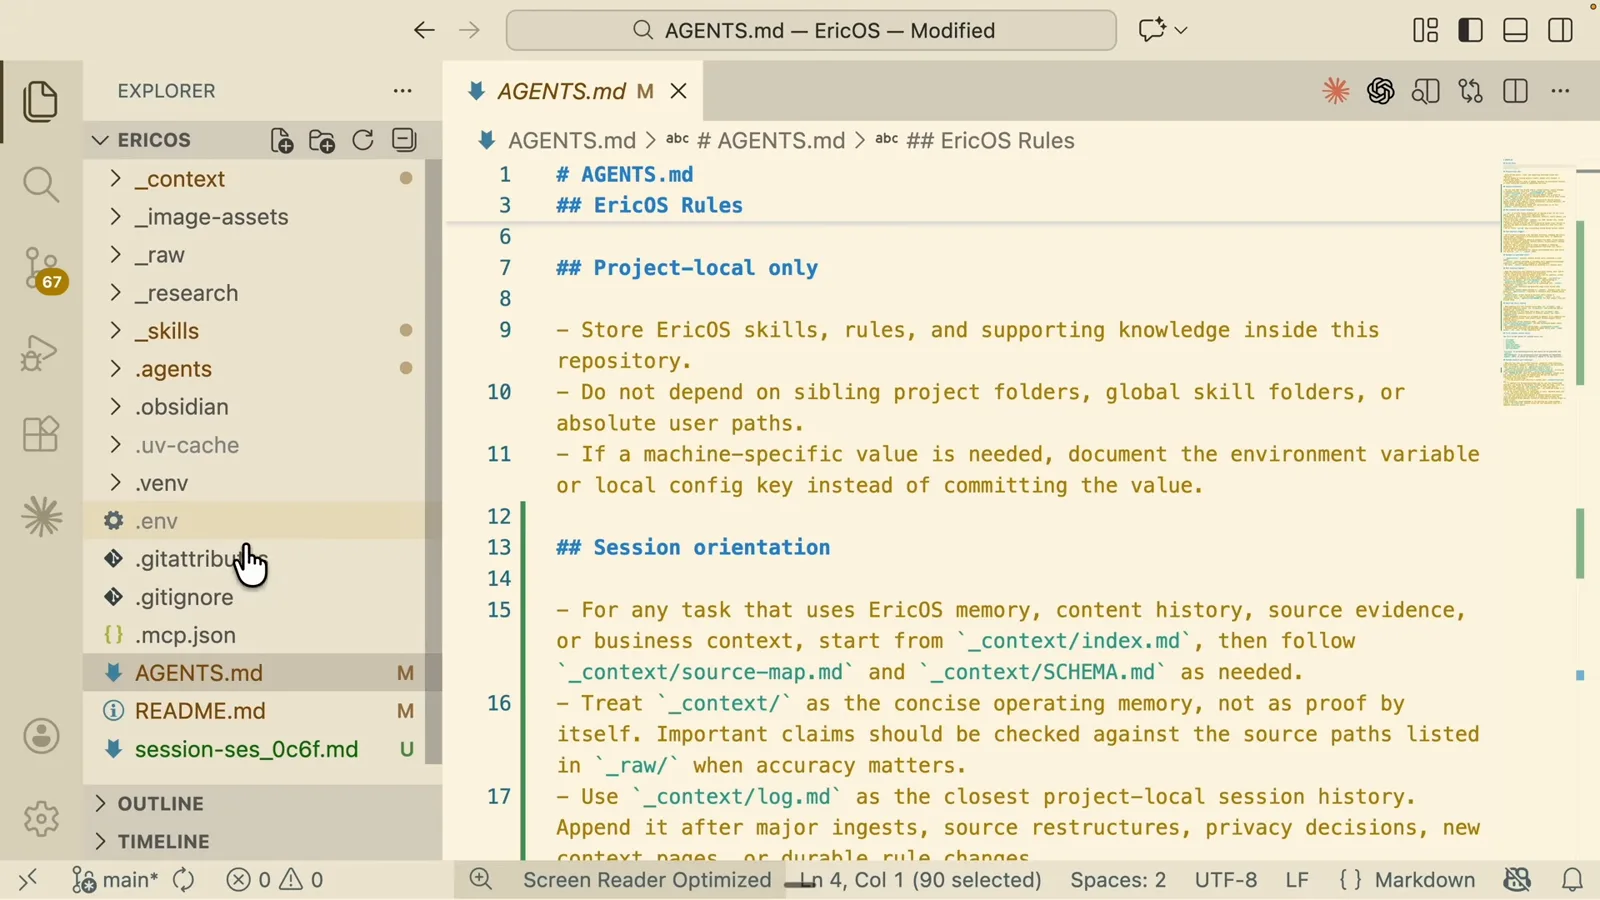
/init 生成的 AGENTS.md 保存着每个会话都会继承的规则。观看 17:30 处