
GitHub Copilot CLI チュートリアル:npm インストールからカスタム agents まで
GitHub Copilot CLI は任意のターミナルにエージェントを届けます。リポジトリを読み、diff を提案し、テストを実行し、内蔵 MCP サーバー経由で GitHub とやり取りします。この 15 ステップのウォークスルー(画像はすべて GitHub 公式デモ動画からのスクリーンショット)では、インストール、ログイン、フォルダの信頼、最初のプロンプト、instructions ファイル、skills、カスタム agents を解説します。
要約:4 行で分かる GitHub Copilot CLI
- インストールは 1 回:Node 22+ と有効な Copilot サブスクリプションがあれば npm install -g @github/copilot で、任意のリポジトリで copilot と入力するだけ。ログイン時に GitHub MCP サーバーも接続され、最初のプロンプトからリポジトリ・issue・PR にアクセスできます。
- Copilot は実行前に確認を取ります:起動時のフォルダ信頼、シェルコマンドごとの許可(今回のみ/常に許可)、ファイル編集前の 3 択 diff レビュー。Shift+Tab でプランモード切替、Ctrl+T でモデルの思考過程を表示。
- Markdown で規約を教える:/init が copilot-instructions.md を生成(常にコンテキスト内)、.instructions.md は applyTo の glob で対象ファイルを限定、gh.io/awesome-copilot に React や Playwright 向けの定番セットがあります。
- さらに拡張:.github/skills はスラッシュコマンドや自然言語で発火する再利用可能なタスク、.github/agents はアクセシビリティや SEO の専門エージェント、/delegate はセッション丸ごとをクラウドの coding agent に引き渡します。
The ultimate guide to the GitHub Copilot CLI - Full demo
デモ動画:GitHub Checkout · GitHub6:18
Using GitHub Copilot CLI — commands, shortcuts, permissions
製品情報:docs.github.comDocs
スクリーンショットはすべて GitHub 公式チャンネルのクリーンな録画からのスチルです。ステップ 1-8 は "Getting started with GitHub Copilot CLI"、instructions・skills・agents の各フレームは "How to use agents, skills, and instructions in Copilot CLI" から。/mcp、プレインストールされた GitHub MCP サーバー、issue 実装、ポート調査などの事実は上の "The ultimate guide to the GitHub Copilot CLI" に基づき、コマンド名・承認ラベル・ショートカットは docs.github.com と突き合わせて確認しました。
画像は GitHub 公式動画からの引用スクリーンショットで、それぞれタイムスタンプに深リンクしています。本文はこのサイトのオリジナルで、字幕の転載ではありません。
GitHub Copilot CLI を一歩ずつ
1 · インストールとログイン
- 1
npm で Copilot CLI をインストール
必要なのは Node.js 22 以上、npm、有効な GitHub Copilot サブスクリプション。任意のターミナルで npm install -g @github/copilot を実行します。これは GitHub が文書化している中心的なクロスプラットフォーム方式です。パッケージマネージャー派には Homebrew(brew install --cask copilot-cli)や Windows の winget もあります。
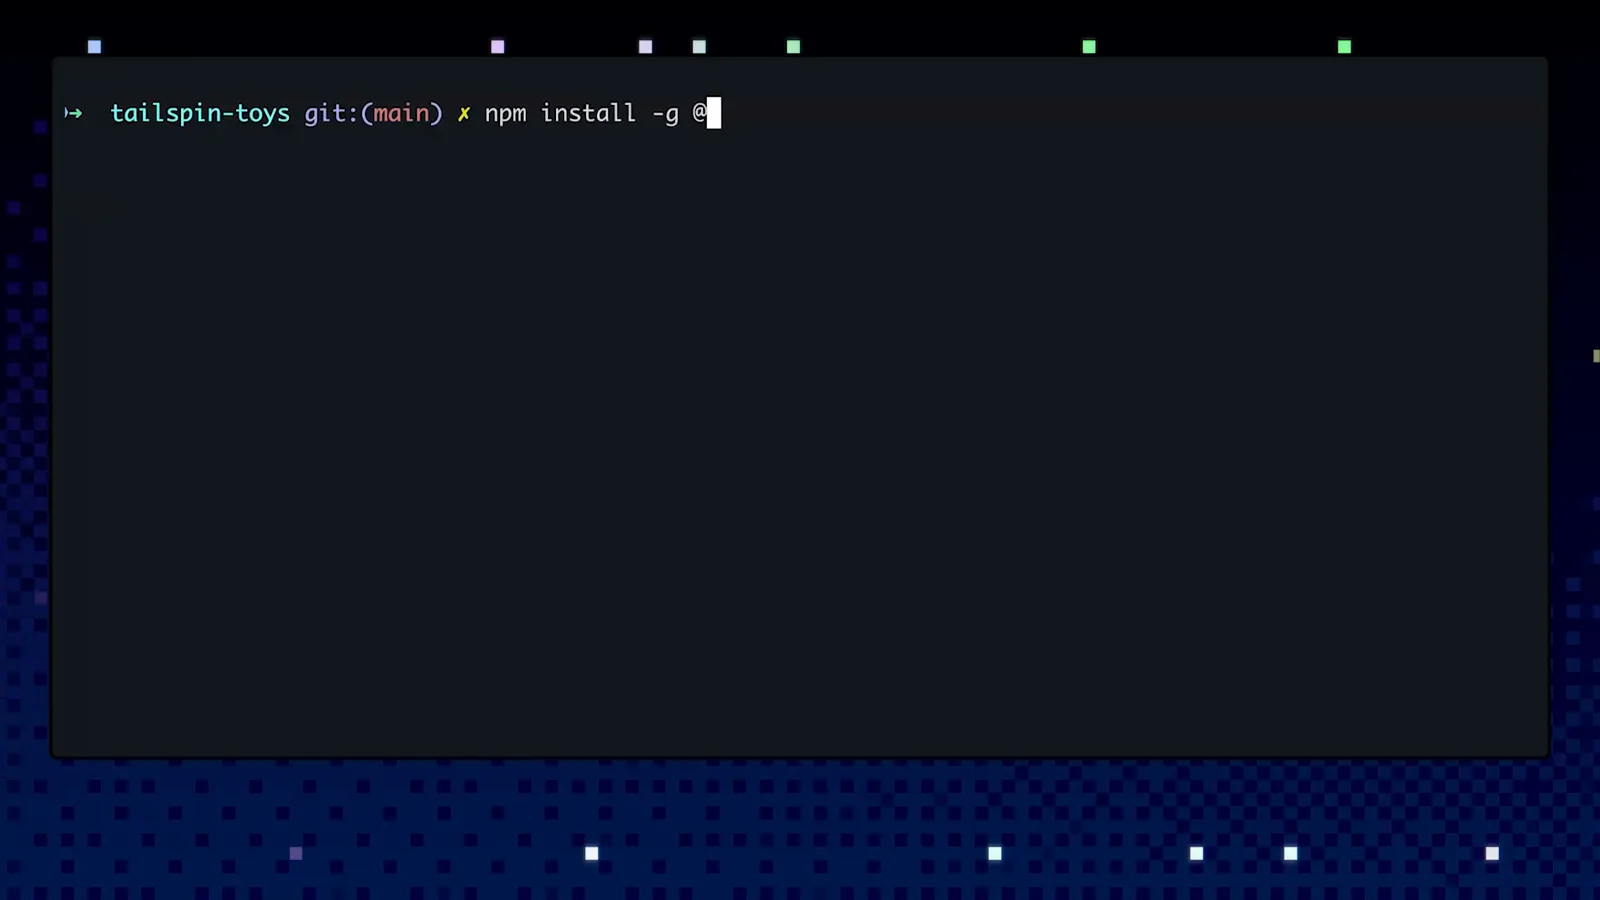
デモリポジトリのターミナルで npm install -g @github/copilot を入力したところ。動画の 1:24 を見る - 2
起動してアカウントを選ぶ
プロジェクトフォルダで copilot と入力して起動します。初回起動時にはログイン先のアカウントを聞かれます:GitHub.com、または *.ghe.com ドメインでデータレジデンシーを要求する GitHub Enterprise Cloud。自分の Copilot サブスクリプションがある方を選びましょう。
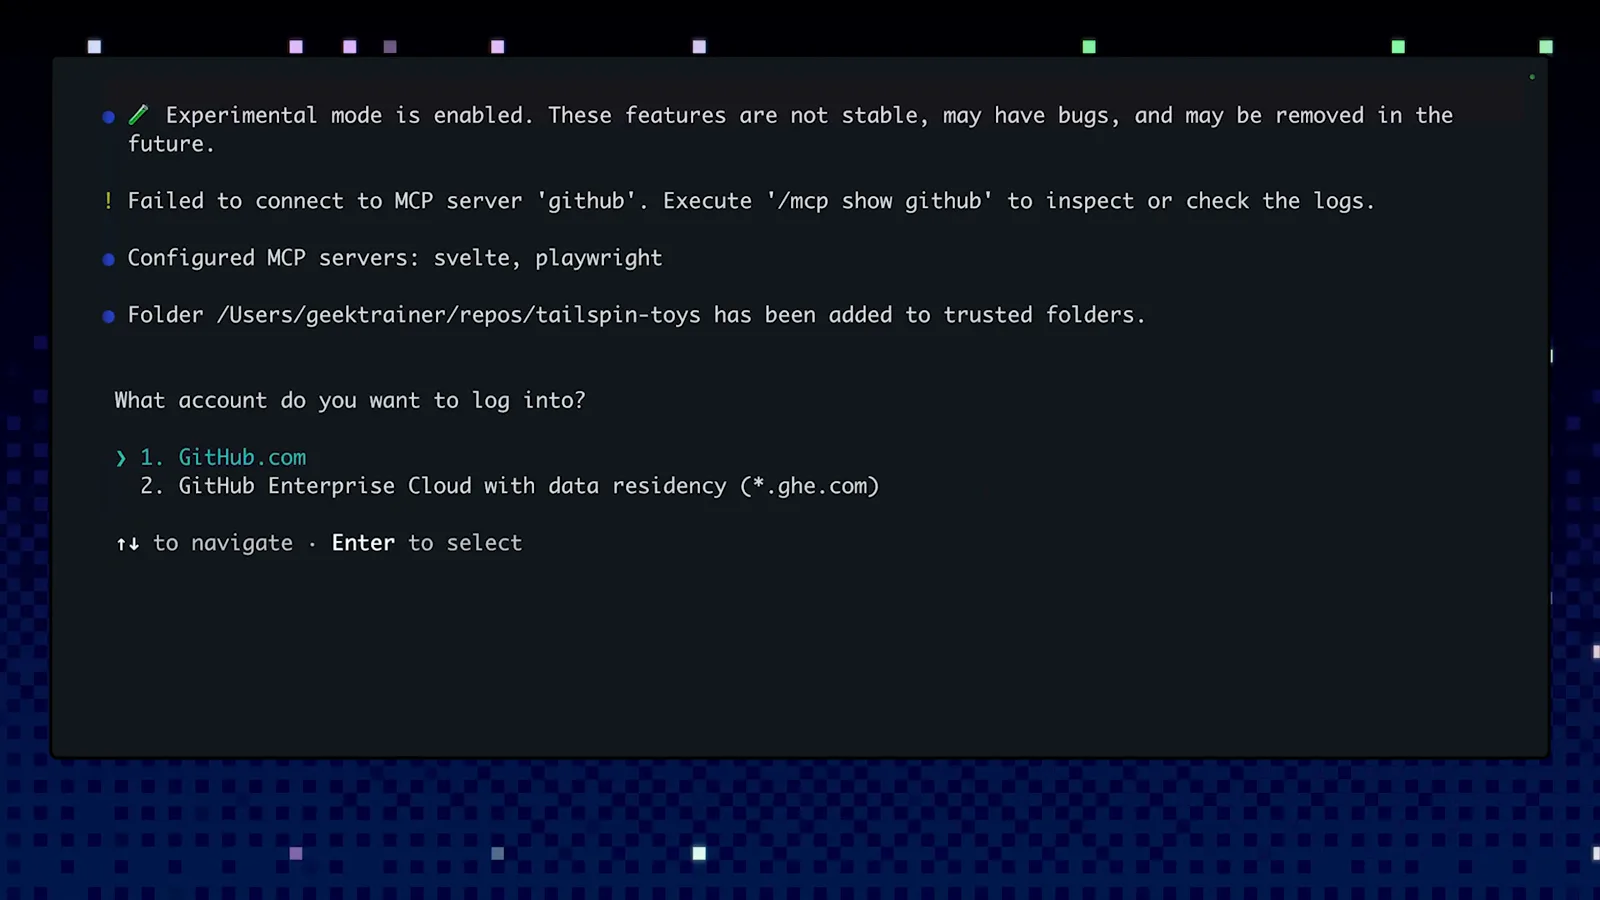
初回起動のアカウント選択画面。GitHub.com を選択した状態。動画の 2:00 を見る - 3
ブラウザでデバイスを承認
Copilot CLI は GitHub のデバイスフローでログインを完了します。ブラウザが開き、CLI を承認すると、GitHub が "Congratulations, you're all set! Your device is now connected." と表示します。ログインは 2 つの役割を果たします。クライアントを Copilot アカウントに紐付けることと、GitHub MCP サーバーを接続することです。後者のおかげで、後からエージェントが issue や PR を読めます。
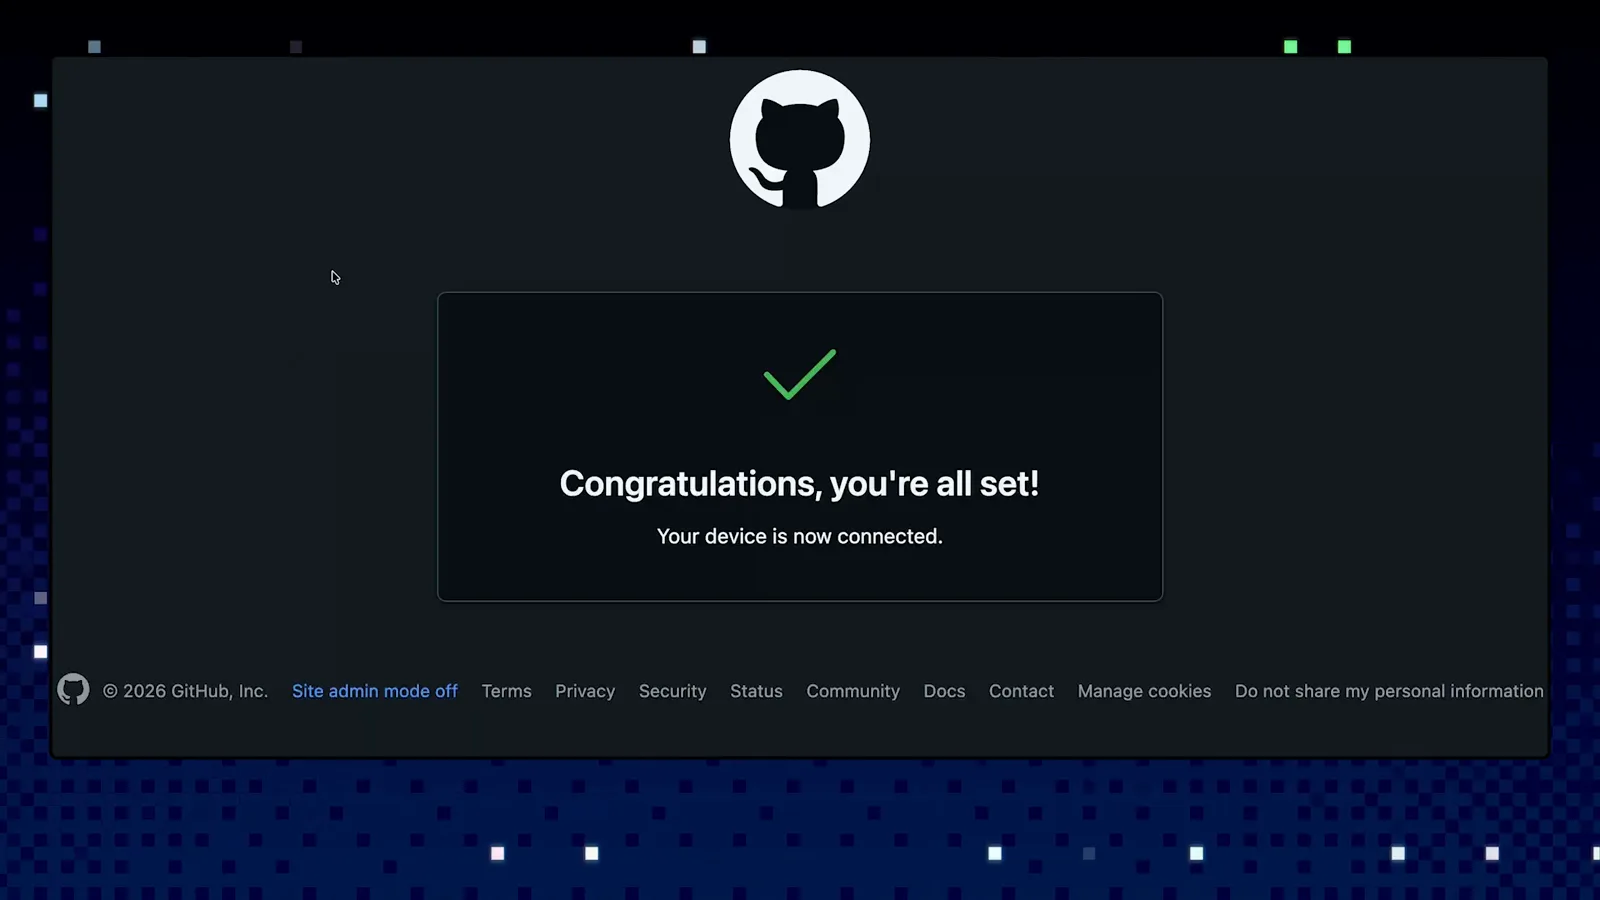
Copilot CLI を承認した後に表示される GitHub のデバイスフロー確認画面。動画の 2:06 を見る - 4
プロジェクトフォルダを信頼する
読み書きの前に、Copilot は "Do you trust the files in this folder?" と尋ねます。信頼できないファイルがエージェントに危険なコマンドを実行させる恐れがあるためです。このセッションだけなら Yes、常連のリポジトリなら "Yes, and remember this folder for future sessions" を選べば二度と承認し直さずに済みます。フォルダの追加は後から /add-dir で。
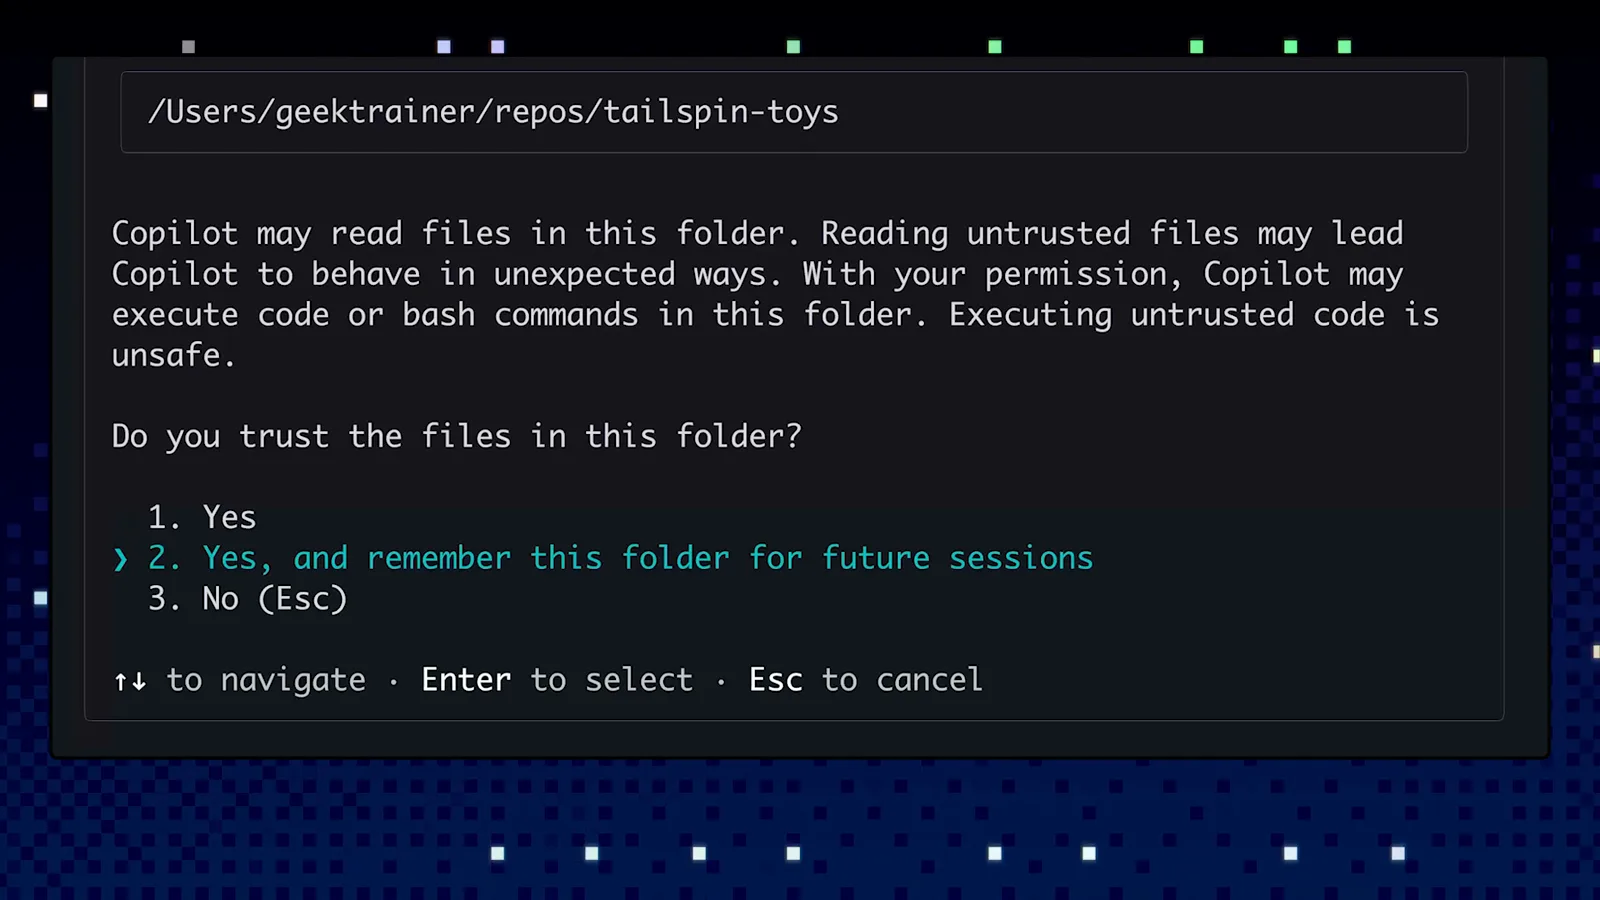
フォルダ信頼の確認。「今後のセッションでも記憶」オプションをハイライト。動画の 2:23 を見る
2 · エージェントの実力を確かめる最初のプロンプト
- 5
ログイン完了——まず概要を聞く
"Signed in successfully" と GitHub MCP Server: Connected を確認したら、定番の最初のプロンプトを送りましょう:"Give me an overview of this project." Copilot はディレクトリを調べ、重要なファイルを開き、結果を報告してくれます。デモでは src ツリーを地図のように示し、Quick Start コマンドも列挙。プロンプト行にはアクティブなモデルが表示され(このセッションは claude-sonnet-4.5)、/model で切り替えられます。
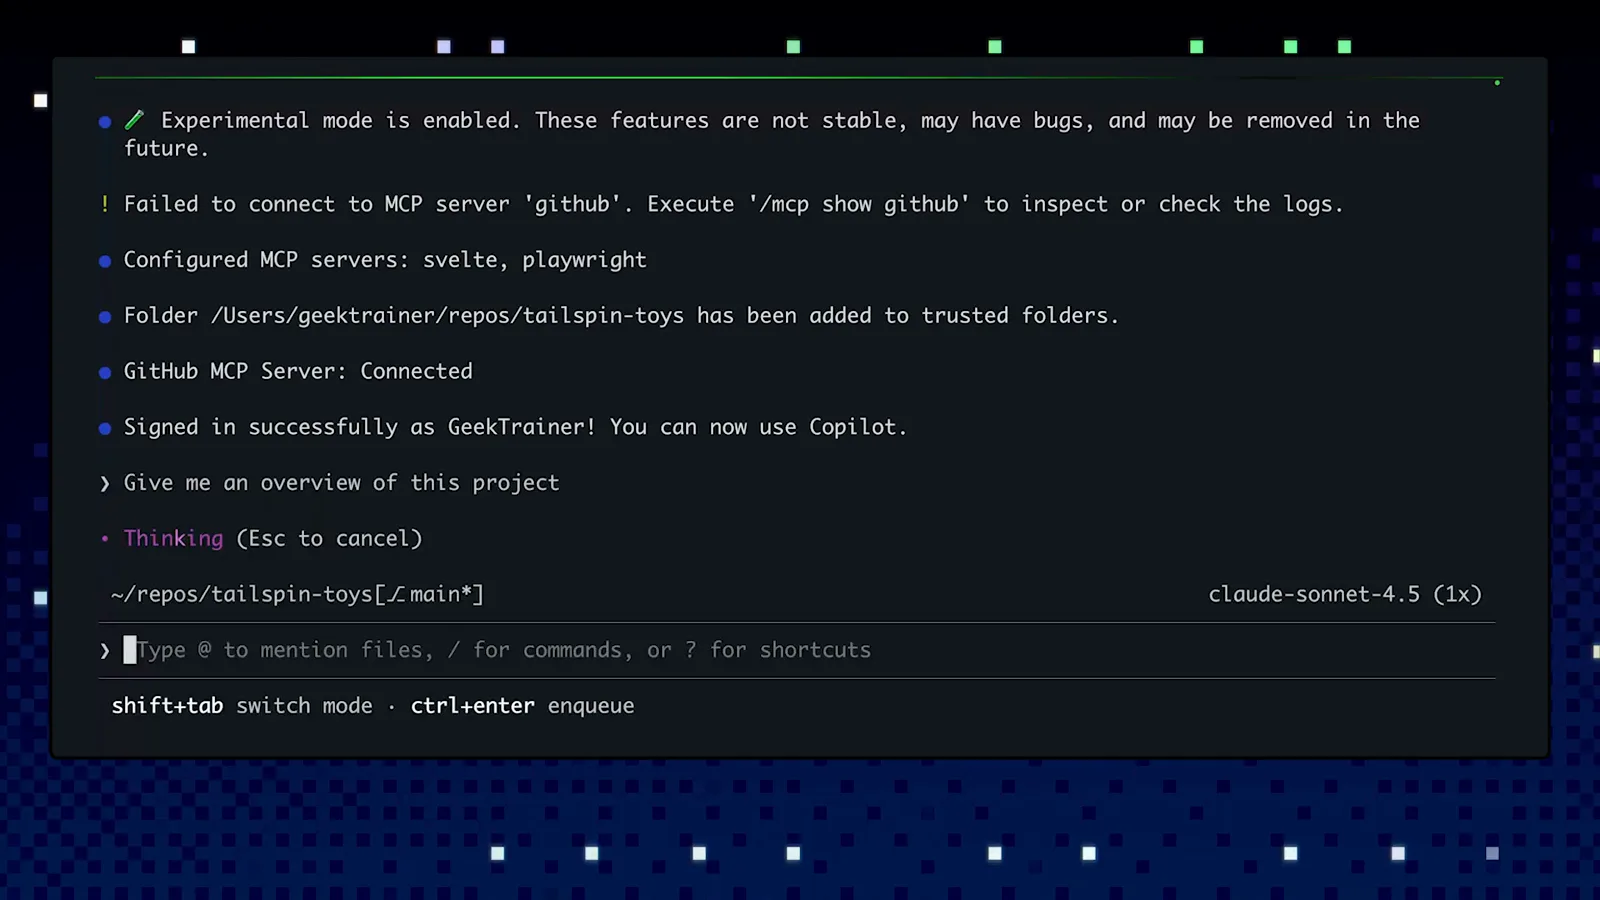
ログイン済みで GitHub MCP サーバー接続済み、最初のプロンプト送信後。動画の 2:50 を見る - 6
本物の機能を頼む
エージェントの価値は雑談ではなくタスクで発揮されます。デモでは概観に続いて "Let's add a new endpoint to return all categories" と依頼。Copilot はプロジェクトを読み直し、既存のドキュメントやサンプルを見つけ、そこから汲んだパターンに沿って変更を計画します。Shift+Tab でプランと編集モードを行き来できます。
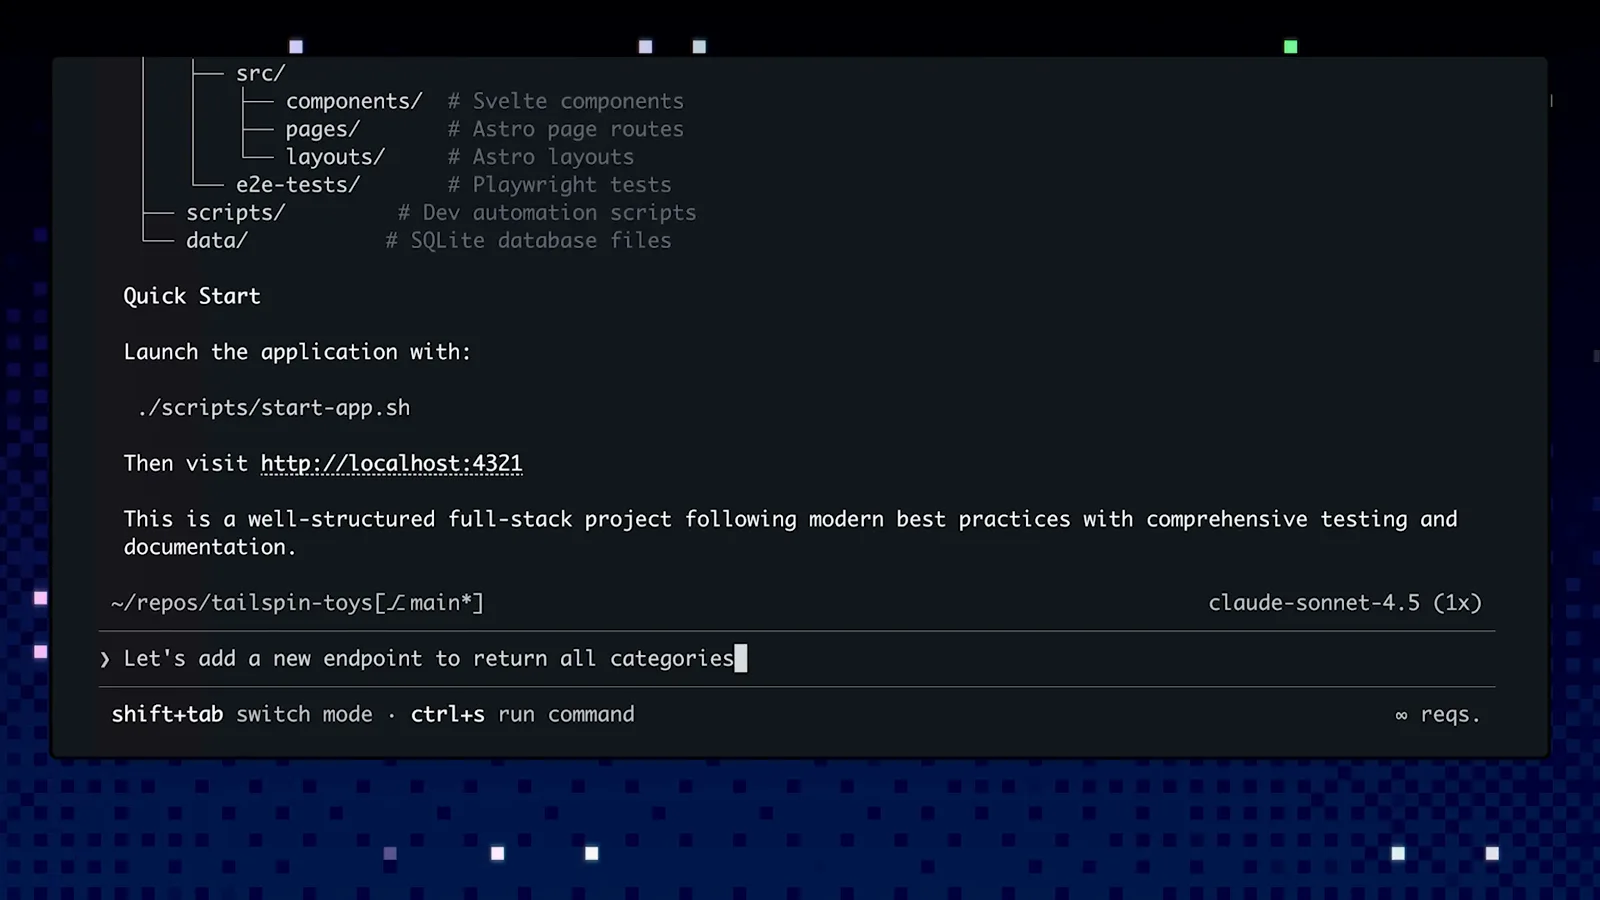
概観の回答の下に、エンドポイント追加の依頼が入力された状態。動画の 3:02 を見る - 7
編集前には必ず diff を確認
Copilot はまず探索します——"List directory" や "Exploring API structure" が流れるのを見てから——変更を提案します。ファイル編集は必ず承認で止まります:Yes、"Yes, and approve all file operations for the rest of the running session"、または "No, and tell Copilot what to do differently (Esc)"。デモの diff は get_publishers_list に docstring を追加するもので、まさにプロジェクトの instructions が求めていた内容です。
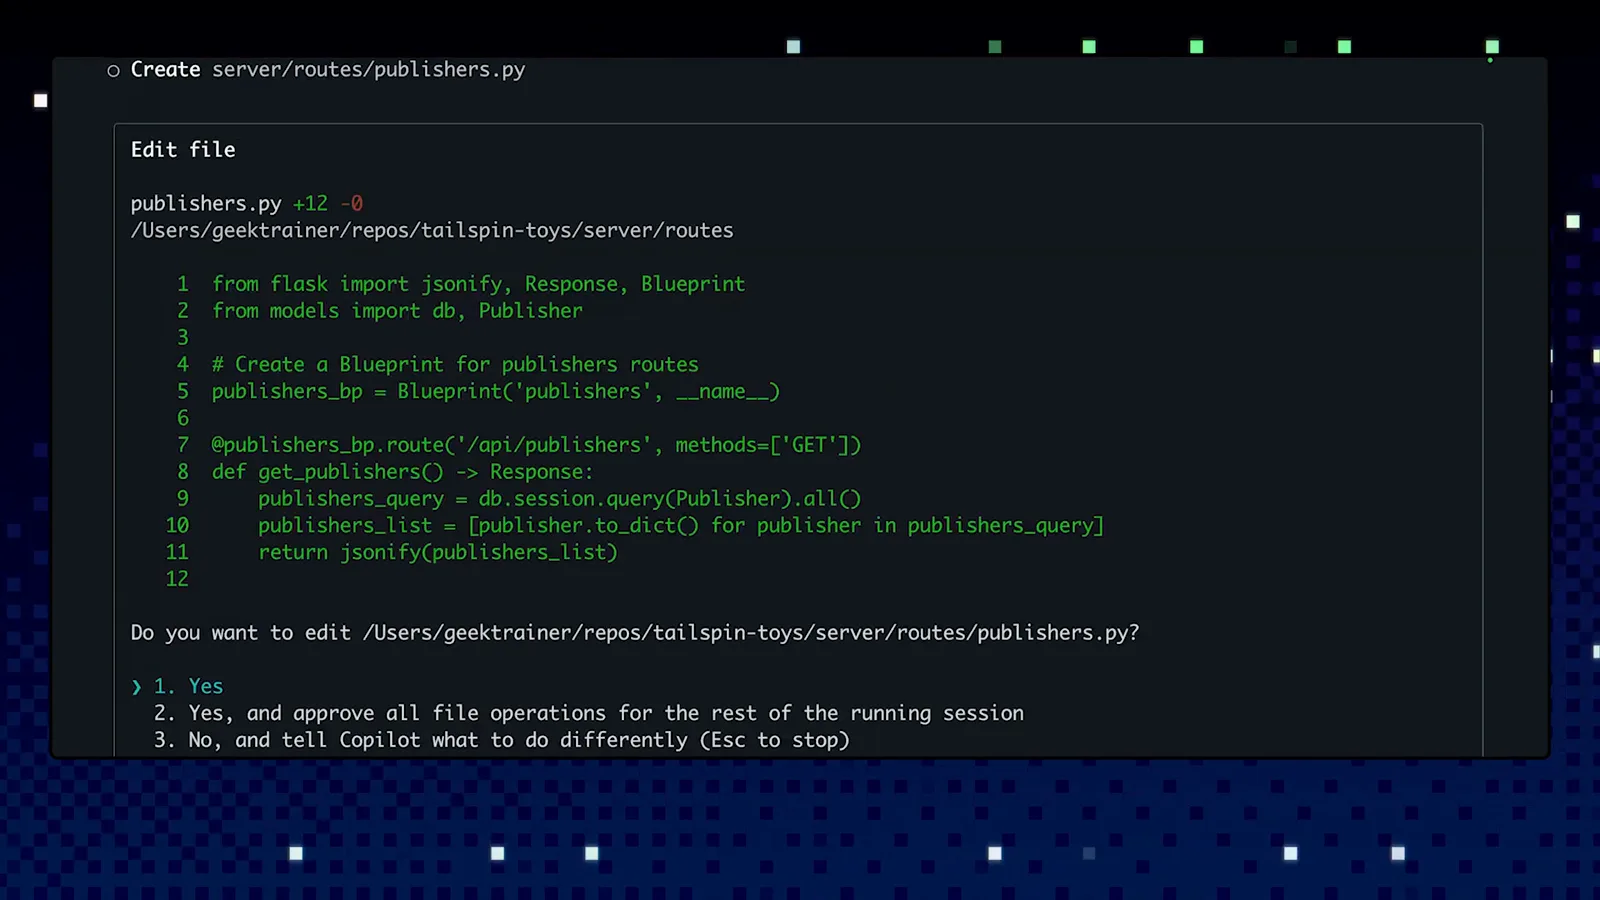
publishers.py の diff と、その下に 3 択の編集承認。動画の 1:38 を見る - 8
テストと自己修復はお任せ
承認すれば Copilot がエンドポイントを書き上げ、自ら検証します。デモでは全 59 テストの合格、両ルートへの実アクセス確認、API レスポンス例を報告し、実装がリポジトリの Flask endpoint guidelines に従っていると注記します。これがエージェントの得意なループです:構築し、テストを走らせ、壊れていれば二度言われずに直す。
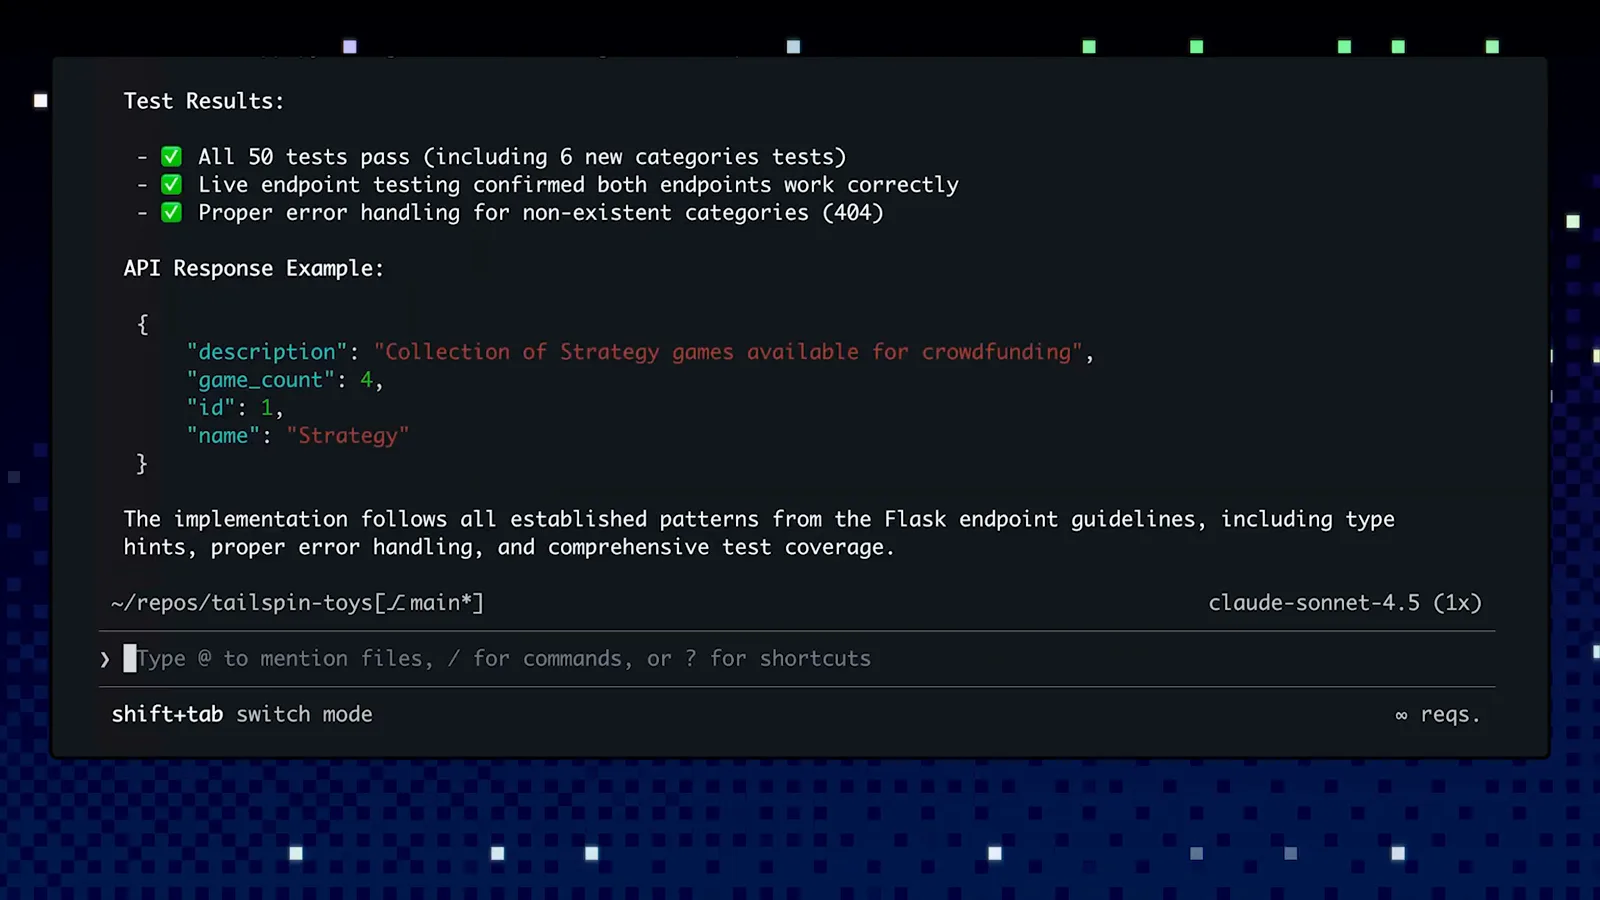
テスト結果と API レスポンス例、ガイドライン準拠の注記。動画の 3:16 を見る
3 · instructions ファイルで規約を教える
- 9
まず /init を実行
ウェルカムバナー自身が教えてくれます:"No copilot instructions found. Run /init to generate a copilot-instructions.md file for this project." このファイルはプロジェクト単位で常にコンテキストに入り、GitHub チームは全リポジトリの table stakes と呼びます。/init が生成するのは白紙ではなく、磨き込める起点です。同じバナーにはモデルを替える /model と、セッションをクラウドの coding agent に引き渡す /delegate のヒントもあります。
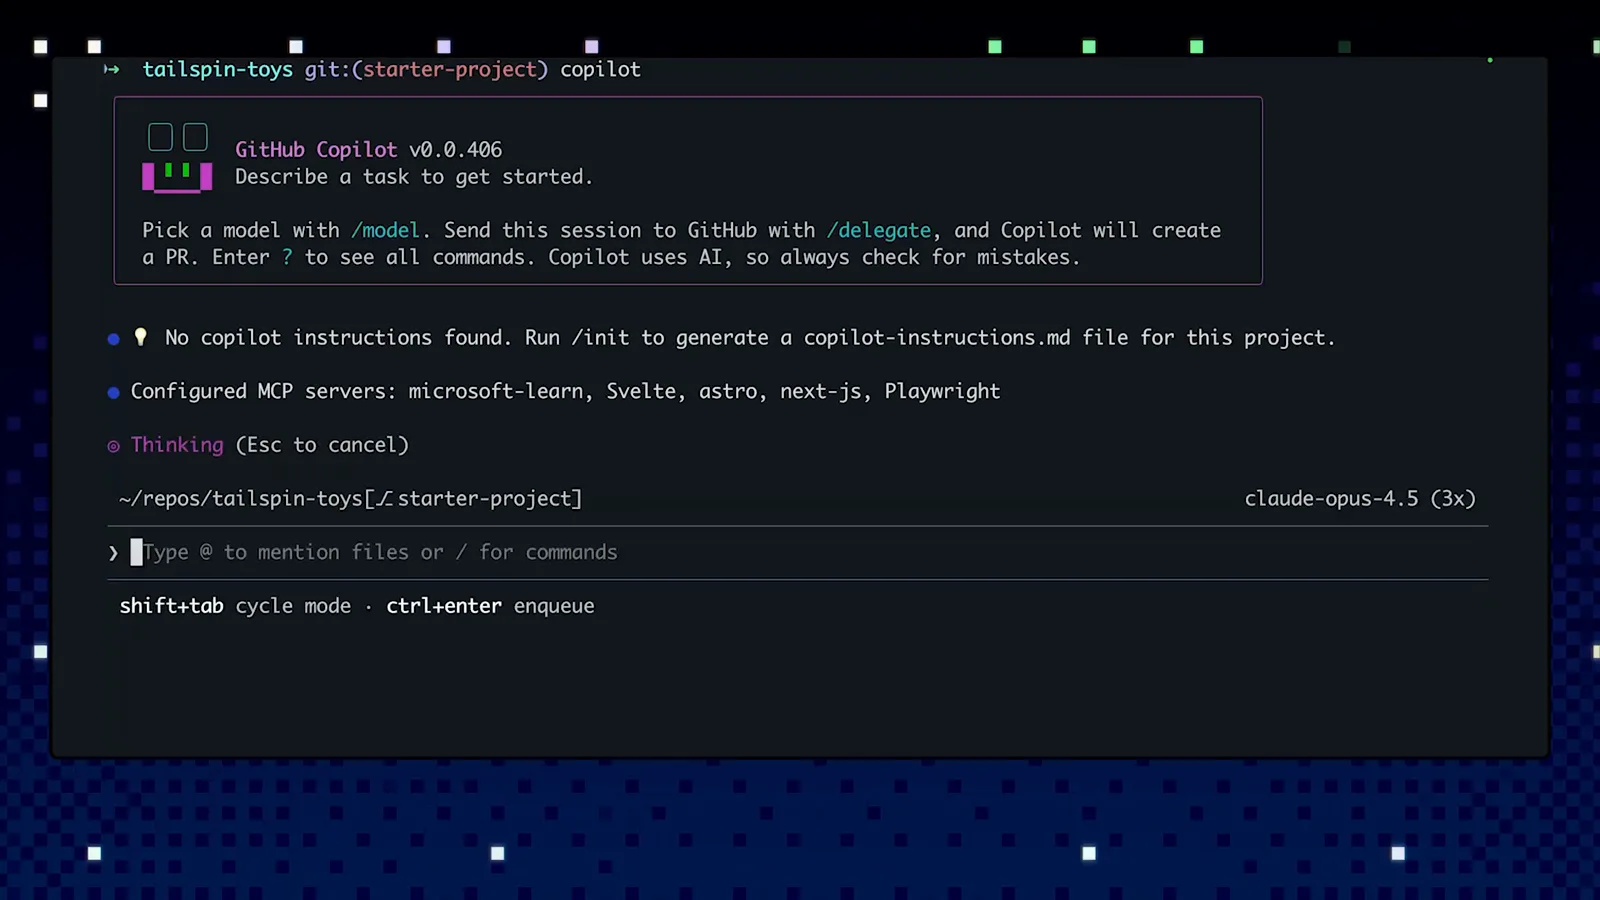
ウェルカムバナー:/model と /delegate のヒント、/init の推奨。動画の 1:30 を見る - 10
copilot-instructions.md を要点だけで埋める
生成されたファイルにはすでにプロジェクトの輪郭があります。デモでは "Tailspin Toys is a game crowdfunding platform with a Flask/SQLAlchemy backend and Astro/Svelte frontend" という概要と、Build, Test, and Run Commands を押さえています。書くのは永続的な事実だけ:何を作っているか、スタック、コマンド。同じ依頼でもコードは変わります。デモで docstrings のルールを追加すると、再生成された関数には実際に docstring が付きました。
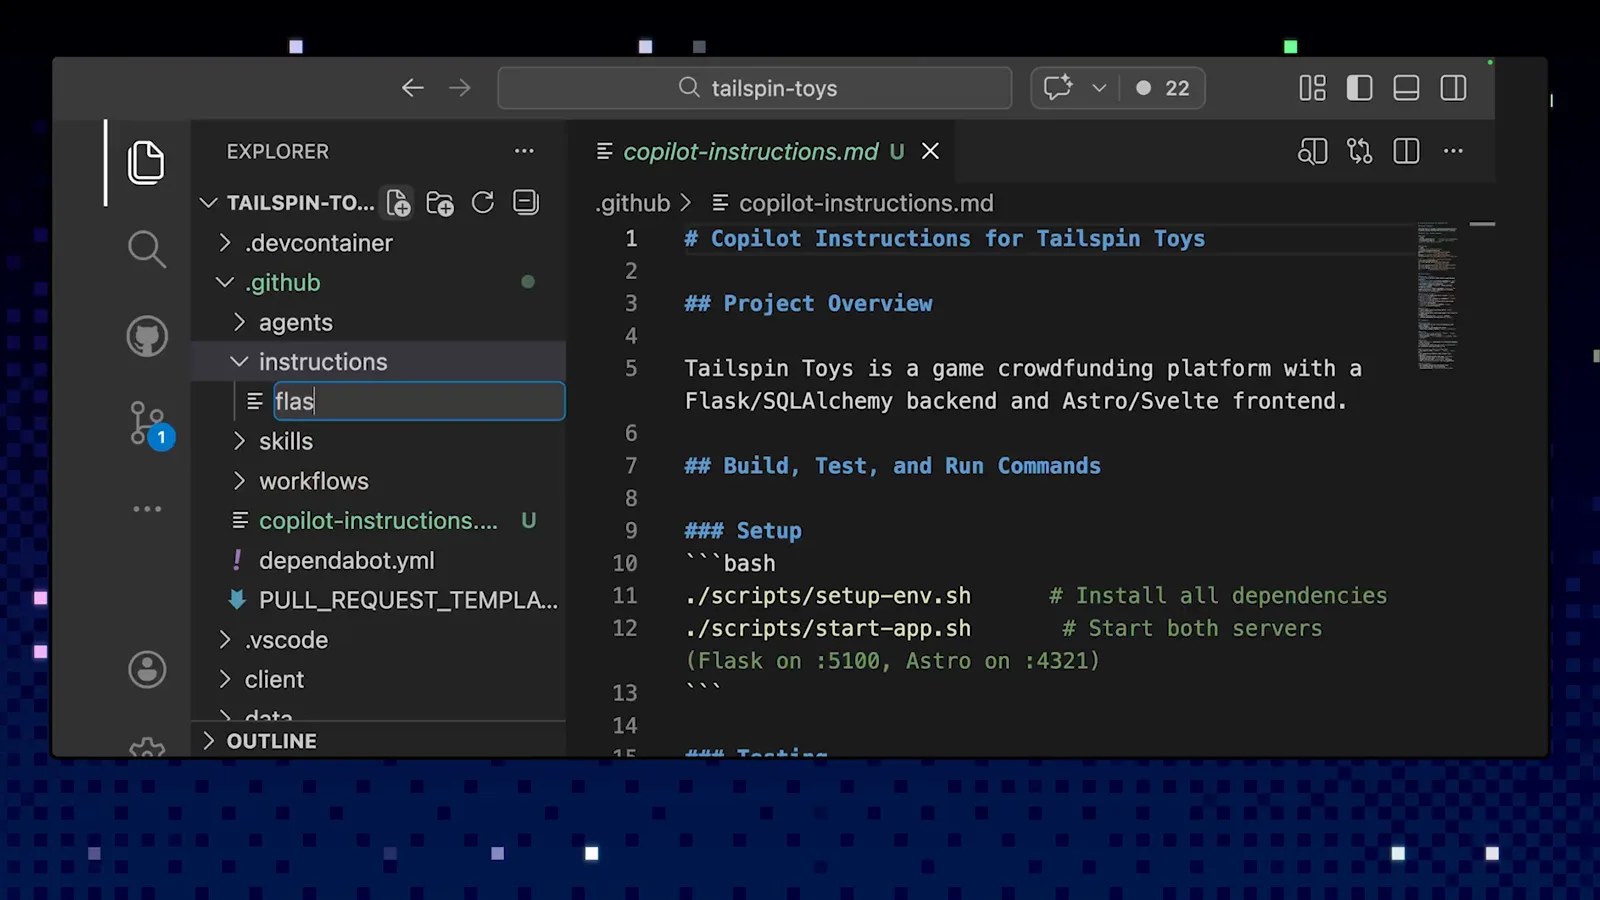
生成された copilot-instructions.md:プロジェクト概要と実行コマンド。動画の 2:30 を見る - 11
.instructions.md でルールの適用範囲を絞る
一部のファイルにだけ当てはまるルールは分離します。.github/instructions の .instructions.md は front matter に applyTo の glob を書きます。デモの astro.instructions.md は '**/*.astro' を指定し、Astro のルールが Astro ファイルにだけ読み込まれます。gh.io/awesome-copilot には React コンポーネントや Playwright テストなどをカバーする既成セットが集まっています。
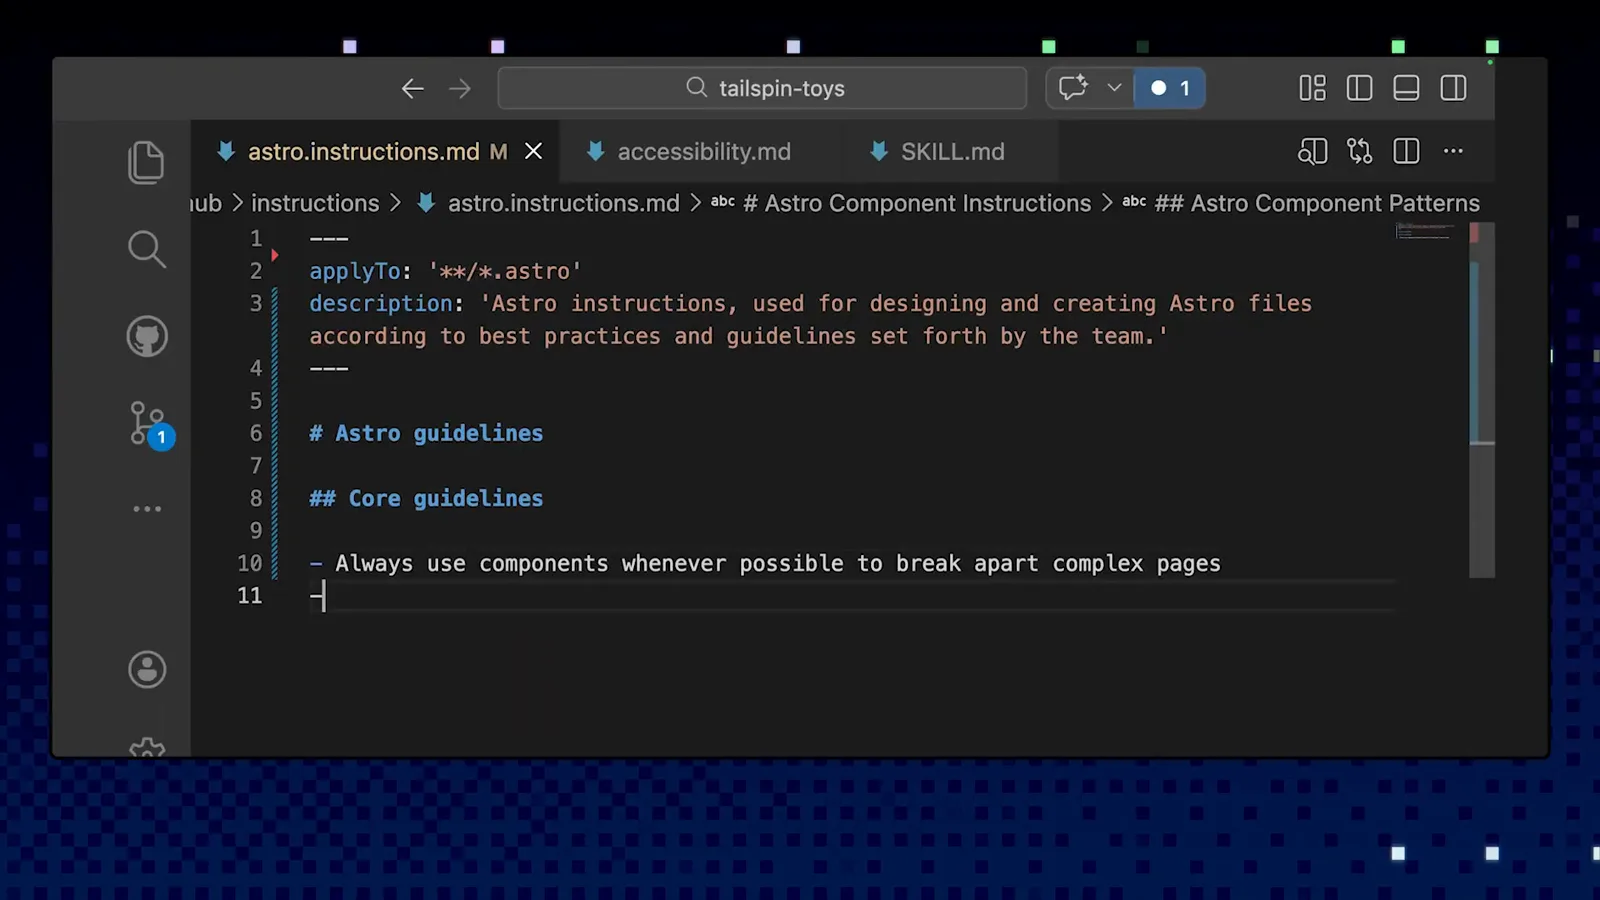
astro.instructions.md の applyTo が **/*.astro を指定。動画の 0:36 を見る - 12
Markdown 三種セットを理解する
拡張はすべて .github の Markdown で行います。copilot-instructions.md が常時コンテキスト、skills がタスクの型番、custom agents が専門ワーカーです。デモリポジトリではそれら全部が同時に開かれています。instructions ファイル 2 枚、アクセシビリティエージェント、SKILL.md。三つは役割が分担されています:instructions はコードの書き方、skills はタスクの進め方、agents が仕事全体を受け持ちます。
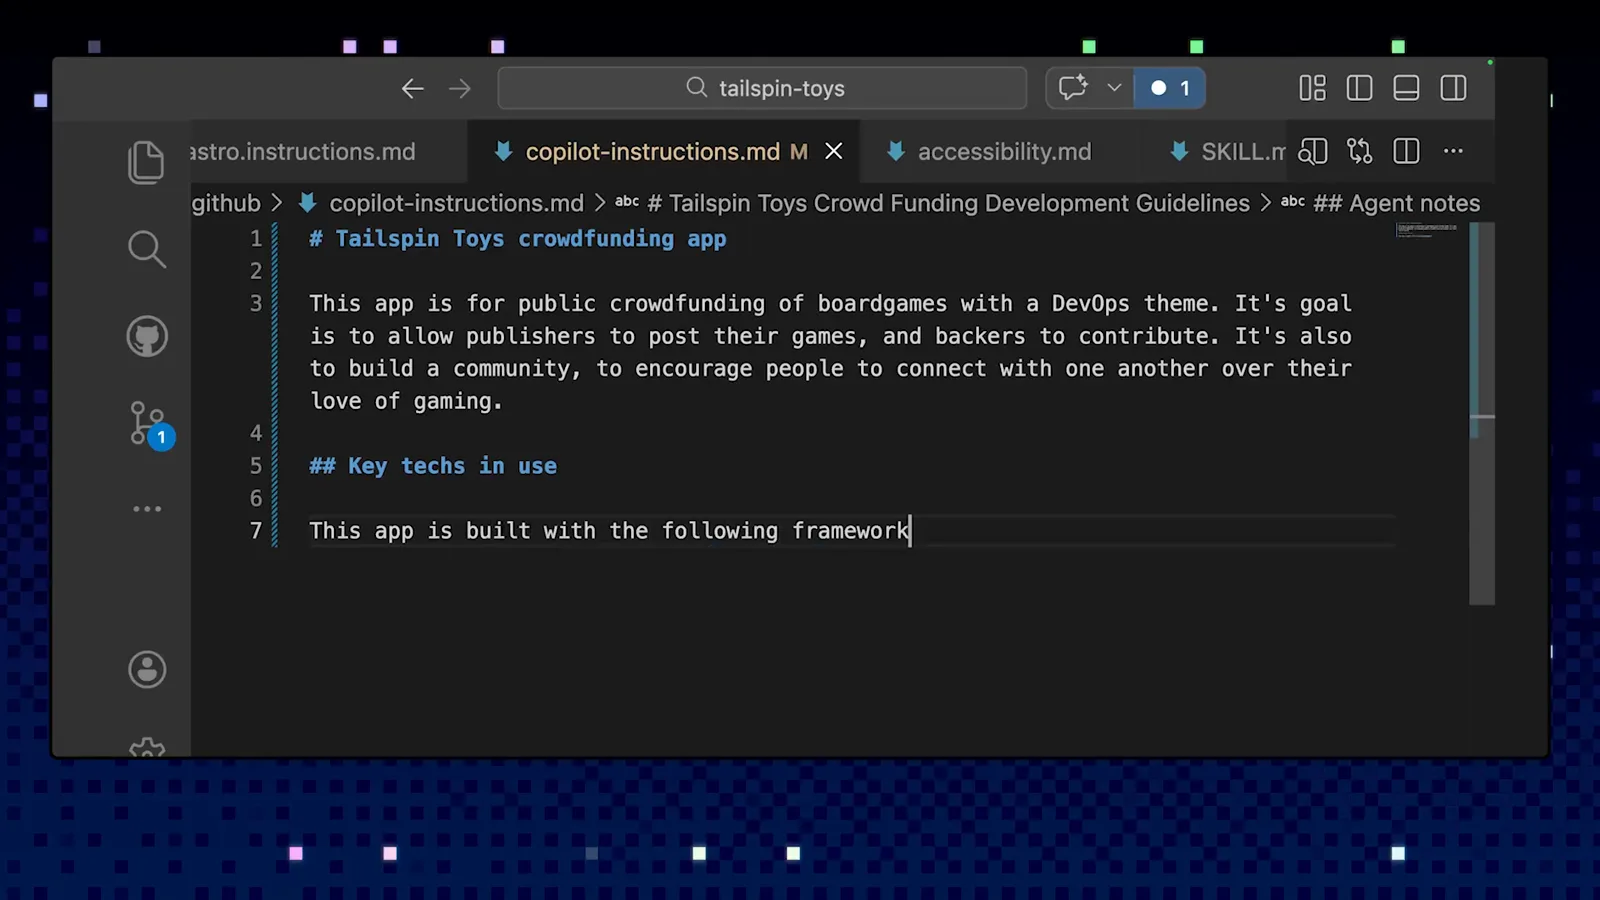
VS Code で並べて開かれた instructions・agent・skill の各ファイル。動画の 1:15 を見る
4 · skills とカスタム agents
- 13
skill をコマンドのように呼ぶ
skills は .github/skills に Markdown と任意のスクリプトで置きます。スラッシュコマンドメニューにはビルトインと並んで表示され、/ と入力すれば /make-contribution とその説明が出てきます。デモの contribution skill は、リポジトリの貢献ガイドと issue・PR テンプレートを探してそれに従うよう Copilot に指示します。
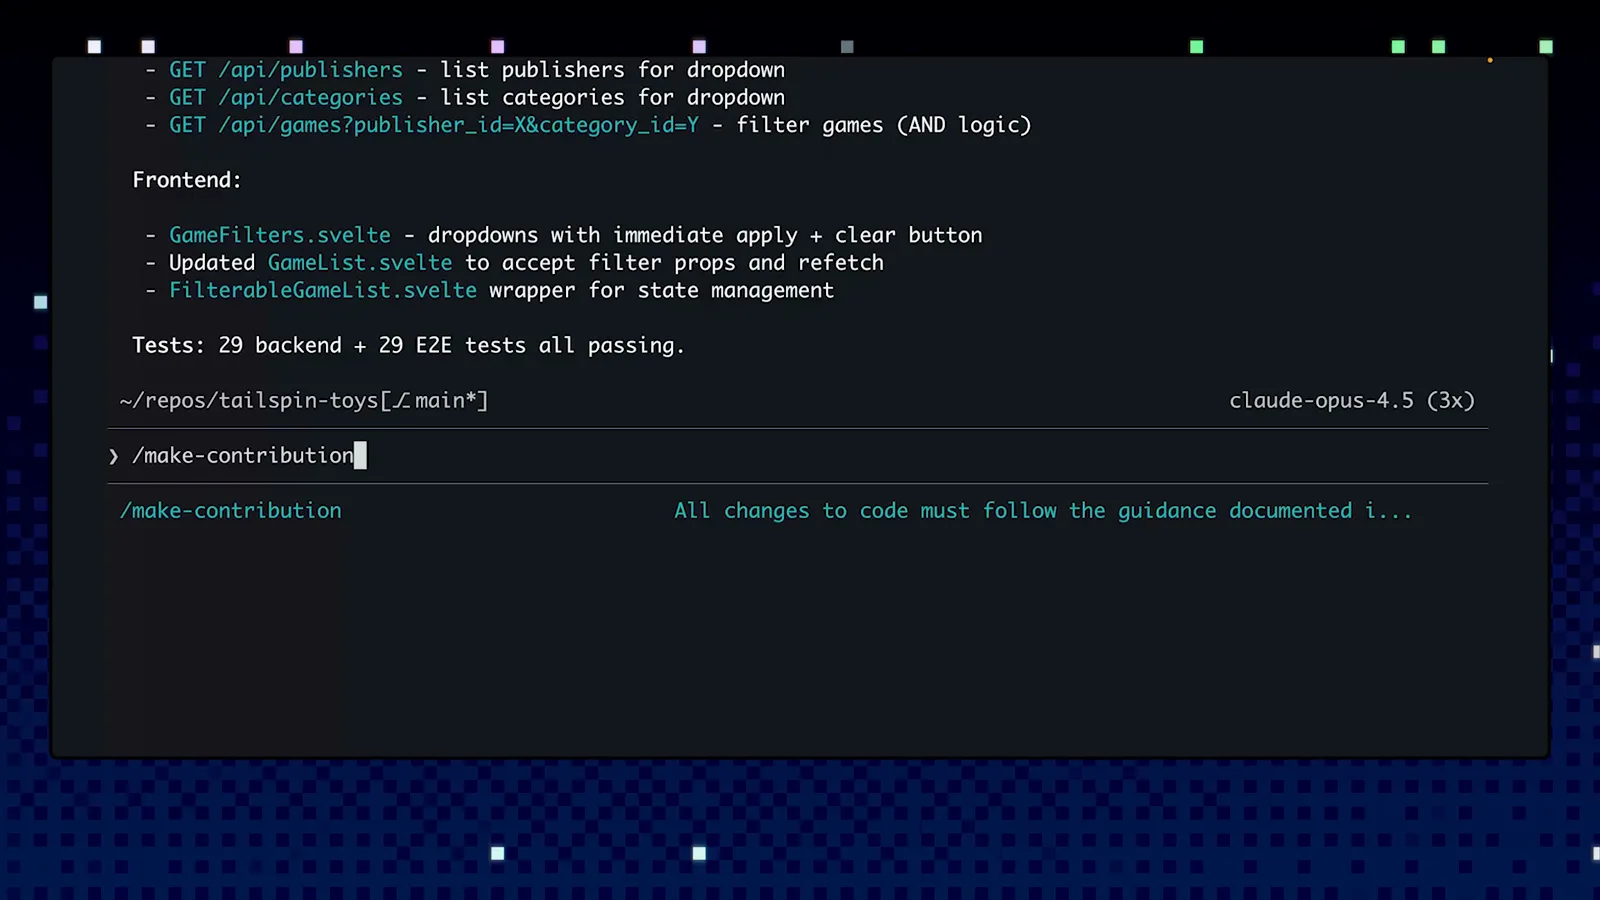
スラッシュメニューに表示された /make-contribution とその説明。動画の 3:50 を見る - 14
自然言語で発火させることもできる
コマンドを暗記する必要はありません。"let's create a pull request" と頼めば、CLI は skill(make-contribution) が自働で起動したと表示します。skill はブランチを切り、コミットを論理的にまとめ、リポジトリ自身のテンプレートで PR を開きます。この二重トリガー——スラッシュコマンドと自然言語——が skills を実用的なものにしています。
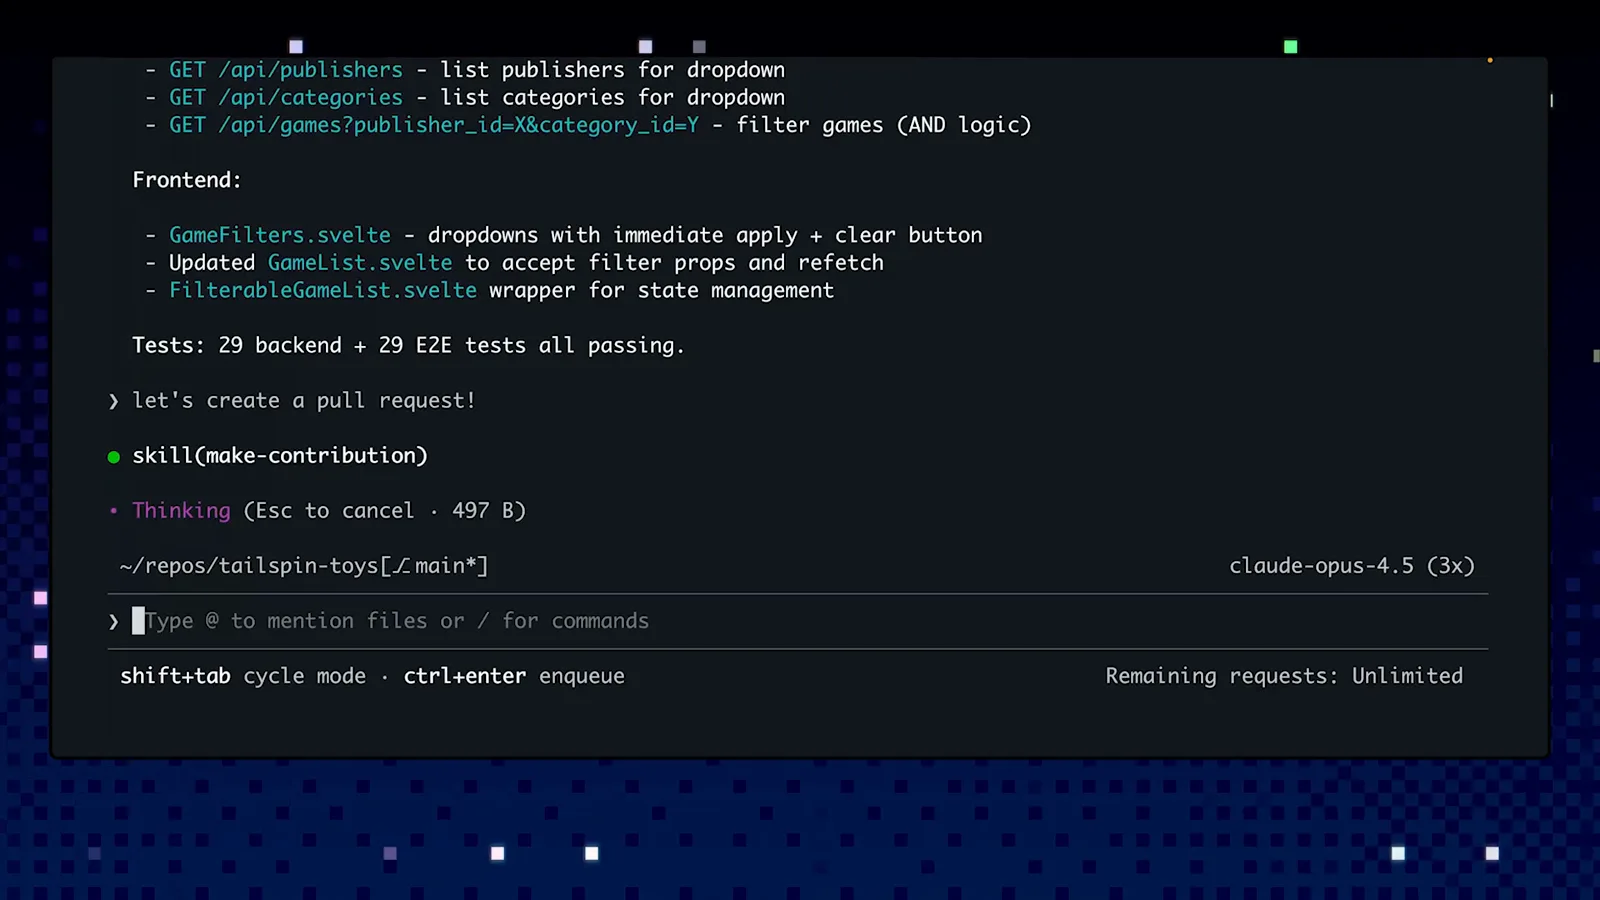
PR 作成の依頼後に自動起動した skill(make-contribution)。動画の 4:06 を見る - 15
大きな仕事は custom agent に
プロジェクト全体に及ぶ仕事は /agent で Select Agent リストを開きます:Default、Accessibility agent、Code review、Compliance、Documentation Specialist、react 19 upgrade、Search engine optimisation (SEO)、さらに Create new agent。agents は .github/agents に置く Markdown ファイルで、それぞれ専用のコンテキストを持ちます。デモではアクセシビリティエージェントを選び、最も効果の大きい改善のレビューを依頼し、その適用まで任せます。
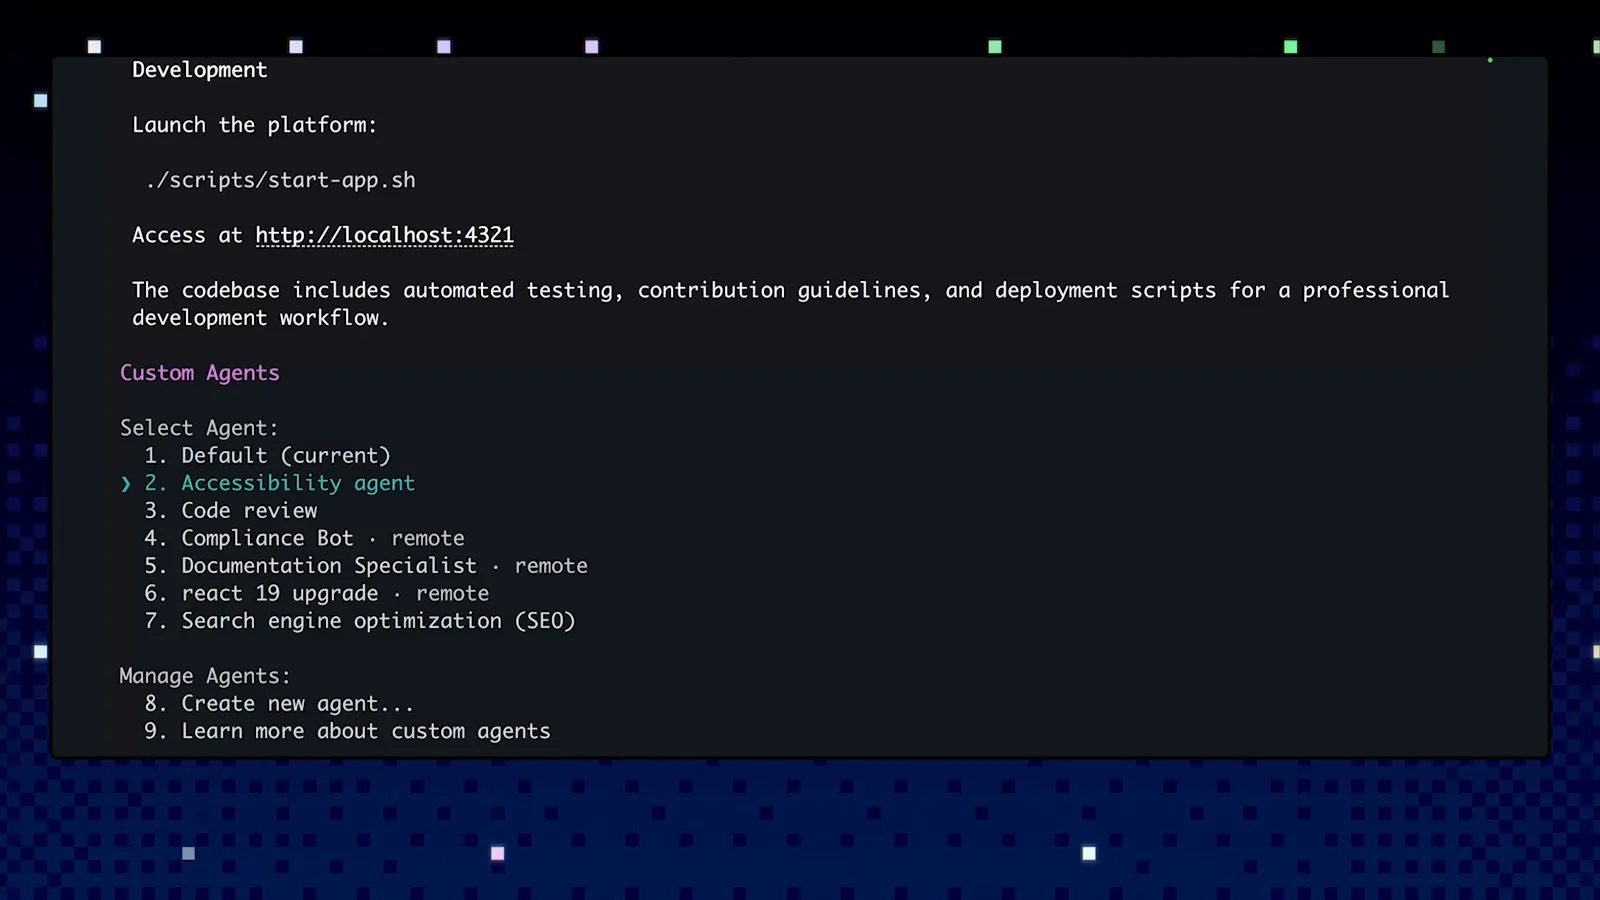
Select Agent メニュー。アクセシビリティエージェントをハイライト。動画の 5:00 を見る