
GitHub Copilot CLI 튜토리얼: npm 설치부터 커스텀 agents까지
GitHub Copilot CLI는 어떤 터미널에도 에이전트를 가져옵니다. 저장소를 읽고, diff를 제안하고, 테스트를 실행하고, 내장 MCP 서버로 GitHub와 대화합니다. 이 15단계 워크스루(모든 이미지는 GitHub 공식 데모 영상에서 발췌한 스크린샷)는 설치, 로그인, 폴더 신뢰, 첫 프롬프트, instructions 파일, skills, 커스텀 agents를 다룹니다.
요약: 네 줄로 보는 GitHub Copilot CLI
- 설치는 한 번: Node 22+와 유효한 Copilot 구독만 있으면 npm install -g @github/copilot으로 끝나고, 아무 저장소에서 copilot을 입력하면 됩니다. 로그인 시 GitHub MCP 서버도 연결되어 첫 프롬프트부터 저장소, 이슈, PR에 접근할 수 있습니다.
- Copilot은 실행 전에 허락을 구합니다: 시작 시 폴더 신뢰 확인, 셸 명령별 허용(이번만/항상 허용), 파일 편집 전 3지선다 diff 리뷰. Shift+Tab은 계획 모드 전환, Ctrl+T는 모델 추론 과정 표시입니다.
- Markdown으로 규칙을 가르칩니다: /init이 copilot-instructions.md를 생성(항상 컨텍스트에 유지), .instructions.md는 applyTo glob으로 대상 파일을 한정, gh.io/awesome-copilot에 React·Playwright 등의 기성 세트가 있습니다.
- 그다음 확장: .github/skills는 슬래시 명령이나 자연어로 발동하는 재사용 가능한 작업, .github/agents는 접근성·SEO 전문 에이전트, /delegate는 세션 전체를 클라우드 coding agent에 넘깁니다.
The ultimate guide to the GitHub Copilot CLI - Full demo
데모 영상:GitHub Checkout · GitHub6:18
Using GitHub Copilot CLI — commands, shortcuts, permissions
제품 사실:docs.github.comDocs
모든 스크린샷은 GitHub 공식 채널의 깨끗한 녹화에서 발췌했습니다. 1-8단계는 "Getting started with GitHub Copilot CLI", instructions·skills·agents 프레임은 "How to use agents, skills, and instructions in Copilot CLI"에서 왔습니다. /mcp, 사전 설치된 GitHub MCP 서버, 이슈 구현, 포트 점검 등의 사실은 위의 "The ultimate guide to the GitHub Copilot CLI"에서, 명령 이름·승인 라벨·단축키는 docs.github.com과 교차 확인했습니다.
이미지는 GitHub 공식 영상에서 출처를 밝힌 스크린샷이며 각각 타임스탬프로 연결됩니다. 본문은 이 사이트의 오리지널 글이며 자막이 아닙니다.
GitHub Copilot CLI 한 걸음씩
1 · 설치와 로그인
- 1
npm으로 Copilot CLI 설치
필요한 것: Node.js 22 이상, npm, 유효한 GitHub Copilot 구독. 아무 터미널에서 npm install -g @github/copilot을 실행하세요. GitHub 문서가 핵심 크로스플랫폼 방식으로 안내하는 방법입니다. 패키지 매니저를 선호한다면 Homebrew(brew install --cask copilot-cli)나 Windows winget도 있습니다.
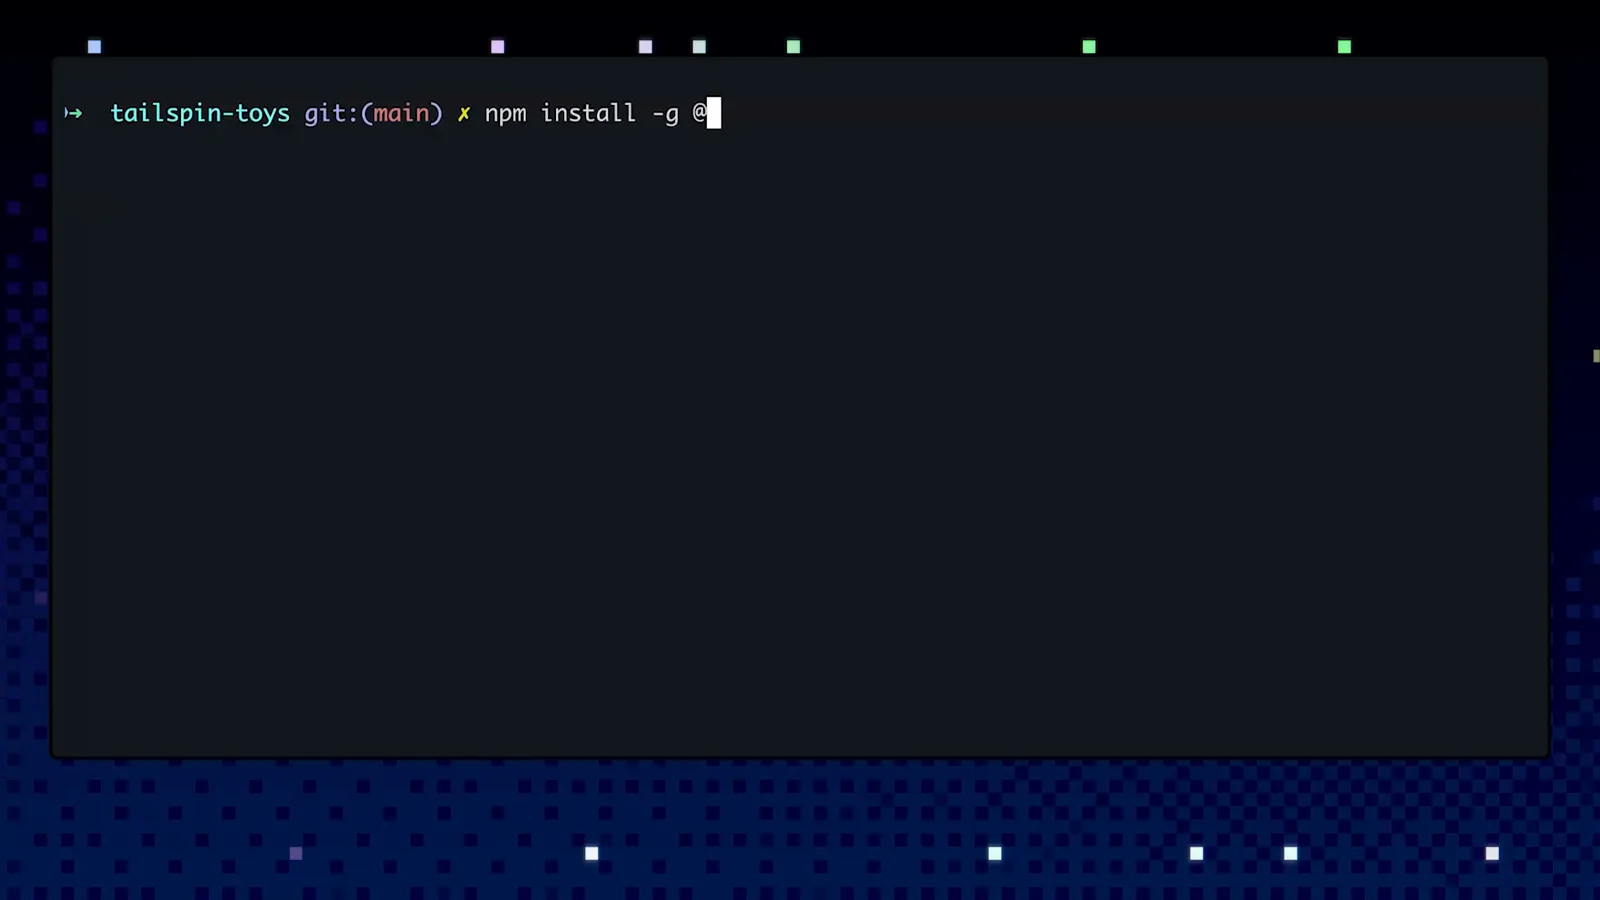
데모 저장소 터미널 프롬프트에 입력된 npm install -g @github/copilot.영상 1:24 보기 - 2
실행하고 계정 고르기
프로젝트 폴더에서 copilot을 입력해 실행합니다. 첫 실행 시 로그인할 계정을 묻습니다: GitHub.com, 또는 *.ghe.com 도메인에서 데이터 레지던시를 요구하는 GitHub Enterprise Cloud. Copilot 구독이 묶여 있는 쪽을 고르세요.
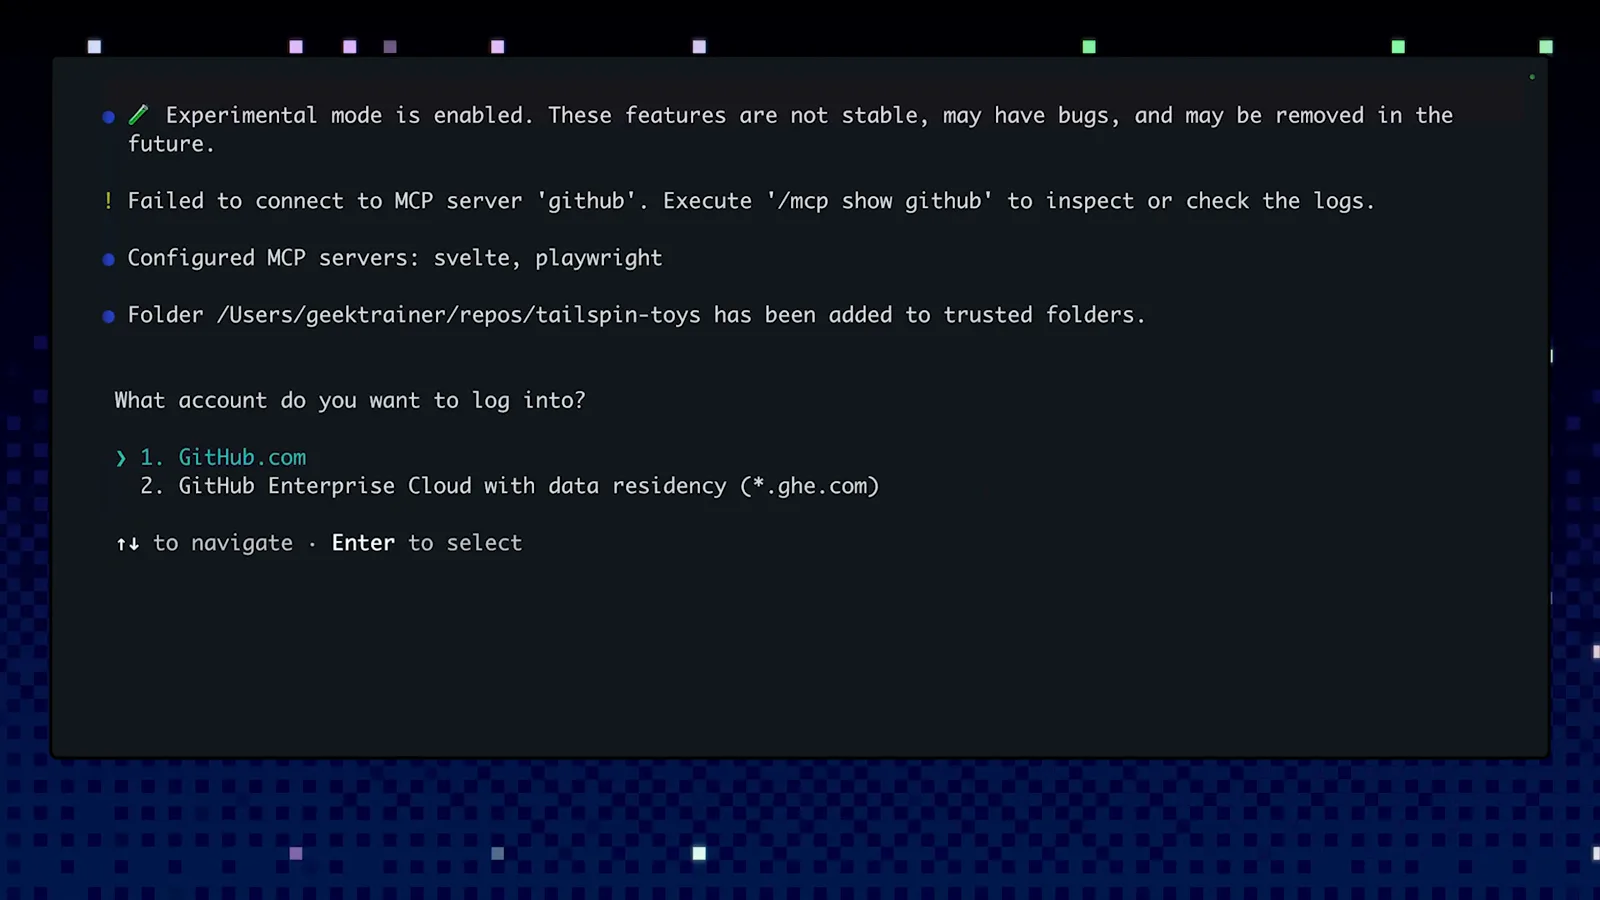
첫 실행 계정 선택 화면. GitHub.com이 선택된 상태.영상 2:00 보기 - 3
브라우저에서 기기 승인
Copilot CLI는 GitHub 기기 플로우로 로그인을 마칩니다. 브라우저가 열리고 CLI를 승인하면 GitHub가 "Congratulations, you're all set! Your device is now connected."라고 확인해 줍니다. 로그인은 두 가지를 합니다. 클라이언트를 Copilot 계정에 묶고, GitHub MCP 서버를 연결합니다. 이후 에이전트가 이슈와 PR을 읽을 수 있는 것은 바로 이 때문입니다.
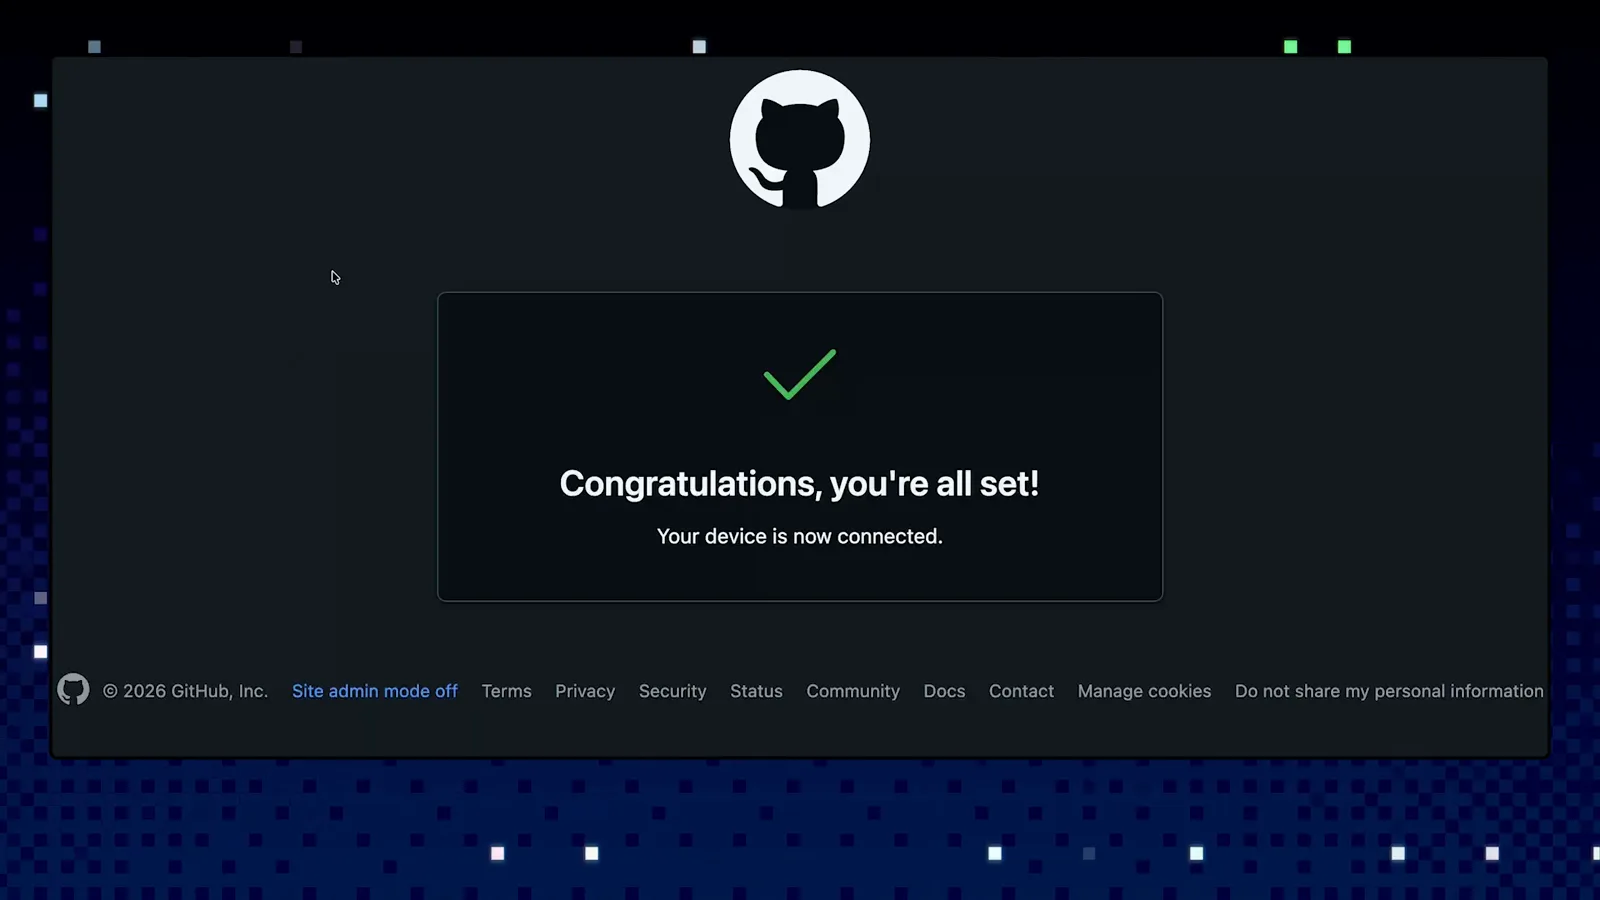
Copilot CLI 승인 후 표시되는 GitHub 기기 플로우 확인 화면.영상 2:06 보기 - 4
프로젝트 폴더 신뢰하기
읽거나 수정하기 전에 Copilot은 "Do you trust the files in this folder?"라고 묻습니다. 신뢰할 수 없는 파일이 에이전트를 위험한 명령 실행으로 유도할 수 있기 때문입니다. 이 세션만 쓰려면 Yes, 늘 쓰는 저장소라면 "Yes, and remember this folder for future sessions"를 골라 재승인을 생략하세요. 폴더 추가는 이후 /add-dir로 가능합니다.
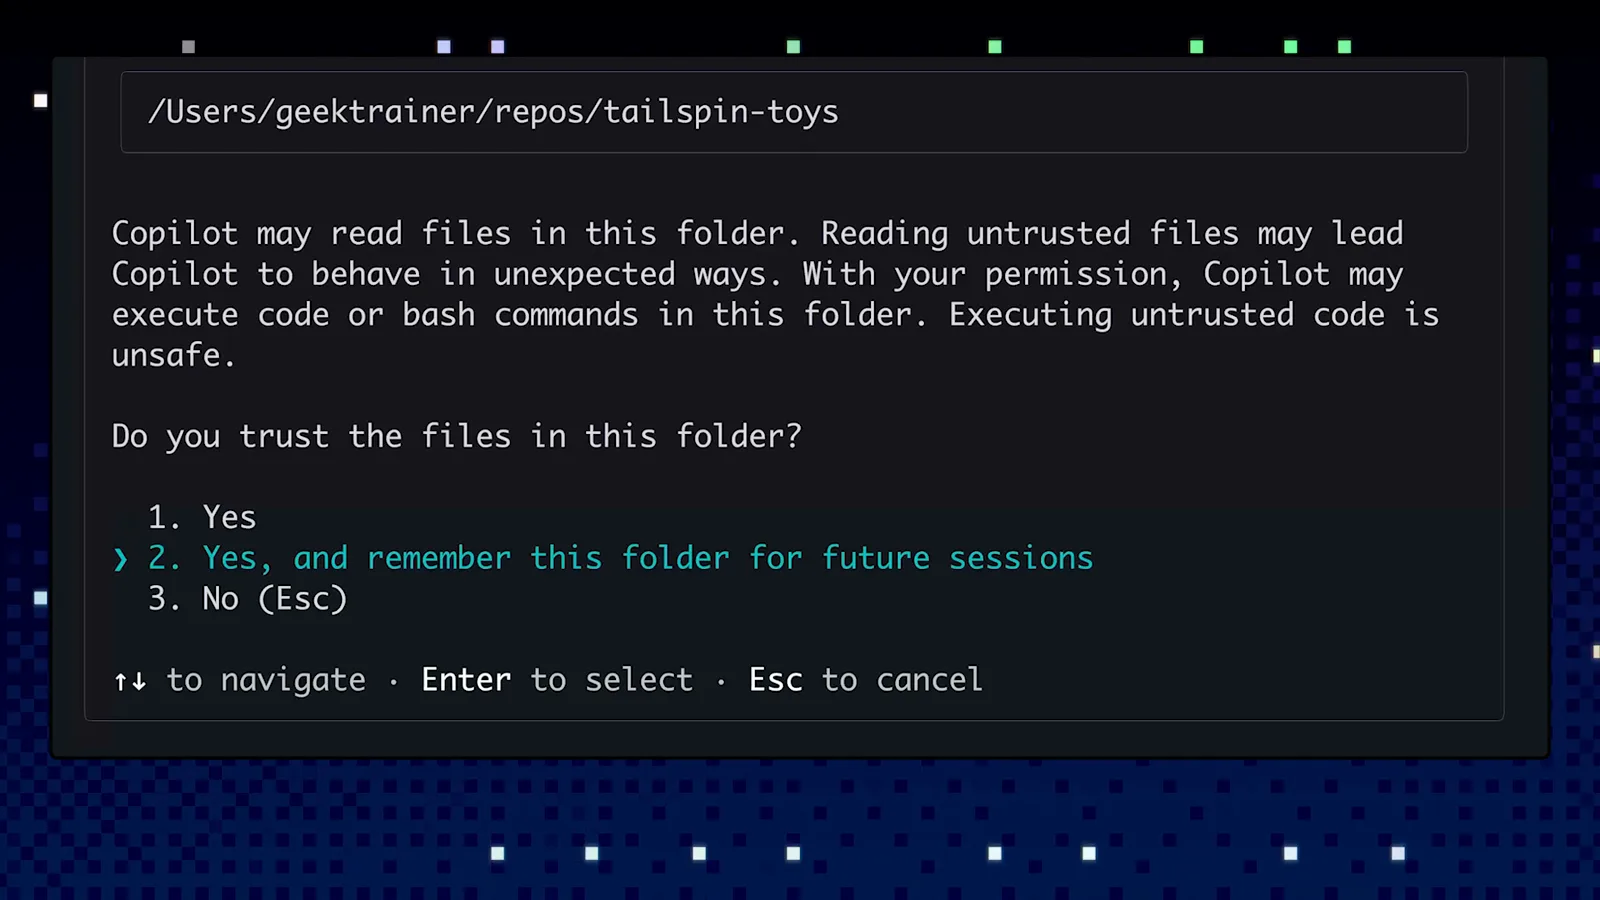
폴더 신뢰 확인 대화상자. '향후 세션에도 기억' 옵션이 강조됨.영상 2:23 보기
2 · 에이전트의 품격을 보여주는 첫 프롬프트
- 5
로그인 완료 — 먼저 개요를 요청
"Signed in successfully"와 GitHub MCP Server: Connected가 보이면 정석적인 첫 프롬프트를 보냅니다: "Give me an overview of this project." Copilot은 디렉터리를 훑고 중요한 파일을 열어 결과를 보고합니다. 데모에서는 src 트리를 지도처럼 그리고 Quick Start 명령을 나열했습니다. 프롬프트 줄에는 활성 모델이 표시되며(이 세션은 claude-sonnet-4.5), /model로 바꿀 수 있습니다.
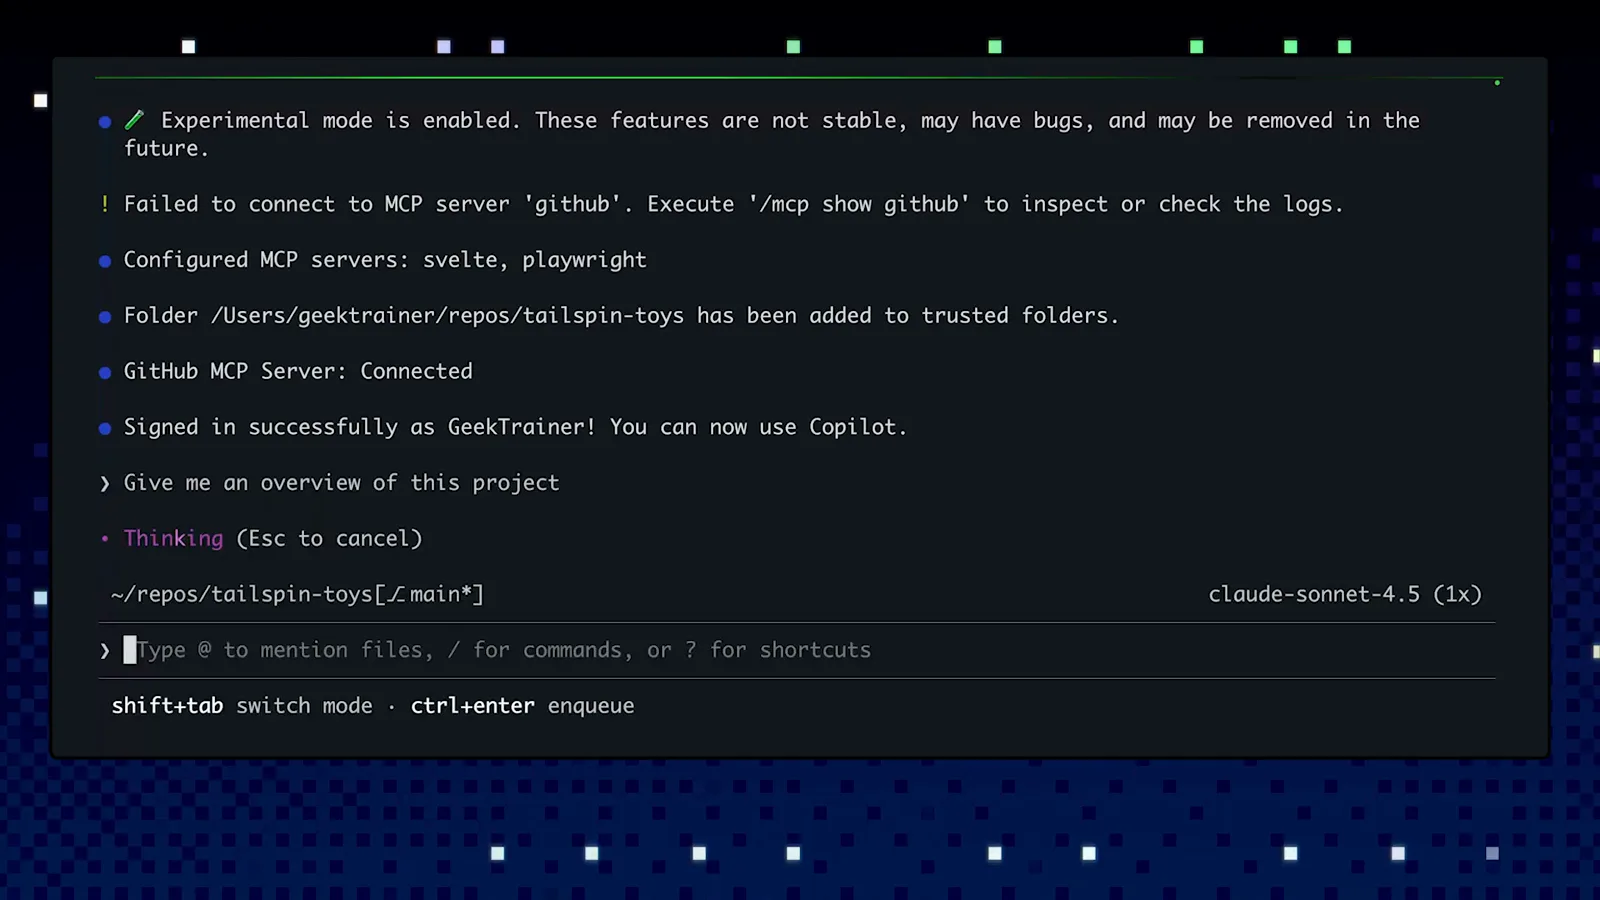
로그인 완료, GitHub MCP 서버 연결, 첫 프롬프트 전송 직후.영상 2:50 보기 - 6
진짜 기능 하나 시키기
에이전트의 가치는 잡담이 아니라 작업에서 나옵니다. 데모는 개요에 이어 "Let's add a new endpoint to return all categories"를 요청합니다. Copilot은 프로젝트를 다시 읽고, 기존 문서와 예제를 찾고, 발견한 패턴에 맞춰 변경을 계획합니다. 작업 중 Shift+Tab으로 계획 모드와 편집 모드를 오갈 수 있습니다.
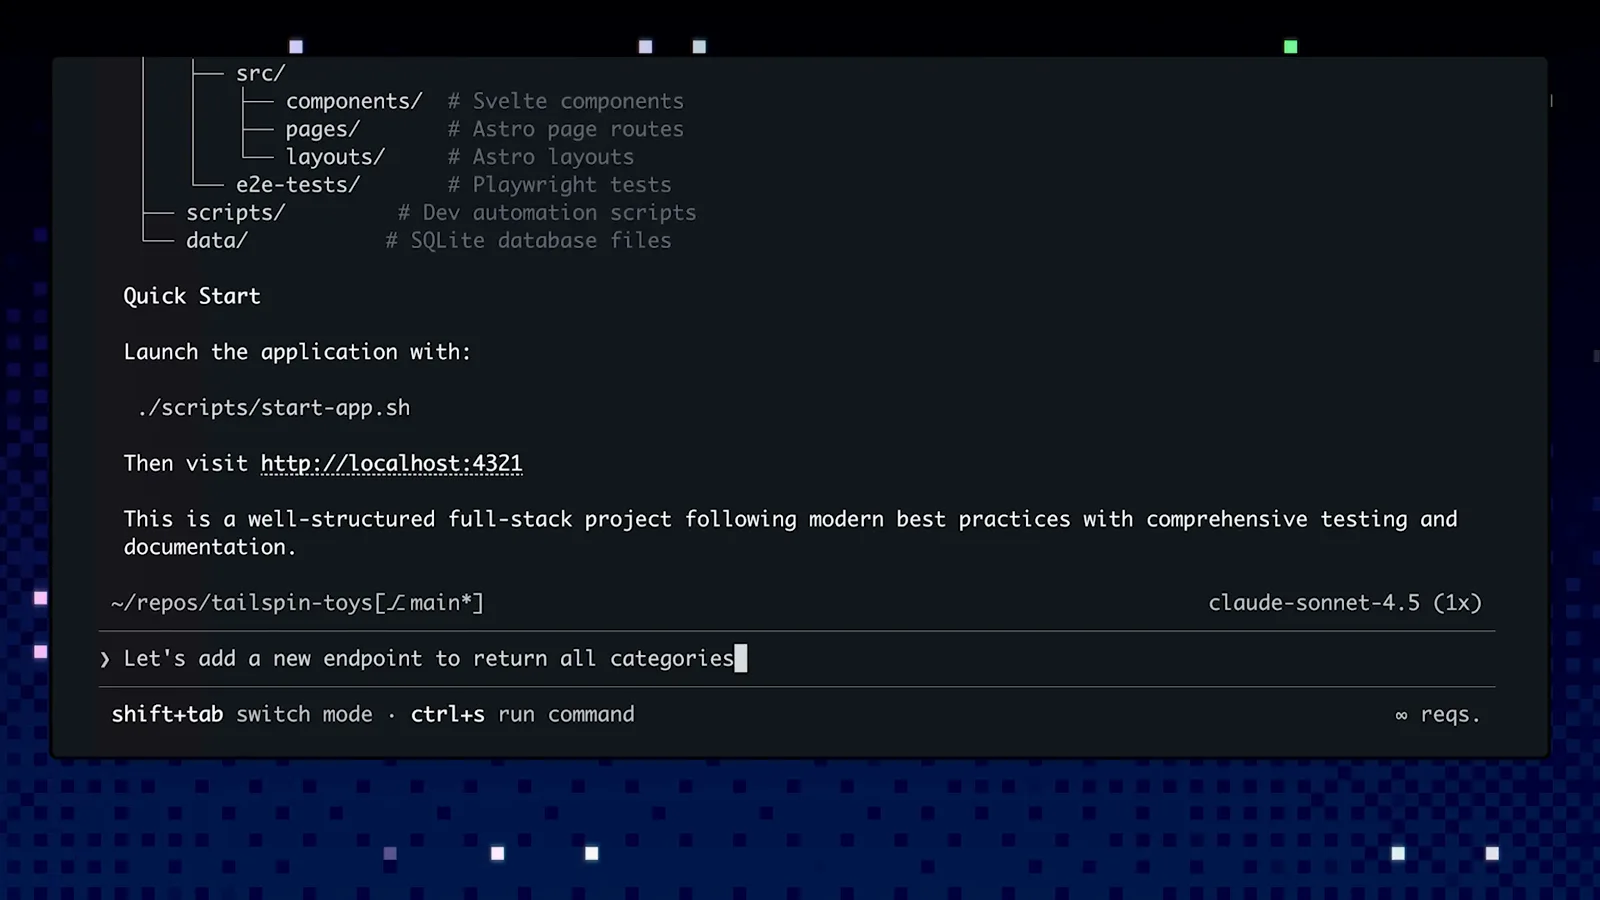
개요 답변 아래에 엔드포인트 추가 요청이 입력된 모습.영상 3:02 보기 - 7
편집 전에는 반드시 diff 검토
Copilot은 먼저 탐색합니다 — 진행 중에 "List directory"와 "Exploring API structure"가 흐릅니다 — 그다음 변경을 제안합니다. 모든 파일 편집은 승인에서 멈춥니다: Yes, "Yes, and approve all file operations for the rest of the running session", 또는 "No, and tell Copilot what to do differently (Esc)". 데모의 diff는 get_publishers_list에 docstring을 추가하는 것으로, 정확히 프로젝트 instructions가 요구한 내용입니다.
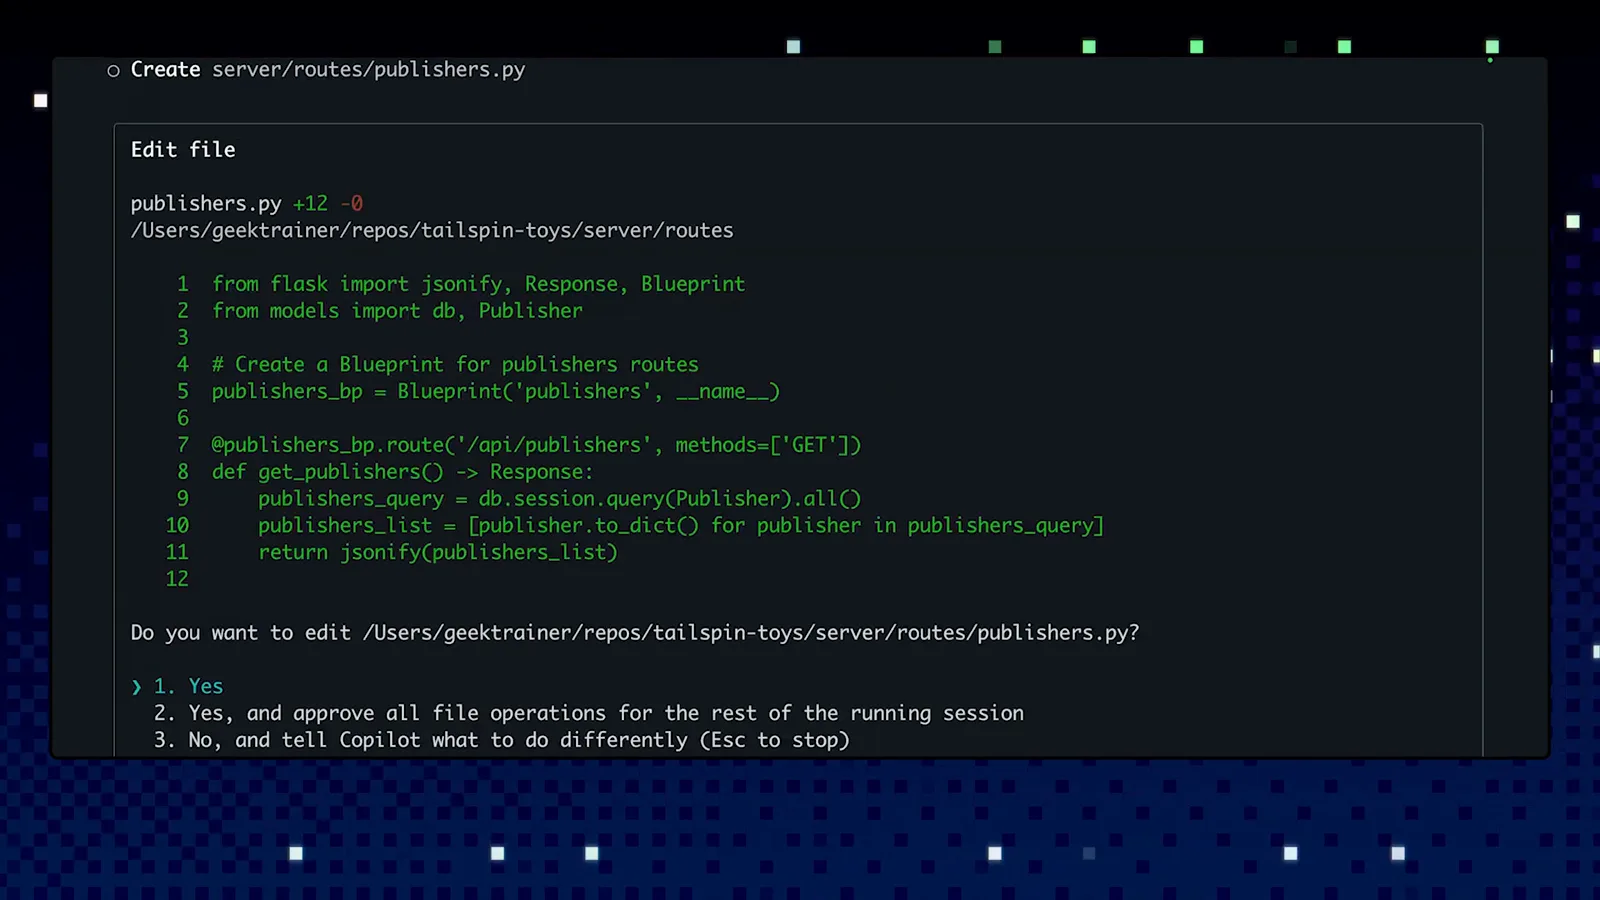
publishers.py diff와 그 아래 3지선다 편집 승인.영상 1:38 보기 - 8
테스트와 자가 수복은 맡기기
승인하면 Copilot이 엔드포인트를 작성하고 스스로 검증합니다. 데모는 총 59개 테스트 통과, 두 라우트에 대한 실제 엔드포인트 확인, API 응답 예시를 보고하며 구현이 저장소의 Flask endpoint guidelines를 따른다고 밝힙니다. 이것이 에이전트가 잘하는 루프입니다. 빌드하고, 테스트를 돌리고, 깨진 것을 두 번 듣지 않고 고칩니다.
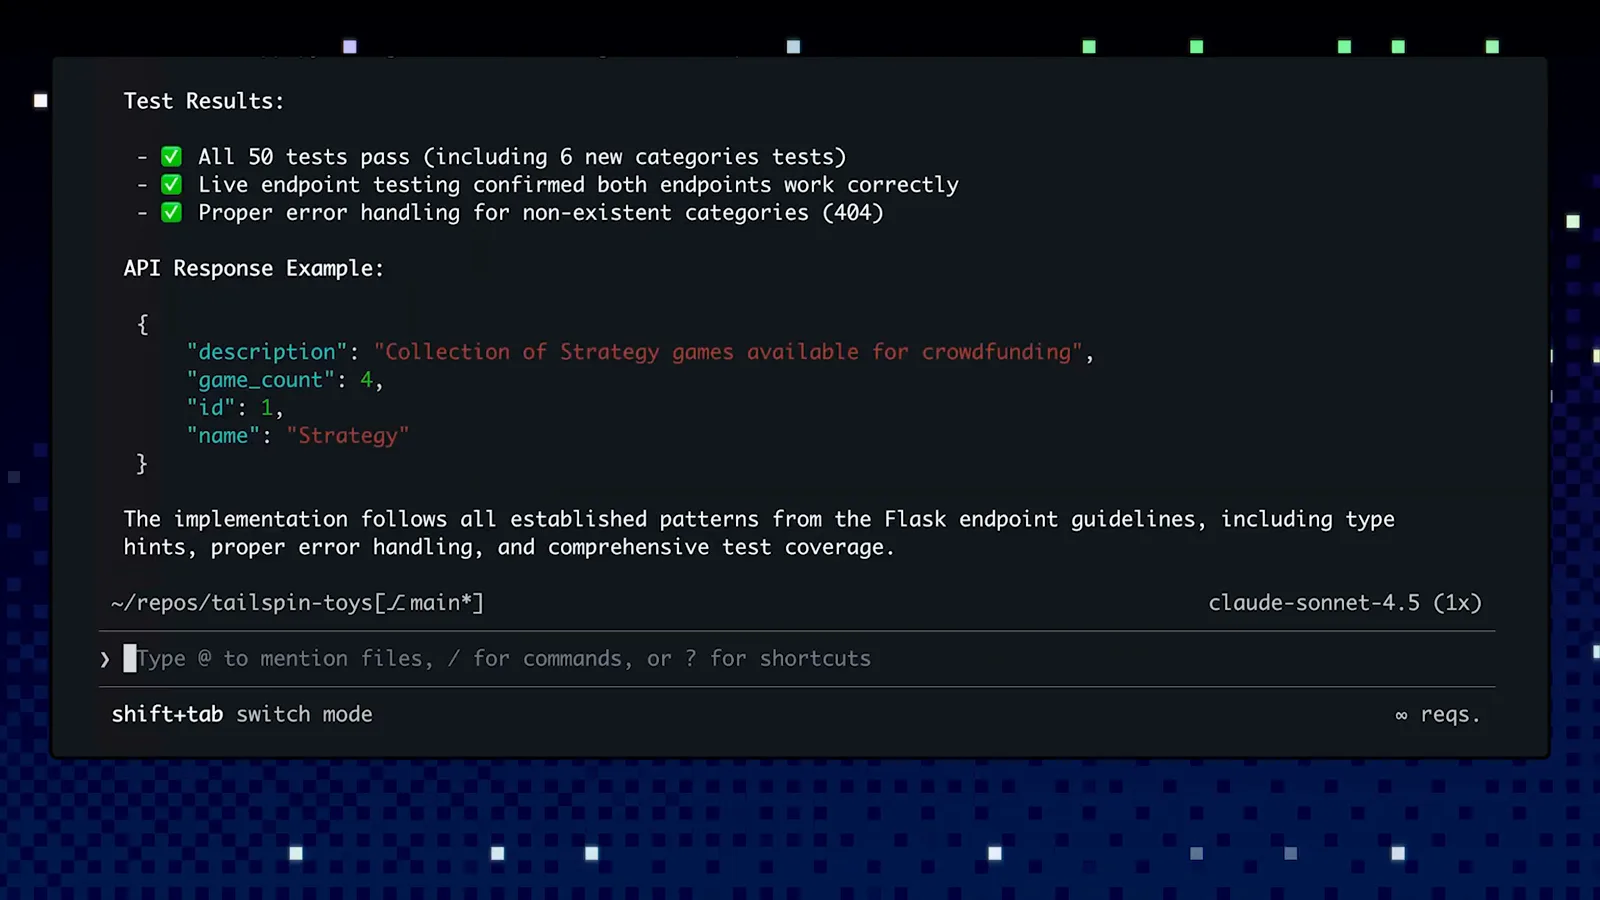
테스트 요약, API 응답 예시, 가이드라인 준수 메모.영상 3:16 보기
3 · instructions 파일로 표준 가르치기
- 9
무엇보다 먼저 /init 실행
웰컴 배너가 직접 알려줍니다: "No copilot instructions found. Run /init to generate a copilot-instructions.md file for this project." 이 파일은 프로젝트 단위로 항상 컨텍스트에 들어가며, GitHub 팀은 모든 저장소의 table stakes라 부릅니다. /init이 만들어 주는 것은 백지가 아니라 다듬을 수 있는 출발점입니다. 같은 배너에는 모델 교체용 /model과 세션을 클라우드 coding agent에 넘기는 /delegate 힌트도 있습니다.
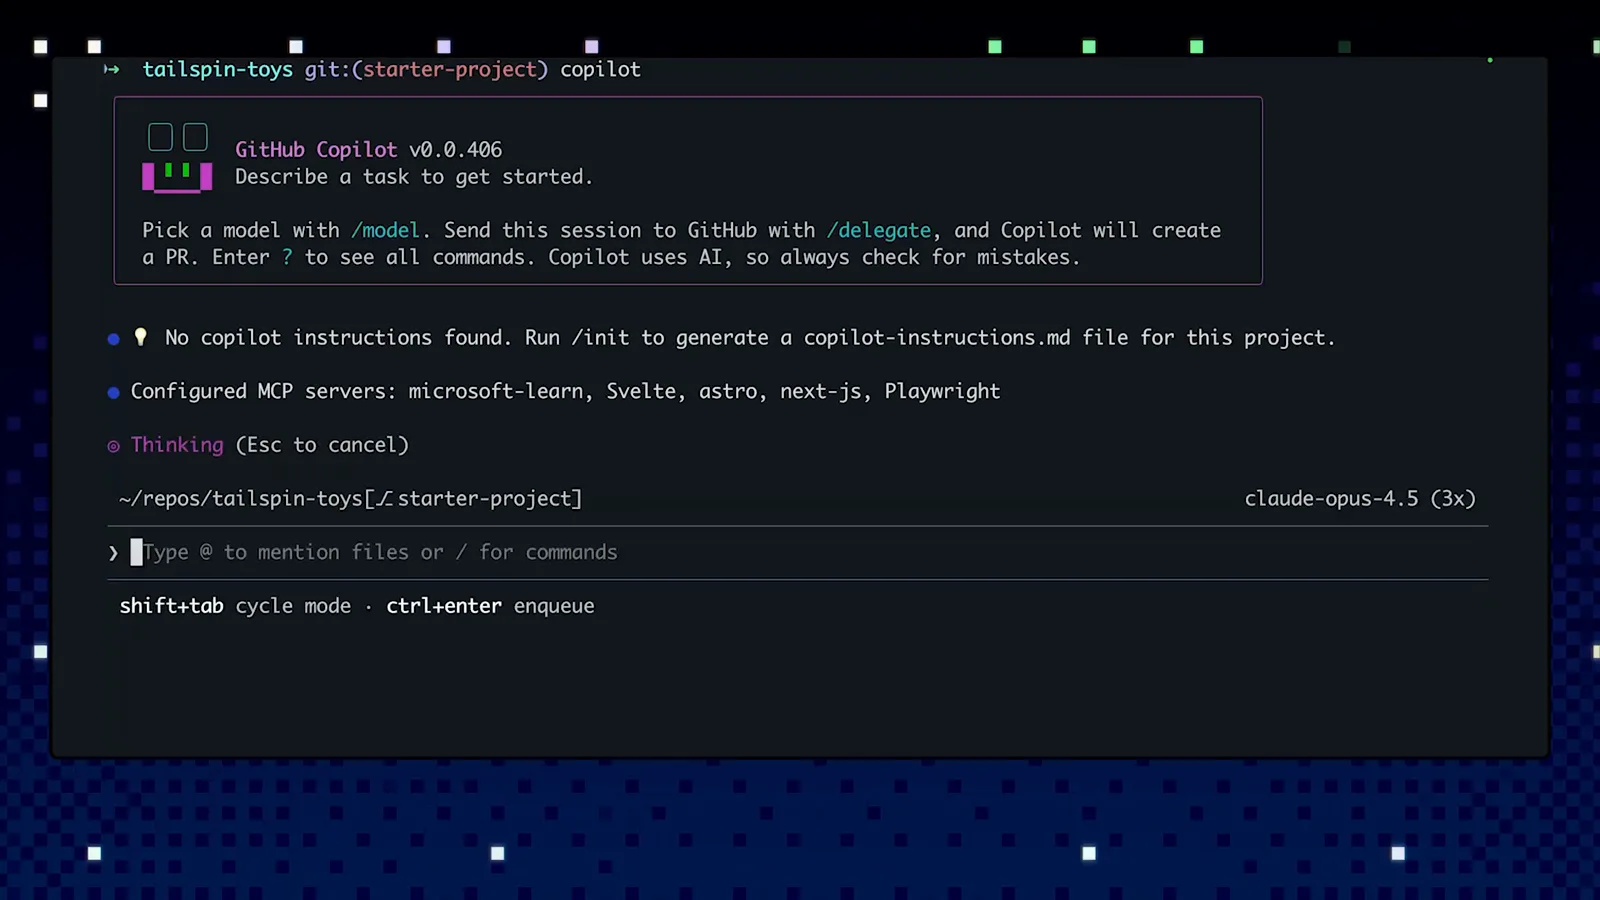
웰컴 배너: /model·/delegate 힌트와 /init 권장.영상 1:30 보기 - 10
copilot-instructions.md는 핵심만 채우기
생성된 파일에는 이미 프로젝트 윤곽이 담겨 있습니다. 데모는 "Tailspin Toys is a game crowdfunding platform with a Flask/SQLAlchemy backend and Astro/Svelte frontend"라는 개요와 Build, Test, and Run Commands를 담습니다. 오래 유효한 사실만 적으세요. 무엇을 만드는지, 스택, 명령. 같은 요청이 다른 코드를 낳습니다. 데모에서 docstrings 규칙을 추가하자 재생성된 함수에는 실제로 docstring이 붙었습니다.
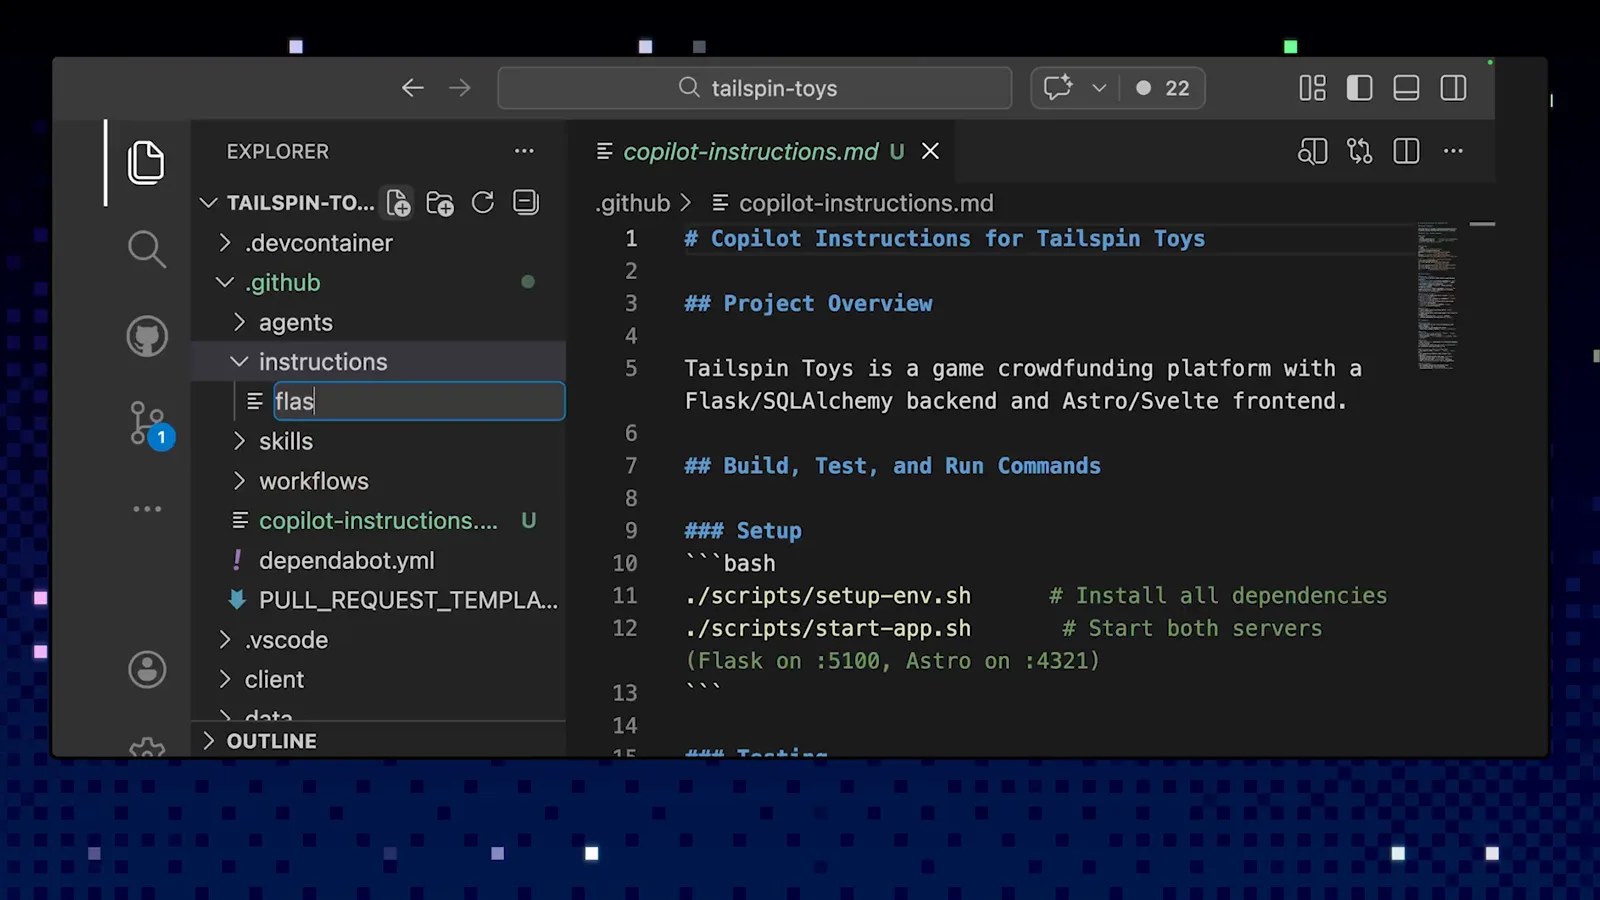
생성된 copilot-instructions.md: 프로젝트 개요와 실행 명령.영상 2:30 보기 - 11
.instructions.md로 규칙 범위 한정
일부 파일에만 적용되는 지침은 분리합니다. .github/instructions의 .instructions.md 파일은 front matter에 applyTo glob을 적습니다. 데모의 astro.instructions.md는 '**/*.astro'를 지정해 Astro 규칙이 Astro 파일에만 로드됩니다. gh.io/awesome-copilot에는 React 컴포넌트, Playwright 테스트 등을 다룬 기성 컬렉션이 모여 있습니다.
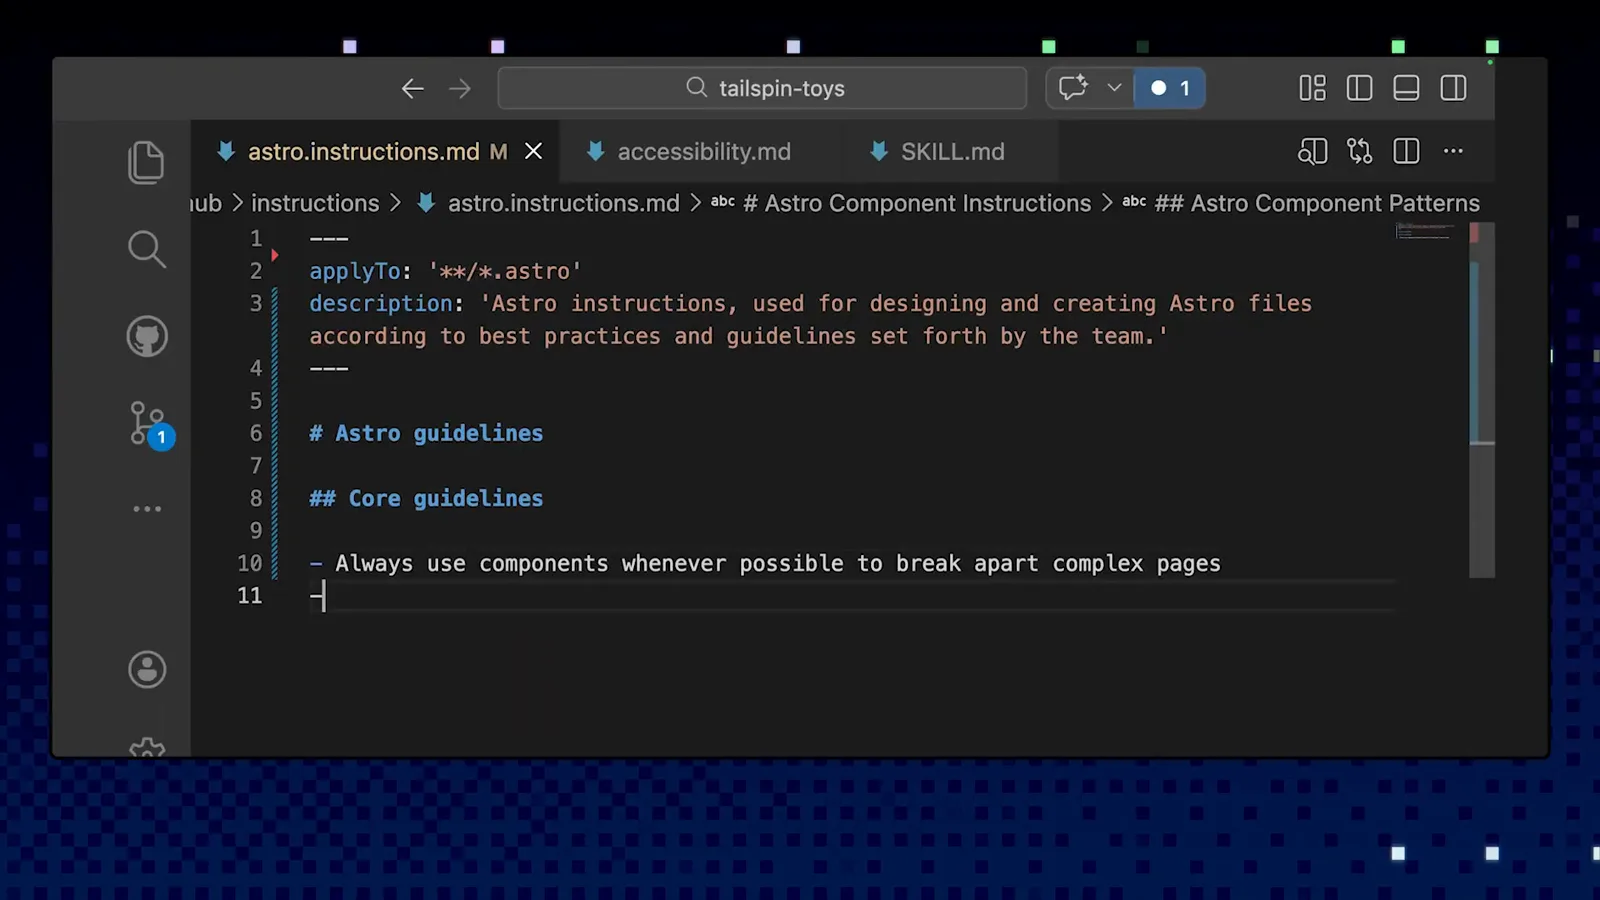
astro.instructions.md의 applyTo가 **/*.astro를 지정.영상 0:36 보기 - 12
Markdown 삼형제 이해하기
모든 확장은 .github의 Markdown으로 이뤄집니다. copilot-instructions.md는 상시 컨텍스트, skills는 작업 플레이북, custom agents는 전문 워커입니다. 데모 저장소는 이것들을 모두 동시에 열어 보여줍니다. instructions 파일 두 개, 접근성 에이전트, SKILL.md. 셋은 역할이 나뉩니다. instructions는 코드 작성 방식을, skills는 작업 수행 방식을, agents는 작업 전체를 맡습니다.
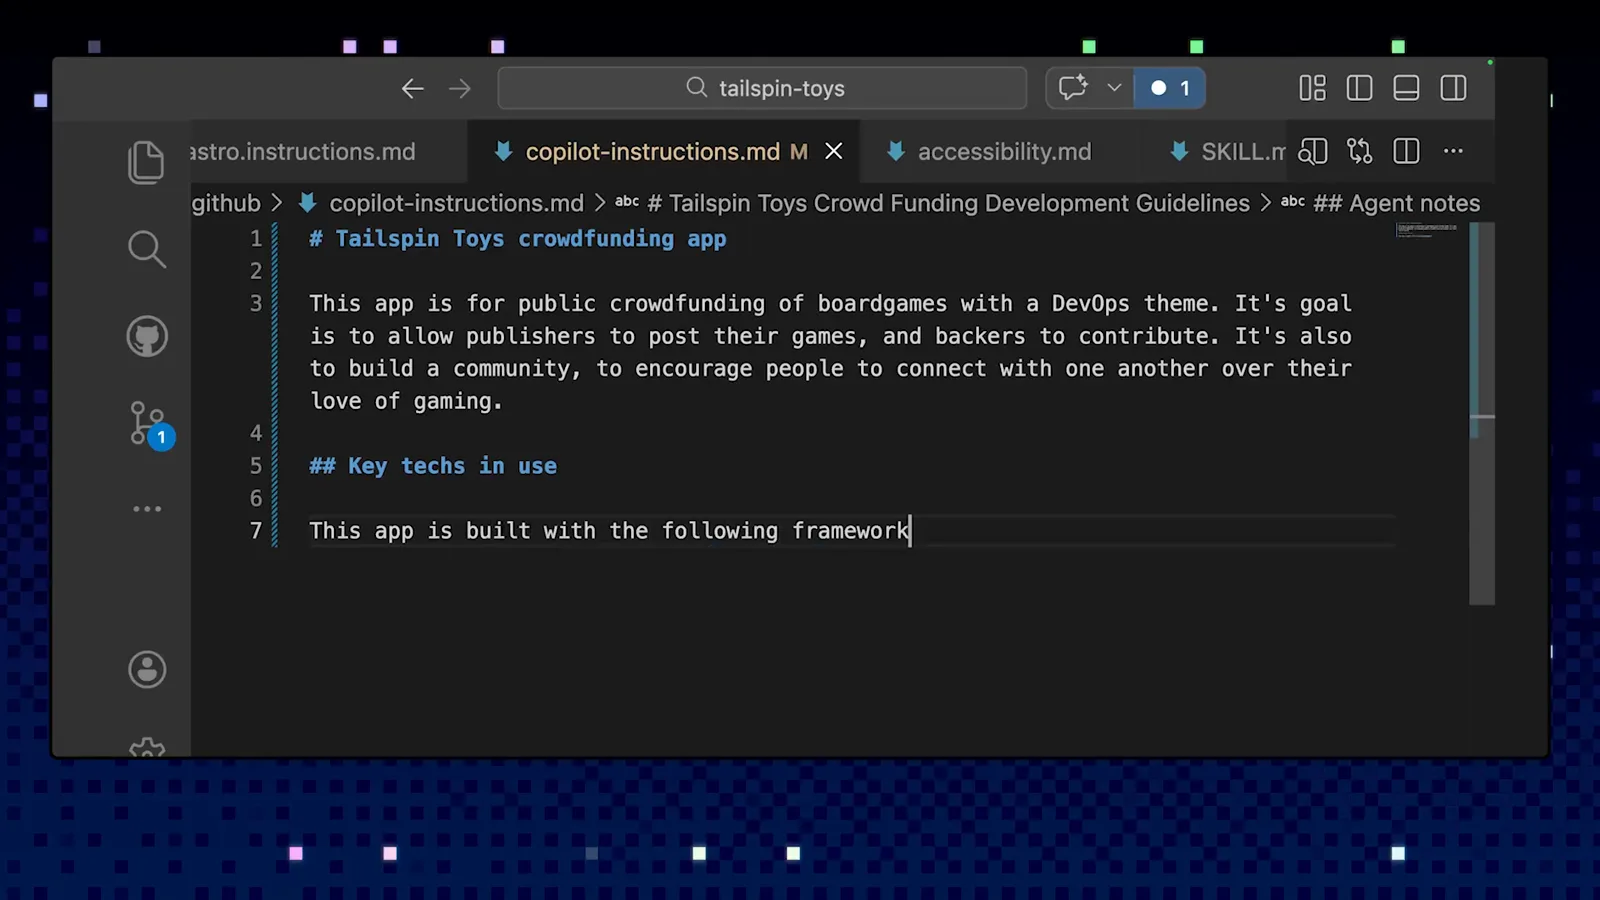
VS Code에서 나란히 열린 instructions·agent·skill 파일.영상 1:15 보기
4 · Skills와 커스텀 agents
- 13
skill을 명령처럼 호출
skills는 .github/skills에 Markdown과 선택적 스크립트로 둡니다. 슬래시 명령 메뉴에 내장 명령과 나란히 나타나며, /를 입력하면 /make-contribution과 설명이 보입니다. 데모의 contribution skill은 Copilot에게 저장소의 기여 가이드와 이슈·PR 템플릿을 찾아 따르도록 지시합니다.
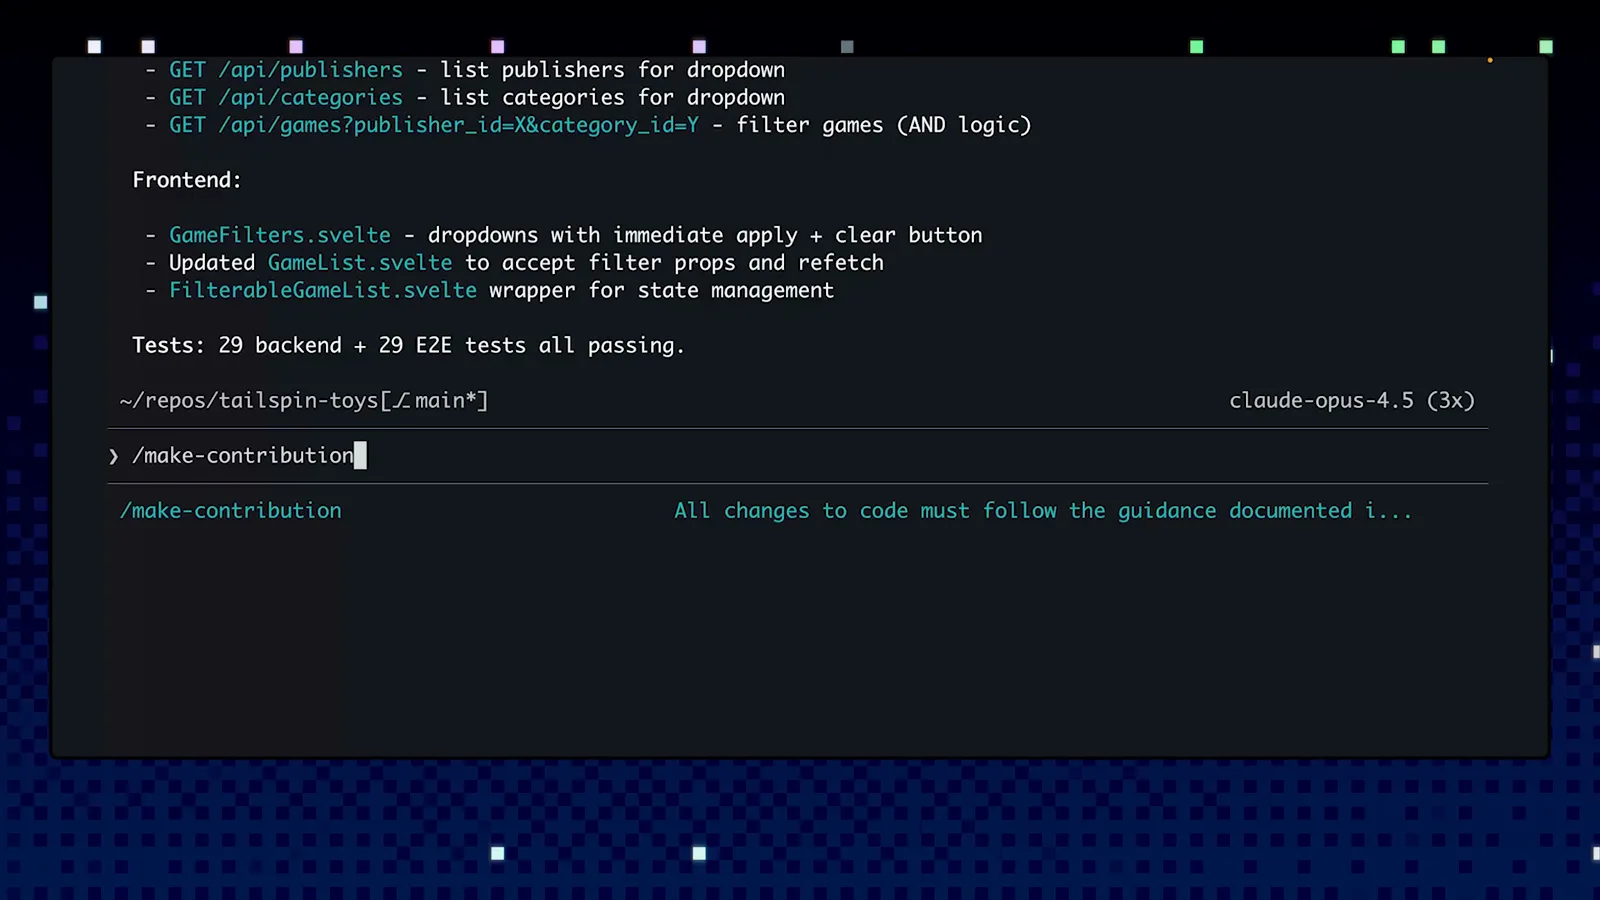
슬래시 메뉴에 표시된 /make-contribution과 설명.영상 3:50 보기 - 14
자연어로도 트리거 가능
명령을 외울 필요는 없습니다. "let's create a pull request"라고 요청하면 CLI는 skill(make-contribution)이 저절로 활성화된다고 표시합니다. skill은 브랜치를 만들고, 커밋을 논리적으로 묶고, 저장소 자체 템플릿으로 PR을 엽니다. 슬래시 명령과 자연어라는 이중 트리거가 skills를 실용적으로 만듭니다.
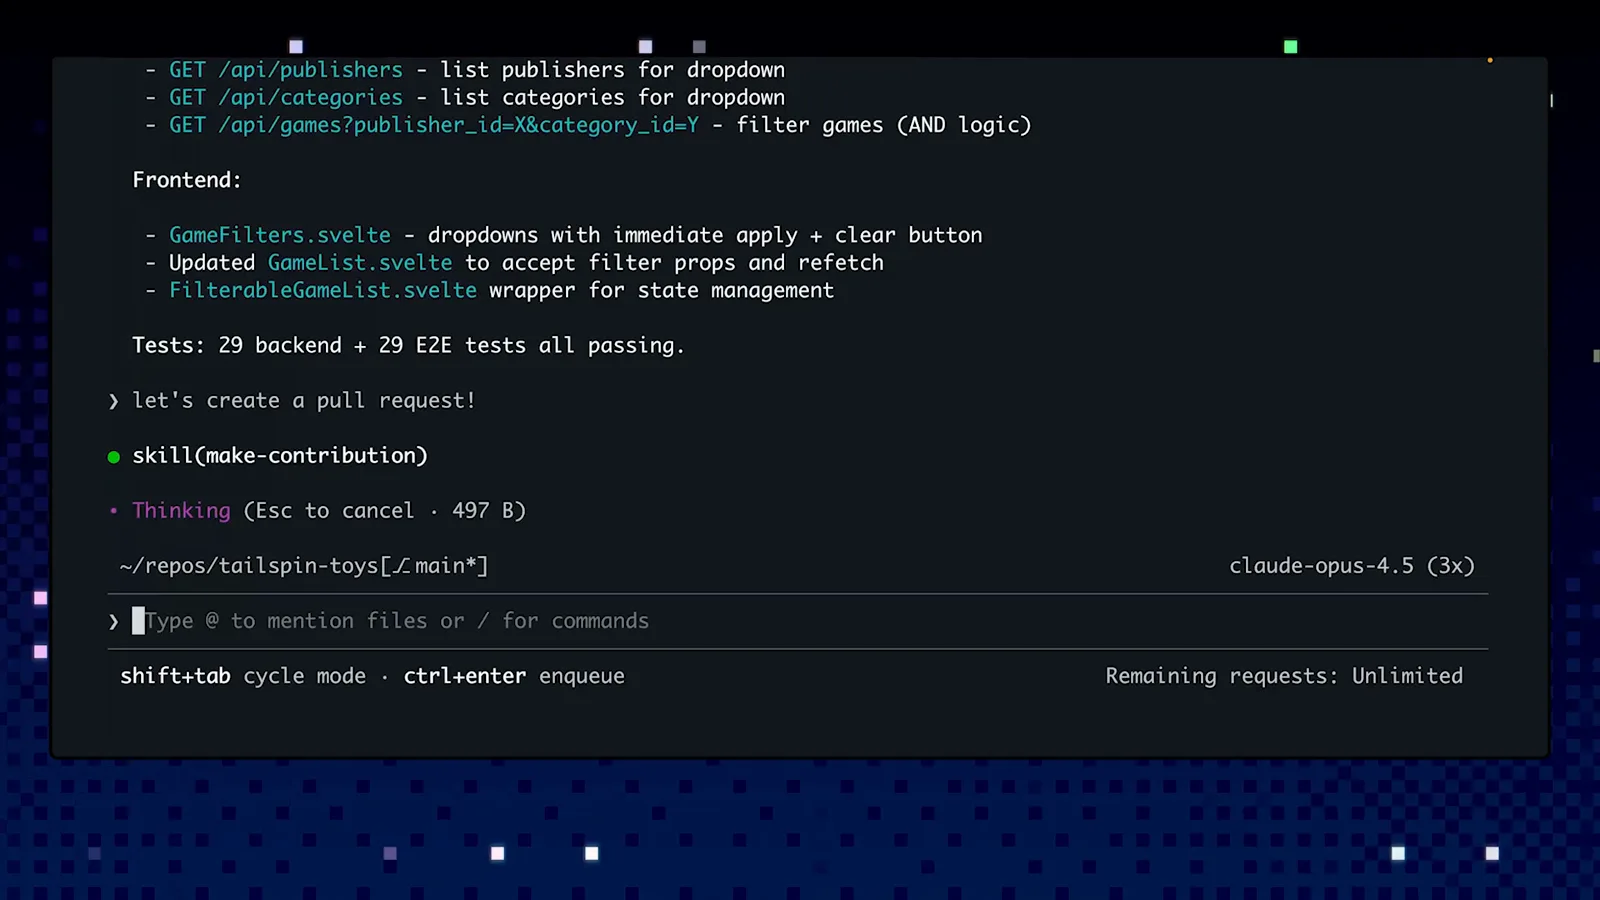
PR 생성 요청 후 자동 활성화된 skill(make-contribution).영상 4:06 보기 - 15
큰 작업은 custom agent에게
프로젝트 전반에 걸친 작업은 /agent로 Select Agent 목록을 엽니다: Default, Accessibility agent, Code review, Compliance, Documentation Specialist, react 19 upgrade, Search engine optimisation (SEO), 그리고 Create new agent. agents는 .github/agents의 Markdown 파일로 각자 전용 컨텍스트를 갖습니다. 데모는 접근성 에이전트를 골라 가장 영향 큰 개선 검토를 요청하고, 적용까지 맡깁니다.
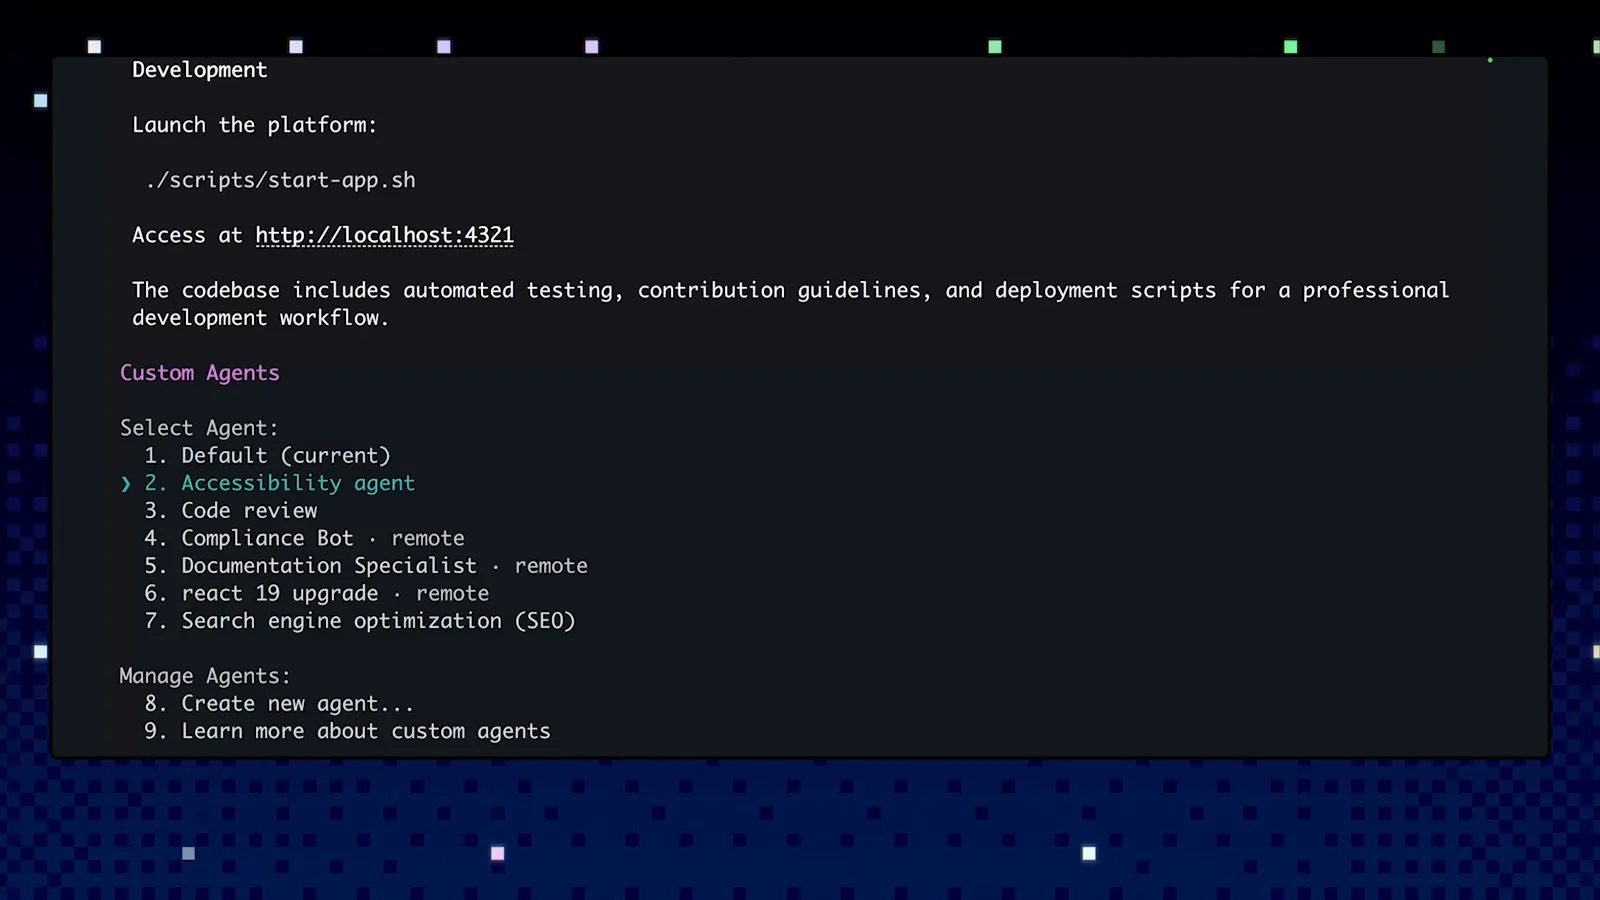
Select Agent 메뉴. 접근성 에이전트가 강조됨.영상 5:00 보기